搭建zookeeper集群
要先准备好Java环境
先下载zookeeper3.4.14
wget https://mirrors.tuna.tsinghua.edu.cn/apache/zookeeper/zookeeper-3.4.14/zookeeper-3.4.14.tar.gz
将zookeeper移动到local文件夹并解压
mv zookeeper-3.4.14.tar.gz /usr/local
tar -zxvf zookeeper-3.4.14.tar.gz
在zookeeper目录下新建data和log文件夹
mkdir data
mkdir log
进入zookeeper的conf文件夹并复制重命名zoo_sample.cfg为zoo.cfg
cp zoo_sample.cfg zoo.cfg
修改zoo.cfg配置文件
# The number of milliseconds of each tick
tickTime=2000
# The number of ticks that the initial
# The number of ticks that can pass between
# sending a request and getting an acknowledgement
syncLimit=5
# the directory where the snapshot is stored.
# do not use /tmp for storage, /tmp here is just
# example sakes.
#路径要自己的
dataDir=/usr/local/zookeeper-3.4.14/data
dataLogDir=/usr/local/zookeeper-3.4.14/log
# the port at which the clients will connect
clientPort=2181
# the maximum number of client connections.
# increase this if you need to handle more clients
#maxClientCnxns=60
#
# Be sure to read the maintenance section of the
# administrator guide before turning on autopurge.
#
# http://zookeeper.apache.org/doc/current/zookeeperAdmin.html#sc_maintenance
#
# The number of snapshots to retain in dataDir
#autopurge.snapRetainCount=3
# Purge task interval in hours
# Set to "0" to disable auto purge feature
#autopurge.purgeInterval=1
#ip地址要自己的
server.0=192.168.65.77:2888:3888
server.1=192.168.65.78:2888:3888
server.2=192.168.65.79:2888:3888
配置环境变量
vi /etc/profile
export ZK_HOME=/usr/local/zookeeper-3.4.14
export PATH=$PATH:$ZK_HOME/bin
source /etc/profile
在data位置下放置myid文件
vi myid
0
0对应之前配置文件中service.0的0
#ip可换成别名
server.0=192.168.65.77:2888:3888
server.1=192.168.65.78:2888:3888
server.2=192.168.65.79:2888:3888
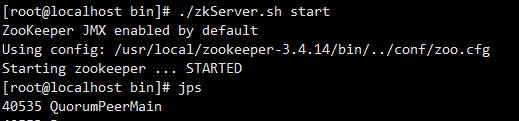
在zookeeper的bin文件夹下启动zookeeper
./zkServer.sh start     #启动
./zkServer.sh stop      #停止
./zkServer.sh restart   #重启
./zkServer.sh status    #查看状态
启动成功:
另外两个zookeeper节点配置一样,只是将myid的内容换成1和2
