网上真的很多这种资料了,但是大多数都是不全面的,有的甚至纯文本文字,我的天,纯文字你叫别人凭空想象你这门技术怎么实现?有的踩坑又不说,更多的是复制粘贴,佩服了,还是那句话,自己根本没实现过的技术,拿别人的东西当自己原创,佩服。
一:Mysql主从复制同步的优点:
1:读写分离,缓解服务器访问压力!更加有利于做报表系统!
主从复制就是对主库master进行增删改操作;同时数据的变化会默认毫秒级同步到slave从库;数据是一样的;那么我们就可以在项目中配多数据源拆分处理读写请求;如果是增删改,那就在主库进行。大多数数据库都是大量的查操作造成的性能瓶颈,这里就让读的请求全部去从库。
从库的操作不会同步回主库;所以我们在一主多从的情况下可以拆分项目线进行生产数据的开发测试。
2:有利于测试和本地开发。
这一点我深有体会;开发库测试库的脏数据问题严重;给开发测试工作带来很多不方便。有的接口会有性能问题但是少量的开发库测试库数据根本没法复现。之前在某厂订单数据单表去到了六千万,那张表的操作都是非常慢。开发的接口也是要非常注意。
3:失败迁移;有利于容灾;Plan B计划可减少损失。
缺点:
1: 提高了生产成本!要新加服务器;某主管就明确告诉我提议不错但是公司不考虑增加这笔生产成本。
2:维护成本增加;对开发人员有一定难度系数。每一个简单的demo当真的放到了生产环境去面对复杂的生产;那么对开发员人要求还是较高的。
主从复制可通过配置,在主库服务器崩溃或者不可用的时候,把请求转移到从库中;因为有binlog日志的存在,对一些误操作也好做数据清洗!(阿里云日志CSV格式的也行)。
二:主从复制同步的原理:
原理其实非常简单:
1.数据库通过bin-log二进制文件,记录下master主库所有sql 操作。
2.读取bin-log文件里面的sql操作。
3.Slave_IO这条线程把binlog操作写到了从库专属的relay-log重做日志。
4.Slave_SQL这条线程,把relay-log重做日志的操作读出来,并按照日志说的操作开始对从库动手动脚。
这就是同步的底层原理(个人理解,如果有误,请告诉我,一起讨论)。
三:主从复制的手把手实操:
这里用Mac电脑上的mysql做主库,Windows系统做从库。注意两台机器一定要关闭防火墙相互ping得通。mysql的主从机制,与什么操作系统毫无关系,一点鸡毛关系都没有,最多就是用惯了的操作系统忽然变就不适应而已,对功能没有半毛钱关系,但是一定一定跟网络会有关系,ping不通,就玩不起。
(1)Mac 主库配置:
Mac系统的mysql重启在这个位置。stop按完后你就会看到按钮变成了start。在修改了配置文件都记得要重启一下mysql。


打开iterm登陆本地的数据库做测试

记住Windows系统mysql配置文件是my.ini; Mac系统的是my.cnf;Mac系统的配置文件固定放在/etc 下面,没有的话要自己创建一个。

没有的话就创建,输入下面命令行按 i 编辑模式后复制粘贴下面的一大串配置。

# Example MySQL config file for medium systems.
#
# This is for a system with little memory (32M - 64M) where MySQL plays
# an important part, or systems up to 128M where MySQL is used together with
# other programs (such as a web server)
#
# MySQL programs look for option files in a set of
# locations which depend on the deployment platform.
# You can copy this option file to one of those
# locations. For information about these locations, see:
# http://dev.mysql.com/doc/mysql/en/option-files.html
#
# In this file, you can use all long options that a program supports.
# If you want to know which options a program supports, run the program
# with the "--help" option.
# The following options will be passed to all MySQL clients
[client]
default-character-set=utf8
#password   = your_password
port        = 3306
socket      = /tmp/mysql.sock
# Here follows entries for some specific programs
# The MySQL server
[mysqld]
character-set-server=utf8
init_connect='SET NAMES utf8
port        = 3306
socket      = /tmp/mysql.sock
skip-external-locking
key_buffer_size = 16M
max_allowed_packet = 1M
table_open_cache = 64
sort_buffer_size = 512K
net_buffer_length = 8K
read_buffer_size = 256K
read_rnd_buffer_size = 512K
myisam_sort_buffer_size = 8M
character-set-server=utf8
init_connect='SET NAMES utf8'
 #skip-networking
# Replication Master Server (default)
# binary logging is required for replication
 log-bin=mysql-bin
# binary logging format - mixed recommended
binlog_format=mixed
  # required unique id between 1 and 2^32 - 1
  # defaults to 1 if master-host is not set
  # but will not function as a master if omitted
  server-id   = 1
  binlog-do-db=jojotest
# Replication Slave (comment out master section to use this)
#
# To configure this host as a replication slave, you can choose between
# two methods :
#
# 1) Use the CHANGE MASTER TO command (fully described in our manual) -
#    the syntax is:
#
#    CHANGE MASTER TO MASTER_HOST=<host>, MASTER_PORT=<port>,
#    MASTER_USER=<user>, MASTER_PASSWORD=<password> ;
#
#    where you replace <host>, <user>, <password> by quoted strings and
#    <port> by the master's port number (3306 by default).
#
#    Example:
#
#    CHANGE MASTER TO MASTER_HOST='125.564.12.1', MASTER_PORT=3306,
#    MASTER_USER='joe', MASTER_PASSWORD='secret';
#
# OR
#
# 2) Set the variables below. However, in case you choose this method, then
#    start replication for the first time (even unsuccessfully, for example
#    if you mistyped the password in master-password and the slave fails to
#    connect), the slave will create a master.info file, and any later
#    change in this file to the variables' values below will be ignored and
#    overridden by the content of the master.info file, unless you shutdown
#    the slave server, delete master.info and restart the slaver server.
#    For that reason, you may want to leave the lines below untouched
#    (commented) and instead use CHANGE MASTER TO (see above)
#
# required unique id between 2 and 2^32 - 1
# (and different from the master)
# defaults to 2 if master-host is set
# but will not function as a slave if omitted
#server-id       = 2
#
# The replication master for this slave - required
#master-host     =   <hostname>
#
# The username the slave will use for authentication when connecting
# to the master - required
#master-user     =   <username>
#
# The password the slave will authenticate with when connecting to
# the master - required
#master-password =   <password>
#
# The port the master is listening on.
# optional - defaults to 3306
#master-port     =  <port>
#
 # binary logging - not required for slaves, but recommended
 #log-bin=mysql-bin

  # Uncomment the following if you are using InnoDB tables
  #innodb_data_home_dir = /usr/local/mysql/data
  #innodb_data_file_path = ibdata1:10M:autoextend
  #innodb_log_group_home_dir = /usr/local/mysql/data
  # You can set .._buffer_pool_size up to 50 - 80 %
  # of RAM but beware of setting memory usage too high
  #innodb_buffer_pool_size = 16M
  #innodb_additional_mem_pool_size = 2M
  # Set .._log_file_size to 25 % of buffer pool size
  #innodb_log_file_size = 5M
  #innodb_log_buffer_size = 8M
  #innodb_flush_log_at_trx_commit = 1
  #innodb_lock_wait_timeout = 50

    [mysqldump]
    quick
    max_allowed_packet = 16M

      [mysql]
      no-auto-rehash
      # Remove the next comment character if you are not familiar with SQL
      #safe-updates
      default-character-set=utf8

    [myisamchk]
    key_buffer_size = 20M
    sort_buffer_size = 20M
    read_buffer = 2M
    write_buffer = 2M

      [mysqlhotcopy]
      interactive-timeout
server-id就是主库的标志,记得千万不能重复。binlog-do-db就是说binlog日志同步指定的数据库,这里是指定我的jojotest数据库。

添加完配置后记得修改一下访问权限:sudo chmod 664 /etc/my.cnf
下一步,创建一个全权限用户来访问主从数据库。
注意:mysql 8 以前可以直接创建一个用户并且赋予权限;所以直接执行grant replication slave on . to ‘superman’@‘172.80.10.191’ identified by “123456”;就行;其中superman 是用户名,IP地址换成你从库的IP地址!切记!后面那串就是密码。
mysql 8 以后会报错,必须先创建新用户,再赋予权限。


看下新用户是否创建成功了,这里的%代表的是任何主机都可以使用的用户,172.80.10.%则代表172.80.10开头的Host主机都可以使用该用户。指定主机只需要添加对应的IP地址。


show master status 看下master主库的状态;Position是从属数据库要用的,这个值是会变的,第一次配置要FLUSH TABLE WITH READ LOCK;配置好后再unlock tables;配置文件指定同步的数据库(Binlog_do_DB)是否正确;File下面的mysql-bin.000003就是binlog同步日记文件;通过读取这个文件进行同步操作。Binlog_Ignore_DB就是你不需要同步的数据库,比如mysql库那些schema什么的一堆都是我们用不上的数据。

最后,要导出主库这边创建好的数据库和表结构和表数据!拿去从库所在机器上装的mysql跑一遍,不然玩不了同步操作!如果单纯导出表结构那么恭喜你旧的数据全部都没有!记住同步是从当前position开始同步,只会对CURD的SQL语句操作有logbin记录!从库读取再在自己本地CURD,就是那么简单!但是你手动修改主库的数据,手动保存,不用sql语句,那是不会生效的,记住记住!!
(2)Windows 从库配置:

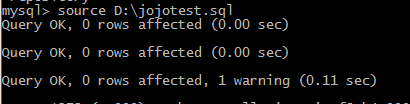
导入.sql文件,命令行用 source 存放路径,其他数据库可视化工具动动鼠标就行,简单吧?
这个文件里装的就是你创建表的语句;记事本打开看一下。

这里如果你直接导入的话,mysql 8 有一个Bug,就是编码问题,显示:MySQL 导入 sql 文件报错 [Err] 1273 - Unknown collation: ‘utf8mb4_0900_ai_ci’ 之 类的
解决方法:
把 MySQL8 导出的 SQL 文件用记事本打开,把 utf-8mb4 全部替换为 utf-8,把 utf8mb4_0900_ai_ci 全部替换为 utf8_general_ci 。MySQL8.0.17 以上版本修复了。
下面又到了最讨厌的修改配置文件的时间了。配置文件就是配置一些读写Buffer的大小,读写时间,重试机制,日记格式之类的很多东西,有时间可以仔细研究一下。

改完配置文件还是要重启,Windows的重启如下:

下一步,打开Windows的mysql命令行iterm;写入下面的配置(这些数据都是刚才show master status 显示出来的;ip地址就是你主库那边的IP地址;user和password就是自己刚才定义的%host访问的用户;这里注意密码没设置就不写,不要‘’;空字符串跟null是两个概念):

配置好后start slave; 然后show slave status 看看。它会出来一串东西;包括你设置的主库IP,同步的库名,端口号,主库权限用户等等。但是重点看两个地方。
一个是两个最重要的连接线程是否running:
解释一下,非常重要!
Slave_IO 是binlog日志的通道;就是这条IO把主库CURD操作记录日志传过来。
Slave_SQL 是从库的操作通道;这条线程就是把主库做过的操作,往slave从库动手做了一遍。

第二个是Slave_IO_status这个状态是否waiting;如果是这个状态是connecting,那就是一直连接不上,还会有触发重试机制:

比如这样就是不行的:

解决方法:
1:ping一下两台机器看看能否ping通;如果不行,检查是否在同一网段;检查防火墙配置等等。
2:user用户账号密码打错了;仔细检查;就像null和‘’ 是完全不同的。
3:看看是不是service-ID粗心大意写错了,写成了跟主库一样的 1 。
4:position起始偏移量不对应;那个是会变化的;配置时候让它锁一下,配置好了unlock就行。
当然还会有其他原因,加上生产环境会比我这个小Demo复杂得多;比如死机情况下;同步的速度快慢,会导致数据脏读幻读,甚至因为同步时间的延迟会找不到对应的数据,对此,mysql的主从机制是做出了非常多的同步模式的;具体可以后期自己了解。
欢迎留言给我。留言必回。鞠躬!

