eslint
项目代码规范化
eslint设置
基础的crud
要创建一个基础的crud界面,首先要创建对应的路由
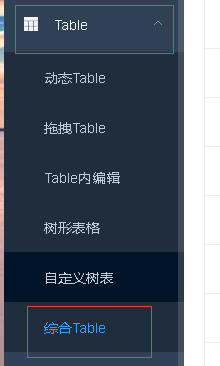
以src/router/modules/table.js下,complexTable为例
	{
      path: 'complex-table',
      component: () => import('@/views/table/complexTable'),
      name: 'ComplexTable',
      meta: { title: 'complexTable' }
    }
    component: () => import('@/views/table/complexTable'), 表示这个路由对应的vue界面的位置
    一个路由一般对应一个vue界面,注意这个子路由是在table的children的数组下的一个对象,在路由加载时就会加载成table下的子菜单
以 src/views/table/complexTable.vue为例
由于这里不支持双色,建议复制到vscode或者别的编译器中查看,我写的都是带了注释的应该为绿色
<template>
  <div class="app-container">
    <div class="filter-container">

<!--饿了么的input组件   placeholder设置默认值 :是v-bind缩写,绑定到了i18n国际化的table.title
		      v-model  双向绑定 到下面vue声明的变量 listQuery.title中
		      @keyup.enter.native="handleFilter"  @是v-on缩写 当回车按键弹起的时候触发handleFilter方法,native阻止input默认事情
        -->

      <el-input :placeholder="$t('table.title')" v-model="listQuery.title" style="width: 200px;" class="filter-item" @keyup.enter.native="handleFilter"/>

      <!--饿了么的select 组件 v-model  双向绑定 当listQuery.importance的值等于 el-option的key值时默认选中 -->
      <el-select v-model="listQuery.importance" :placeholder="$t('table.importance')" clearable style="width: 90px" class="filter-item">
        <el-option v-for="item in importanceOptions" :key="item" :label="item" :value="item"/>
      </el-select>
      <el-select v-model="listQuery.type" :placeholder="$t('table.type')" clearable class="filter-item" style="width: 130px">
        <el-option v-for="item in calendarTypeOptions" :key="item.key" :label="item.display_name+'('+item.key+')'" :value="item.key"/>
      </el-select>
      <el-select v-model="listQuery.sort" style="width: 140px" class="filter-item" @change="handleFilter">
        <el-option v-for="item in sortOptions" :key="item.key" :label="item.label" :value="item.key"/>
      </el-select>
      <!--饿了么的button 组件   v-waves使用水波纹特效 type设置样式  icon设置图标 @click触发方法
        -->
      <el-button v-waves class="filter-item" type="primary" icon="el-icon-search" @click="handleFilter">{{ $t('table.search') }}</el-button>
      <el-button class="filter-item" style="margin-left: 10px;" type="primary" icon="el-icon-edit" @click="handleCreate">{{ $t('table.add') }}</el-button>
      <el-button v-waves :loading="downloadLoading" class="filter-item" type="primary" icon="el-icon-download" @click="handleDownload">{{ $t('table.export') }}</el-button>
      <el-checkbox v-model="showReviewer" class="filter-item" style="margin-left:15px;" @change="tableKey=tableKey+1">{{ $t('table.reviewer') }}</el-checkbox>
    </div>
	<!--以上都是搜索框的内容  -->
	<!-- 下面是列表展示  -->
	<!-- v-loading 过渡效果 listLoading
		   data 遍历的数组
		   border 是否带有纵向边框
		   fit 列的宽度是否自撑开
           @sort-change 当表格的排序条件发生变化的时候会触发该事件
	  -->
    <el-table
      v-loading="listLoading"
      :key="tableKey"
      :data="list"
      border
      fit
      highlight-current-row
      style="width: 100%;"
      @sort-change="sortChange">

      **<!-- 表单的列组件  label  显示的标题  prop  对应列内容的字段名  sortable 对应列是否可以排序  align 对齐方式 -->**

      <el-table-column :label="$t('table.id')" prop="id" sortable="custom" align="center" width="65">
        <template slot-scope="scope">
          <span>{{ scope.row.id }}</span>
        </template>
      </el-table-column>
      <el-table-column :label="$t('table.date')" width="150px" align="center">
        <template slot-scope="scope">
          <span>{{ scope.row.timestamp | parseTime('{y}-{m}-{d} {h}:{i}') }}</span>
        </template>
      </el-table-column>
      <el-table-column :label="$t('table.title')" min-width="150px">
        <template slot-scope="scope">
          <span class="link-type" @click="handleUpdate(scope.row)">{{ scope.row.title }}</span>
          <el-tag>{{ scope.row.type | typeFilter }}</el-tag>
        </template>
      </el-table-column>
      <el-table-column :label="$t('table.author')" width="110px" align="center">
        <template slot-scope="scope">
          <span>{{ scope.row.author }}</span>
        </template>
      </el-table-column>
      <el-table-column v-if="showReviewer" :label="$t('table.reviewer')" width="110px" align="center">
        <template slot-scope="scope">
          <span style="color:red;">{{ scope.row.reviewer }}</span>
        </template>
      </el-table-column>
      <el-table-column :label="$t('table.importance')" width="80px">
        <template slot-scope="scope">
          <svg-icon v-for="n in +scope.row.importance" :key="n" icon-class="star" class="meta-item__icon"/>
        </template>
      </el-table-column>
      <el-table-column :label="$t('table.readings')" align="center" width="95">
        <template slot-scope="scope">
          <span v-if="scope.row.pageviews" class="link-type" @click="handleFetchPv(scope.row.pageviews)">{{ scope.row.pageviews }}</span>
          <span v-else>0</span>
        </template>
      </el-table-column>
      <el-table-column :label="$t('table.status')" class-name="status-col" width="100">
        <template slot-scope="scope">
          <el-tag :type="scope.row.status | statusFilter">{{ scope.row.status }}</el-tag>
        </template>
      </el-table-column>
      <el-table-column :label="$t('table.actions')" align="center" width="230" class-name="small-padding fixed-width">
        <template slot-scope="scope">
          <el-button type="primary" size="mini" @click="handleUpdate(scope.row)">{{ $t('table.edit') }}</el-button>
          <el-button v-if="scope.row.status!='published'" size="mini" type="success" @click="handleModifyStatus(scope.row,'published')">{{ $t('table.publish') }}
          </el-button>
          <el-button v-if="scope.row.status!='draft'" size="mini" @click="handleModifyStatus(scope.row,'draft')">{{ $t('table.draft') }}
          </el-button>
          <el-button v-if="scope.row.status!='deleted'" size="mini" type="danger" @click="handleModifyStatus(scope.row,'deleted')">{{ $t('table.delete') }}
          </el-button>
        </template>
      </el-table-column>
    </el-table>
    <!-- 分页组件 -->
    <pagination v-show="total>0" :total="total" :page.sync="listQuery.page" :limit.sync="listQuery.limit" @pagination="getList" />

    <!-- 饿了么的对话框组件  这里用于展示 新增修改界面
     :title="textMap[dialogStatus]"  标题为下面声明的textMap数组中的dialogStatus key 的值
     :visible.sync="dialogFormVisible"   是否显示 Dialog 传入true展示 flase隐藏 这里界面初始化时为false 点击新增和修改时修改为true
     -->
    <el-dialog :title="textMap[dialogStatus]" :visible.sync="dialogFormVisible">

       <!-- 饿了么的表单组件
         ref  给表单起个别名dataForm 下面可以用this.$ref.dataForm获取表单dom
         rules设置表单数据校验规则为rules,rules在下面vue中声明  label-position标题对齐方式
     -->
      <el-form ref="dataForm" :rules="rules" :model="temp" label-position="left" label-width="70px" style="width: 400px; margin-left:50px;">
        <el-form-item :label="$t('table.type')" prop="type">
          <el-select v-model="temp.type" class="filter-item" placeholder="Please select">
            <el-option v-for="item in calendarTypeOptions" :key="item.key" :label="item.display_name" :value="item.key"/>
          </el-select>
        </el-form-item>
        <el-form-item :label="$t('table.date')" prop="timestamp">
          <el-date-picker v-model="temp.timestamp" type="datetime" placeholder="Please pick a date"/>
        </el-form-item>
        <el-form-item :label="$t('table.title')" prop="title">
          <el-input v-model="temp.title"/>
        </el-form-item>
        <el-form-item :label="$t('table.status')">
          <el-select v-model="temp.status" class="filter-item" placeholder="Please select">
            <el-option v-for="item in statusOptions" :key="item" :label="item" :value="item"/>
          </el-select>
        </el-form-item>
        <el-form-item :label="$t('table.importance')">
          <el-rate v-model="temp.importance" :colors="['#99A9BF', '#F7BA2A', '#FF9900']" :max="3" style="margin-top:8px;"/>
        </el-form-item>
        <el-form-item :label="$t('table.remark')">
          <el-input :autosize="{ minRows: 2, maxRows: 4}" v-model="temp.remark" type="textarea" placeholder="Please input"/>
        </el-form-item>
      </el-form>
      <div slot="footer" class="dialog-footer">
        <el-button @click="dialogFormVisible = false">{{ $t('table.cancel') }}</el-button>
        <!--@click="dialogStatus==='create'?createData():updateData()"  如果 vue的变量dialogStatus为create就执行新增方法,
        否则执行修改 -->
        <el-button type="primary" @click="dialogStatus==='create'?createData():updateData()">{{ $t('table.confirm') }}</el-button>
      </div>
    </el-dialog>

    <el-dialog :visible.sync="dialogPvVisible" title="Reading statistics">
      <el-table :data="pvData" border fit highlight-current-row style="width: 100%">
        <el-table-column prop="key" label="Channel"/>
        <el-table-column prop="pv" label="Pv"/>
      </el-table>
      <span slot="footer" class="dialog-footer">
        <el-button type="primary" @click="dialogPvVisible = false">{{ $t('table.confirm') }}</el-button>
      </span>
    </el-dialog>

  </div>
</template>
<script>
// 从api中引入与后台交互的请求方法
import { fetchList, fetchPv, createArticle, updateArticle } from '@/api/article'
// 引入水波纹
import waves from '@/directive/waves' // Waves directive
// 格式化时间
import { parseTime } from '@/utils'
// 分页组件
import Pagination from '@/components/Pagination' // Secondary package based on el-pagination

// calendarTypeOptions  选择框中的下拉数组
const calendarTypeOptions = [
  { key: 'CN', display_name: 'China' },
  { key: 'US', display_name: 'USA' },
  { key: 'JP', display_name: 'Japan' },
  { key: 'EU', display_name: 'Eurozone' }
]

// arr to obj ,such as { CN : "China", US : "USA" }
const calendarTypeKeyValue = calendarTypeOptions.reduce((acc, cur) => {
  acc[cur.key] = cur.display_name
  return acc
}, {})

export default {
  name: 'ComplexTable',
  // 引用的组件
  components: { Pagination },
  // 自定义组件引入水波纹特效
  directives: { waves },
  // 定义过滤器   调用只需要  数据  | 过滤器名
  filters: {
    //状态过滤器
    statusFilter(status) {
      const statusMap = {
        published: 'success',
        draft: 'info',
        deleted: 'danger'
      }
      return statusMap[status]
    },
    // 类型过滤器
    typeFilter(type) {
      return calendarTypeKeyValue[type]
    }
  },
  // 定义基础数据
  data() {
    return {
      tableKey: 0,
      list: null,
      total: 0,
      listLoading: true,
      // 搜索框请求数据及分页数据
      listQuery: {
        page: 1,
        limit: 20,
        importance: undefined,
        title: undefined,
        type: undefined,
        sort: '+id'
      },
      importanceOptions: [1, 2, 3],
      calendarTypeOptions,
      sortOptions: [{ label: 'ID Ascending', key: '+id' }, { label: 'ID Descending', key: '-id' }],
      statusOptions: ['published', 'draft', 'deleted'],
      showReviewer: false,
      // 新增与修改界面使用的缓存数据
      temp: {
        id: undefined,
        importance: 1,
        remark: '',
        timestamp: new Date(),
        title: '',
        type: '',
        status: 'published'
      },
      // 对话框展示控制属性
      dialogFormVisible: false,
      dialogStatus: '',
      // 对话框标题数组
      textMap: {
        update: 'Edit',
        create: 'Create'
      },
      dialogPvVisible: false,
      pvData: [],
      // 新增修改界面前端校验规则
      rules: {
       //type 与上面form表单中的 prop一一对应  required是否必须 message 校验出错时提示的数据
       //  trigger: 'change' 当数据发现变化时触发校验   trigger: 'blur' 当失去焦点时触发校验
        type: [{ required: true, message: 'type is required', trigger: 'change' }],
        timestamp: [{ type: 'date', required: true, message: 'timestamp is required', trigger: 'change' }],
        title: [{ required: true, message: 'title is required', trigger: 'blur' }]
      },
      downloadLoading: false
    }
  },
  // 钩子函数,当界面创建的时候调用.getList() 获取列表数据
  created() {
    this.getList()
  },
  // 方法
  methods: {
    // 获取列表数据
    getList() {
      // 将table设置 载入效果
      this.listLoading = true
      //从后台请求数据
      fetchList(this.listQuery).then(response => {
       //将后台返回的数据设置到table 遍历的List中
        this.list = response.data.items
        // 设置分页参数
        this.total = response.data.total

        // 这里是模拟请求的过程,正式开发去除
        setTimeout(() => {
        // 取消tabel的载入效果,展示数据
          this.listLoading = false
        }, 1.5 * 1000)
      })
    },
    handleFilter() {
      this.listQuery.page = 1
      this.getList()
    },
    handleModifyStatus(row, status) {
      this.$message({
        message: '操作成功',
        type: 'success'
      })
      row.status = status
    },
    sortChange(data) {
      const { prop, order } = data
      if (prop === 'id') {
        this.sortByID(order)
      }
    },
    sortByID(order) {
      if (order === 'ascending') {
        this.listQuery.sort = '+id'
      } else {
        this.listQuery.sort = '-id'
      }
      this.handleFilter()
    },
    // 重置temp缓存数据 在每次点击新增和修改时调用,避免数据出错
    resetTemp() {
      this.temp = {
        id: undefined,
        importance: 1,
        remark: '',
        timestamp: new Date(),
        title: '',
        status: 'published',
        type: ''
      }
    },
    // 点击新增按钮触发的方法  展示新增界面
    handleCreate() {
      //清空temp数据
      this.resetTemp()
      this.dialogStatus = 'create'
      this.dialogFormVisible = true
      // 当下一次vue的dom元素更新时执行
      this.$nextTick(() => {
        this.$refs['dataForm'].clearValidate()
      })
    },
    // 创建数据方法
    createData() {
     // 饿了么form表单前端校验的固定写法,当点击确定新增数据时,再校验一遍数据是否符合rules
      this.$refs['dataForm'].validate((valid) => {
        if (valid) {
         //设置基础数据
          this.temp.id = parseInt(Math.random() * 100) + 1024 // mock a id
          this.temp.author = 'vue-element-admin'
          // 到后端请求新增数据
          createArticle(this.temp).then(() => {
            this.list.unshift(this.temp)
            // 将dialog对话框隐藏
            this.dialogFormVisible = false
            // 提示执行成功
            this.$notify({
              title: '成功',
              message: '创建成功',
              type: 'success',
              duration: 2000
            })
          })
        }
      })
    },
    // 点击修改执行的方法  显示修改界面
    handleUpdate(row) {
     // 将table中的row数据深拷贝到temp 中
      this.temp = Object.assign({}, row) // copy obj
      //设置基础数据
      this.temp.timestamp = new Date(this.temp.timestamp)
      this.dialogStatus = 'update'
      this.dialogFormVisible = true
       // 当下一次vue的dom元素更新时执行
      this.$nextTick(() => {
        this.$refs['dataForm'].clearValidate()
      })
    },
    // 修改数据方法
    updateData() {
    //下面的知识点上面都说过了就不写了
      this.$refs['dataForm'].validate((valid) => {
        if (valid) {
          const tempData = Object.assign({}, this.temp)
          tempData.timestamp = +new Date(tempData.timestamp) // change Thu Nov 30 2017 16:41:05 GMT+0800 (CST) to 1512031311464
          updateArticle(tempData).then(() => {
            for (const v of this.list) {
              if (v.id === this.temp.id) {
                const index = this.list.indexOf(v)
                this.list.splice(index, 1, this.temp)
                break
              }
            }
            this.dialogFormVisible = false
            this.$notify({
              title: '成功',
              message: '更新成功',
              type: 'success',
              duration: 2000
            })
          })
        }
      })
    },
    handleDelete(row) {
      this.$notify({
        title: '成功',
        message: '删除成功',
        type: 'success',
        duration: 2000
      })
      const index = this.list.indexOf(row)
      this.list.splice(index, 1)
    },
    handleFetchPv(pv) {
      fetchPv(pv).then(response => {
        this.pvData = response.data.pvData
        this.dialogPvVisible = true
      })
    },
    handleDownload() {
      this.downloadLoading = true
      import('@/vendor/Export2Excel').then(excel => {
        const tHeader = ['timestamp', 'title', 'type', 'importance', 'status']
        const filterVal = ['timestamp', 'title', 'type', 'importance', 'status']
        const data = this.formatJson(filterVal, this.list)
        excel.export_json_to_excel({
          header: tHeader,
          data,
          filename: 'table-list'
        })
        this.downloadLoading = false
      })
    },
    formatJson(filterVal, jsonData) {
      return jsonData.map(v => filterVal.map(j => {
        if (j === 'timestamp') {
          return parseTime(v[j])
        } else {
          return v[j]
        }
      }))
    }
  }
}
</script>
element-ui
- 饿了么官方文档
- el-dialog 弹窗对话框
visible.sync 控制显示 - Form前端校验
element-ui Form 组件提供了表单验证的功能,只需要通过 rules 属性传入约定的验证规则,并将 Form-Item 的 prop 属性设置为需校验的字段名即可。
form校验数据
前后端请求
代码位置 src/api
建议一个view对应一个api下的js,将一个页面中基础的crud等与后端访问的请求写到一起,方便管理
这里使用了/utils/request.js,封装了一下axios请求,分别展示了一个get和post的使用方法
import request from '@/utils/request'

export function fetchList(query) {
  return request({
    url: '/ArticleApi/list',
    method: 'get',
    params: query
  })
}
export function createArticle(data) {
  return request({
    url: '/ArticleApi/create',
    method: 'post',
    data
  })
}
src/utils/request.js
这里的baseURL就是访问后端的基础路径,使用的是process.env.BASE_API ,在config/dev.env.js配置文件中配置BASE_API
例如 dev 环境中使用 fetchList 访问后台的路径就是 http://localhost:8080/ArticleApi/list
config/dev.env.js中的BASE_API是 http://localhost:8080
api 中的 url 是 /ArticleApi/list
当使用打包命令 npm run build 时,访问的就是 config/prod.env.js 文件中的 BASE_API
import axios from 'axios'
import { Message } from 'element-ui'
import store from '@/store'
import { getToken } from '@/utils/auth'

// create an axios instance
const service = axios.create({
  baseURL: process.env.BASE_API // api 的 base_url
  timeout: 5000 // 请求过期时间
})

// request interceptor
service.interceptors.request.use(
  config => {
    // Do something before request is sent
    if (store.getters.token) {
      // 让每个请求携带token-- ['X-Token']为自定义key 请根据实际情况自行修改
      config.headers['Authorization'] = getToken()
    }
    return config
  },
  error => {
    // Do something with request error
    console.log(error) // for debug
    Promise.reject(error)
  }
)
分页
<div class="pagination-container">
      <el-pagination v-show="total>0" :current-page="listQuery.page" :page-sizes="[10,20,30, 50]" :page-size="listQuery.limit" :total="total" background layout="total, sizes, prev, pager, next, jumper" @size-change="handleSizeChange" @current-change="handleCurrentChange"/>
    </div>
前端请求将 page(页码) limit(每页条数)发给后台,后台筛选数据后,返回一个数组给前端
删除二次确认
- 删除二次确认
this.$confirm('此操作将永久删除该数据, 是否继续?', '提示', {
        confirmButtonText: '确定',
        cancelButtonText: '取消',
        type: 'warning'
      }).then(() => {
        delArticle(tempData).then(() => {
         	....
          })
        })
      }).catch(() => {
        this.$message({
          type: 'info',
          message: '已取消删除'
        })
      })
过滤器
概念:Vue.js 允许你自定义过滤器,可被用作一些常见的文本格式化。过滤器可以用在两个地方:mustache 插值和 v-bind 表达式。过滤器应该被添加在 JavaScript 表达式的尾部,由“管道”符指示;
<el-tag :type="scope.row.status | statusFilter">{{ scope.row.status }}</el-tag>

filters: {
    statusFilter(status) {
      const statusMap = {
        published: 'success',
        draft: 'info',
        deleted: 'danger'
      }
      return statusMap[status]
    },
    typeFilter(type) {
      return calendarTypeKeyValue[type]
    }
  },
一些常使用的vue语法
- this.$refs 一般来说 ,获取DOM元素,需要用
document.querySelector(".input1")
获取这个dom节点,然后在获取input1的值。但是用ref绑定之后,我们就不需要在获取dom节点了,直接在上面的input上绑定input1,然后$refs里面调用就行。
<div id="app">
  <input type="text" ref="input1"/>
  <button @click="add">添加</button>
</div>

<script>
new Vue({
  el: "#app",
  methods:{
  add:function(){
    this.$refs.input1.value ="22"; //this.$refs.input1 减少获取dom节点的消耗
    }
  }
})
</script>
- this.$nextTick 为了在数据变化之后等待 Vue 完成更新 DOM ,可以在数据变化之后立即使用 Vue.nextTick(callback) 。这样回调函数在 DOM 更新完成后就会调用。例如:
<div id="example">{{message}}</div>
var vm = new Vue({
  el: '#example',
  data: {
    message: '123'
  }
})
vm.message = 'new message' // 更改数据
vm.$el.textContent === 'new message' // false
Vue.nextTick(function () {
  vm.$el.textContent === 'new message' // true
})
