极光推送官网文档https://docs.jiguang.cn//jpush/guideline/intro/
自定义计数、自定义计算一直没有这个坑(最后面有写原因、解决),我研究、找资料、反复对比demo、极光文档耗了大半天,但是最后问题解决了,很开心。这也是我,为什么明明官网写得很好了,还多此一举写篇文章,因为想记录自己完成的这个过程,就比如这个坑,下次无论如何我都不会再进去了,有些东西,必须要自己操练一遍才行,写一遍会印象更加深刻,遥远的以后,要是忘记了,回来一看自己的笔记,就能迅速上手了。
一.极光推送,效果图如下:


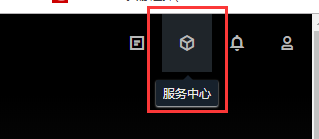
1.注册账号并且要实名认证,进入服务中心——开发者平台——创建应用


2.推送设置(一定要设置对,不然后面推送不了)记住AppKey,后面要用


3. 可用的 gradle 中添加依赖(包括app下的)
android {
    ......
    defaultConfig {
        applicationId "com.xxx.xxx" //JPush上注册的包名,只用写在app下的gradle即可,module不用applicationId
        ......

        ndk {//这个只用写在app下的gradle即可,其它module不用
            //选择要添加的对应 cpu 类型的 .so 库。
            abiFilters 'armeabi', 'armeabi-v7a', 'arm64-v8a'
            // 还可以添加 'x86', 'x86_64', 'mips', 'mips64'
        }

        manifestPlaceholders = [
            JPUSH_PKGNAME : applicationId,
            JPUSH_APPKEY : "你的 Appkey ", //JPush 上注册的包名对应的 Appkey.
            JPUSH_CHANNEL : "developer-default", //暂时填写默认值即可.
        ]
        ......
    }
    ......
}

dependencies {
    ......
    //建议写在一个common模块里面,其它模块api project(':module_app_common')即可,
    //把公共需要的第三方依赖放在common里面,方便统一
    api 'cn.jiguang.sdk:jpush:3.5.4'  // 此处以JPush 3.5.4 版本为例。
    api 'cn.jiguang.sdk:jcore:2.2.4'  // 此处以JCore 2.2.4 版本为例。
    ......
}
4.app下的AndroidManifest.xml配置(自定义的类,从demo里面拷贝出来)
    <!-- Required -->
    <uses-permission android:name="您应用的包名.permission.JPUSH_MESSAGE" />
    <uses-permission android:name="android.permission.RECEIVE_USER_PRESENT" />
    <uses-permission android:name="android.permission.INTERNET" />
    <uses-permission android:name="android.permission.READ_PHONE_STATE" />
    <uses-permission android:name="android.permission.WRITE_EXTERNAL_STORAGE" />
    <uses-permission android:name="android.permission.READ_EXTERNAL_STORAGE" />
    <uses-permission android:name="android.permission.MOUNT_UNMOUNT_FILESYSTEMS" />
    <uses-permission android:name="android.permission.ACCESS_NETWORK_STATE" />
    <uses-permission android:name="android.permission.ACCESS_WIFI_STATE" />

    <application
          <!-- Required SDK 核心功能-->
        <!-- 可配置 android:process 参数将 PushService 放在其他进程中 -->
        <service
            android:name="cn.jpush.android.service.PushService"
            android:enabled="true"
            android:exported="false">
            <intent-filter>
                <action android:name="cn.jpush.android.intent.REGISTER" />
                <action android:name="cn.jpush.android.intent.REPORT" />
                <action android:name="cn.jpush.android.intent.PushService" />
                <action android:name="cn.jpush.android.intent.PUSH_TIME" />
            </intent-filter>
        </service>
        <!-- since 3.0.9 Required SDK 核心功能-->
        <provider
            android:name="cn.jpush.android.service.DataProvider"
            android:authorities="${applicationId}.DataProvider"
            android:exported="false"
            android:process=":pushcore" />
        <!-- Required SDK 核心功能-->
        <receiver
            android:name="cn.jpush.android.service.PushReceiver"
            android:enabled="true">
            <intent-filter android:priority="1000">
                <action android:name="cn.jpush.android.intent.NOTIFICATION_RECEIVED_PROXY" />
                <category android:name="${applicationId}" />
            </intent-filter>
            <intent-filter>
                <action android:name="android.intent.action.USER_PRESENT" />
                <action android:name="android.net.conn.CONNECTIVITY_CHANGE" />
            </intent-filter>
            <!-- Optional -->
            <intent-filter>
                <action android:name="android.intent.action.PACKAGE_ADDED" />
                <action android:name="android.intent.action.PACKAGE_REMOVED" />

                <data android:scheme="package" />
            </intent-filter>
        </receiver>
        <!-- 若您的业务中有使用极光富媒体功能,或者极光早上好功能,需要把此 Activity 的 exported 修改成 true 覆盖 jcenter 上的组件。 -->
        <activity
            android:name="cn.jpush.android.ui.PopWinActivity"
            android:exported="true"
            android:theme="@style/MyDialogStyle"
            tools:node="replace">
            <intent-filter>
                <category android:name="android.intent.category.DEFAULT" />
                <action android:name="cn.jpush.android.ui.PopWinActivity" />
                <category android:name="${applicationId}" />
            </intent-filter>
        </activity>

        <!-- 若您的业务中有使用极光富媒体功能,或者极光早上好功能,需要把此 Activity 的 exported 修改成 true 覆盖 jcenter 上的组件。 -->
        <activity
            android:name="cn.jpush.android.ui.PushActivity"
            android:configChanges="orientation|keyboardHidden"
            android:exported="true"
            android:theme="@android:style/Theme.NoTitleBar"
            tools:node="replace">
            <intent-filter>
                <action android:name="cn.jpush.android.ui.PushActivity" />

                <category android:name="android.intent.category.DEFAULT" />
                <category android:name="${applicationId}" />
            </intent-filter>
        </activity>

        <!-- Since JCore2.0.0 Required SDK核心功能-->
        <!-- 可配置android:process参数将Service放在其他进程中;android:enabled属性不能是false -->
        <!-- 这个是自定义Service,要继承极光JCommonService,可以在更多手机平台上使得推送通道保持的更稳定 -->
        <service
            android:name="com.example.module_common.jiguang.MyJCommonService"
            android:enabled="true"
            android:exported="false"
            android:process=":pushcore">
            <intent-filter>
                <action android:name="cn.jiguang.user.service.action" />
            </intent-filter>
        </service>

          <!-- Required SDK核心功能-->
        <receiver
            android:name="cn.jpush.android.service.AlarmReceiver"
            android:exported="false" />

        <!-- Required since 3.0.7 -->
        <!-- 新的 tag/alias 接口结果返回需要开发者配置一个自定的广播 -->
        <!-- 3.3.0开始所有事件将通过该类回调 -->
        <!-- 该广播需要继承 JPush 提供的 JPushMessageReceiver 类, 并如下新增一个 Intent-Filter -->
        <receiver
            android:name="com.example.module_common.jiguang.MyJPushMessageReceiver"
            android:enabled="true"
            android:exported="false">
            <intent-filter>
                <action android:name="cn.jpush.android.intent.RECEIVE_MESSAGE" />
                <category android:name="${applicationId}" />
            </intent-filter>
        </receiver>

        <!-- User defined. 用户自定义的广播接收器-->
        <!-- 这是3.3.0之前版本的接收方式,3.3.0开始是通过继承 JPushMessageReceiver并配置来接收所有事件回调。-->
        <!-- 如果仍然需要在这个Receiver里接收,需要在JPushMessageReceiver 的子类里不重写对应的回调方法,或者重写方法且调用super-->
        <receiver
            android:name="com.example.module_common.jiguang.MyReceiver"
            android:enabled="true"
            android:exported="false">
            <intent-filter>
                <!--Required 用户注册 SDK 的 intent-->
                <action android:name="cn.jpush.android.intent.REGISTRATION" />
                <!--Required 用户接收 SDK 消息的 intent-->
                <action android:name="cn.jpush.android.intent.MESSAGE_RECEIVED" />
                <!--Required 用户接收 SDK 通知栏信息的 intent-->
                <action android:name="cn.jpush.android.intent.NOTIFICATION_RECEIVED" />
                <!--Required 用户打开自定义通知栏的 intent-->
                <action android:name="cn.jpush.android.intent.NOTIFICATION_OPENED" />
                <!-- 接收网络变化 连接/断开 since 1.6.3 -->
                <action android:name="cn.jpush.android.intent.CONNECTION" />
                <category android:name="${applicationId}" />
            </intent-filter>
        </receiver>

        <!-- 3.5.0新增,用于定时展示功能 -->
        <receiver
            android:name="cn.jpush.android.service.SchedulerReceiver"
            android:exported="false" />
        <!--Required SDK核心功能 since 3.3.0-->
        <activity
            android:name="cn.jpush.android.service.JNotifyActivity"
            android:exported="true"
            android:taskAffinity="jpush.custom"
            android:theme="@android:style/Theme.Translucent.NoTitleBar">
            <intent-filter>
                <action android:name="cn.jpush.android.intent.JNotifyActivity" />
                <category android:name="${applicationId}" />
            </intent-filter>
        </activity>
        <!-- Required. For publish channel feature -->
        <!-- JPUSH_CHANNEL 是为了方便开发者统计 APK 分发渠道。-->
        <!-- 例如: -->
        <!-- 发到 Google Play 的 APK 可以设置为 google-play; -->
        <!-- 发到其他市场的 APK 可以设置为 xxx-market。 -->
        <meta-data
            android:name="JPUSH_CHANNEL"
            android:value="${JPUSH_CHANNEL}" />
        <!-- Required. AppKey copied from Portal -->
        <meta-data
            android:name="JPUSH_APPKEY"
            android:value="${JPUSH_APPKEY}" />
    </application>
5.XXXApplication
public class XXXApplication extends Application {
@Override
    public void onCreate() {
        super.onCreate();
         JPushInterface.setDebugMode(true);//设置开启日志,发布时请关闭日志可用BuildConfig.DEBUG
         JPushInterface.init(this);     // 初始化 JPush
    }
}
6.设置别名标签
JPushInterface.setAlias(getApplicationContext(),1,"12345");//别名

//标签,可add多个
 Set<String> tags = new HashSet<>();
 tags.add("user");
 tags.add("***");
 JPushInterface.setTags(MainActivity.this, 0, tags);
MyJPushMessageReceiver中打印是否设置成功
  @Override
    public void onTagOperatorResult(Context context, JPushMessage jPushMessage) {
        TagAliasOperatorHelper.getInstance().onTagOperatorResult(context, jPushMessage);
        if (jPushMessage.getErrorCode() == 0) {
            Log.e("设置标签成功:", String.valueOf(jPushMessage.getTags()));
        }
        super.onTagOperatorResult(context, jPushMessage);
    }

 @Override
    public void onAliasOperatorResult(Context context, JPushMessage jPushMessage) {
        TagAliasOperatorHelper.getInstance().onAliasOperatorResult(context, jPushMessage);
        if (jPushMessage.getErrorCode() == 0) {
            Log.e("设置别名成功:", jPushMessage.getAlias());
        }
        super.onAliasOperatorResult(context, jPushMessage);
    }
二.统计
1.在前面的基础上,增加依赖
api 'cn.jiguang.sdk:janalytics:2.1.0' // 此处以JAnalytics 2.1.0 版本为例。2. app下的AndroidManifest.xml配置(有些权限是跟前面的一样的)
 <!-- 必需  一些系统要求的权限,如 访问网络等-->
    <uses-permission android:name="android.permission.INTERNET" />
    <uses-permission android:name="android.permission.WAKE_LOCK" />
    <uses-permission android:name="android.permission.READ_PHONE_STATE" />
    <uses-permission android:name="android.permission.WRITE_EXTERNAL_STORAGE" />
    <uses-permission android:name="android.permission.READ_EXTERNAL_STORAGE" />
    <uses-permission android:name="android.permission.ACCESS_NETWORK_STATE" />
    <uses-permission android:name="android.permission.ACCESS_WIFI_STATE" />
3.XXXApplication
public class XXXApplication extends Application {
@Override
    public void onCreate() {
        super.onCreate();
        JAnalyticsInterface.setDebugMode(true);//设置是否开启debug模式。true则会打印更多的日志信息。建议在init接口之前调用。
        JAnalyticsInterface.init(this);// 初始化 JPush

    //统计上报周期period:周期,单位秒,最小10秒,最大1天,超出范围会打印调用失败日志。传0表示统计数据即时上报
    JAnalyticsInterface.setAnalyticsReportPeriod(Context context, int period)
}
3.混淆proguard-rules.pro(ProGuard Rules for app)
-keep class cn.jiguang.** { *; }4.自定义事件统计
JAnalyticsInterface.onEvent(Context context,Event event)
- 接口说明:
- 自定义事件。通过传入不同的事件模型来进行各种事件的统计,具体的事件模型请查看事件模型介绍
- 参数说明:
- context:上下文
- event:事件模型,支持: CountEvent(计数事件,key不建议用event_id)、 CalculateEvent(计算事件,key不建议用event_id,event_value)、 RegisterEvent(注册事件,key不建议用register_method,register_success) 、 LoginEvent(登录事件,key不建议用login_method,login_success)、 BrowseEvent(浏览事件,key不建议用browse_content_id,browse_name,browse_type,browse_duration)、PurchaseEvent(购买事件,key不建议用purchase_goods_id, purchase_goods_name ,purchase_price, purchase_currency, purchase_goods_type, purchase_quantity)
注:此类 key 已被模型使用,如果使用则会导致统计到的数据不准确.
.addExtMap:附加的信息
由上层传来content、event、Map<key,value>(也可传来key、value,进一步put到Map里;putAll可以合并两个MAP,只不过如果有相同的key那么用后面的覆盖前面的)
//调用
DataBuried.setOtherEvent(getApplication(),"Login_page","login_xiaomo","xiaomo");
 /**自定义事件统计,根据需求分开写方法调用
     * @param content
     * @param event
     * @param key
     * @param value
     */
    public static void setAllEvent(Context content, String event, String key, String value) {
        int i = 1;
        Map<String, String> extMap = new HashMap<>();
        extMap.put(key,value);
        //加入公共的map,其中所有的埋点都需要的key-value放在commonMap,eg:网络的类型
        //extMap.putAll(commonMap);

        CountEvent countEvent = new CountEvent(event);//计数事件模型
        countEvent.addExtMap(extMap);
        JAnalyticsInterface.onEvent(content, countEvent);

        CalculateEvent cEvent = new CalculateEvent(event+"_cEvent", i++);//计算事件模型,不能用even,前面CountEvent用了
        cEvent.addExtMap(extMap);
        JAnalyticsInterface.onEvent(content, cEvent);

        LoginEvent lEvent = new LoginEvent(event,true);//登录事件模型
        lEvent.addExtMap(extMap);
        JAnalyticsInterface.onEvent(content, lEvent);

        RegisterEvent rEvent = new RegisterEvent(event,true);//注册事件模型
        rEvent.addExtMap(extMap);
        JAnalyticsInterface.onEvent(content, rEvent);

        BrowseEvent bEvent = new BrowseEvent(event,"广州热点新闻","news",10);//浏览事件模型
        bEvent.addExtMap(extMap);
        JAnalyticsInterface.onEvent(content, bEvent);

        PurchaseEvent pEvent = new PurchaseEvent(event,"舞蹈",50,true, Currency.CNY,"sport",1);//购买事件模型
        pEvent.addExtMap(extMap);
        JAnalyticsInterface.onEvent(content, pEvent);
    }
坑:自定义计数、自定义计算一直没有 ,都是自己惹的祸,捣鼓了大半天、前后反复检查配置什么的,以为自己弄错了。千万千万千万,自定义计数、自定义计算一定要自己“手动创建”才会有的。
入坑:除了自定义计数、自定义计算外,其它的登录、注册……都有数据了,就这两个怎么刷新都没有,后面去极光社区提问后,官方提醒我了,后面就知道原因所在了。自定义计数、自定义计算一定一定要自己手动创建。


