快速入门
本章主要目标完成Spring Boot基础项目的构建,并且实现一个简单的Http请求处理,通过这个例子对Spring Boot有一个初步的了解,并体验其结构简单、开发快速的特性。
系统要求:
Java 7及以上
Spring Framework 4.1.5及以上
本文采用Java 1.8.0_73、Spring Boot 1.3.2调试通过。
使用Maven构建项目
通过
SPRING INITIALIZR工具产生基础项目访问:
http://start.spring.io/选择构建工具
Maven Project、Spring Boot版本1.3.2以及一些工程基本信息,可参考下图所示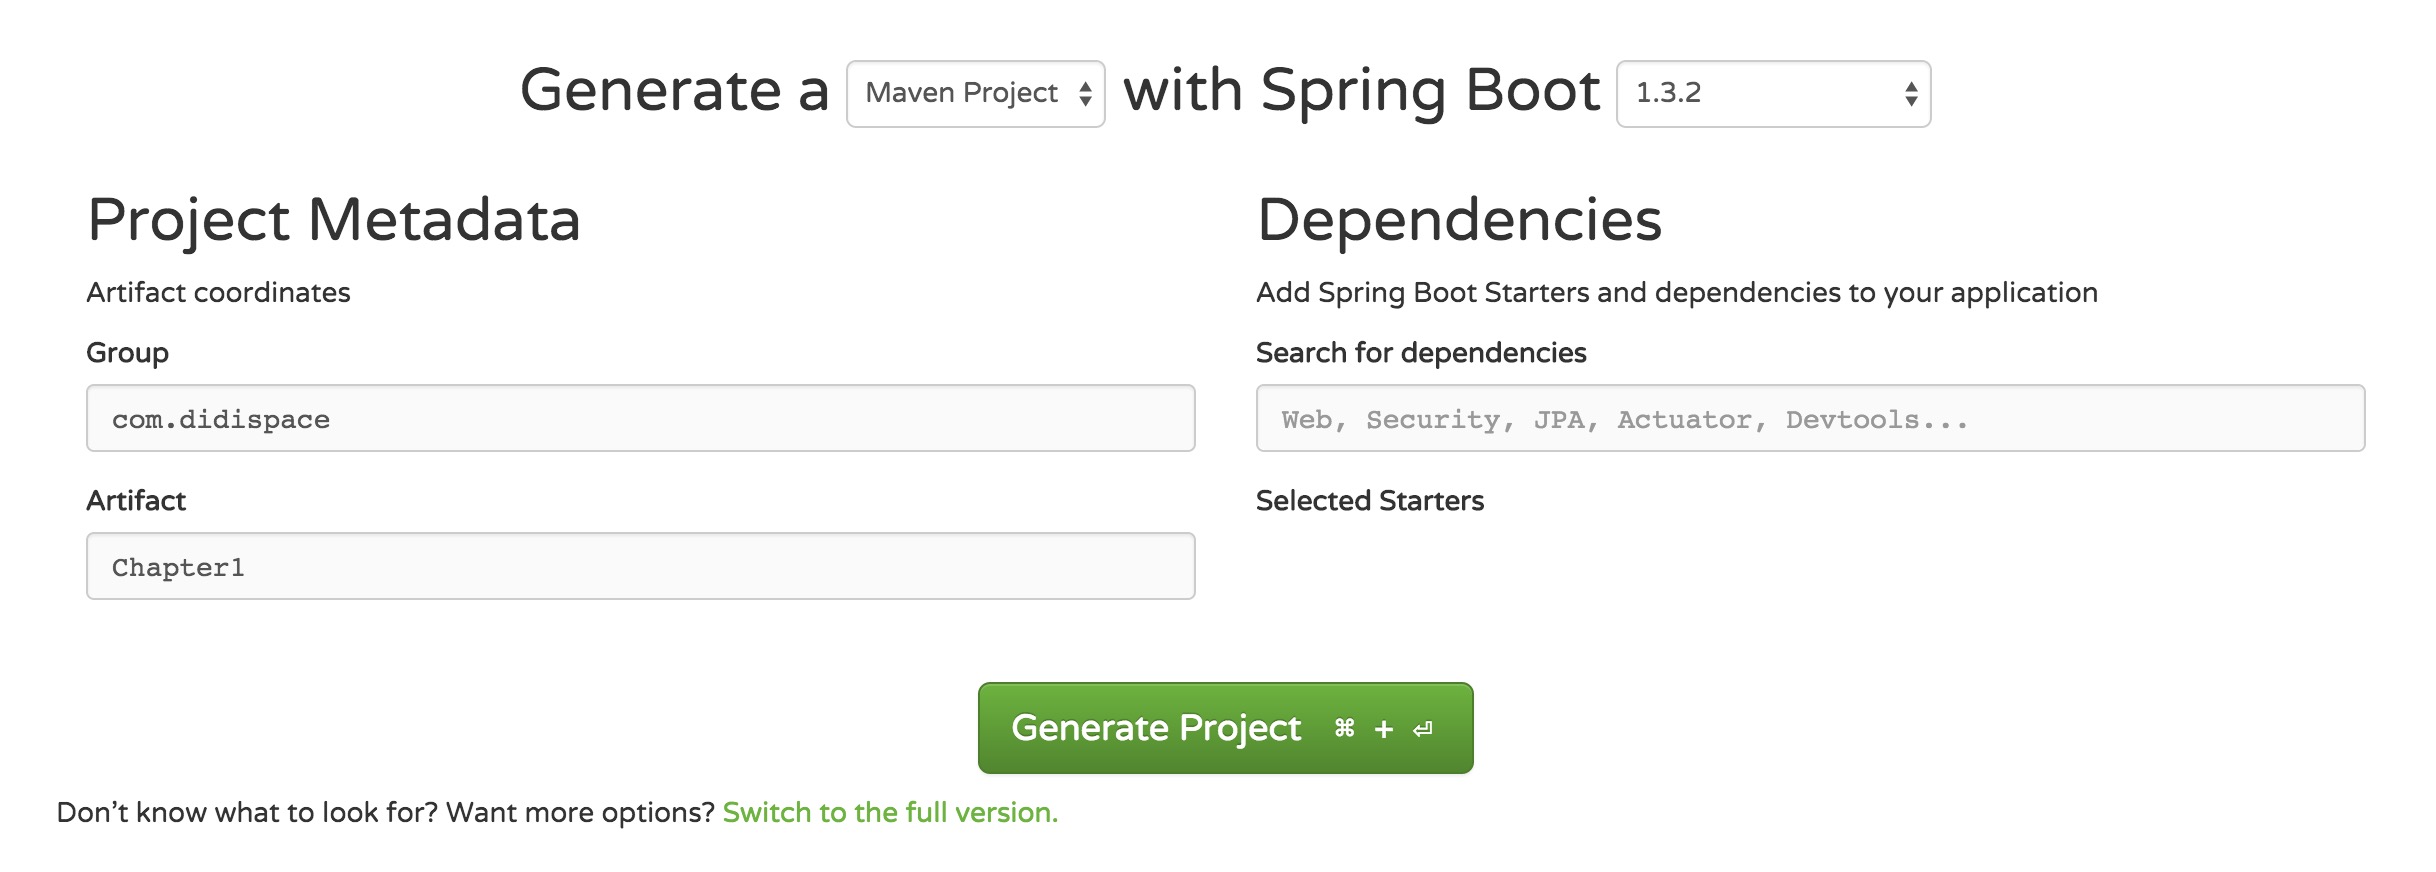 SPRING INITIALIZR
点击
Generate Project下载项目压缩包
解压项目包,并用IDE以
Maven项目导入,以IntelliJ IDEA 14为例:菜单中选择
File–>New–>Project from Existing Sources...选择解压后的项目文件夹,点击
OK点击
Import project from external model并选择Maven,点击Next到底为止。若你的环境有多个版本的JDK,注意到选择
Java SDK的时候请选择Java 7以上的版本
项目结构解析
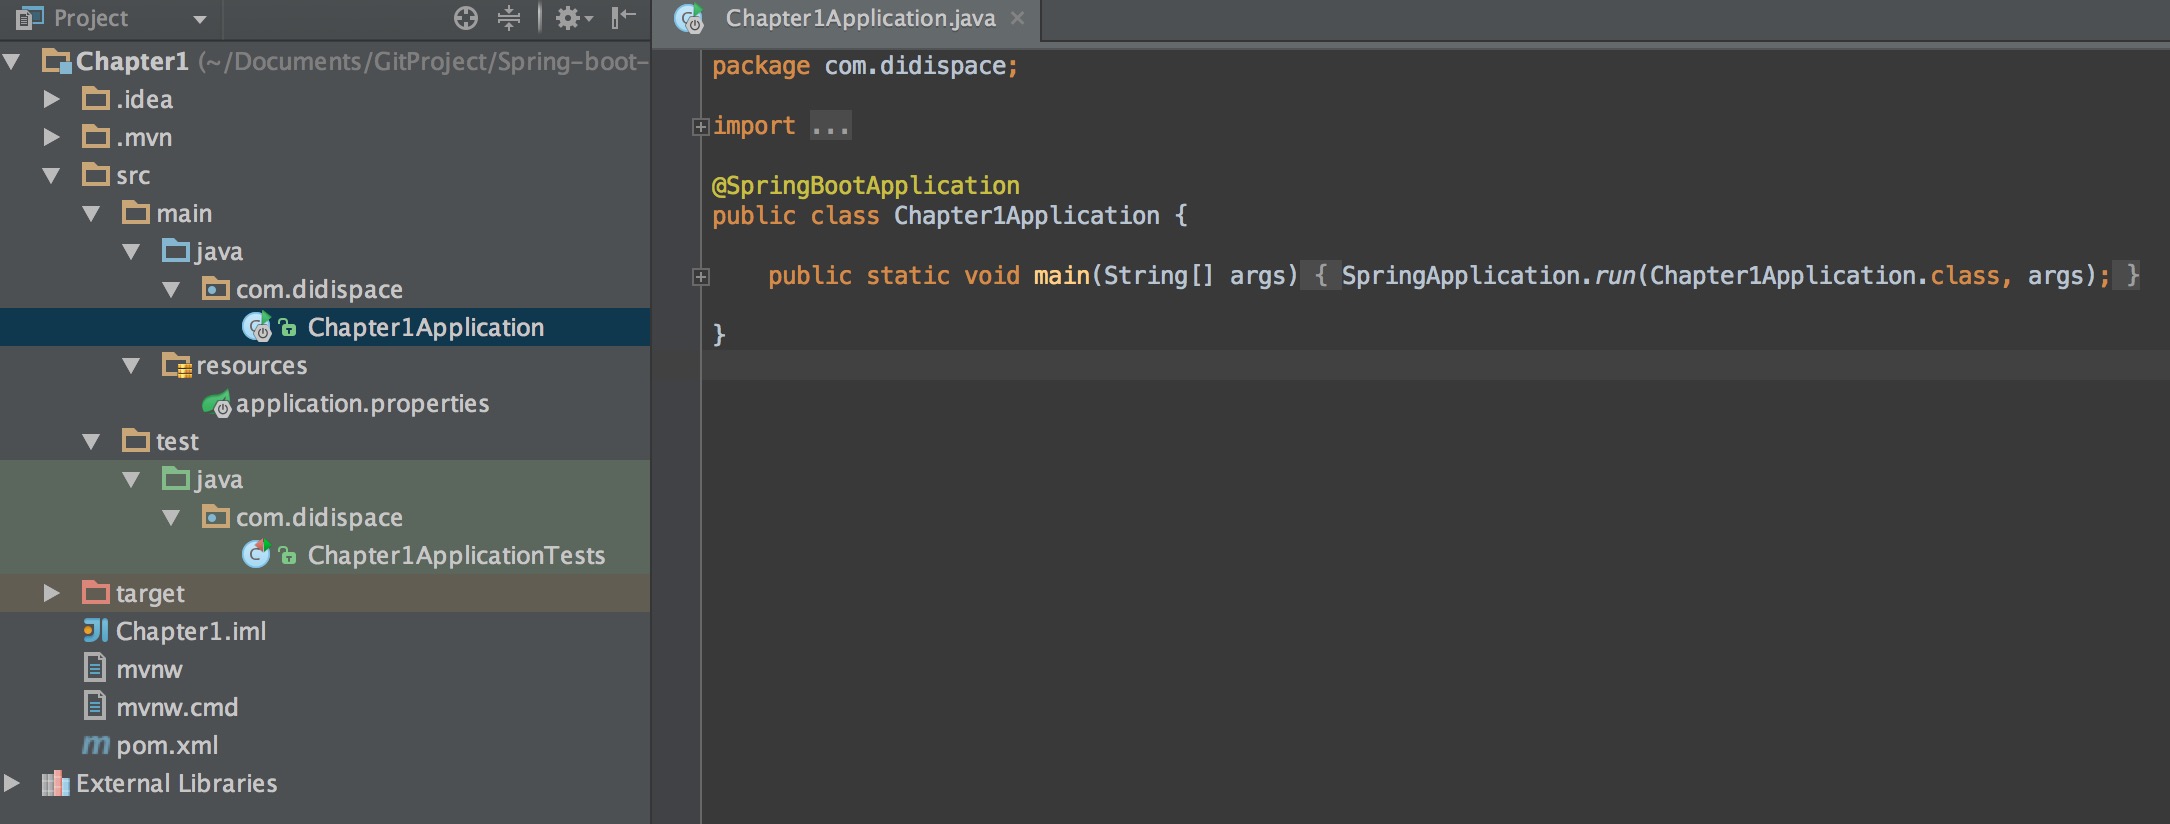 项目结构
项目结构
通过上面步骤完成了基础项目的创建,如上图所示,Spring Boot的基础结构共三个文件(具体路径根据用户生成项目时填写的Group所有差异):
src/main/java下的程序入口:Chapter1Applicationsrc/main/resources下的配置文件:application.propertiessrc/test/下的测试入口:Chapter1ApplicationTests
生成的Chapter1Application和Chapter1ApplicationTests类都可以直接运行来启动当前创建的项目,由于目前该项目未配合任何数据访问或Web模块,程序会在加载完Spring之后结束运行。
引入Web模块
当前的pom.xml内容如下,仅引入了两个模块:
spring-boot-starter:核心模块,包括自动配置支持、日志和YAMLspring-boot-starter-test:测试模块,包括JUnit、Hamcrest、Mockito<dependencies> <dependency> <groupId>org.springframework.boot</groupId> <artifactId>spring-boot-starter</artifactId> </dependency> <dependency> <groupId>org.springframework.boot</groupId> <artifactId>spring-boot-starter-test</artifactId> <scope>test</scope> </dependency></dependencies>
引入Web模块,需添加
spring-boot-starter-web模块:<dependency> <groupId>org.springframework.boot</groupId> <artifactId>spring-boot-starter-web</artifactId></dependency>
编写HelloWorld服务
创建
package命名为com.didispace.web(根据实际情况修改)创建
HelloController类,内容如下@RestControllerpublic class HelloController { @RequestMapping("/hello") public String index() { return "Hello World"; } }启动主程序,打开浏览器访问
http://localhost:8080/hello,可以看到页面输出Hello World编写单元测试用例
打开的
src/test/下的测试入口Chapter1ApplicationTests类。下面编写一个简单的单元测试来模拟http请求,具体如下:@RunWith(SpringJUnit4Cla***unner.class) @SpringApplicationConfiguration(classes = MockServletContext.class) @WebAppConfigurationpublic class Chapter1ApplicationTests { private MockMvc mvc; @Before public void setUp() throws Exception { mvc = MockMvcBuilders.standaloneSetup(new HelloController()).build(); } @Test public void getHello() throws Exception { mvc.perform(MockMvcRequestBuilders.get("/hello").accept(MediaType.APPLICATION_JSON)) .andExpect(status().isOk()) .andExpect(content().string(equalTo("Hello World"))); } }使用
MockServletContext来构建一个空的WebApplicationContext,这样我们创建的HelloController就可以在@Before函数中创建并传递到MockMvcBuilders.standaloneSetup()函数中。注意引入下面内容,让
status、content、equalTo函数可用import static org.hamcrest.Matchers.equalTo;import static org.springframework.test.web.servlet.result.MockMvcResultMatchers.content;import static org.springframework.test.web.servlet.result.MockMvcResultMatchers.status;
至此已完成目标,通过Maven构建了一个空白Spring Boot项目,再通过引入web模块实现了一个简单的请求处理。