OpenAM简介
OpenAM 是一个开源的访问管理、授权服务平台。由ForegeRock公司发起。OpenAM前身为OpenSSO,由SUN公司创建,Oracle关闭OpenSSO后,OpenAM成为其继续者。
OpenAM 将“控制访问”(access control)实现聚焦在处理验证(authentication)和授权(authorization)两个方面。
- “
验证”是对个体身份的鉴别,例如,验证用户名、密码等身份信息。 - “
授权”既授予通过验证后的用户对一些资源(图片、URL等)的访问权。
关于验证(authentication)
OpenAM中定义了一条"验证链"(authentication chain)来对用户身份信息进行验证,“验证链”由单个或多个验证模块(authentication module)组成。将不同的验证服务连接在一起,为一些敏感资源提供更强的保护。还可以实现当用户成功登陆后记住用户的登陆设备、当用户登陆环境不正常时提供额外的验证要求等。
这些模块分别用身份信息仓储(identity repositories)连接,身份信息仓储存储了用户的信息并提供验证服务。身份信息仓储包含了LDAP目录,关系型数据库,RADIUS(Remote Authentification Dial in User Service) , Windows授权,one-time 密码服务(OTP)和一些其他的访问管理系统。
关于授权(authorization)
OpenAM对授权信息进行了集中化管理(centralize authorization),这使得访问策略(access policy)与受保护的资源分离。
与在web应用(受保护的)代码中嵌入访问策略不同,OpenAM在web应用部署的web服务器上(nginx,tomcat等)上安装一个策略代理(policy agent,下文简称PA)来执行OpenAM的验证结果。OpenAM做出用户验证判断结果(允许或拒绝用户访问某资源),交给PA来执行。
OpanAM下载
https://github.com/OpenIdentityPlatform/OpenAM/releases
https://backstage.forgerock.com/downloads/search?q=openam
https://zhengkai.blog.csdn.net/
安装流程
首先,OpenAM-14.1.x.war这个war包包含了服务器和控制台,直接将他放到应用服务器例如tomcat下即可。在开始之前,请访问hosts文件(C:\Windows\System32\drivers\etc),并添加127.0.0.1 openam.example.com的映射,以便开始下面的教程。
-
第一步,把war包
改名为openam.war并放到tomcat\webapp目录下,这样启动后就可以直接访问/openam了。而且请注意,不能直接放在ROOT目录下或者命名为ROOT.war,总之就是路径不能为空。 -
第二步,启动tomcat并访问
http://openam.example.com:8080/openam。 -
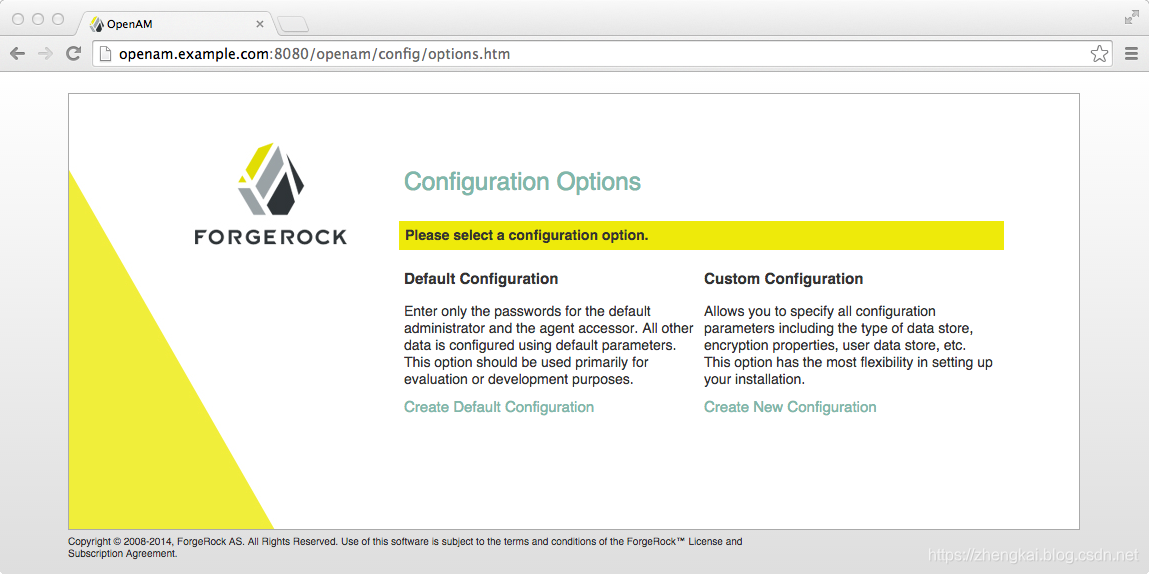
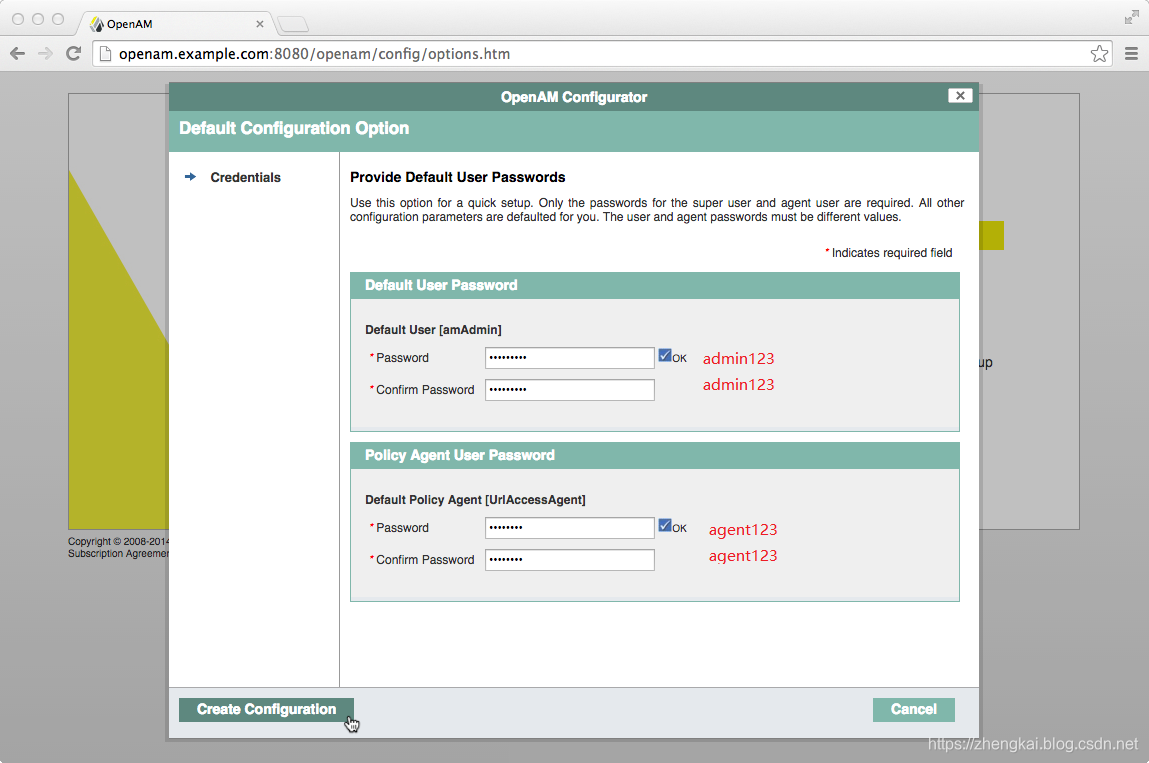
第三步,使用默认的配置【
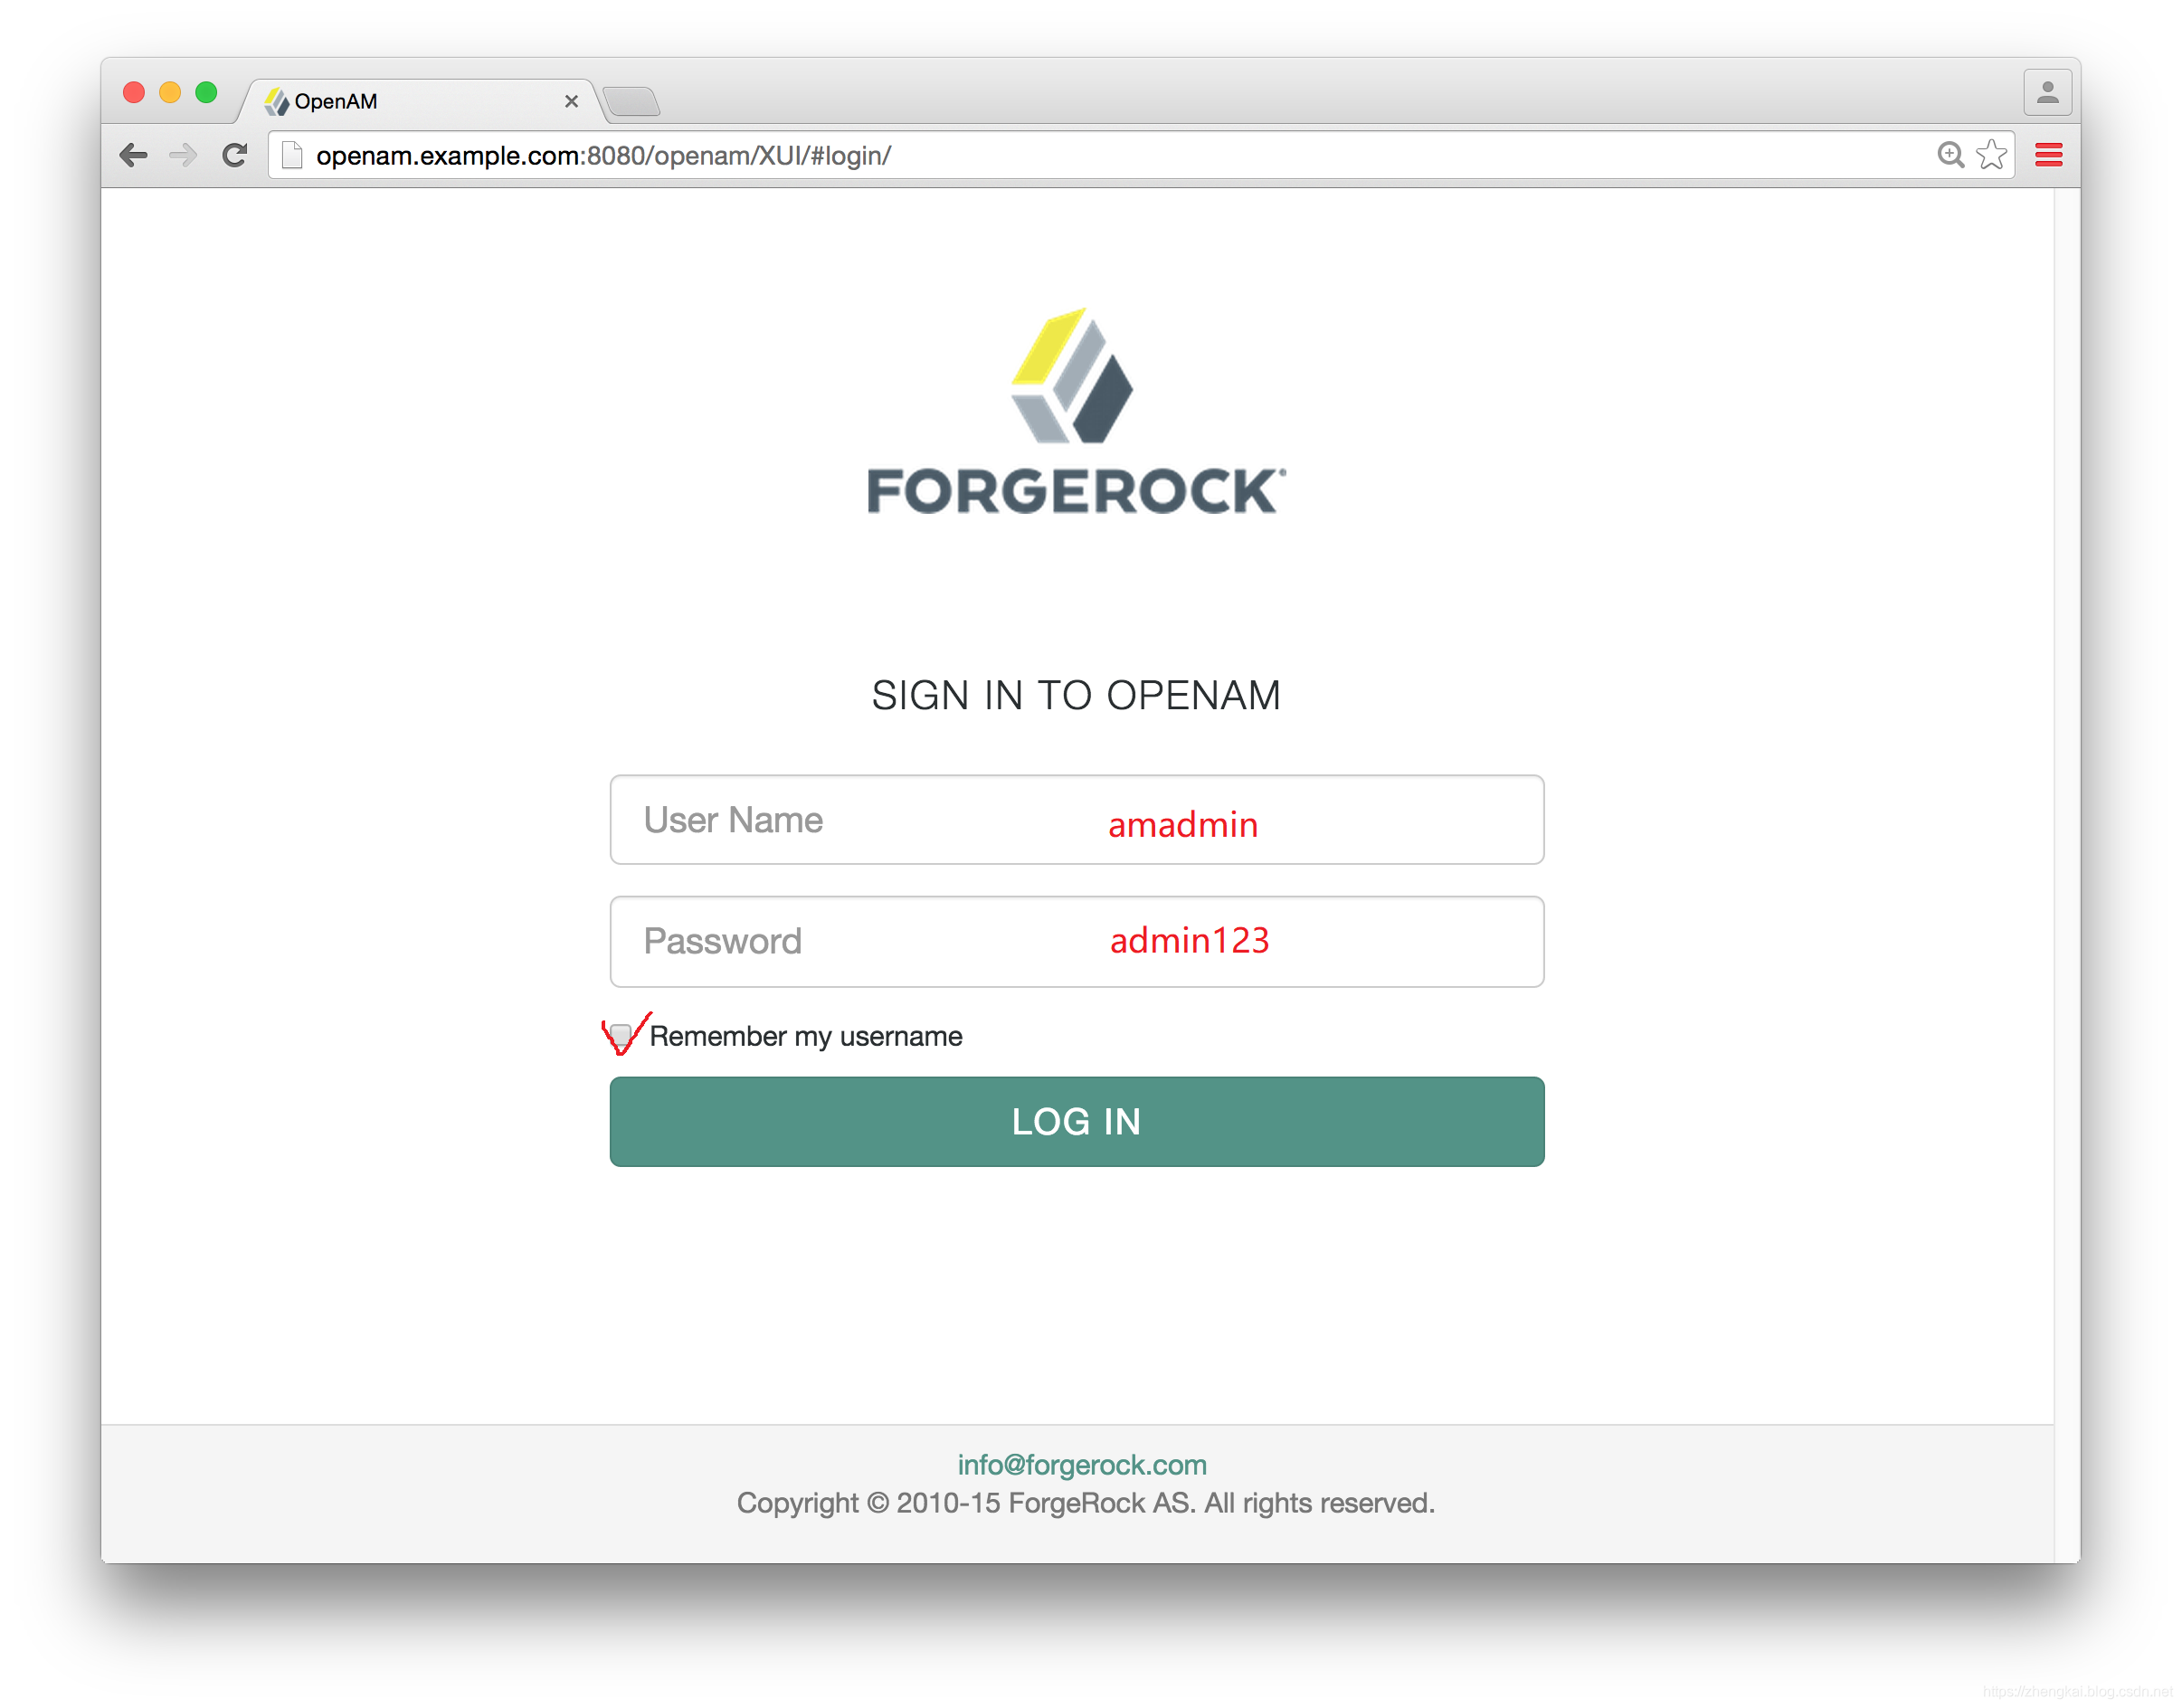
Configure OpenAM With Defaults】安装即可,需要填写password,懒得记的话建议默认管理员密码是admin123(账号默认amadmin,别打成adadmin),agent的默认密码懒得记的话建议是agent123(不需要账号)。 -
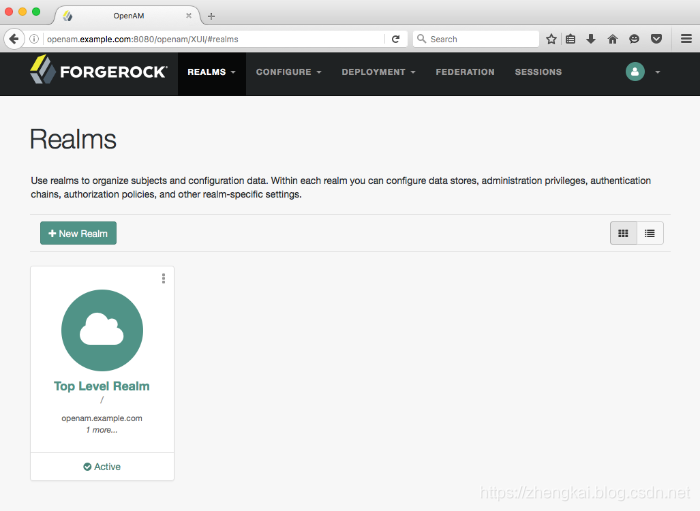
第四步,登录成功后,系统跳转到OpenAM
Realms,会有一个默认的Top Level Realm给到你,这个不用改,直接点进去即可。扫描二维码关注公众号,回复: 8310336 查看本文章
-
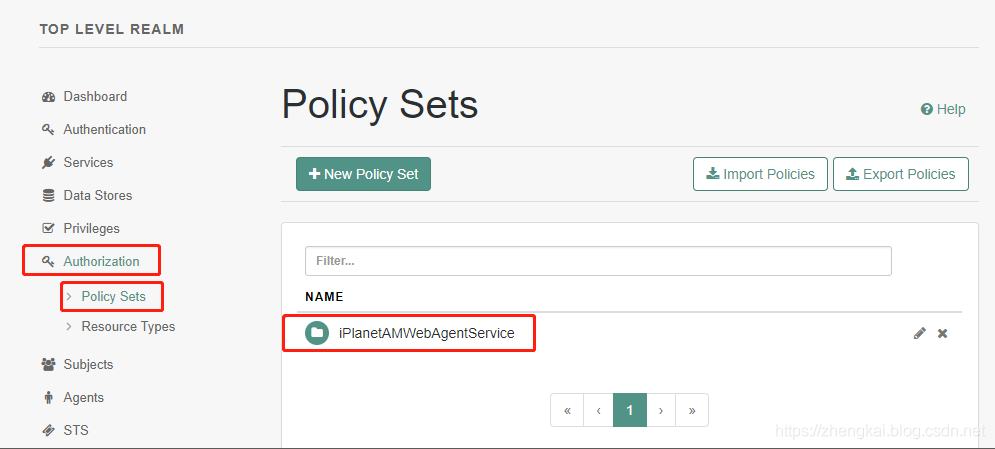
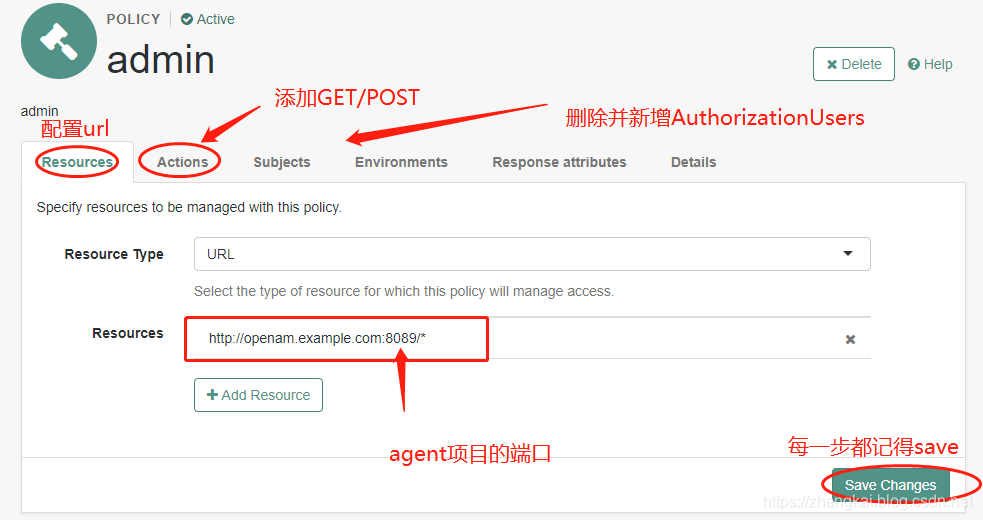
第五步,找到
policy并设置。 -
第六步,配置tomcat 或者其他agent (后续会有教程,本文仅供安装)

官方英文文档可以到以下地址查看
https://backstage.forgerock.com/docs/openam/13.5/install-guide/#deploy-openam

    The OpenAM-13.5.2.war file contains OpenAM server with OpenAM Console. How you deploy the .war file depends on your web application container.

    1.Deploy the .war file on your container.For example, copy the file to deploy on Apache Tomcat.
    $ cp OpenAM-13.5.2.war /path/to/tomcat/webapps/openam.war
    You change the file name to openam.war when deploying in Tomcat so that the deployment URI is /openam.

    Note:
    You change the file name to something other than openam.war when deploying in Tomcat so that the deployment URI is not /openam. For helpful hints on avoiding obvious deployment defaults, see "Avoiding Obvious Defaults" in the Administration Guide.
    Important
    To properly configure OpenAM, OpenAM requires a deployment URI with a non-empty string after /. Do not deploy OpenAM at the root context. Do not rename the .war file to ROOT.war before deploying on Tomcat, for example.
    It can take several seconds for OpenAM to be deployed in your container.
    Browse to the initial configuration screen, for example at http://openam.example.com:8080/openam.

    To Configure OpenAM With Defaults:
    The default configuration option configures the embedded OpenDJ server using default ports. If the ports are already in use, OpenAM uses free ports as both configuration store and identity store.
    The default configuration sets the cookie domain based on the full URL that was used to access the configurator, such as example.com, server.west.example.com, or example.local.
    Configuration settings are saved to the home directory of the user running the web application container in a directory named after the deployment URI. In other words if OpenAM is deployed under /openam, then the configuration is saved under $HOME/openam/.
    In the initial configuration screen, click Create Default Configuration under Default Configuration.
    Review the software license agreement. If you agree to the license, click "I accept the license agreement", and then click Continue.

    Provide different passwords for the default OpenAM administrator, amadmin, and default Policy Agent users.

    When the configuration completes, click Proceed to Login, and then login as the OpenAM administrator with the first of the two passwords you provided.

    After successful login, OpenAM redirects you to OpenAM Realms.