Environment (都需要Java环境,jdk){
elasticsearch kibana 安装nginx用以测试
logstash
}
1.首先拉取软件包,给予Java语言开发首选配置Java环境,CentOS 7 推荐4G运行内存

安装jdk环境,第一台机器安装elasticsearch

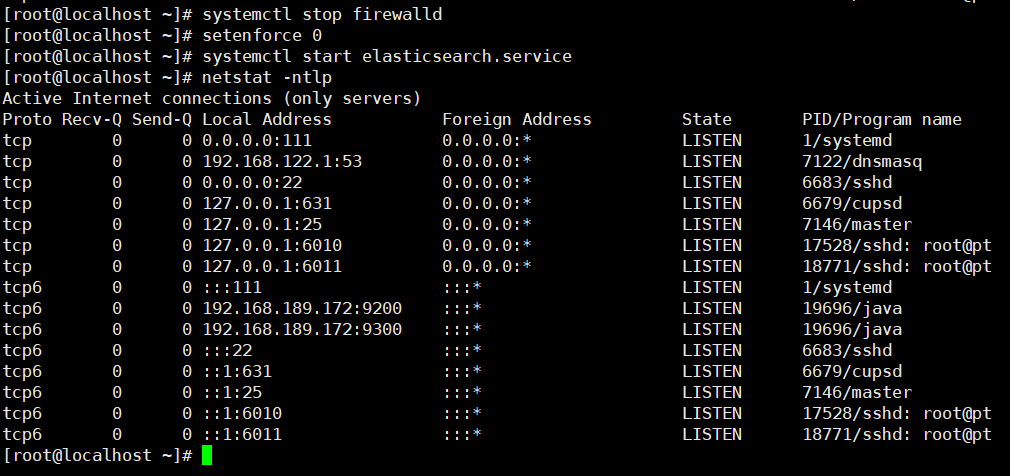
2.修改elasticsearch配置文件,设置网络主机,打开端口,并重启elasticsearch
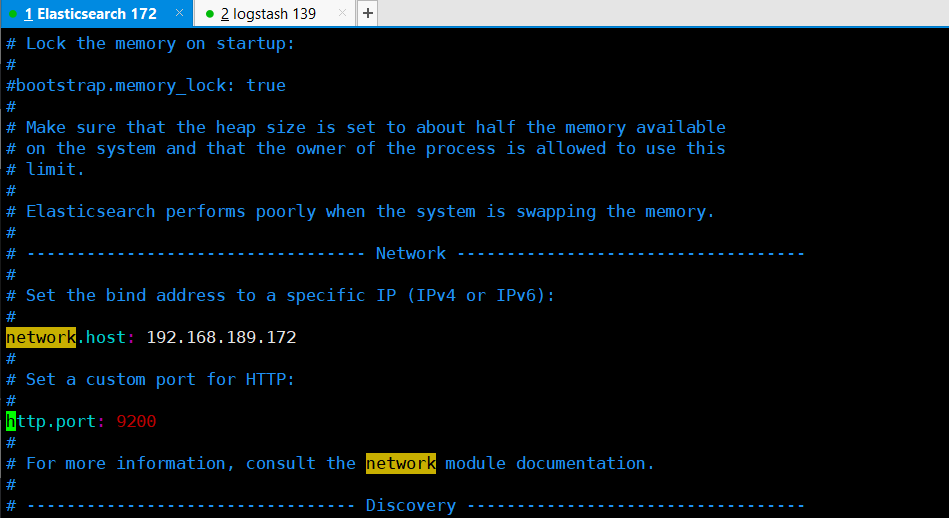

注:关闭防火墙,看到9200和9300端口,代表此服务启动
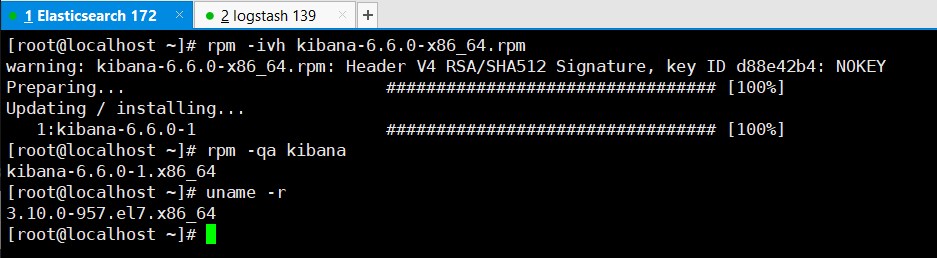
3.安装kibana
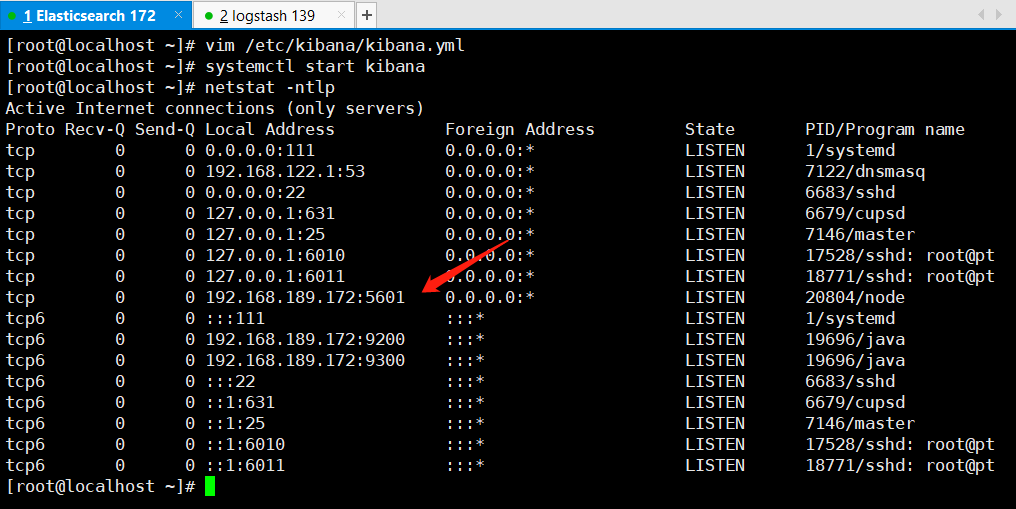
修改kibana配置并启动kibana

启动,看到5601端口
4. 另一台logstash机器操作步骤
- 安装logstash过滤收集工具,类似客户端


2.配置logstash,并重启 logstash,注:监控日志时给日志加权限

添加系统配置文件
input{
        file{
                path => "/var/log/messages"
                type => "system_log"
                start_position => "beginning"
        }
}
output{
        elasticsearch{
        hosts => ["192.168.189.172:9200"]  #elasticsearch主机的ip
        index => "system_log_%{+YYYY.MM.dd}"
        }
}
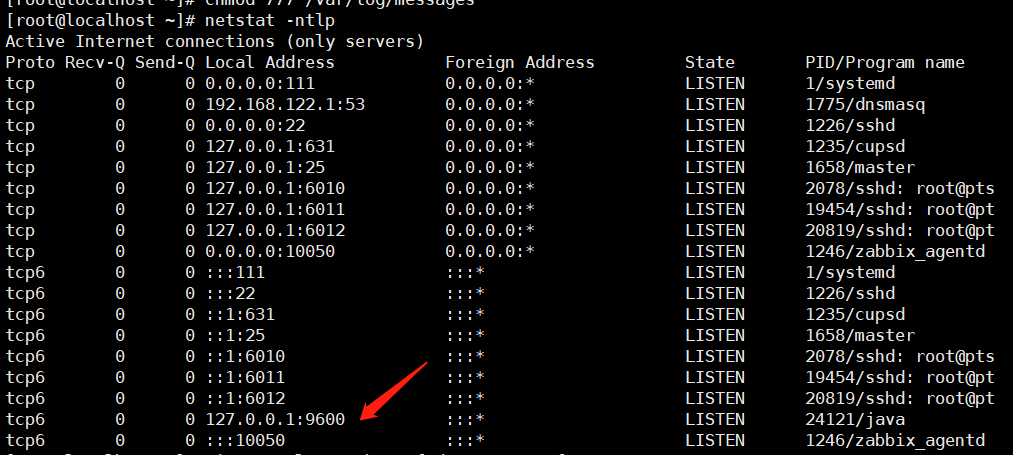
注:9600为logstash搜索日志的端口
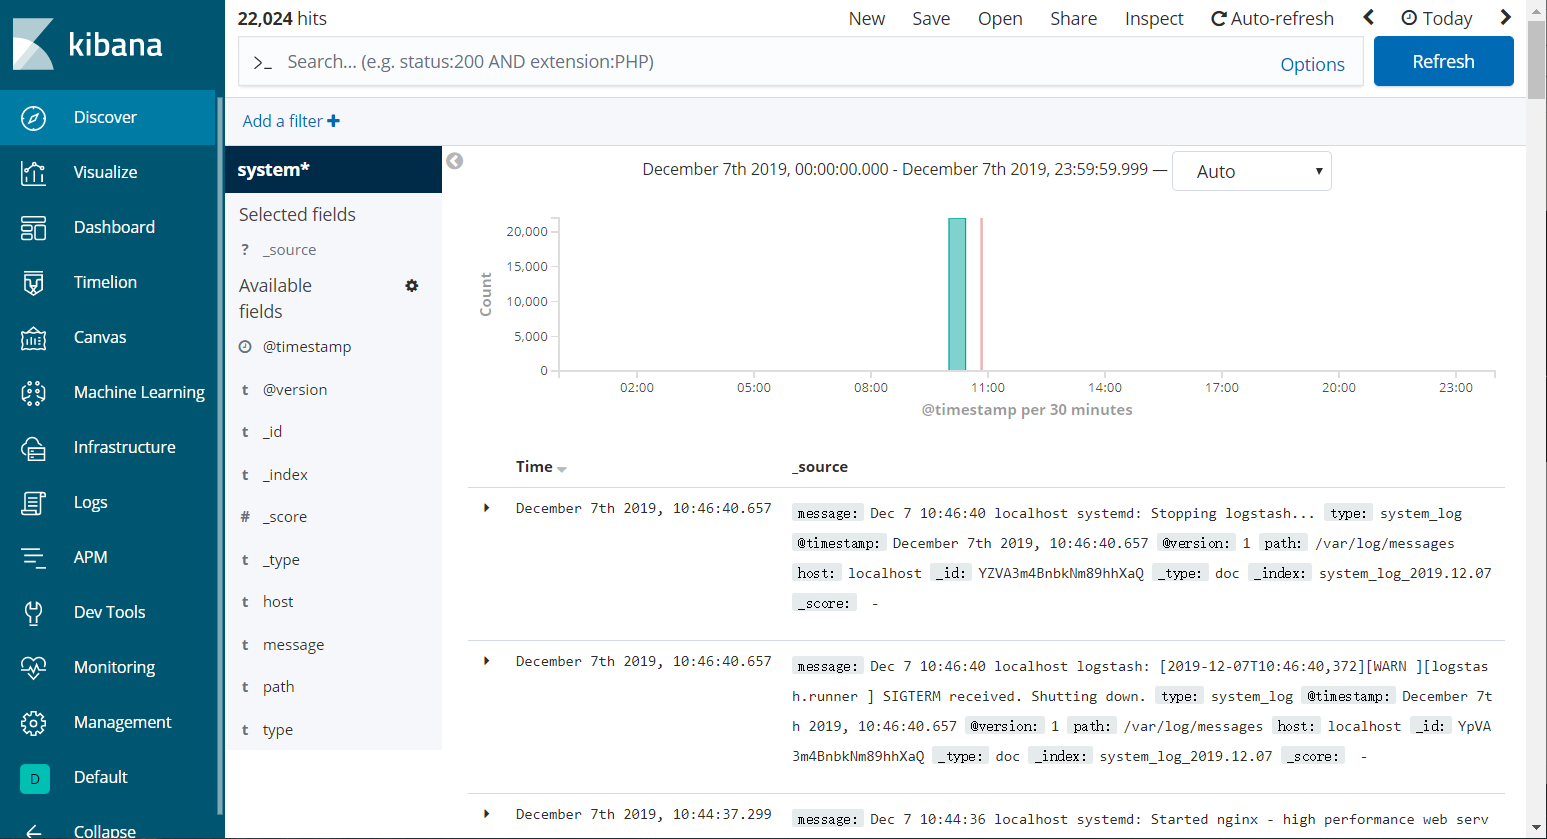
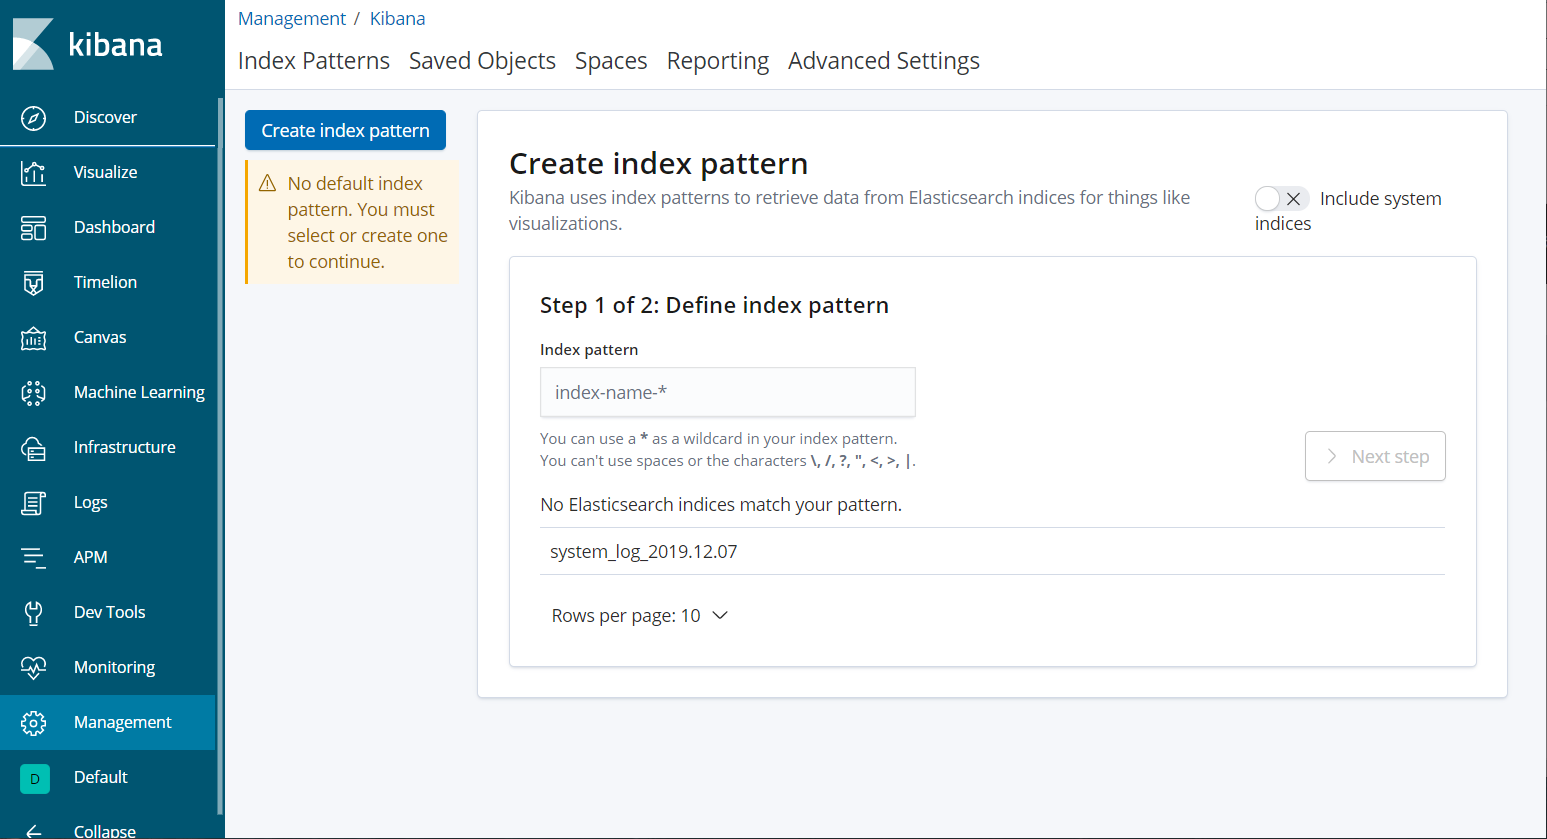
3.效果出现索引 网页输入ip:5601 显示kibana


Extend:原有基础上,监听nginx日志,并启动nginx(此步骤不唯一,可监听多个服务)
logstash机器
1.配置nginx源,yum安装nginx,并启动nginx(可导包解压,方法不唯一,根据实际操作)
vim /etc/yum.repos.d/nginx.repo
[nginx]
name=nginx repo
baseurl=http://nginx.org/packages/centos/7/$basearch/
gpgcheck=0
enabled=1
下面步骤安装启动nginx
2.配置logstash配置文件,定义配置规则NIGNXACCESS,用来配置nginx过滤访问日志,记住加权限
cd /usr/share/logstash/vendor/bundle/jruby/2.3.0/gems/logstash-patterns-core-4.1.2/patterns/
vim nginx_access
URIPARAM1 [A-Za-z0-9$.+!*'|(){},~@#%&/=:;_?\-\[\]]*
NGINXACCESS %{IPORHOST:client_ip} (%{USER:ident}|- ) (%{USER:auth}|-) \[%{HTTPDATE:timestamp}\] "(?:%{WORD:verb}
(%{NOTSPACE:request}|-)(?: HTTP/%{NUMBER:http_version})?|-)" %{NUMBER:status} (?:%{NUMBER:bytes}|-) "(?:%{URI:referrer}|-)"
 "%{GREEDYDATA:agent}"
chmod 644 /var/log/nginx/access.log
vim /etc/logstash/conf.d/system.conf
input{
   file{
        path => "/var/log/messages"
        type => "system_log"
        start_position => "beginning"
   }
   file{
        path => "/var/log/nginx/access.log"
        type => "nginx_log"
        start_position => "beginning"
   }

}

filter{
   if [type] == "nginx_log"{
        grok {
             match => { "message" => "%{NGINXACCESS}" }
        }
   }
}

output{
   if [type] == "nginx_log"{
        elasticsearch{
             hosts => ["10.0.0.41:9200"]
             index => "nginx_log_%{+YYYY.MM.dd}"
        }
   } else {
        elasticsearch{
             hosts => ["10.0.0.41:9200"]
             index => "system_log_%{+YYYY.MM.dd}"
        }
   }
}
systemctl restart logstash
3.切记nginx日志格式是否开启,yum安装日志默认打开
vim /etc/nginx/nginx.conf

4.nginx页面做好后,刷新几次产生日志