方式一:
也就是大家熟悉的 你安装Android sdk E:\Android\android-sdk\tools 目录下的 uiautomatorviewer.bat 直接双击打开就可以定位手机元素
存在问题一:
(1)adb 版本不能太低
(2)对于安卓版本高的手机(安卓9.0我就碰到过 死活连不上),无法连接 无法定位
方式二:
前提:需要安装java jdk
(1)安装SDK
Android SDK 下载地址(需要安装sdk):
http://tools.android-studio.org/index.php/sdk
需要在系统变量中添加环境变量(是新增)
ANDROID_HOME D:\android\Android\sdk(写自己的地址 别复制了)
(2)安装appium-server
https://bitbucket.org/appium/appium.app/downloads/ 安装包地址:
安装完成 在命令窗口输入:appium-doctor 检查环境 (以上两个安装完成之前要保证java jdk已安装)
出现 all checks were successful 才是正确的
1、安装WEditor:进入cmd,输入pip install --pre --upgrade weditor
2、打开WEditor:在cmd下,输入python -m weditor,此时会自动打开默认浏览器
weditor可能在python2.7上安装存在问题
方式三:
appiun-desk
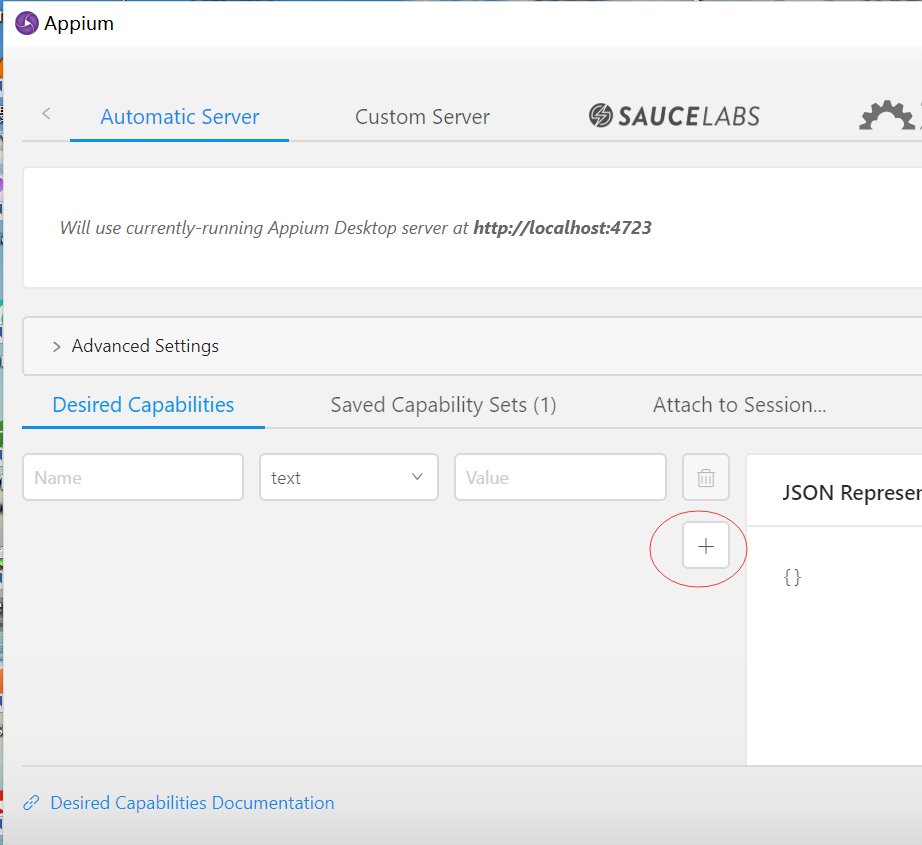
启动之后点击+号新增 你的启动配置
举个栗子:
{
"platformName": "Android", #手机系统
"platformVersion": "9", #安卓版本
"deviceName": "2f7e2ac9", #devices 名称 拿 adb devices 可以查到
"noReset": "true", #不管
"packageName": "com.oppopay.payments", #待测试应用的包名称
"app": "E:\\Apitest\\Finshell_memory\\Finshell_15_11_2019_UAT_v25.apk", #待测应用的绝对路径
"automationName": "uiautomator" #启动
}
一切ok之后点击start session (启动这个之前 需启动appium )这个东西就是为appium服务的 必须要先打开。
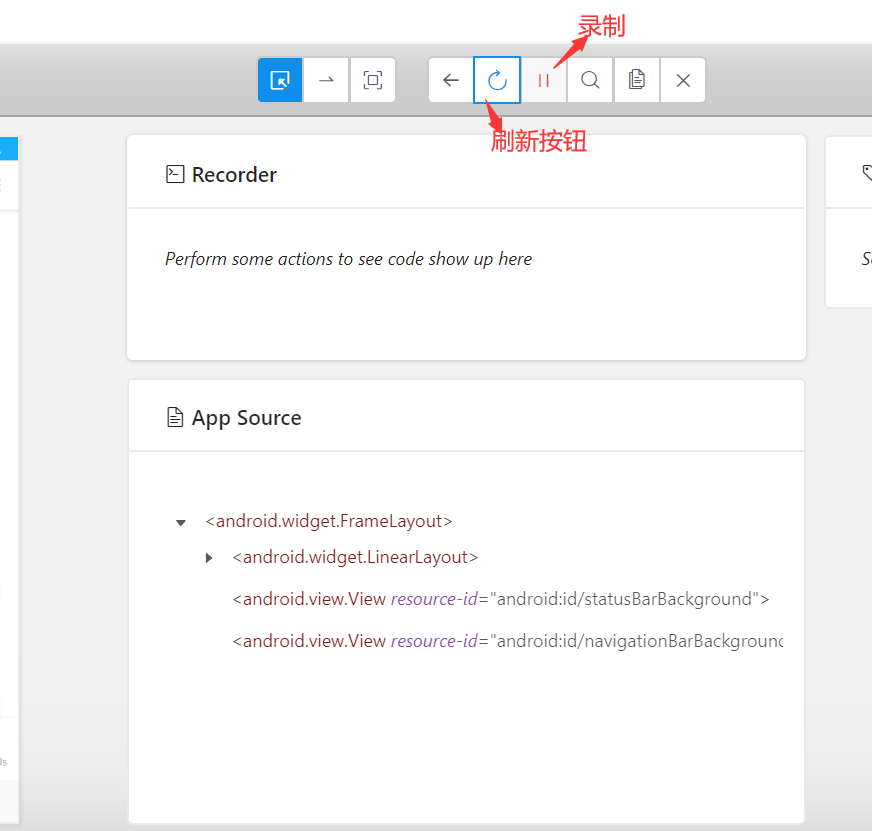
元素三种定位工具都讲完了,试下吧。。。
ps 关于滑动操作:
(1)才用appium时
分享一个公共函数:
# coding=utf-8
# 跳过浏览器引导
import time


class swipe(object):

    def __init__(self, driver):
        self.driver = driver
        self.width = self.driver.get_window_size()['width']
        self.height = self.driver.get_window_size()['height']

    def swipetoUp(self):
        time.sleep(10)
        self.driver.swipe(self.width / 2, self.height * 3 / 4,
                          self.width / 2, self.height / 4, 0)

    def swipetoDown(self):
        time.sleep(5)
        self.driver.swipe(self.width / 2, self.height / 3,
                          self.width / 2, self.height * 3 / 4, 0)

    def swipetoLeft(self):
        time.sleep(5)
        self.driver.swipe(self.width * 0.9, self.height / 2,
                          self.width * 0.1, self.height / 2, 0)

    def swipetoRight(self):
        time.sleep(5)
        self.driver.swipe(self.width * 0.1, self.height / 2,
                          self.width * 0.9, self.height / 2, 0)


appium启动应用 时:
# -*- coding: utf-8 -*-
from appium import webdriver


class startSession(object):
    def __init__(self,desired_caps):
        self.desired_caps = desired_caps

    def run(self):
        print '******* StartSession ******'
        self.driver = webdriver.Remote('http://localhost:4723/wd/hub', self.desired_caps)
        return self.driver
def desired_caps():
    desired_caps = {}
    desired_caps['platformName'] = 'Android'
    desired_caps['platformVersion'] = '7.1.1'
    desired_caps['automationName'] = "uiautomator2"
    desired_caps['deviceName'] ='2f7e2ac9'#YDBUJNYL8SNNPZGE   2f7e2ac9
    desired_caps['noReset'] = 'true'
    desired_caps['appActivity'] ='com.pay.payments.ui.activity.SplashActivity'
    desired_caps['androidDeviceReadyTimeout'] = '180'
    desired_caps['appPackage'] ='com.pay.payments'
    return desired_caps

拿封装两个函数来启动

具体使用就是:
要导入这两个函数进来
driver = startSession(desired_caps()).run()
一行就搞定了启动应用


下面就是u2了
个人感觉做ui自动化 u2简单多了

启动应用
import uiautomator2 as u2
d = u2.connect()
# d.app_start('com.pay.payments')  # 第二种启动app的方式
d.session('com.pay.payments')  # 第三种启动app的方式

一句话就启动了应用对于appium 优势很明显。

但是u2对于appium 滑动操作比较麻烦:
d = u2.connect()
d(scrollable=True).scroll.to(text='Next')
这是我找到一个很好方式 滑动这个指定 内容的地方 以上就是滑动到Next 这里 页面会首先向上 然后向下找。