参考文章:https://blog.csdn.net/qq_34410726/article/details/98214992
一、maven分布式工程的基本架构
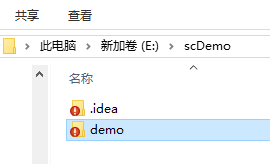
demo #父工程模块,主要用来定义整个分布式工程的依赖版本
---- common #公共模块,主要用来定义一些公共的组件,比如实体类等
---- function-one #功能模块1,引入common模块
---- function-two #功能模块2,引入common模块
---- pom.xml
二、maven父工程demo的搭建
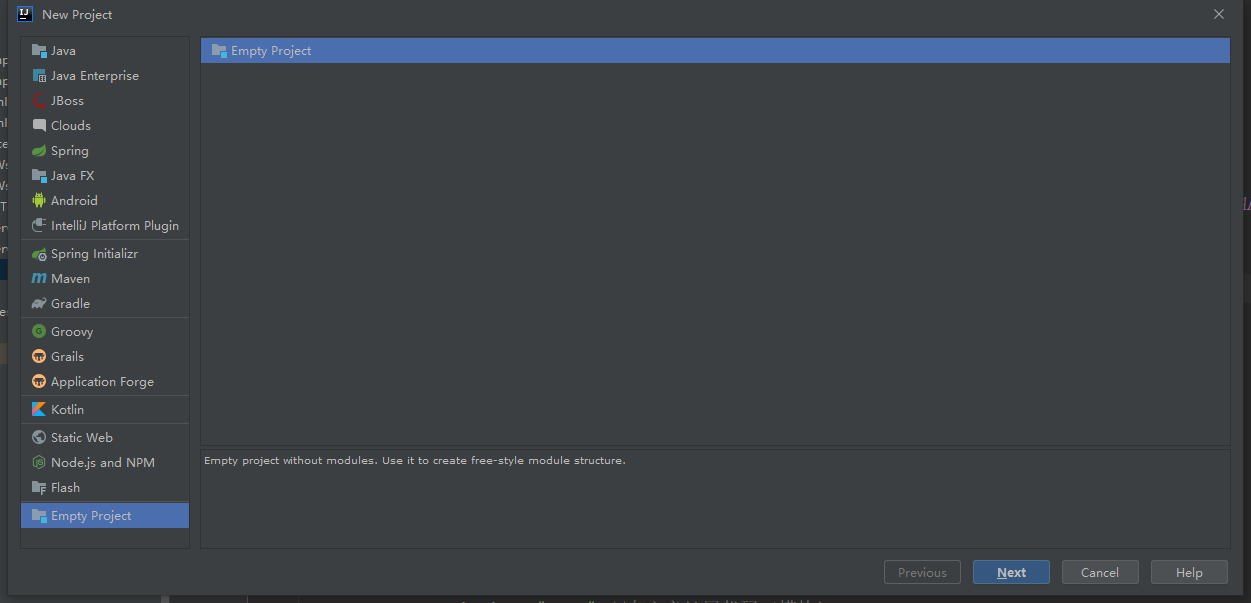
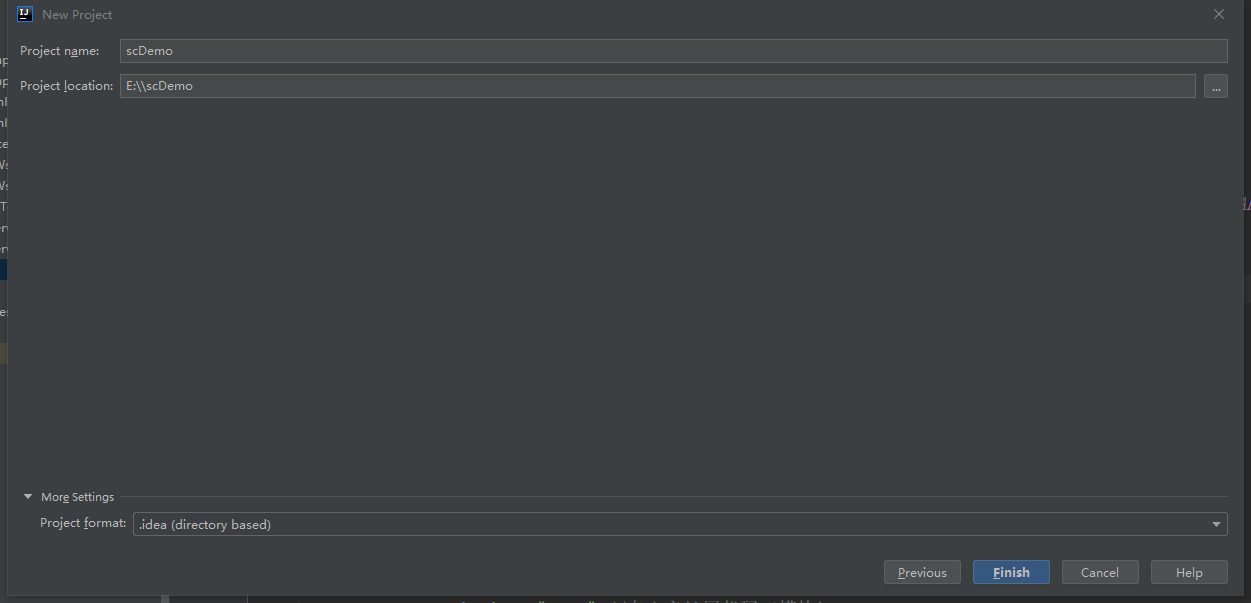
1.打开IDEA,File->New->New Project,然后选择Empty Project,如下:
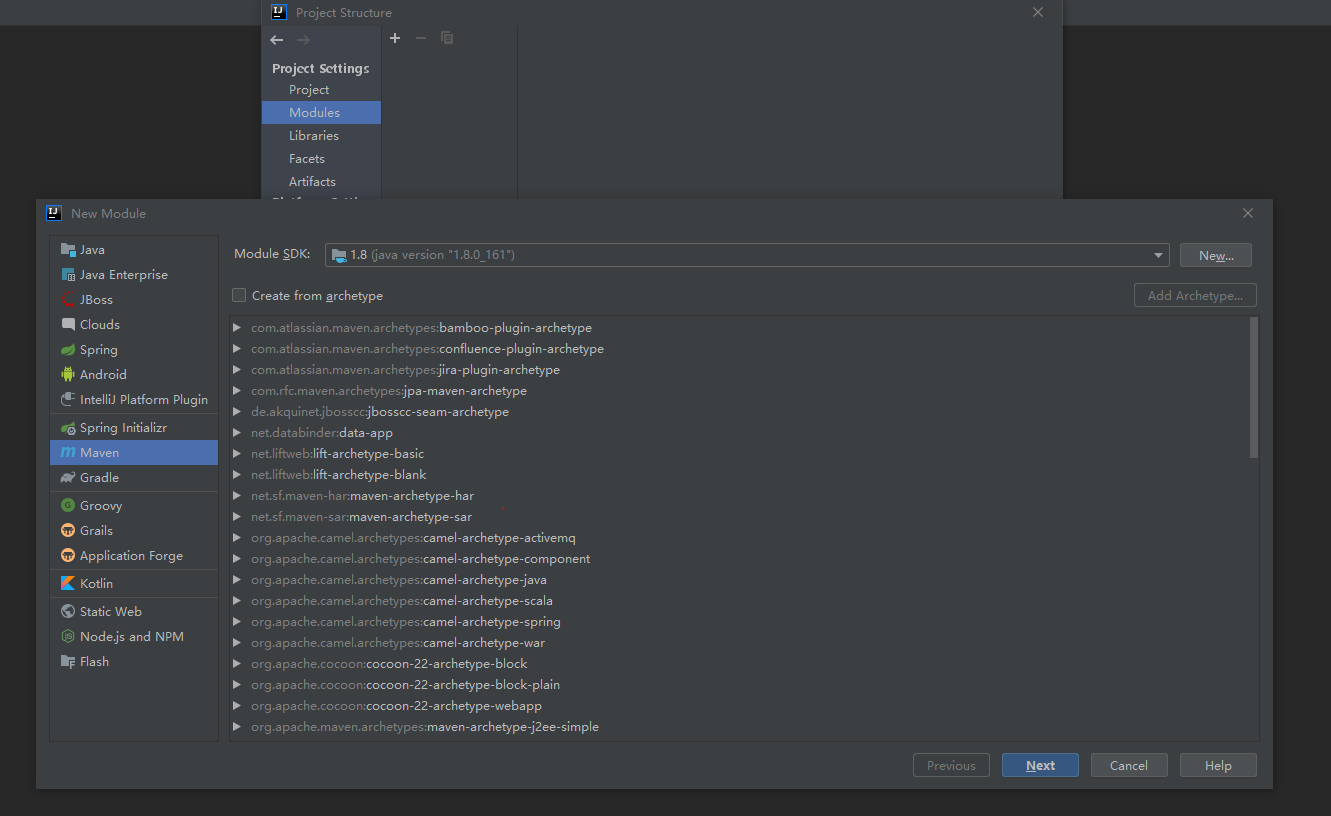
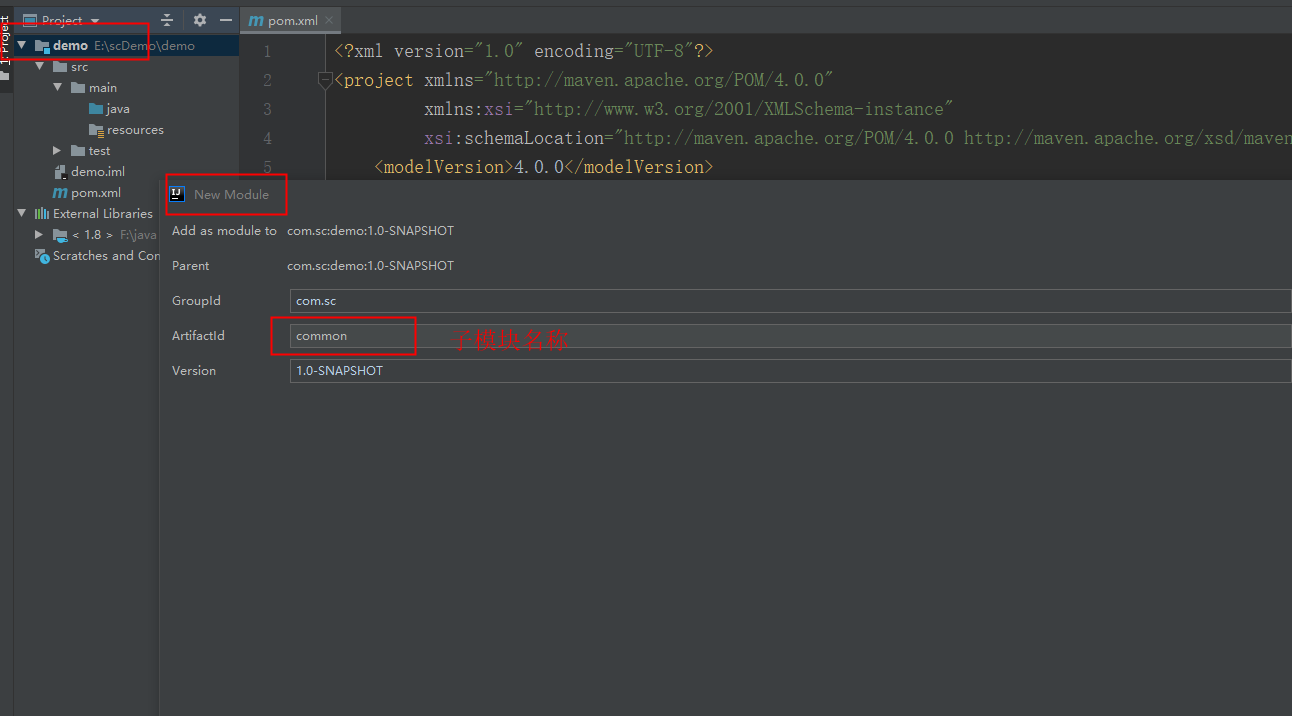
接下来会弹出窗口让我们新建modules,点击+号,新建一个父工程,也就是一个父module。然后我们选择maven工程,选择jd 版本

2.pom.xml
创建好之后,该父工程demo是个空的maven工程,只有src目录和pom.xml文件,删除src目录,修改pom.xml
<?xml version="1.0" encoding="UTF-8"?>
<project xmlns="http://maven.apache.org/POM/4.0.0"
         xmlns:xsi="http://www.w3.org/2001/XMLSchema-instance"
         xsi:schemaLocation="http://maven.apache.org/POM/4.0.0 http://maven.apache.org/xsd/maven-4.0.0.xsd">
    <modelVersion>4.0.0</modelVersion>

    <groupId>com.sc</groupId>
    <artifactId>demo</artifactId>
    <version>1.0-SNAPSHOT</version>

    <packaging>pom</packaging>
    <name>demo</name>
    <description>This is parent project</description>

    <!-- 子模块清单(创建新子模块后,会自动填入)-->
    <modules>
        <module>common</module>
        <module>function-one</module>
        <module>function-two</module>
    </modules>

    <!-- 本项目的父模块使用spring-boot框架 -->
    <parent>
        <groupId>org.springframework.boot</groupId>
        <artifactId>spring-boot-starter-parent</artifactId>
        <version>2.0.2.RELEASE</version>
    </parent>

    <!-- 项目自定义属性 -->
    <properties>
        <project.build.sourceEncoding>UTF-8</project.build.sourceEncoding>
        <project.reporting.outputEncoding>UTF-8</project.reporting.outputEncoding>
        <java.version>1.8</java.version>
        <!-- 依赖的版本号:在定义版本时,要注意的是不同的依赖版本之间会有影响,有些最新的版本不支持其他依赖的低版本一起使用-->
        <mysql.driver.version>5.1.29</mysql.driver.version>
        <org.mybatis.spring.boot.version>1.3.1</org.mybatis.spring.boot.version>
        <alibaba.druid.version>1.1.9</alibaba.druid.version>
        <spring.cloud.version>Edgware.SR1</spring.cloud.version>
    </properties>

    <!-- 项目依赖项 -->
    <dependencyManagement>    <!-- dependencyManagement只是声明依赖,并不实现引入 -->
        <dependencies>
            <!-- Spring Cloud -->
            <dependency>
                <groupId>org.springframework.cloud</groupId>
                <artifactId>spring-cloud-dependencies</artifactId>
                <version>${spring.cloud.version}</version>
                <type>pom</type>
                <scope>import</scope>
            </dependency>
        </dependencies>
    </dependencyManagement>

    <dependencies>
        <!-- Spring Boot -->
        <dependency>
            <groupId>org.springframework.boot</groupId>
            <artifactId>spring-boot-starter</artifactId>
            <version>2.0.2.RELEASE</version>
        </dependency>
        <dependency>
            <groupId>org.springframework.boot</groupId>
            <artifactId>spring-boot-starter-web</artifactId>
            <version>2.0.2.RELEASE</version>
        </dependency>
        <dependency>
            <groupId>org.springframework.boot</groupId>
            <artifactId>spring-boot-starter-test</artifactId>
            <scope>test</scope>
        </dependency>
        <!-- 添加junit4依赖 单元测试-->
        <dependency>
            <groupId>junit</groupId>
            <artifactId>junit</artifactId>
            <version>4.12</version>
            <scope>test</scope>
        </dependency>
        <!-- 切面 -->
        <dependency>
            <groupId>org.aspectj</groupId>
            <artifactId>aspectjweaver</artifactId>
            <version>1.8.8</version>
        </dependency>
        <!-- 简化Entity代码(实体类添加@Data,编译时为所有字段添加@ToString/@EqualsAndHashCode/@Getter/为非final字段添加@Setter) -->
        <dependency>
            <groupId>org.projectlombok</groupId>
            <artifactId>lombok</artifactId>
            <version>1.16.20</version>
        </dependency>
        <!-- 添加mybatis依赖-->
        <dependency>
            <groupId>org.mybatis.spring.boot</groupId>
            <artifactId>mybatis-spring-boot-starter</artifactId>
            <version>${org.mybatis.spring.boot.version}</version>
        </dependency>
        <!-- 添加mysql驱动依赖 -->
        <dependency>
            <groupId>mysql</groupId>
            <artifactId>mysql-connector-java</artifactId>
            <scope>runtime</scope>
            <version>${mysql.driver.version}</version>
        </dependency>
        <!-- 添加数据库连接池依赖 -->
        <dependency>
            <groupId>com.alibaba</groupId>
            <artifactId>druid</artifactId>
            <version>${alibaba.druid.version}</version>
        </dependency>

    </dependencies>
    <!-- <scope>主要管理依赖的部署
       * compile,缺省值,适用于所有阶段,会随着项目一起发布。
       * provided,类似compile,期望JDK、容器或使用者会提供这个依赖。如servlet.jar。
       * runtime,只在运行时使用,如JDBC驱动,适用运行和测试阶段。
       * test,只在测试时使用,用于编译和运行测试代码。不会随项目发布。
       * system,类似provided,需要显式提供包含依赖的jar,Maven不会在Repository中查找它。
    -->

    <build>
        <plugins>
            <!--打包跳过测试-->
            <plugin>
                <groupId>org.apache.maven.plugins</groupId>
                <artifactId>maven-surefire-plugin</artifactId>
                <configuration>
                    <skip>true</skip>
                </configuration>
            </plugin>
        </plugins>
    </build>

</project>
三、maven子工程common模块的搭建
1.创建
2.创建之后,只有src空目录和pom.xml,我们可以把图中这些文件放在common公共模块中

3.pom.xml
<?xml version="1.0" encoding="UTF-8"?>
<project xmlns="http://maven.apache.org/POM/4.0.0"
         xmlns:xsi="http://www.w3.org/2001/XMLSchema-instance"
         xsi:schemaLocation="http://maven.apache.org/POM/4.0.0 http://maven.apache.org/xsd/maven-4.0.0.xsd">
    <parent>
        <groupId>com.sc</groupId>
        <artifactId>demo</artifactId>
        <version>1.0-SNAPSHOT</version>
    </parent>
    <modelVersion>4.0.0</modelVersion>

    <artifactId>common</artifactId>
    <version>1.0-SNAPSHOT</version>
    <packaging>jar</packaging>

    <properties>
        <!-- 依赖的版本号 -->
        <joda.time.version>2.9.9</joda.time.version>
        <commons.lang.version>2.6</commons.lang.version>
        <commons.io.version>2.5</commons.io.version>
        <fastjson.version>1.2.29.sec06</fastjson.version>
        <pinyin4j.version>2.5.1</pinyin4j.version>
        <commons.codec.version>1.9</commons.codec.version>
    </properties>

    <dependencies>
        <!-- 在Java中处理日期和时间是很常见的需求,基础的工具类就是我们熟悉的Date和Calendar,然而这些工具类的api使用并不是很方便和强大,于是就诞生了Joda-Time这个专门处理日期时间的库。-->
        <dependency>
            <groupId>joda-time</groupId>
            <artifactId>joda-time</artifactId>
            <version>${joda.time.version}</version>
        </dependency>

        <dependency>
            <groupId>commons-lang</groupId>
            <artifactId>commons-lang</artifactId>
            <version>${commons.lang.version}</version>
        </dependency>

        <dependency>
            <groupId>commons-io</groupId>
            <artifactId>commons-io</artifactId>
            <version>${commons.io.version}</version>
        </dependency>

        <!-- fastJson用于对JSON格式的数据进行解析和打包 -->
        <dependency>
            <groupId>com.alibaba</groupId>
            <artifactId>fastjson</artifactId>
            <version>${fastjson.version}</version>
        </dependency>

        <!-- 用于转换拼音,调用PinyinHelper类的静态工具方法 -->
        <dependency>
            <groupId>com.belerweb</groupId>
            <artifactId>pinyin4j</artifactId>
            <version>${pinyin4j.version}</version>
        </dependency>

        <!-- redis -->
        <dependency>
            <groupId>org.springframework.boot</groupId>
            <artifactId>spring-boot-starter-data-redis</artifactId>
        </dependency>

        <!-- 用于摘要运算、编码解码 -->
        <dependency>
            <groupId>commons-codec</groupId>
            <artifactId>commons-codec</artifactId>
            <version>${commons.codec.version}</version>
        </dependency>

        <!-- JPA的宗旨是为POJO提供持久化标准规范,比如@Table注解 -->
        <dependency>
            <groupId>javax.persistence</groupId>
            <artifactId>persistence-api</artifactId>
            <version>1.0</version>
        </dependency>

        <!-- thymeleaf:前后端数据交互模板引擎 -->
        <dependency>
            <groupId>org.springframework.boot</groupId>
            <artifactId>spring-boot-starter-thymeleaf</artifactId>
        </dependency>

    </dependencies>
</project>
4.安装lombok插件,创建一个实体类UserEntity.java
lombok插件:简化Entity实体类,@Data,可以免写set/get方法

UserEntity.java
package entity.one;

import lombok.Data;

import javax.persistence.Column;
import javax.persistence.Table;

@Data
@Table(name = "user")
public class UserEntity {

    @Column(name = "id")
    private Integer id;
    @Column(name = "name")
    private String name;
    @Column(name = "age")
    private Integer age;

}
5.新建Mapper层类
UserMapper.java
package mapper.one;

import entity.one.UserEntity;
import org.apache.ibatis.annotations.Param;
import org.apache.ibatis.annotations.Select;
import org.springframework.stereotype.Component;

import java.util.List;

@Component
public interface UserMapper{

    @Select("SELECT * FROM user")
    List<UserEntity> getList();

    UserEntity getById(@Param("id") Integer id);

}
UserMapper.xml
<?xml version="1.0" encoding="UTF-8"?>
<!DOCTYPE mapper PUBLIC "-//mybatis.org//DTD Mapper 3.0//EN"
        "http://mybatis.org/dtd/mybatis-3-mapper.dtd">
<mapper namespace="mapper.one.UserMapper">
    <resultMap id="BaseResultMap" type="entity.one.UserEntity">
        <id column="id" jdbcType="INTEGER" property="id" />
        <result column="name" jdbcType="VARCHAR" property="name" />
        <result column="age" jdbcType="INTEGER" property="age" />
    </resultMap>

    <select id="getById" resultType="entity.one.UserEntity">
         SELECT *
         FROM user
         WHERE id = #{id}
    </select>

</mapper>
四、maven子工程function-one模块的搭建
1.创建之后,添加一些目录,function-two类似
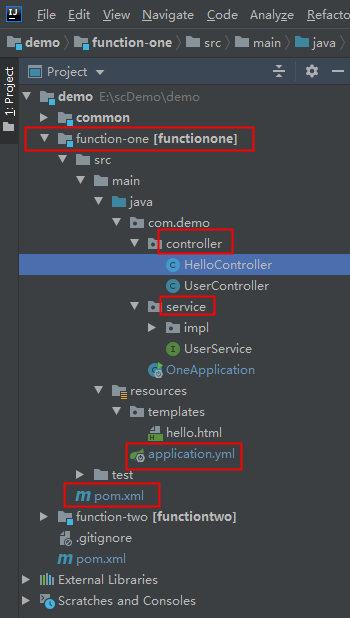
2.pom.xml,function-two也引入common包
<?xml version="1.0" encoding="UTF-8"?>
<project xmlns="http://maven.apache.org/POM/4.0.0"
         xmlns:xsi="http://www.w3.org/2001/XMLSchema-instance"
         xsi:schemaLocation="http://maven.apache.org/POM/4.0.0 http://maven.apache.org/xsd/maven-4.0.0.xsd">
    <parent>
        <groupId>com.sc</groupId>
        <artifactId>demo</artifactId>
        <version>1.0-SNAPSHOT</version>
    </parent>
    <modelVersion>4.0.0</modelVersion>

    <artifactId>function-one</artifactId>
    <packaging>jar</packaging>

    <dependencies>
        <!-- 引入自己定义的common通用包 -->
        <dependency>
            <groupId>com.sc</groupId>
            <artifactId>common</artifactId>
            <version>1.0-SNAPSHOT</version>
        </dependency>
    </dependencies>
</project>
3.application.yml
server:
  port: 8666
  servlet:
    context-path: /demo
spring:
  datasource:
    url:  jdbc:mysql://127.0.0.1:3306/demo_one?useSSL=false&useUnicode=true&characterEncoding=utf-8
    username: root
    password: 123456
    driver-class-name: com.mysql.jdbc.Driver
    type: com.alibaba.druid.pool.DruidDataSource
  #thymeleaf
  thymeleaf:
    prefix: classpath:/templates/
    suffix: .html
    cache: false
    servlet:
      content-type: text/html
    enabled: true
    encoding: UTF-8
    mode: HTML5
mybatis:
  mapper-locations: classpath:mapper/*.xml    #配置映射文件
  type-aliases-package: entity   #配置实体类
function-two,端口号8888,连接的数据库demo_two
4.OneApplication.java
package com.demo;

import com.ctrip.framework.apollo.spring.annotation.EnableApolloConfig;
import org.mybatis.spring.annotation.MapperScan;
import org.springframework.boot.SpringApplication;
import org.springframework.boot.autoconfigure.SpringBootApplication;

@SpringBootApplication
@MapperScan({"mapper"})  //项目启动时会扫描mapper接口,否则会报错找不到mapper文件
public class OneApplication {

    public static void main(String[] args) {
        SpringApplication.run(OneApplication.class, args);
    }

}
五、测试
一、直接后台测试
common模块的UserEntity.java、UserMapper.java、UserMapper.xml
function-one模块:
1.UserController.java
import org.springframework.web.bind.annotation.PathVariable;
import org.springframework.web.bind.annotation.RequestMapping;
import org.springframework.web.bind.annotation.RestController;
import com.demo.service.UserService;

import java.util.List;

@RestController
@RequestMapping("/user")
public class UserController {

    @Autowired
    private UserService userService;


    @GetMapping("/getList")
    public List<UserEntity> getList(){

        return userService.getList();
    }

    @GetMapping("/getById/{id}")
    public UserEntity getById(@PathVariable("id") Integer id){

        return userService.getById(id);
    }
}
2.UserService.java
package com.demo.service;

import entity.one.UserEntity;

import java.util.List;

public interface UserService{

    List<UserEntity> getList();

    UserEntity getById(Integer id);

}
3.UserServiceImpl.java
package com.demo.service.impl;

import entity.one.UserEntity;


import mapper.one.UserMapper;
import org.springframework.beans.factory.annotation.Autowired;
import org.springframework.stereotype.Service;
import com.demo.service.UserService;

import java.util.List;

@Service
public class UserServiceImpl implements UserService {

    @Autowired
    private UserMapper userMapper;


    @Override
    public List<UserEntity> getList() {

        return userMapper.getList();
    }

    @Override
    public UserEntity getById(Integer id) {

        return userMapper.getById(id);
    }
}
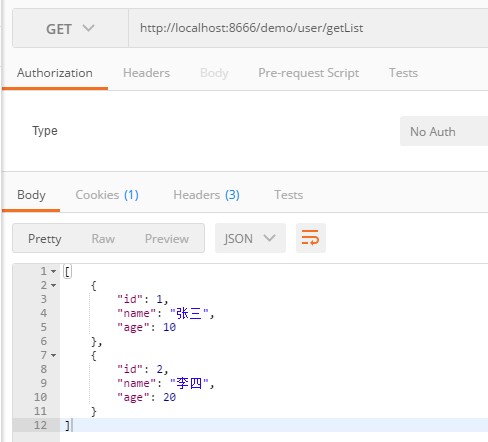
4.测试
http://localhost:8666/demo/user/getList
二、前后端交互数据测试
1.利用前后端数据交互模板引擎:thymeleaf
引入包,然后在.yml中添加配置
resources/templates目录下hello.html
<!DOCTYPE html>
<html lang="en" xmlns:th="http://www.w3.org/1999/xhtml">
<head>
    <meta charset="UTF-8">
    <title>hello</title>
</head>
<body>
<h1>this is the hello.html in templates</h1>
<span th:text="${key}"></span>
</body>
</html>
2.HelloController.java
package com.demo.controller;

import com.demo.service.UserService;
import org.springframework.beans.factory.annotation.Autowired;
import org.springframework.stereotype.Controller;
import org.springframework.web.bind.annotation.RequestMapping;
import org.springframework.web.servlet.ModelAndView;

@Controller     //需跳转到页面,不能用@RestController
public class HelloController {

    @Autowired
    private UserService userService;


    @RequestMapping("/hello")
    public ModelAndView sayHello(){
        ModelAndView modelAndView = new ModelAndView();
        modelAndView.setViewName("hello");
        String name = userService.getById(1).getName();
        modelAndView.addObject("key", "您好!"+ name);
        return modelAndView;
    }

}
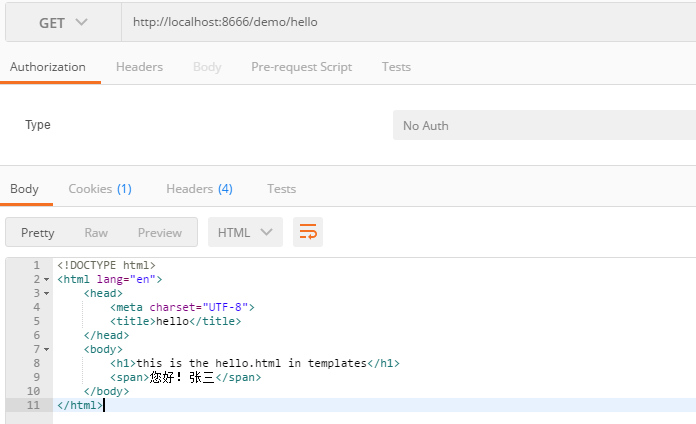
3.测试
http://localhost:8666/demo/hello