博文目录
一、rsync概述
1、rsync命令的基本用法
二、配置rsync
1、配置同步身份验证的rsync
2、rsync定期同步
3、配置inotify+rsync实时同步
一、rsync概述
rsync(Remote Sync,远程同步)是一个开源的快速备份工具,可以在不同主机之间镜像同步整个目录树,支持增量备份,保持链接和权限,且采用优化的同步算法,传输前执行压缩,因此非常适用于异地备份、镜像服务器等应用。rsync的官方站点是http://rsync.samba.org/ 作为一种常用的文件备份工具,rsync往往是Linux和UNIX系统默认安装的基本组件之一。
[root@centos01 ~]# rpm -q rsync
rsync-3.0.9-18.el7.x86_64
在远程同步任务中,负责发起rsync同步 操作的客户机称为发起端,而负责响应来自客户机的rsync同步操作的服务器称为同步源。在同步过程中,同步源负责提供文档的原始位置,发起端应对该位置具有读取权限。rsync作为同步源时以守护进程运行,为其他客户机提供备份源。配置rsync同步源需要建立配置文件rsync.conf,创建备份账号,然后将rsync程序以守护进程(“--daemon”选项)方式运行。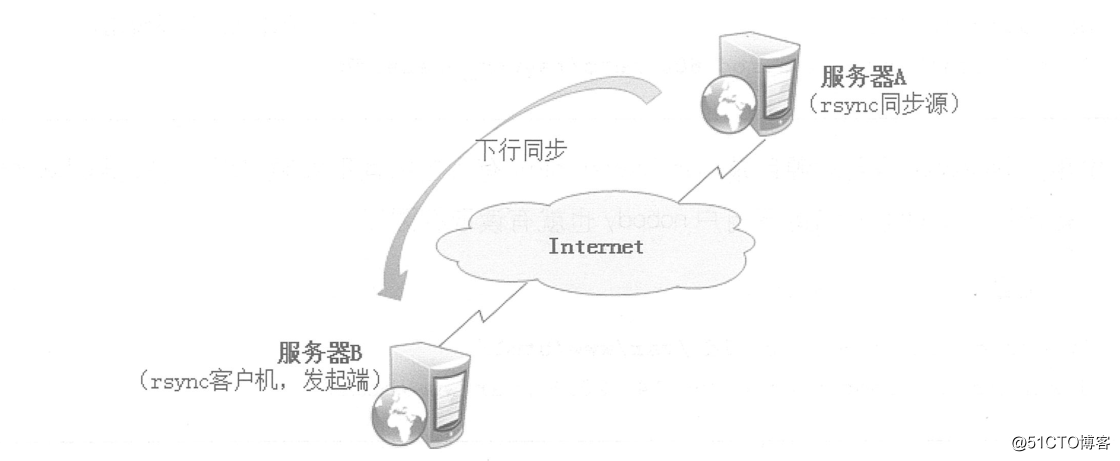
1、rsync命令的基本用法
绝大多数的备份程序要求指定原始位置、目标位置,rsync命令也一样。最简单的rsync用法类似于cp命令。例如,可以将文件/etc/fstab、目录/boot/grub同步备份到/opt目录下,其中,“-r”选项表示递归整个目录树,“-l”选项用来备份链接文件。
备份的基本格式为“rsync [选项] 原始位置 目标位置”,其中常用的一些命令选项如下:
- -r:递归模式,包含目录及子目录中的所有文件;
- -l:对于符号链接文件仍然复制为符号链接文件;
- -v:显示同步过程的详细信息;
- -a:归档模式,保留文件的权限、属性等信息,等同于组合选项“-rlptgoD”;
- -z:在传输文件时进行压缩;
- -p:保留文件的权限标记;
- -t:保留文件的时间标记;
- -g:保留文件的属组标记(仅超级用户使用);
- -o:保留文件的属主标记(仅超级用户使用);
- -H:保留硬连接文件;
- -A:保留ACL属性信息;
- -D:保留设备文件及其他特殊文件;
- --delete:删除目标位置有而原始位置没有的文件;
- --checksum:根据校验和(而不是文件大小、修改时间)来决定是否跳过文件;
二、配置rsync
[root@centos01 ~]# cp /etc/rsyncd.conf /etc/rsyncd.conf.bak   <!--备份rsync主配置文件-->
[root@centos01 ~]# vim /etc/rsyncd.conf   <!--编辑主配置文件-->
uid = nobody         <!--管理rsync的用户-->
 gid = nobody       <!--管理rsync的组-->
 port 873           <!--rsync的端口号-->
pid file = /var/run/rsyncd.pid        <!--rsync进程id位置-->
dont compress   = *.gz *.tgz *.zip *.z *.Z *.rpm *.deb *.bz2  <!--同步在压缩的文件类型-->
 auth users = bob           <!--验证账户-->
 secrest file = /etc/rsync_user.db          <!--密码数据库-->
 address = 192.168.100.10            <!--rsync服务监听的ip地址-->
 hosts allow = 192.168.100.0/24       <!--允许192.168.100.0网段访问-->
 read only = yes          <!--允许读取权限-->
[root@centos01 ~]# rsync --daemon          <!--启动rsync服务-->
[root@centos01 ~]# netstat -anptu | grep rsync        <!--监听rsync服务是否正常启动-->
tcp        0      0 192.168.100.10:873      0.0.0.0:*               LISTEN      1422/rsync
[root@centos01 ~]# kill 1422        <!--停止服务使用kill结束进程-->
[root@centos01 ~]# vim /etc/rc.d/rc.local          <!--设置开机自动启动rsync服务-->
/usr/bin/rsync --daemon          <!--rsync启动服务添加到配置文件中-->
[root@centos01 ~]# chmod +x /etc/rc.d/rc.local         <!--添加执行权限-->

[root@centos01 ~]# mkdir centos7             <!--创建centos7目录-->
[root@centos01 ~]# rsync -alv /mnt/* ./centos7/
                                                         <!--将mnt目录下的文件复制到centos7目录里-->
[root@centos01 ~]# mkdir benet            <!--创建目录-->
[root@centos01 ~]# mkdir xsh          <!--创建目录-->

[root@centos01 ~]# echo "11111" > ./benet/1.txt          <!--写入数据-->
[root@centos01 ~]# echo "22222" > ./xsh/2.txt           <!--写入数据-->
[root@centos01 ~]# rsync -av --delete ./benet/ ./xsh
                   <!--将源benet目录中数据同步到目录xsh目录,删除xsh目录中的历史数据-->
sending incremental file list
./
deleting 2.txt
1.txt

sent 92 bytes  received 34 bytes  252.00 bytes/sec
total size is 6  speedup is 0.05
[root@centos01 ~]# cd xsh          <!--进入xsh目录-->
[root@centos01 xsh]# ls           <!--查看是否同步成功-->
1.txt
[root@centos01 ~]# rsync -av ./xsh/ [email protected]:/
                      <!--将本地xsh目录中的数据,同步到远程主机192.168.100.20的根目录中-->
The authenticity of host '192.168.100.20 (192.168.100.20)' can't be established.
ECDSA key fingerprint is SHA256:PUueT9fU9QbsyNB5NC5hbSXzaWxxQavBxXmfoknXl4I.
ECDSA key fingerprint is MD5:6d:f7:95:0e:51:1a:d8:9e:7b:b6:3f:58:51:51:4b:3b.
Are you sure you want to continue connecting (yes/no)? yes       <!--输入yes-->
Warning: Permanently added '192.168.100.20' (ECDSA) to the list of known hosts.
[email protected]'s password:         <!--输入密码-->
sending incremental file list
./
1.txt

sent 92 bytes  received 34 bytes  19.38 bytes/sec
total size is 6  speedup is 0.05
[root@centos02 ~]# cd /      <!--进入根目录-->
[root@centos02 /]# ls         <!--查看目录下文件-->
1.txt  boot  etc   lib    media  opt   root  sbin  sys  usr
bin    dev   home  lib64  mnt    proc  run   srv   tmp  var
1、配置同步身份验证的rsync
[root@centos01 ~]# vim /etc/rsync_user.db
                                       <!--创建rsync验证数据库,账户是bob,密码是pwd@123-->
bob:pwd@123
[root@centos01 ~]# chmod 600 /etc/rsync_user.db     <!--验证数据库文件添加600权限-->
[root@centos01 ~]# vim /etc/rsyncd.conf      <!--修改rsync主配置文件创建共享-->
  [accp]          <!--同步共享模块名字-->
        path = /accp    <!--同步物理目录-->
        comment = test    <!--描述-->
        auth users bob     <!--验证账户-->
        secrets file = /etc/rsync_user.db     <!--验证的数据库-->
        read only = yes       <!--允许只读权限-->
[root@centos01 ~]# mkdir /accp      <!--创建同步物理目录-->
[root@centos01 ~]# echo "accp.com" > /accp/qq.txt      <!--写入测试数据-->
[root@centos01 ~]# rsync -av [email protected]::accp ./xsh/
<!--客户端同步数据,将远程服务器192.168.100.10的accp数据同步到当前位置的xsh目录-->
receiving incremental file list
./
aa.txt

sent 48 bytes  received 118 bytes  332.00 bytes/sec
total size is 4  speedup is 0.02
[root@centos01 ~]# rsync -av rsync://[email protected]/accp ./xsh/       <!--第二种方式同步-->
receiving incremental file list
./
aa.txt

sent 48 bytes  received 118 bytes  332.00 bytes/sec
total size is 4  speedup is 0.02
[root@centos01 ~]# cd xsh/         <!--验证是否同步成功-->
[root@centos01 xsh]# ls
aa.txt
2、rsync定期同步
[root@centos01 ~]# mount /dev/cdrom /mnt/     <!--切换Linux光盘安装inotify-->
mount: /dev/sr0 写保护,将以只读方式挂载
[root@centos01 ~]# tar zxvf /mnt/inotify-tools-3.14.tar.gz -C /usr/src/   <!--解压缩inotify-->
[root@centos01 ~]# cd /usr/src/inotify-tools-3.14/   <!--进入inotify目录-->
[root@centos01 inotify-tools-3.14]# ./configure     <!--配置inotify-->
[root@centos01 inotify-tools-3.14]# make && make install  <!--编译安装inotify-->
[root@centos01 ~]# cat /proc/sys/fs/inotify/max_queued_events
                                                                   <!--查看inotify监控事件队列-->
16384
[root@centos01 ~]# cat /proc/sys/fs/inotify/max_user_instances <!--查看最多监控实例数-->
128
[root@centos01 ~]# cat /proc/sys/fs/inotify/max_user_watches <!--查看每个实例最多监控文件数-->
8192
[root@centos01 ~]# vim /etc/sysctl.conf  <!--修改inotify配置文件,加大三个参数的值-->
fs.inotify.max_queued_events = 16384
fs.inotify.max_user_instances = 1024
fs.inotify.max_user_watches = 1048576
[root@centos01 ~]# sysctl -p          <!--更新内核参数-->
fs.inotify.max_queued_events = 16384
fs.inotify.max_user_instances = 1024
fs.inotify.max_user_watches = 1048576
[root@centos01 ~]# inotifywait -mrq -e modify,create,delete,move,attrib /
accp/
                         <!--配置一次性监控,监控/accp目录发生的变化-->
[root@centos01 ~]# cd /accp/
                             <!--进入accp目录,修改、删除、创建数据测试是否监控成功-->
[root@centos01 accp]# ls
aa.txt
[root@centos01 accp]# touch 11.txt
[root@centos01 accp]# echo "111" > 1.txt
[root@centos01 accp]# rm -rf 11.txt
[root@centos01 ~]# inotifywait -mrq -e modify,create,delete,move,attrib /
accp/
            <!--查看监控状态-->
/accp/ CREATE 11.txt
/accp/ ATTRIB 11.txt
/accp/ CREATE 1.txt
/accp/ MODIFY 1.txt
/accp/ DELETE 11.txt
3、配置inotify+rsync实时同步
[root@centos01 ~]# vim rsync.sh         <!--创建编写实时同步脚本-->
#!/bin/bash
INW="inotifywait -mrq -e modify,create,delete,move,attrib /accp/"
RSYNC="rsync -avzH /accp/ [email protected]:/baidu/ --delete"
$INW | while read DIRECTORY EVENT FILE;do
$RSYNC &> /dev/null
done
[root@centos01 ~]# chmod +x rsync.sh      <!--脚本添加执行权限-->
[root@centos01 ~]# ssh-keygen -t rsa          <!--配置密钥对-->
[root@centos01 ~]# ssh-copy-id -i ./.ssh/id_rsa.pub [email protected]
                                                              <!--上传ssh客户端的公钥到ssh服务器端-->
[root@centos01 ~]# netstat -anptu | grep rsync     <!--停止rsync服务重新启动-->
tcp        0      0 0.0.0.0:873             0.0.0.0:*               LISTEN      7657
tcp6       0      0 :::873                  :::*                    LISTEN      765
[root@centos01 ~]# kill 7657             <!--停止rsync服务-->
[root@centos01 ~]# rsync --daemon      <!--重新启动-->
[root@centos02 ~]# mkdir baidu          <!--服务器端创建baidu目录-->
[root@centos02 ~]# cd baidu/             <!--进入baidu目录-->
[root@centos02 baidu]# echo "111" > 333.txt       <!--插入数据-->
[root@centos02 baidu]# ls         <!--查看-->
333.txt
[root@centos01 ~]# ./rsync.sh &          <!--执行脚本-->
[3] 11160
[root@centos02 ~]# cd /baidu/
                  <!--服务器端查看baidu目录是否删除历史数据插入客户端accp目录下的数据-->
[root@centos02 baidu]# ls
w.txt
[root@centos01 ~]# vim /etc/rc.d/rc.local
                              <!--将rsync实时同步的脚本添加到开机自动启动配置文件中-->
/root/rsync.sh &           <!--执行脚本的路径添加进来-->
[root@centos02 ~]# kill 7984       <!--停止rsync服务-->
[root@centos02 ~]# rsync --daemon    <!--重新启动-->