一. spring boot 整合mybatis
1.整合思路:
1.1 添加依赖 mybatis
1.2 在配置文件中配置数据源信息
1.3 编写pojo mapper接口 mapeer映射文件
1.4
1.5 启动springboot服务器
2.开始工程部署:
2.1:添加依赖 mybatis

<!--整合springboot与mybatis的整合-->
<dependencies> <dependency> <groupId>org.mybatis.spring.boot</groupId> <artifactId>mybatis-spring-boot-starter</artifactId> <version>1.1.1</version> </dependency> </dependencies> <!--将mapper下的mapper接口与mapper映射文件放在一个mapper包下所需要的依赖--> <build> <resources> <resource> <directory>src/main/java</directory> <includes> <include>**/*.properties</include> <include>**/*.xml</include> </includes> <filtering>false</filtering> </resource> <resource> <directory>src/main/resources</directory> <includes> <include>**/*.*</include> </includes> <filtering>false</filtering> </resource> </resources> <plugins> <plugin> <groupId>org.springframework.boot</groupId> <artifactId>spring-boot-maven-plugin</artifactId> </plugin> </plugins> </build>
2.2:在配置文件中配置数据源信息 application.yml
#DB Configation  JPA Configation
spring:
  datasource:
    driver-class-name: com.mysql.jdbc.Driver
    url: jdbc:mysql://localhost:3306/test
    username: root
    password: root

  jpa:
    database: MySQL
    generate-ddl: true
    show-sql: true
如果不想将接口和映射文件放在一个包下,那么会遇到:
错误:org.apache.ibatis.binding.BindingException: Invalid bound statement (not found): com.offcn.mapper.UserMapper.getUserList
解决方法:
1 把映射文件 放到resources 目录下 结构目录一模一样
2.按照上述依赖配置后边的plug即可
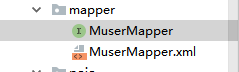
mapper接口:
package com.wf.mapper;

import com.wf.pojo.Muser;

import java.util.List; public interface MuserMapper { List<Muser> getUserList(); }
mapeer映射文件:
<?xml version="1.0" encoding="UTF-8" ?>
<!DOCTYPE mapper
        PUBLIC "-//mybatis.org//DTD Mapper 3.0//EN"
        "http://mybatis.org/dtd/mybatis-3-mapper.dtd"> <mapper namespace="com.xhn.mapper.MuserMapper"> <select id="getUserList" resultType="com.xhn.pojo.Muser"> select * from user </select> </mapper>
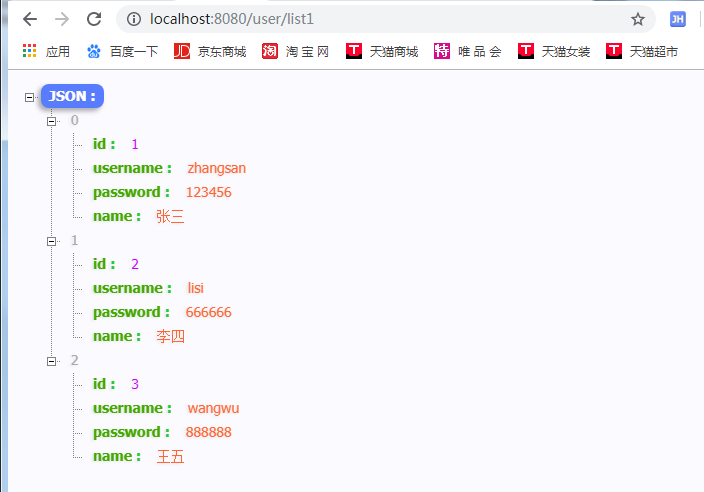
对应的controller中书写接口方法:
package com.wf.controller;

import com.wf.mapper.MuserMapper;
import com.wf.pojo.Muser; import org.springframework.beans.factory.annotation.Autowired; import org.springframework.web.bind.annotation.RequestMapping; import org.springframework.web.bind.annotation.RestController; import java.util.List; @RestController @RequestMapping("/user") public class UserController { @Autowired private MuserMapper muserMapper; //使用mybatis查询出所有数据 @RequestMapping("/list1") public List<Muser> getUserList1(){ return muserMapper.getUserList(); } }
2.4
package com.wf;

import org.mybatis.spring.annotation.MapperScan;
import org.springframework.boot.SpringApplication; import org.springframework.boot.autoconfigure.SpringBootApplication; //扫描mapper包下的所有mapper接口和映射文件 @MapperScan(basePackages = "com.xhn.mapper") //添加启动类 @SpringBootApplication public class StartApplication { public static void main(String[] args) { SpringApplication.run(StartApplication.class,args); } }
2.5 启动springboot服务器
二:使用Junit进行测试
使用用法:
1 添加依赖
        <!--测试junit-->
        <dependency> <groupId>org.springframework.boot</groupId> <artifactId>spring-boot-starter-test</artifactId> <scope>test</scope> </dependency>
2 创建测试类

package com.wf;

import com.wf.mapper.MuserMapper;
import com.wf.pojo.Muser; import org.junit.Test; import org.junit.runner.RunWith; import org.springframework.beans.factory.annotation.Autowired; import org.springframework.boot.test.context.SpringBootTest; import org.springframework.test.context.junit4.SpringRunner; import java.util.List; @RunWith(SpringRunner.class) //加载主启动类 @SpringBootTest(classes = StartApplication.class) public class AppTest { //依赖注入  @Autowired private MuserMapper mapper; @Test public void test01(){ //先获取所有数据 List<Muser> userList = mapper.getUserList(); for (Muser muser : userList) { System.out.println(muser); } } }