前两天对Spring Boot 实战进行了系统的学习,今天进行项目的快速搭建。
IDEA搭建 Spring Boot
1,New Project
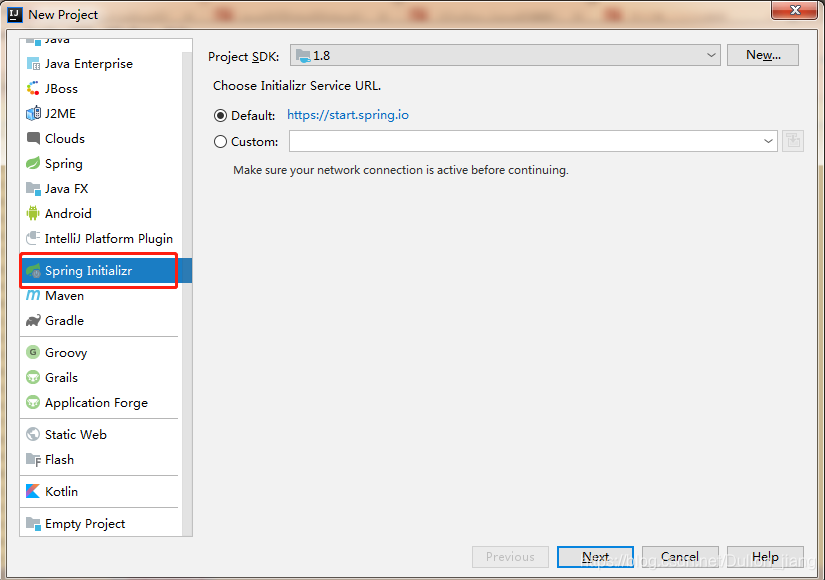
根据项目修改自己的坐标
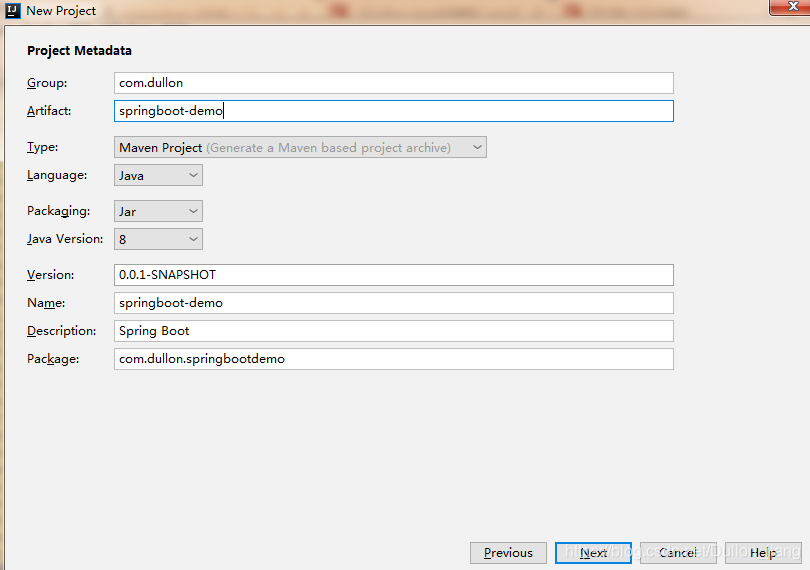
选择项目中需要的组件,为了方便 我这里勾选了web 和整合MyBatis的相关组件
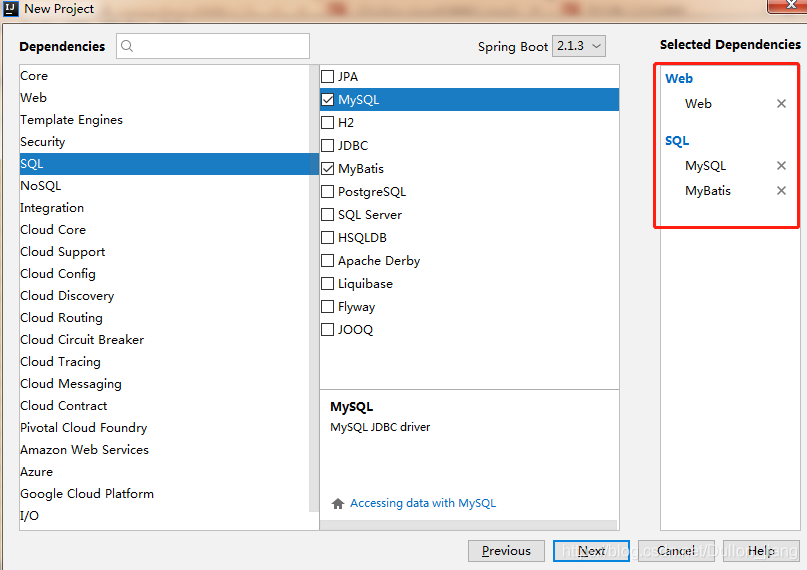
直接完成 即可。ps:这里注意 如果是第一次创建Spring Boot 项目 会下载很多相关jar包。
以上就是快速的搭建 ,下面我们开始整合代码。
Spring Boot 整合代码
首先对pom 文件的自动配置进行微调:
<?xml version="1.0" encoding="UTF-8"?>
<project xmlns="http://maven.apache.org/POM/4.0.0" xmlns:xsi="http://www.w3.org/2001/XMLSchema-instance"
         xsi:schemaLocation="http://maven.apache.org/POM/4.0.0 http://maven.apache.org/xsd/maven-4.0.0.xsd">
    <modelVersion>4.0.0</modelVersion>
    <parent>
        <groupId>org.springframework.boot</groupId>
        <artifactId>spring-boot-starter-parent</artifactId>
        <version>2.1.3.RELEASE</version>
        <relativePath/> <!-- lookup parent from repository -->
    </parent>
    <groupId>com.dullon</groupId>
    <artifactId>springboot-demo</artifactId>
    <version>0.0.1-SNAPSHOT</version>
    <name>springboot-demo</name>
    <description>Spring Boot Demo</description>

    <properties>
        <java.version>1.8</java.version>
    </properties>

    <dependencies>
        <dependency>
            <groupId>org.springframework.boot</groupId>
            <artifactId>spring-boot-starter-web</artifactId>
        </dependency>
        <dependency>
            <groupId>org.mybatis.spring.boot</groupId>
            <artifactId>mybatis-spring-boot-starter</artifactId>
            <version>2.0.0</version>
            <!-- 如果不想依赖自动配置的组件可以自行禁用 -->
            <exclusions>
                <exclusion>
                    <groupId>org.springframework.boot</groupId>
                    <artifactId>spring-boot-starter-logging</artifactId>
                </exclusion>
            </exclusions>
        </dependency>
        <!-- 然后配置自己常用的相关组件 -->
         <dependency>
            <groupId>org.springframework.boot</groupId>
            <artifactId>spring-boot-starter-log4j</artifactId>
        </dependency>
        <dependency>
            <groupId>org.springframework.boot</groupId>
            <artifactId>spring-boot-starter-test</artifactId>
            <scope>test</scope>
        </dependency>
<!-- 在这里 我又加了thymeleaf 组件 用thymeleaf模板开发 -->
        <dependency>
            <groupId>org.springframework.boot</groupId>
            <artifactId>spring-boot-starter-thymeleaf</artifactId>
        </dependency>
        <dependency>
            <groupId>mysql</groupId>
            <artifactId>mysql-connector-java</artifactId>
        </dependency>
    </dependencies>

    <build>
        <plugins>
            <plugin>
                <groupId>org.springframework.boot</groupId>
                <artifactId>spring-boot-maven-plugin</artifactId>
            </plugin>
        </plugins>


 <!-- 此配置是读取 非在 目标路径下的xml文件 -->
            <resources>
                <resource>
                    <directory>src/main/java</directory>
                    <includes>
                        <include>**/*.xml</include>
                    </includes>
                </resource>
                <resource>
                    <directory>src/main/resources</directory>
                    <includes>
                        <include>**/*</include>
                    </includes>
                </resource>
        </resources>
</project>
配置application.properties:
#配置端口号
server.port=8080
#配置数据库数据源
spring.datasource.driver-class-name=com.mysql.jdbc.Driver
spring.datasource.url=jdbc:mysql://localhost:3306/test?characterEncoding=utf8&serverTimezone=UTC
spring.datasource.password=root
spring.datasource.username=root

#mybatis 配置文件路径
#configLocation: classpath:mybatis-config.xml
#mybatis别名配置
mybatis.typeAliasesPackage=com.dullon.springbootdemo.pojo
#读取指定区域的xml文件(classpath:)
#mybatis.mapperLocations=classpath:mapper/*.xml
#thymeleaf 读取区域
spring.thymeleaf.prefix= classpath:/templates/
#spring.thymeleaf.mode=HTML5
#spring.thymeleaf.encoding=UTF-8
spring.thymeleaf.servlet.content-type=text/html
#开发时关闭缓存,不然没法看到实时页面
spring.thymeleaf.cache=false
#spring.freemarker.cache=false 相关的缓存也可以这么关闭
#日志级别
#logging.level.root=info
#logging.pattern.console= 日志输出格式
#logging.path= 日志路径
#logging.file=日志名称 默认10m时 切分日志
不必过多的配置文件,以上两个已经足够 ,下面是简单的示例代码
目录结构:
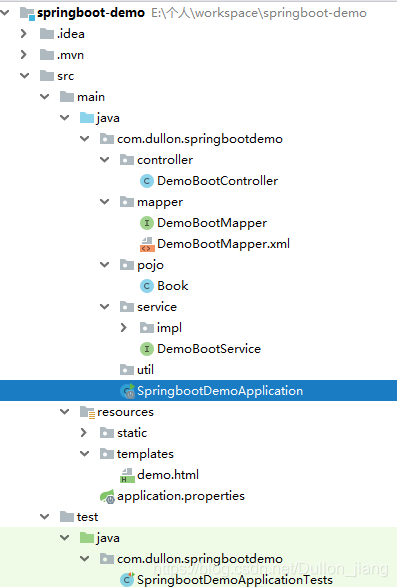
SpringBoot 主方法 :
@SpringBootApplication
//对应扫描value路径下的文件
@MapperScan("com.dullon.springbootdemo.mapper")
public class SpringbootDemoApplication {

    public static void main(String[] args) {
        SpringApplication.run(SpringbootDemoApplication.class, args);
    }

}
controller层:
/**
 * 前端控制器模板 总控
 */
@Controller
@RequestMapping("/test")
public class DemoBootController {
    @Resource
    private DemoBootService dbr ;
    //Logger logger = LogManager.getLogger(this.getClass().getName());
    @RequestMapping
    @ResponseBody
    public String hello(){

        return "Hello World!";
    }
    @RequestMapping(value = "/{reader}",method = RequestMethod.GET)
    public String readerBooks(@PathVariable("reader") String reader , Model model){

        List<Book> readerList = dbr.findByReader(reader);
        if (readerList != null) {
            model.addAttribute("readerList",readerList);
        }
        return "demo";
    }
    @RequestMapping(value = "/{reader}",method = RequestMethod.POST)
    public String addToReadingList(@PathVariable("reader") String reader, Book book){
        book.setReader(reader);
        dbr.save(book);
        return "redirect:/test/{reader}";
    }
}
实体类:
/**
 * 实体类 book
 */
public class Book {
    private Long id;
    private String reader;
    private String isbn;
    private String title;
    private String author;
    private String description;
    /******* set and get *******/
    }
注意: 数据库需要建立相关的表 字段对应。
service 层 及实体类:
import java.util.List;
public interface DemoBootService {

    List<Book> findByReader(String reader);

    void save(Book book);
}


@Service("demoBootService")
public class DemoBootServiceImpl implements DemoBootService {

    @Resource
    private DemoBootMapper demoBootMapper;
    @Override
    public List<Book> findByReader(String reader) {
        return demoBootMapper.findListBooks(reader);
    }
    @Override
    public void save(Book book) {
        demoBootMapper.insertBook(book);
    }


}
mapper接口:
public interface DemoBootMapper {
    public List<Book> findListBooks(@Param("reader") String reader) ;

    void insertBook(Book book);
}
mapper 映射xml:
<?xml version="1.0" encoding="UTF-8" ?>
<!DOCTYPE mapper PUBLIC "-//mybatis.org//DTD Mapper 3.0//EN" "http://mybatis.org/dtd/mybatis-3-mapper.dtd" >
<mapper namespace="com.dullon.springbootdemo.mapper.DemoBootMapper" >
  <resultMap id="BaseResultMap" type="com.dullon.springbootdemo.pojo.Book" >
    <id column="id" property="id" jdbcType="BIGINT" />
    <result column="reader" property="reader" jdbcType="VARCHAR" />
    <result column="isbn" property="isbn" jdbcType="VARCHAR" />
    <result column="title" property="title" jdbcType="VARCHAR" />
    <result column="author" property="author" jdbcType="VARCHAR" />
    <result column="description" property="description" jdbcType="VARCHAR" />
  </resultMap>
  <sql id="Example_Where_Clause" >

  </sql>
  <sql id="Base_Column_List" >
    id, reader, isbn, title, author, description
  </sql>
  <select id="findListBooks" resultMap="BaseResultMap" parameterType="java.lang.String" >
    select
    <include refid="Base_Column_List" />
    from book
    <where>
      <if test="reader != null and reader != ''" >
          AND reader = #{reader,jdbcType=VARCHAR}
      </if>
    </where>
  </select>

  <insert id="insertBook" parameterType="com.dullon.springbootdemo.pojo.Book" >
    insert into book ( reader, isbn, title, author, description)
    values ( #{reader,jdbcType=VARCHAR}, #{isbn,jdbcType=VARCHAR},
      #{title,jdbcType=VARCHAR}, #{author,jdbcType=VARCHAR}, #{description,jdbcType=VARCHAR})
  </insert>
</mapper>
thymeleaf --HTML5文件:
<!DOCTYPE html>
<html lang="en" xmlns:th="http://www.thymeleaf.org">
<head>
    <meta charset="UTF-8">
    <title>Title</title>
    <link rel="stylesheet" th:href="@{/style.css}"/>
</head>
<body>
<h2>Demo Reading List</h2>
<div th:unless = "${#lists.isEmpty(readerList)} ">
    <dl th:each="reader : ${readerList}" >
        <dt class="bookHeadline">
            <span th:text = "${reader.title}">Title</span>
            <span th:text = "${reader.author}">Author</span>
            (ISBN:<span th:text = "${reader.isbn}">Isbn</span>)
        </dt>
        <dd class="bookDescription">
            <span th:if="${reader.description}" th:text="${reader.description}">Description</span>
            <span th:if="${reader.description eq null}"> No description available</span>
        </dd>
    </dl>
</div>
<h3>Add a book</h3>
<form method="post">
    <label for="title">Title:</label>
    <input type="text" id="title" name="title" size="50" /><br/>
    <label for="author">Author:</label>
    <input type="text" id="author" name="author" size="50" /><br/>
    <label for="isbn">Isbn:</label>
    <input type="text" id="isbn" name="isbn" size="15" /><br/>
    <label for="description">Description:</label>
    <textarea type="text" id="description" name="description" cols="100" rows="5" ></textarea><br/>
    <input type="submit"/>
</form>
</body>
</html>
也可以美化一些的css文件
body {
    background: #cccccc;
    font-family: Arial,helvetica,sans-serif;
}

.bookHeadline{
    font-size: 12pt;
    font-weight: bold;
}

.bookDescription{
    font-size: 10pt;
}

label{
    font-weight: bold;
}
以上代码完成后 通过执行SpringBoot的主方法 就可以晕行 内嵌的tomcat 进行页面测试了
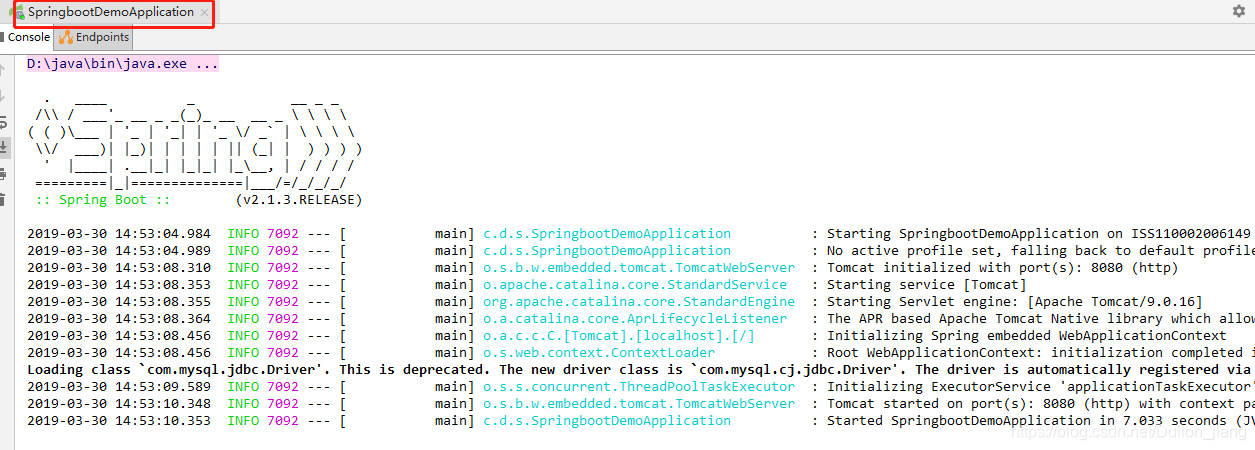
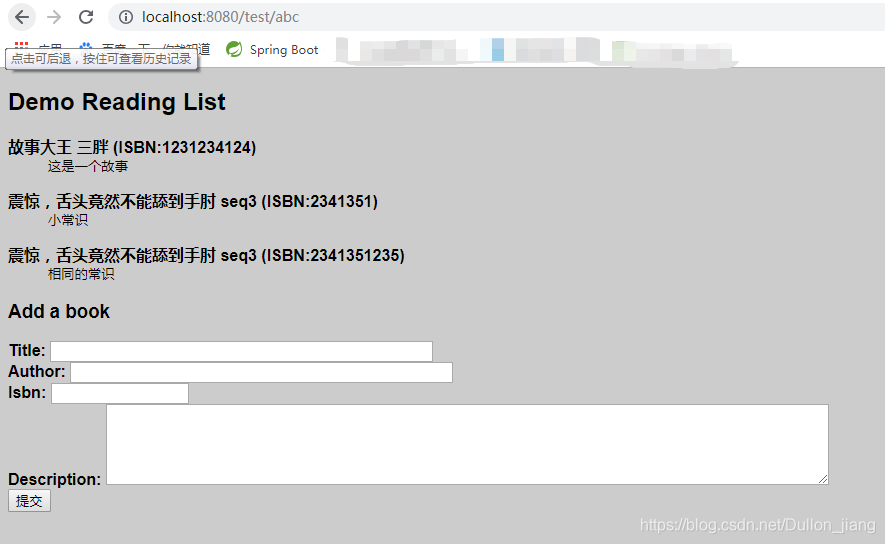
成功! 以上就是Spring Boot 整合MyBatis 的快速搭建和测试。