版权声明:本文为博主原创文章,遵循 CC 4.0 BY-SA 版权协议,转载请附上原文出处链接和本声明。
-
前提
首先确认是否已经安装docker以及k8s集群,此篇侧重介绍基于filebeat、ElasticSearch、Kibana日志解决方案,docker及k8s的安装这里不做过多的介绍。 -
架构设计
整体架构图如图所示:
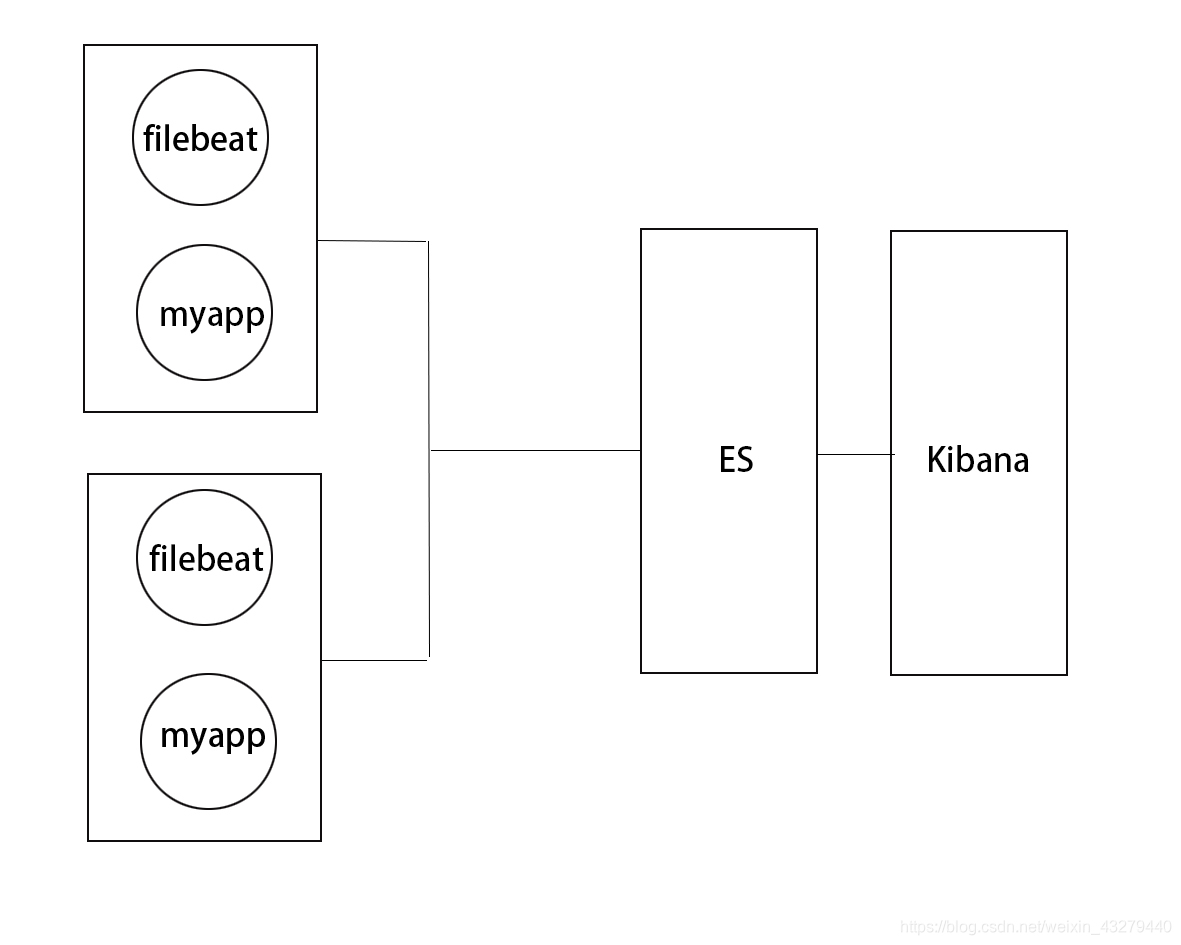
我们选择将filebeat镜像和自己应用的镜像发布在一个pod中,这样应用的日志可以不再挂载在宿主机上就可以直接通过filebeat收集,filebeat收集日志推送到ElasticSearch,然后通过可视化的Kibana平台查看Kibana从ElasticSearch取出的日志。
-
ElasticSearch安装
    #安装 elasticsearch
    brew install elasticsearch
    #启动 elasticsearch
    brew services start elasticsearch
   默认访问地址http://localhost:9200
   可在配置文件(/usr/local/etc/elasticsearch/elasticsearch.yml)
   进行更改
- Kibana 安装
    #安装 kibana
    brew install kibana
    #启动 kibana
    brew services start kibana
   默认访问地址http://localhost:5601,默认连接的es地址为
   localhost:9200,可在配置文件(/usr/local/etc/kibana/kibana.yml)
   对连接的es地址进行更改。
- 应用yaml文件编写
这是比较关键的一步,yaml文件不对将直接导致容器启动的失败,所以认真完成yaml文件的编写。
5.1、configmap.yaml
apiVersion: v1
kind: ConfigMap
metadata:
  name: filebeat-config
data:
  filebeat.yml: |
    filebeat.inputs:
    - type: log
      enabled: true
      paths:
      - /log/*
    setup.template.settings:
      index.number_of_shards: 1
    setup.template.fields: ${path.config}/fields.yml
    setup.template.enabled: true
    setup.ilm.enabled: false
    output.elasticsearch.index: "test_log"
    setup.template.overwrite: true
    setup.template.name: "test_log"
    setup.template.pattern: "test_log*"
    output.elasticsearch:
      hosts: ['192.168.2.219:9200']
    processors:
      - add_host_metadata: ~
      - add_cloud_metadata: ~
5.2、service.yaml
apiVersion: v1
kind: Service
metadata:
  name: boot-test
  labels:
    k8s-app: boot-test
spec:
  type: NodePort
  ports:
  - port: 8088
    protocol: TCP
    targetPort: 8088
    name: http
    nodePort: 32008
  selector:
    k8s-app: boot-test
5.3 deployment.yaml
apiVersion: extensions/v1beta1
kind: Deployment
metadata:
  name: boot-test
  namespace: default
spec:
  replicas: 1
  template:
    metadata:
      labels:
        k8s-app: boot-test
    spec:
      containers:
      - image: docker.elastic.co/beats/filebeat:6.4.0
        imagePullPolicy: IfNotPresent
        name: filebeat
        volumeMounts:
        - name: app-logs
          mountPath: /log
        - name: filebeat-config
          mountPath: /usr/share/filebeat/filebeat.yml
          subPath: path/to/test-file
      - image: test
        name : boot-test
        imagePullPolicy: IfNotPresent
        ports:
        - containerPort: 8088
        volumeMounts:
        - name: app-logs
          mountPath: /logs
      volumes:
      - name: app-logs
        emptyDir: {}
      - name: filebeat-config
        configMap:
          name: filebeat-config
          items:
          - key: filebeat.yml
            path: path/to/test-file
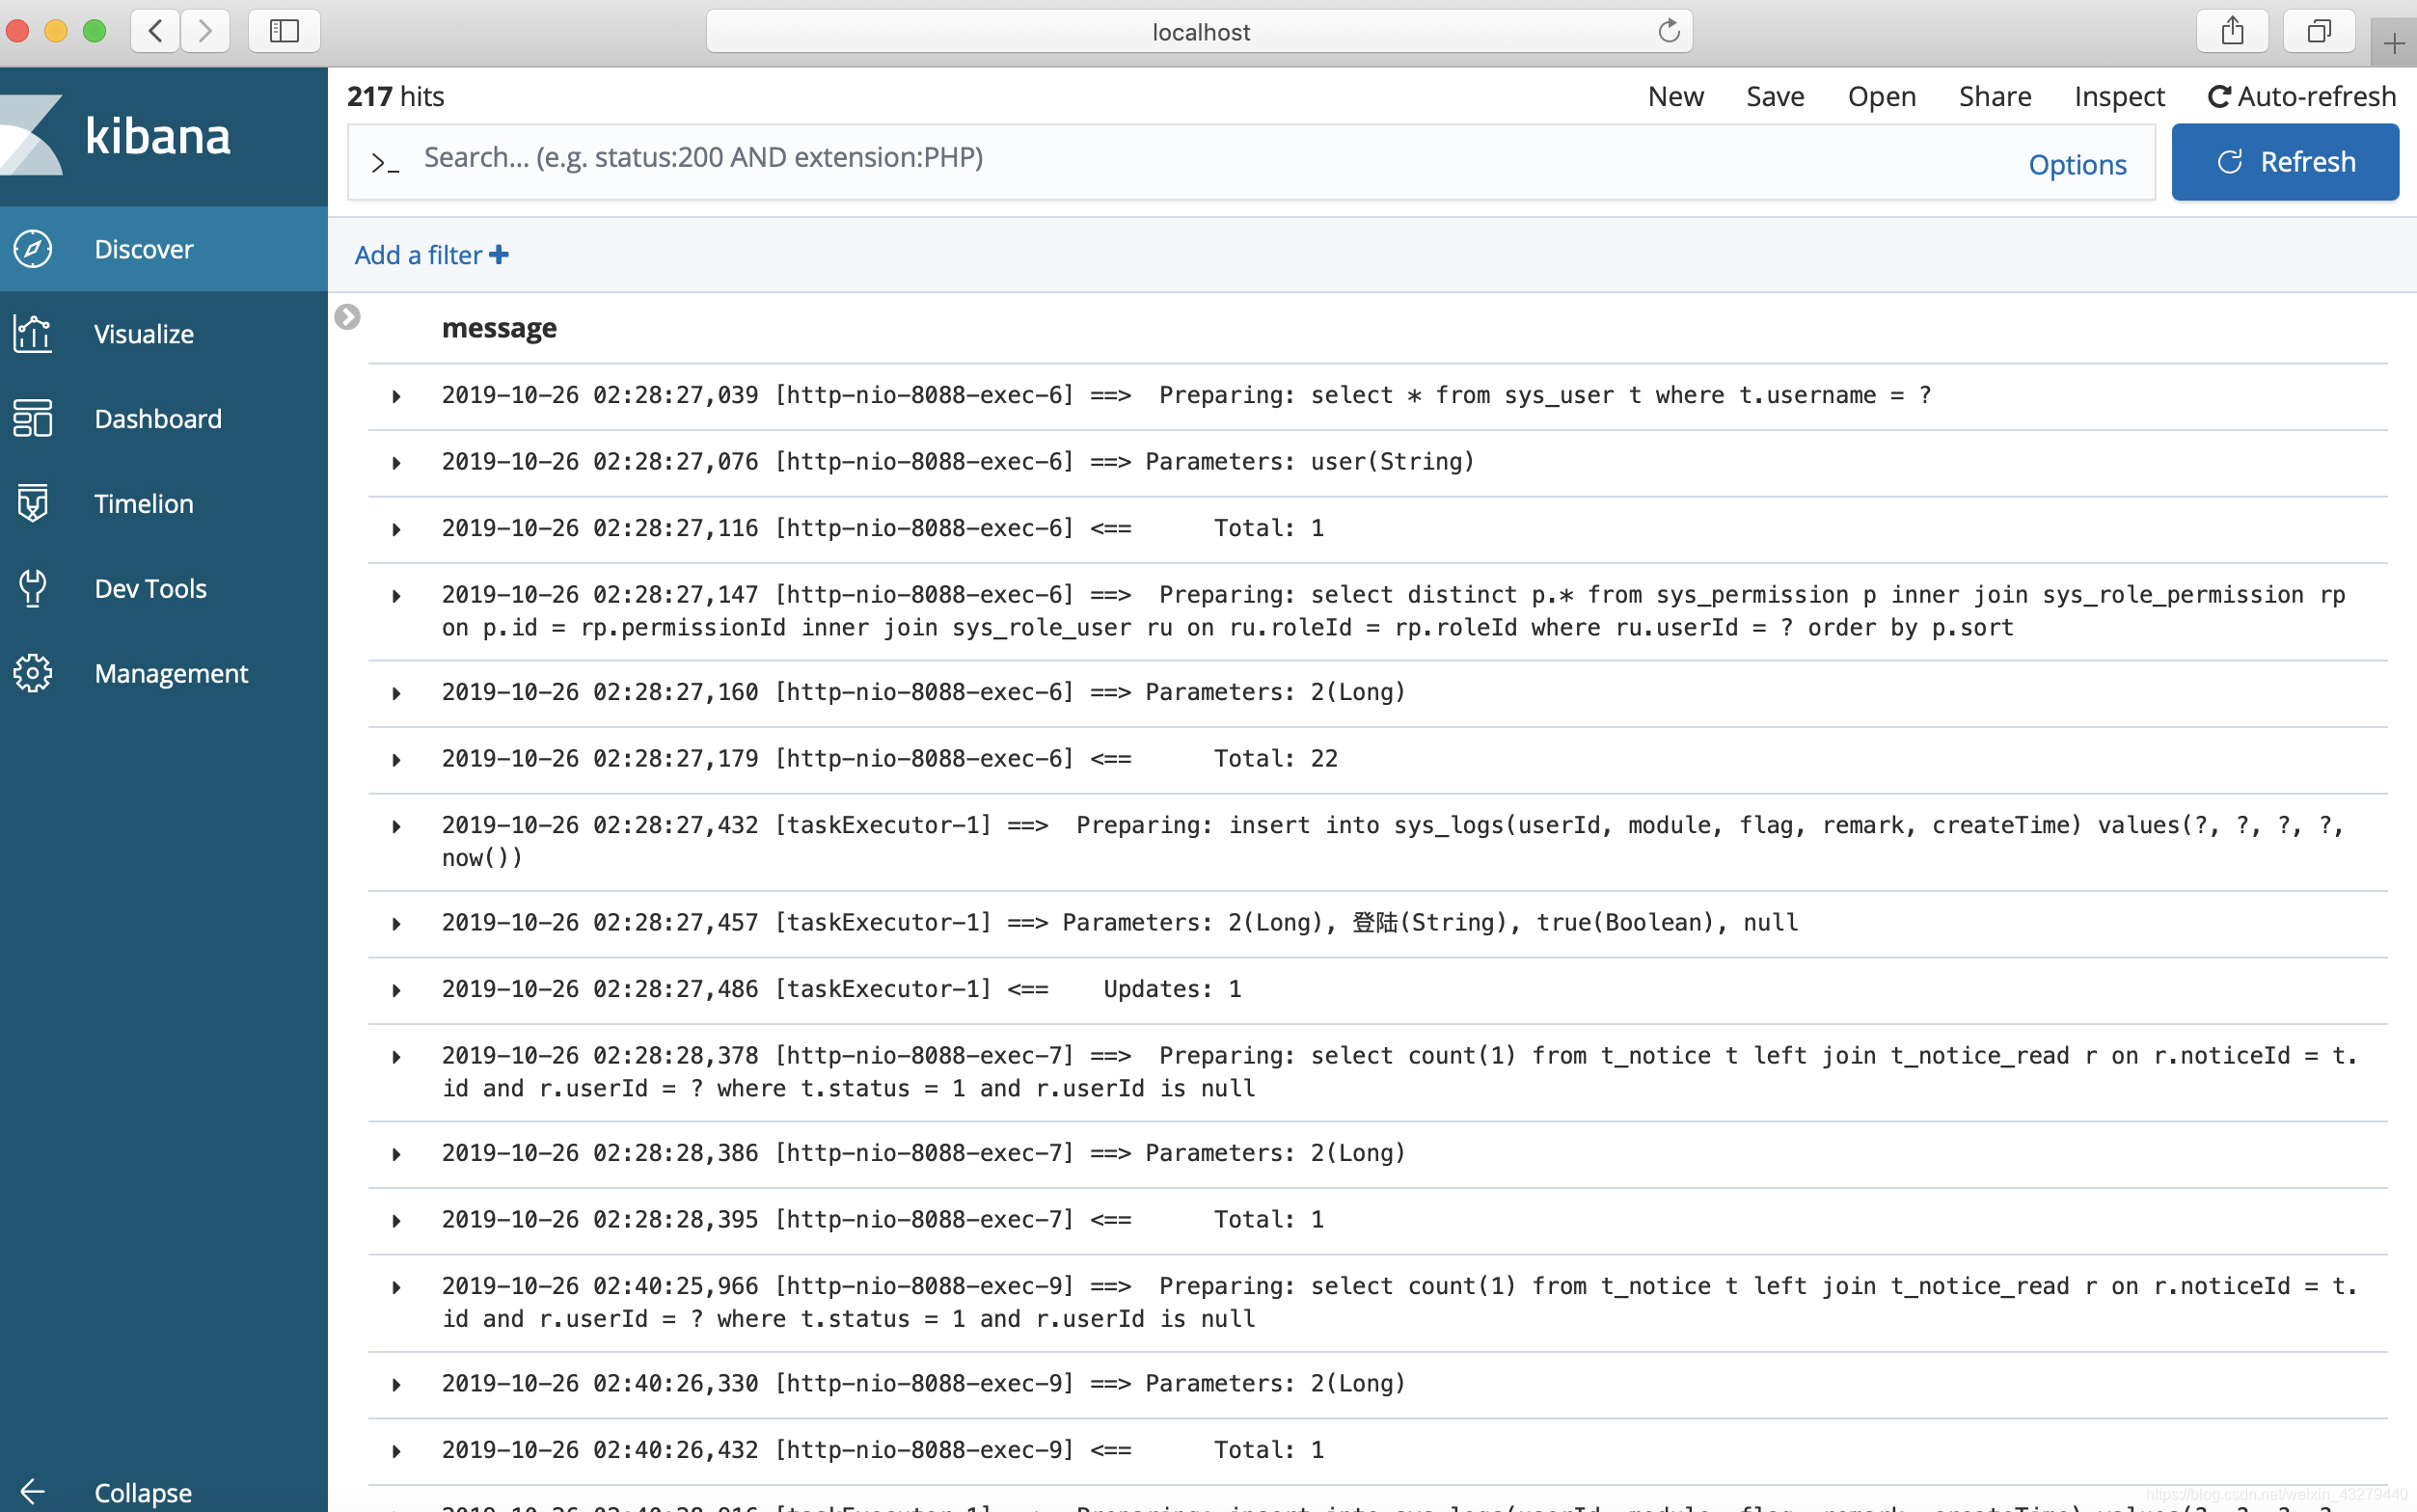
- 创建应用,效果展示。
 #执行命令
  kubectl apply -f configmap.yaml
  kubectl apply -f deployment.yaml
  kubectl apply -f service.yaml
效果展示,登录 http://localhost:5601,如图可以看到我们应用的打印出的日志。