版权声明:本文为博主原创文章,遵循 CC 4.0 BY-SA 版权协议,转载请附上原文出处链接和本声明。
一、配置nginx日志格式为json格式
http {
  include    mime.types;
  default_type application/octet-stream;
  charset utf-8;
   # log_format  main  '$remote_addr - $remote_user [$time_local] "$request" '
   #                   '$status $body_bytes_sent "$http_referer" '
   #                  '"$http_user_agent" "$http_x_forwarded_for" "$request_time" "$upstream_response_time" "$http_cookie" request_body&&&&&$request_body';

  log_format json '{ "@timestamp": "$time_iso8601", '  #时间戳也可以用$time_local
'"host":"$server_addr",'
'"clientip": "$remote_addr", '
'"http_url": "$Host",'
'"request": "$Host",'
'"request_time": "$request_time",'
'"url": "$uri", '
'"body_bytes_size": "$body_bytes_sent", '
'"cookie": "$http_cookie", '
'"up_resp_time": "$upstream_response_time",'
'"up_addr": "$upstream_addr",'
'"up_host": "$upstream_http_host",'
'"user_agent": "$http_user_agent", '
'"x_forwarded": "$http_x_forwarded_for", '
'"http_referer": "$http_referer", '
'"status": "$status" '
' }';
#'"request_body": "$request_body", '
  access_log logs/access.log json;
  (省略内容)
}
二、下载Geoip地图插件
官网地址:https://dev.maxmind.com/geoip/geoip2/geolite2/

wget https://geolite.maxmind.com/download/geoip/database/GeoLite2-City.tar.gz
三、下载软件并配置geoip地图插件
1、下载 6.3.2 版本的软件
地址:https://www.elastic.co/cn/downloads/past-releases/

#下载logstash
wget https://artifacts.elastic.co/downloads/logstash/logstash-6.3.2.tar.gz

#下载elasticsearch
wget https://artifacts.elastic.co/downloads/elasticsearch/elasticsearch-6.3.2.tar.gz

#下载kibana
wget https://artifacts.elastic.co/downloads/kibana/kibana-6.3.2-linux-x86_64.tar.gz
2、安装并启动elasticsearch
详见:https://blog.csdn.net/m0_37886429/article/details/68487922
3、安装logstash和geoip插件
tar -xzf logstash-6.3.2.tar.gz -C /data/services/
mv /data/service/logstash-6.3.2 /data/services/logstash

tar xf GeoLite2-City.tar.gz -C /data/services/logstash/config/
4、编写logstash的配置文件nginx.conf
input{
  file {
    path => "/data/services/nginx/logs/access.log"
	type => "nginx-access-log"
	start_position => "beginning"
    stat_interval => "5"
	codec => "json"
#	codec => multiline {
#	  pattern => "^\[(\d{4}-\d{2}-d{2})"
#	  negate => true
#	  what => "previous"
#	}
  }
}

filter {
  if [type] == "nginx-access-log" {
    geoip {
	  source => "clientip"
	  target => "geoip"
	  database => "/data/services/logstash/config/GeoLite2-City_20191015/GeoLite2-City.mmdb"
	  add_field => [ "[geoip][coordinates]", "%{[geoip][longitude]}" ]
	  add_field => [ "[geoip][coordinates]", "%{[geoip][latitude]}" ]
	}
  }

  mutate {
    convert => [ "[geoip][coordinates]", "float" ]
  }
}

output {
  elasticsearch {
    hosts => ["192.168.0.144:9200"]
    index => "logstash-nginx-access-%{+YYYY.MM.dd}"
  }
}
5、启动logstash
##检查配置文件语法是否正确
 /data/services/logstash/bin/logstash -f /data/services/logstash/config/nginx.conf -t
##启动
 /data/services/logstash/bin/logstash -f /data/services/logstash/config/nginx.conf
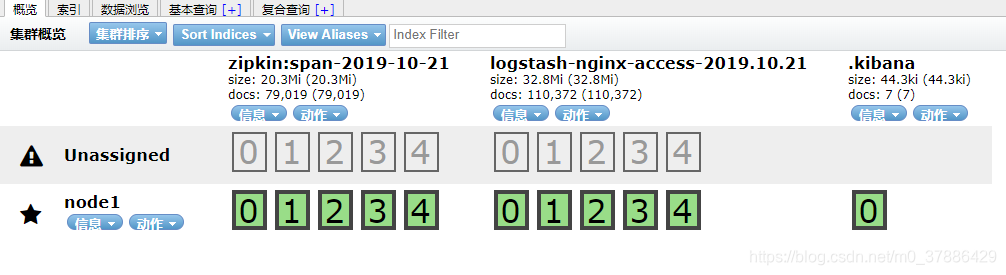
这样就可以把nginx的访问日志收集到了elasticsearch中
四、安装配置kibana
1、配置和启动kibana
##解压
tar -xzf kibana-6.3.2-linux-x86_64.tar.gz -C /data/services/
mv /data/services/kibana-6.3.2-linux-x86_64  /data/services/kibana

##配置
vim /data/services/kibana/config/kibana.yml
server.port: 5601
server.host: "192.168.0.144"     #如果测试可以用0.0.0.0,生产环境配置内网地址,前端通过nginx代理
elasticsearch.url: "http://192.168.0.144:9200"


##启动kibana
/data/services/kibana/bin/kibana &
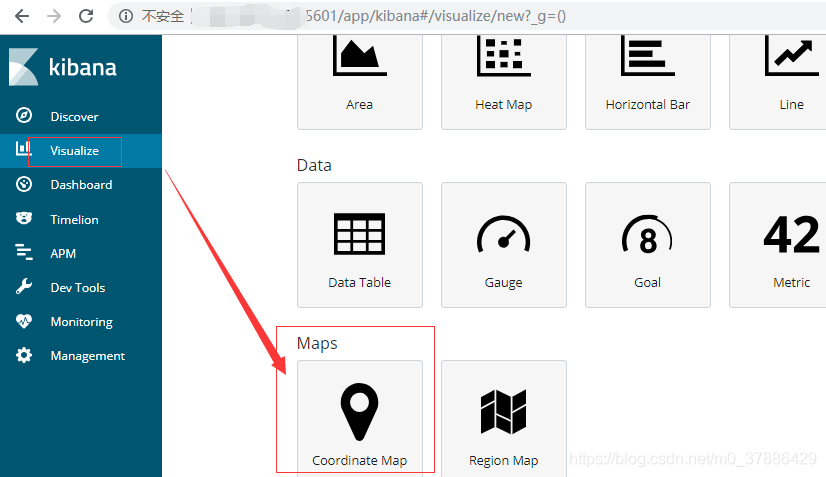
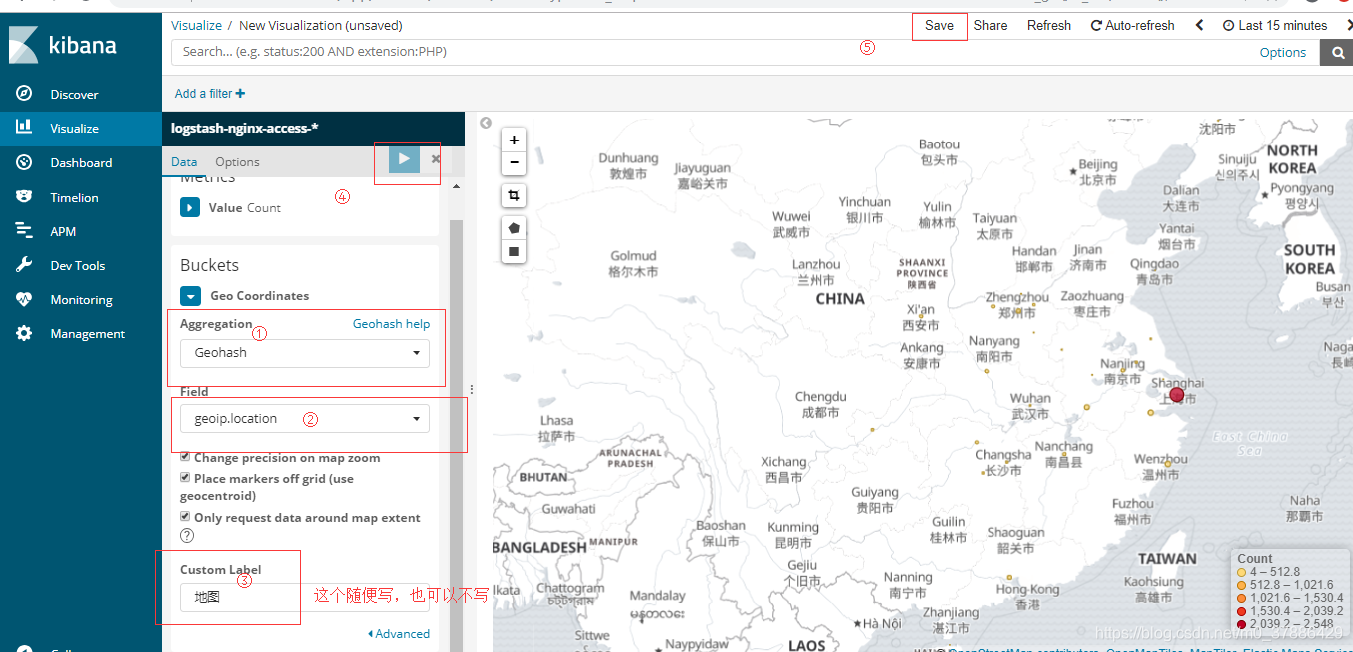
2、访问并配置地图