版权声明:本文为博主原创文章,遵循 CC 4.0 BY-SA 版权协议,转载请附上原文出处链接和本声明。
本项目中其他模块内容:
微服务架构下如何集成支付宝接口实现支付服务(一)总体设计.
微服务架构下如何集成支付宝接口实现支付服务(二)使用SpringCloudConfig搭建配置中心.
微服务架构下如何集成支付宝接口实现支付服务(三)结合配置中心搭建eureka服务注册中心.
微服务架构下如何集成支付宝接口实现支付服务(四)集成alipay来提供支付服务.
微服务架构下如何集成支付宝接口实现支付服务(五)消费支付服务的消费者搭建.
微服务架构下如何集成支付宝接口实现支付服务(六)支付宝接口(沙箱环境)申请.
在搭建项目的过程中最好也根据我提供的这几个步骤来进行搭建。可以帮助你整理出一个统一的方法论。大概的步骤就是三个配置pom文件,编写yml配置文件,配置springboot启动器,搭建所有需要的文件目录结构,这里我把文件目录结构放到前面是方便大家观看。
1、pom文件
<project xmlns="http://maven.apache.org/POM/4.0.0" xmlns:xsi="http://www.w3.org/2001/XMLSchema-instance" xsi:schemaLocation="http://maven.apache.org/POM/4.0.0 http://maven.apache.org/xsd/maven-4.0.0.xsd">
  <modelVersion>4.0.0</modelVersion>
  <parent>
    <groupId>com.shqblog</groupId>
    <artifactId>blog</artifactId>
    <version>0.0.1-SNAPSHOT</version>
  </parent>
  <artifactId>blog-config-3344</artifactId>
	<dependencies>
		<!-- spirngCloud Config -->
		<dependency>
			<groupId>org.springframework.cloud</groupId>
			<artifactId>spring-cloud-config-server</artifactId>
		</dependency>
		<!-- 避免Config的Git插件报错:org/eclipse/jgit/api/TransportConfigCallback -->
		<!-- <dependency> <groupId>org.eclipse.jgit</groupId> <artifactId>org.eclipse.jgit</artifactId>
			<version>4.10.0.201712302008</version> </dependency> -->
		<dependency>
			<groupId>org.springframework.boot</groupId>
			<artifactId>spring-boot-starter-jetty</artifactId>
		</dependency>
		<dependency>
			<groupId>org.springframework.boot</groupId>
			<artifactId>spring-boot-starter-web</artifactId>
		</dependency>
		<dependency>
			<groupId>org.springframework.boot</groupId>
			<artifactId>spring-boot-starter-test</artifactId>
		</dependency>
		<!-- 热部署 -->
		<dependency>
			<groupId>org.springframework.boot</groupId>
			<artifactId>spring-boot-devtools</artifactId>
		</dependency>
		<!-- eureka客户端配置 -->
		<dependency>
			<groupId>org.springframework.cloud</groupId>
			<artifactId>spring-cloud-starter-config</artifactId>
		</dependency>
		<!-- actuator监控信息完善 -->
		<dependency>
			<groupId>org.springframework.boot</groupId>
			<artifactId>spring-boot-starter-actuator</artifactId>
		</dependency>
		<!-- 添加hystrix -->
		<dependency>
			<groupId>org.springframework.cloud</groupId>
			<artifactId>spring-cloud-starter-hystrix</artifactId>
			<version>1.4.3.RELEASE</version>
		</dependency>
	</dependencies>
</project>
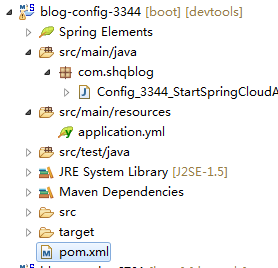
2、文件目录结构
这个的目录结构比较简单,主要就是配置文件和一个启动类。
3、配置文件
server:
  port: 3344
spring:
  application:
    name: blog-config
  cloud:
    config:
      server:
        git:
          uri: https://github.com/xxx  #github上面git仓库名字
这个仓库的名字直接到github上复制地址即可。

具体如何将配置文件上传的github上请参照博客:使用SpringCloudConfig搭建配置中心(二)将配置文件提交到Github
4、启动器配置
@SpringBootApplication
@EnableConfigServer //开启SpringCloudConfig
public class Config_3344_StartSpringCloudApp {
	public static void main(String[] args) {
		SpringApplication.run(Config_3344_StartSpringCloudApp.class, args);
	}
}
之后就可以直接启动项目了
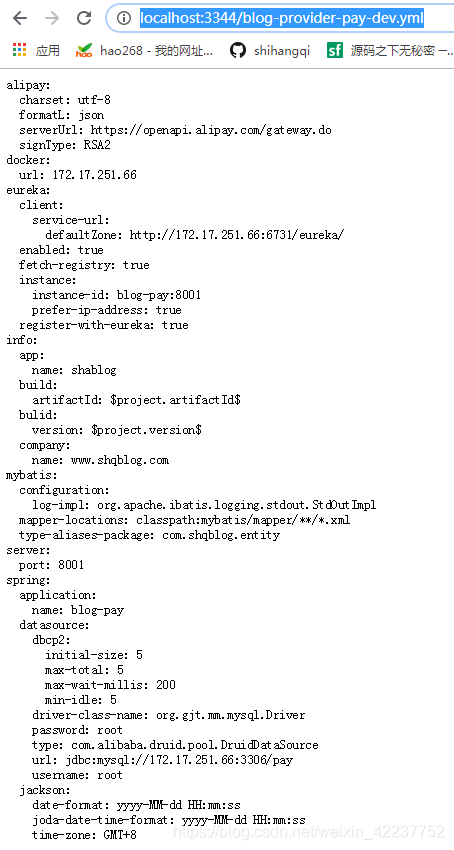
5、在浏览器中访问GitHub上对应的配置文件
可以在浏览器中直接输入地址
http://localhost:3344/blog-provider-pay-dev.yml
这里前面是你配置的配置中心地址,后面blog-provider-pay是你配置文件的名称。
-dev 是你配置文件中profiles的类型,就是启动类型。
访问出来的配置文件是以json格式返回的