文章大纲
- 引言
- 一、视图动画View Animation
- 二、属性动画Property Animation
- 1、ValueAnimator
- 2、ObjectAnimator
- 3、AnimatorSet
- 4、使用LayoutTransition在布局改变时使用属性动画
- 5、使用属性动画用于构造StateListDrawable
- 5.1、直接在res/xml/目录下定义selector为根节点的xml文件
- 5.2、通过代码动态构造
- 5.3、可以使用AnimatedStateListDrawable在状态更改之间播放可绘制动画,而不是动画视图的属性
- 6、对一个View的多个属性进行动画时的三种形式
- 7、点击View放大图片再次点击还原
- 三、过渡(转场)动画Transition Animation
引言
抛开功能及后台业务逻辑,对于一个App来说最先吸引人的应该是精美的UI和优秀的体验,所以不言而喻,动画体系对于App是何其重要,在Android 动画体系中大致按照功能分为三大类:视图动画View Animation、属性动画Property Animation和 转场动画Transition Animation。
一、视图动画View Animation
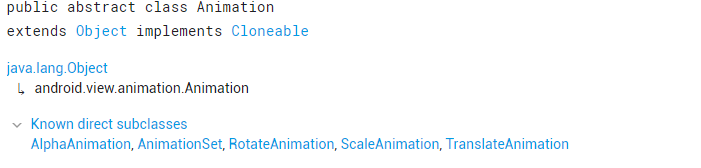
视图动画的基类是Animation,主要的作用对象就是View上面,可以呈现视图移动、变形、透明度改变、旋转以及连续播放一系列图片的动画效果,本质是通过改变绘制效果,至于视图动画的基本知识和使用请参考Android入门——补间动画和帧动画应用小结 和Android入门——Drawable及对应的资源xml和.9 Patch图片的应用,此处仅作总结性补充说明,一般使用视图动画的主要步骤分为:
- 创建动画Drawable,可以通过xml形式直接定义,也可以使用VectorDrawable,也可以通过代码动态定义,总之所有的动画资源都是Drawable
- 如果是采用xml形式定义的,首先得把动画Drawable设置到目标对象上,如果是采用代码定义的,需要创建AnimationSet 及对应的动画对象并添加到AnimationSet
- 通过AnimationSet和Animation实例设置动画监听Animation.AnimationListener,如果是通过AnimationSet设置监听需要注意监听的周期方法会被执行多次
- 通过View的startAnimation(anim)方法或者**AnimationDrawable的start()**方法开启动画。
AnimationDrawable rocketAnimation;

public void onCreate(Bundle savedInstanceState) {
  super.onCreate(savedInstanceState);
  setContentView(R.layout.main);

  ImageView rocketImage = (ImageView) findViewById(R.id.rocket_image);
  rocketImage.setBackgroundResource(R.drawable.rocket_thrust);
  rocketAnimation = (AnimationDrawable) rocketImage.getBackground();

  rocketImage.setOnClickListener(new View.OnClickListener() {
      @Override
      public void onClick(View view) {
        rocketAnimation.start();
      }
  });
}
- 在不需要动画时通过**View的clearAnimation()**方法销毁动画
- 根据业务需要通过LayoutAnimationsController用于一个layout里面的控件,或者是一个ViewGroup里面的控件设置统一的动画效果,可以通过xml或者代码形式定义
//通过加载XML动画设置文件来创建一个Animation对象;
   Animation animation=AnimationUtils.loadAnimation(this, R.anim.slide_right);   //得到一个LayoutAnimationController对象;
   LayoutAnimationController controller = new LayoutAnimationController(animation);   //设置控件显示的顺序;
   controller.setOrder(LayoutAnimationController.ORDER_REVERSE);   //设置控件显示间隔时间;
   controller.setDelay(0.3);   //为ListView设置LayoutAnimationController属性;
   listView.setLayoutAnimation(controller);
   listView.startLayoutAnimation();
二、属性动画Property Animation
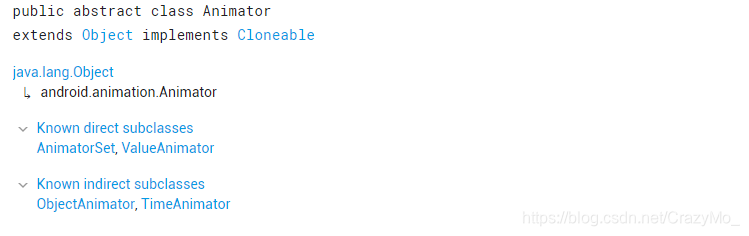
属性动画的基类是Animator,通过动画的执行类(Animator系)来自动计算(插值器直接影响计算结果)并设置动画操作的对象的属性、持续时间,开始和结束的属性值,时间差值等,然后系统会根据设置的参数动态地改变对象的属性从而形成的一种动画效果,简而言之就是持续动态地改变View的真实属性从而形成动态效果,属性动画框架中提供了Duration动画的持续时间、Interpolation的计算方式、TypeEvaluator、Repeat Count and behavoir重复次数与方式、Animation sets:动画集合和
Frame refreash delay帧刷新延迟的引擎自身的属性特征设置接口,通过对应的接口可以实现不同的动画效果。同样,属性动画的基本知识和使用参考Android进阶——属性动画Property Animation详解(一)和Android进阶——属性动画Property Animation详解与应用(二),本文仅作总结性补充说明,一般根据应用场景不同去创建
ValueAnimator、ObjectAnimator、AnimatorSet中其中之一或者之二或者三者的对象,三者可通过代码或者xml形式创建实例,Java类和xml 根节点的映射关系如下图
| Java 类 | XML 根节点 |
|---|---|
| ValueAnimator | < animator > |
| ObjectAnimator | < objectAnimator > |
| AnimatorSet - | < set > |
其中set内部可以包含多个< animator >、< objectAnimator >和< set >子节点。
1、ValueAnimator
ValueAnimator继承自Animator是属性动画的基本计时引擎,用于根据设置的插值器自动对象的属性值,具备计算动画的所有核心功能。对于属性动画来说可以分为两个部分:计算动画值和把这些动画值动态设置到目标对象上,ValueAnimator只负责计算,所以还需要监听ValueAnimator.AnimatorUpdateListener接口把值设置到目标对象上,所以使用ValueAnimator的主要步骤为:
- 通过ValueAnimator的ofInt、ofFloat、ofObject、ofArgb、ofPropertyValuesHolder等静态工厂方法传入对应类型的不定参数创建ValueAnimator实例(对于属性值,若值传递一个的时,默认为当前对象该属性的值为开始值,框架会通过getPropName反射获取,因此对应的属性字段必须是实际存在的,再设置的值为终点。若传递两个,则一个为开始、一个为结束)
- 配置ValueAnimator实例的自身的属性特征
- 通过setTarget方法 设置目标应用对象
- 设置ValueAnimator.AnimatorUpdateListener监听,并在监听中改变目标对象的属性值
- 通过start方法启动引擎
2、ObjectAnimator
ObjectAnimator 是ValueAnimator的子类,支持将在目标对象和对象的属性上执行动画效果,绝大多数情况下可以替代ValueAnimator实现相同的动画效果,而且比ValueAnimator 更简便,但是使用ObjectAnimator执行属性动画时需要注意:
2.1、ObjectAnimator的使用前提
因为与ValueAnimator不一样,ObjectAnimator除了做计算还负责动态设置属性工作,所以它在动画期间自动去通过反射调用
setPropName方法去更新对象的属性,因此目标对象中必须提供“驼峰形式”的setter方法;而且如果创建动画时候没有传递初始值(即在工厂方法的不定参数项只传递一个参数),这个参数会被当成是结束值,系统会通过getPropName方法获取属性的初始值,还需要提供对应getter方法,即要更新对象的属性值必须是真是存在的且提供了对应“驼峰形式”且参数操作类型相同的getter和setter方法,如果所应用的对象属性不满足,可以采取以下任一种措施处理:
- 直接在对象属性中添加对应的setter和getter方法
- 二次封装,用一个类来包装原始对象,间接为其提供get和set方法
- 改用ValueAnimator
2.2、ObjectAnimator的使用ObjectAnimator的主要步骤
-
创建ObjectAnimator实例并绑定目标对象,主要有三种形式:
-
直接通过ofInt、ofFloat等静态工厂方法创建并绑定目标对象
-
先通过构造方法创建实例再调用setTarget方法绑定目标对象。
-
通过AnimatorInflater.loadAnimator映射xml形式创建实例
<?xml version="1.0" encoding="utf-8"?>
<objectAnimator xmlns:android="http://schemas.android.com/apk/res/android"
    android:duration="2000"
    android:propertyName="scaleX"
    android:valueFrom="1.0"
    android:valueTo="0.5"
    android:valueType="floatType" >
</objectAnimator>
// 加载动画
Animator anim = AnimatorInflater.loadAnimator(this, R.animator.animator_scale);
-
-
配置ObjectAnimator实例的自身的属性特征
-
根据业务通过addListener方法添加动画事件监听
 objanimator.addListener(new AnimatorListenerAdapter() {
            @Override
            public void onAnimationCancel(Animator animation) {
                super.onAnimationCancel(animation);
            }

            @Override
            public void onAnimationEnd(Animator animation) {
                super.onAnimationEnd(animation);
            }

            @Override
            public void onAnimationRepeat(Animator animation) {
                super.onAnimationRepeat(animation);
            }

            @Override
            public void onAnimationStart(Animator animation) {
                super.onAnimationStart(animation);
            }

            @Override
            public void onAnimationPause(Animator animation) {
                super.onAnimationPause(animation);
            }

            @Override
            public void onAnimationResume(Animator animation) {
                super.onAnimationResume(animation);
            }
        });
-
通过start方法启动ObjectAnimator实例执行动画
-
根据具体的属性可能还需要在onAnimationUpdate()回调中执行invalidate()方法以强制屏幕使用更新的动画值重绘自身。
3、AnimatorSet
AnimatorSet也继承自Animator,在实际开发中我们使用AnimatorSet编排多个属性动画,控制他们按顺序、同时播放等其他播放逻辑,AnimatorSet的主要使用步骤:
- 创建AnimatorSet实例,可以通过构造方法,也可以通过res/animator 目录下的xml形式构造
<?xml version="1.0" encoding="utf-8"?>
<set xmlns:android="http://schemas.android.com/apk/res/android"
    android:ordering="together" >
    <objectAnimator
        android:duration="3000"
        android:propertyName="scaleX"
        android:valueFrom="1"
        android:valueTo="0.5" >
    </objectAnimator>
    <objectAnimator
        android:duration="0000"
        android:propertyName="scaleY"
        android:valueFrom="1"
        android:valueTo="0.5" >
    </objectAnimator>
    <objectAnimator
        android:duration="3000"
        android:propertyName="alpha"
        android:valueFrom="1.0"
        android:valueTo="0">
    </objectAnimator>
</set>
从xml中加载动画创建实例(与通过xml创建ObjectAnimator实例一样)
AnimatorSet animSet = (AnimatorSet)AnimatorInflater.loadAnimator(this, R.animator.animatorset_scalealpha);
animSet.setTartget(mIvTest);
animSet.start();
- 调用play、with、after等方法配置各属性动画的播放逻辑关系
- 调用start方法启动AnimatorSet实例执行动画
AnimatorSet bouncer = new AnimatorSet();
bouncer.play(bounceAnim).before(squashAnim1);
bouncer.play(squashAnim1).with(squashAnim2);
bouncer.play(squashAnim1).with(stretchAnim1);
bouncer.play(squashAnim1).with(stretchAnim2);
bouncer.play(bounceBackAnim).after(stretchAnim2);
ValueAnimator fadeAnim = ObjectAnimator.ofFloat(newBall, "alpha", 1f, 0f);
fadeAnim.setDuration(250);
AnimatorSet animatorSet = new AnimatorSet();
animatorSet.play(bouncer).before(fadeAnim);
animatorSet.start();
4、使用LayoutTransition在布局改变时使用属性动画
当ViewGroup中的原有的布局改变时,无论是添加或删除ViewGroup中的子View,还是调用View的setVisibility方法改变状态,都可以通过LayoutTransition来配置相关的动画(比如说显示、消失或者在新位置的动画等等),ViewGrop的android:animateLayoutchanges属性设置为true时才生效,使用LayoutTransition在布局改变时使用属性动画的主要步骤:
- 创建LayoutTransition实例,可以通过构造方法直接,也可以通过根节点为layout-animation的res/animator 目录下的xml中映射
<layoutAnimation xmlns:android="http://schemas.android.com/apk/res/android"
        android:delay="30%"
        android:animationOrder="reverse"
        android:animation="@anim/slide_right"/>
-
设置属性动画,可以调用setAnimator方法,也可以直接在目标ViewGroup中android:layoutAnimation属性配置
-
根据业务通过addTransitionListener(new LayoutTransition.TransitionListener()设置监听
-
设置ViewGroup的LayoutTransition对象即可自动开启动画,可以通过ViewGroup的setLayoutTransition方法绑定实例,也可以通过xml形式绑定
5、使用属性动画用于构造StateListDrawable
Android提供了一个直接继承自Object的StateListAnimator(虽然也有Animator字样,但是这个类并不继承Animator或其子类) 用于支持把多个属性动画应用于View的状态变化,简而言之,当view的状态改变的时候而自动切换对应的属性动画。
5.1、直接在res/xml/目录下定义selector为根节点的xml文件
- 定义res/xml/animate_scale.xml
<?xml version="1.0" encoding="utf-8"?>
<selector xmlns:android="http://schemas.android.com/apk/res/android">
    <!-- the pressed state; increase x and y size to 150% -->
    <item android:state_pressed="true">
        <set>
            <objectAnimator android:propertyName="scaleX"
                android:duration="@android:integer/config_shortAnimTime"
                android:valueTo="1.5"
                android:valueType="floatType"/>
            <objectAnimator android:propertyName="scaleY"
                android:duration="@android:integer/config_shortAnimTime"
                android:valueTo="1.5"
                android:valueType="floatType"/>
        </set>
    </item>
    <!-- the default, non-pressed state; set x and y size to 100% -->
    <item android:state_pressed="false">
        <set>
            <objectAnimator android:propertyName="scaleX"
                android:duration="@android:integer/config_shortAnimTime"
                android:valueTo="1"
                android:valueType="floatType"/>
            <objectAnimator android:propertyName="scaleY"
                android:duration="@android:integer/config_shortAnimTime"
                android:valueTo="1"
                android:valueType="floatType"/>
        </set>
    </item>
</selector>
- 在View的android:stateListAnimator属性中配置
<Button android:stateListAnimator="@xml/animate_scale"
        ... />
5.2、通过代码动态构造
- 通过AnimatorInflater.loadStateListAnimator()方法映射创建实例
- 调用View的setStateListAnimator()方法设置
5.3、可以使用AnimatedStateListDrawable在状态更改之间播放可绘制动画,而不是动画视图的属性
AnimatedStateListDrawable与StateListAnimator不同,AnimatedStateListDrawable是在状态更改之间播放可绘制动画,而不是动画视图的属性,可以在res/drawable/目录下定义根节点为animated-selector的xml文件,并设置到View上即可。
<!-- res/drawable/myanimstatedrawable.xml -->
<animated-selector
    xmlns:android="http://schemas.android.com/apk/res/android">
    <!-- provide a different drawable for each state-->
    <item android:id="@+id/pressed" android:drawable="@drawable/drawableP"
        android:state_pressed="true"/>
    <item android:id="@+id/focused" android:drawable="@drawable/drawableF"
        android:state_focused="true"/>
    <item android:id="@id/default"
        android:drawable="@drawable/drawableD"/>
    <!-- specify a transition -->
    <transition android:fromId="@+id/default" android:toId="@+id/pressed">
        <animation-list>
            <item android:duration="15" android:drawable="@drawable/dt1"/>
            <item android:duration="15" android:drawable="@drawable/dt2"/>
            ...
        </animation-list>
    </transition>
</animated-selector>
6、对一个View的多个属性进行动画时的三种形式
ViewPropertyAnimator直接继承自Object,提供了一种使用单个底层Animator对象并行动画View的多个属性的简单方法。 它的行为很像ObjectAnimator,因为它修改了视图属性的实际值,但在一次动画多个属性时效率更高

7、点击View放大图片再次点击还原
package com.crazymo.animate;

import android.animation.Animator;
import android.animation.AnimatorListenerAdapter;
import android.animation.AnimatorSet;
import android.animation.ObjectAnimator;
import android.graphics.Point;
import android.graphics.Rect;
import android.os.Bundle;
import android.support.v7.app.AppCompatActivity;
import android.util.Log;
import android.view.View;
import android.view.animation.DecelerateInterpolator;
import android.widget.ImageView;

/**
 * 点击View时放大的属性动画
 * @author Crazy.Mo
 */
public class MainActivity extends AppCompatActivity {
    /**
     * 单位 ms
     */
    private final int shortAnimationDuration = 200;
    private Animator currentAnimator;

    @Override
    protected void onCreate(Bundle savedInstanceState) {
        super.onCreate(savedInstanceState);
        setContentView(R.layout.activity_main);
        //正常显示时把这个ImageView看成是放大后的缩略图
        final ImageView ivThumb = findViewById(R.id.iv_thumb);
        ivThumb.setOnClickListener(new View.OnClickListener() {
            @Override
            public void onClick(View v) {
                zoomImageFromThumb(ivThumb, R.mipmap.ic_panda);
            }
        });
    }

    /**
     * @param thumbView
     * @param imageResId
     */
    private void zoomImageFromThumb(final View thumbView, int imageResId) {
        //如果当前动画正在执行,先停止当前动画
        if (currentAnimator != null) {
            currentAnimator.cancel();
        }
        final ImageView expandedImageView = findViewById(R.id.iv_expanded);
        expandedImageView.setImageResource(imageResId);
        //用于保存View的起始边界和结束边界。
        final Rect startBounds = new Rect();
        final Rect finalBounds = new Rect();
        final Point globalOffset = new Point();

        /**
         * http://www.cnblogs.com/ai-developers/p/4413585.html
         * https://www.jianshu.com/p/30b0ae304518
         * getLocalVisibleRect(Rect r)方法可以把视图的长和宽映射到一个Rect对象上
         * getLocalVisibleRect的作用是获取视图本身可见的坐标区域,坐标以自己的左上角为原点(0,0)
         */
        thumbView.getGlobalVisibleRect(startBounds);
        Log.e("Crz", "startBounds=" + startBounds.toString());
        /**
         * getLocalVisibleRect的作用是获取视图本身可见的坐标区域,以自己的左上角为坐标原点(0,0),只要视图本身完全显示在屏幕范围内,
         * 那么左上角坐标就永远为(0,0),右下角坐标为(right,bottom),right和bottom正是图片的长和宽;即targetView.getLocalVisibleRect()的坐标总是等于:
         *(0, 0, targetView.getwidth(), targetView.getheight())但是假如视图移动到屏幕外,相应的坐标值会随之改变,
         * 可以看成是“相对坐标系”,以自己的左上角为原点,getLocalVisibleRect(Rect r)方法可以把视图的长和宽映射到一个Rect对象上。
         *
         *getGlobalVisibleRect方法的作用是获取视图在屏幕坐标中的可视区域的坐标(以屏幕左上角为坐标原点),简单来说就是视图的可视区域相对屏幕的,
         * 比如说视图的另外需要说的是,getGlobalVisibleRect还可以接受第二个Point类型的参数:targetView.getGlobalVisibleRect(Rect r, Point gobalOffset)调用完毕后,
         * globalOffset的值就是targetView原点偏离屏幕坐标原点的距离。
         *
         */
        findViewById(R.id.container).getGlobalVisibleRect(finalBounds, globalOffset);
        Log.e("Crz", "finalBounds=" + finalBounds.toString() + "globalOffset" + globalOffset);
        //该矩阵在x轴和y轴分别发生的偏移量(很有用,可以上下移动矩阵)
        startBounds.offset(-globalOffset.x, -globalOffset.y);
        Log.e("Crz", "startBounds2=" + startBounds.toString());
        finalBounds.offset(-globalOffset.x, -globalOffset.y);
        Log.e("Crz", "finalBounds2=" + finalBounds.toString());

        float startScale;
        if ((float) finalBounds.width() / finalBounds.height() > (float) startBounds.width() / startBounds.height()) {
            // 水平扩展起始边界
            startScale = (float) startBounds.height() / finalBounds.height();
            float startWidth = startScale * finalBounds.width();
            float deltaWidth = (startWidth - startBounds.width()) / 2;
            startBounds.left -= deltaWidth;
            startBounds.right += deltaWidth;
        } else {
            // 垂直扩展起始边界
            startScale = (float) startBounds.width() / finalBounds.width();
            float startHeight = startScale * finalBounds.height();
            float deltaHeight = (startHeight - startBounds.height()) / 2;
            startBounds.top -= deltaHeight;
            startBounds.bottom += deltaHeight;
        }

        thumbView.setAlpha(0f);
        expandedImageView.setVisibility(View.VISIBLE);

        // Set the pivot point for SCALE_X and SCALE_Y transformations to the top-left corner of the zoomed-in view (the default is the center of the view).
        expandedImageView.setPivotX(0f);
        expandedImageView.setPivotY(0f);

        // Construct and run the parallel animation of the four translation and scale properties (X, Y, SCALE_X, and SCALE_Y).
        AnimatorSet set = new AnimatorSet();
        set.play(ObjectAnimator.ofFloat(expandedImageView, View.X,startBounds.left, finalBounds.left))
           .with(ObjectAnimator.ofFloat(expandedImageView, View.Y,startBounds.top, finalBounds.top))
           .with(ObjectAnimator.ofFloat(expandedImageView, View.SCALE_X,startScale, 1f))
           .with(ObjectAnimator.ofFloat(expandedImageView,View.SCALE_Y, startScale, 1f));
        set.setDuration(shortAnimationDuration);
        set.setInterpolator(new DecelerateInterpolator());
        set.addListener(new AnimatorListenerAdapter() {
            @Override
            public void onAnimationEnd(Animator animation) {
                currentAnimator = null;
            }

            @Override
            public void onAnimationCancel(Animator animation) {
                currentAnimator = null;
            }
        });
        set.start();
        currentAnimator = set;

        // Upon clicking the zoomed-in image, it should zoom back down to the original bounds and show the thumbnail instead of the expanded image.
        final float startScaleFinal = startScale;
        expandedImageView.setOnClickListener(new View.OnClickListener() {
            @Override
            public void onClick(View view) {
                if (currentAnimator != null) {
                    currentAnimator.cancel();
                }

                // Animate the four positioning/sizing properties in parallel,
                // back to their original values.
                AnimatorSet set = new AnimatorSet();
                set.play(ObjectAnimator.ofFloat(expandedImageView, View.X, startBounds.left))
                        .with(ObjectAnimator.ofFloat(expandedImageView,View.Y, startBounds.top))
                        .with(ObjectAnimator.ofFloat(expandedImageView,View.SCALE_X, startScaleFinal))
                        .with(ObjectAnimator.ofFloat(expandedImageView,View.SCALE_Y, startScaleFinal));
                set.setDuration(shortAnimationDuration);
                set.setInterpolator(new DecelerateInterpolator());
                set.addListener(new AnimatorListenerAdapter() {
                    @Override
                    public void onAnimationEnd(Animator animation) {
                        thumbView.setAlpha(1f);
                        expandedImageView.setVisibility(View.GONE);
                        currentAnimator = null;
                    }

                    @Override
                    public void onAnimationCancel(Animator animation) {
                        thumbView.setAlpha(1f);
                        expandedImageView.setVisibility(View.GONE);
                        currentAnimator = null;
                    }
                });
                set.start();
                currentAnimator = set;
            }
        });
    }
}
布局文件
<FrameLayout xmlns:android="http://schemas.android.com/apk/res/android"
             android:id="@+id/container"
             android:layout_width="match_parent"
             android:layout_height="match_parent">

    <LinearLayout android:layout_width="match_parent"
                  android:layout_height="wrap_content"
                  android:orientation="vertical"
                  android:padding="16dp">

        <ImageView
            android:id="@+id/iv_thumb"
            android:layout_width="100dp"
            android:layout_height="75dp"
            android:layout_marginRight="1dp"
            android:src="@mipmap/ic_panda"
            android:scaleType="centerCrop"
            />

    </LinearLayout>

    <!-- This initially-hidden ImageView will hold the expanded/zoomed version of
         the images above. Without transformations applied, it takes up the entire
         screen. To achieve the "zoom" animation, this view's bounds are animated
         from the bounds of the thumbnail button above, to its final laid-out
         bounds.
         -->

    <ImageView
        android:id="@+id/iv_expanded"
        android:layout_width="match_parent"
        android:layout_height="match_parent"
        android:src="@mipmap/ic_launcher_round"
        android:visibility="invisible"
        />

</FrameLayout>
三、过渡(转场)动画Transition Animation
篇幅问题详见下文。