本项目的笔记和资料的Download,请点击这一句话自行获取。
day01-springboot(理论篇) ;day01-springboot(实践篇) ;day01-springboot(Thymeleaf快速入门)
5.Thymeleaf快速入门
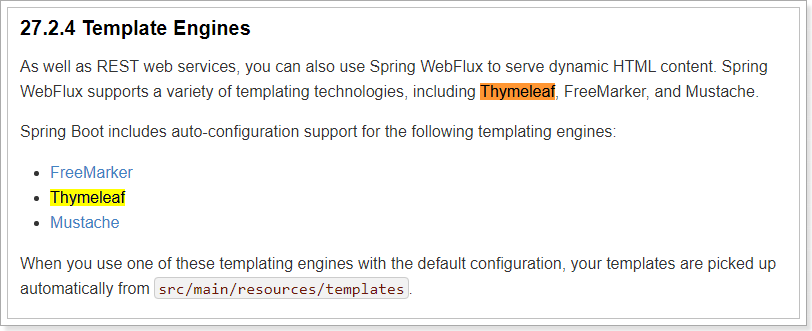
SpringBoot不推荐使用jsp,但是支持一些模板引擎技术:
5.1.为什么是Thymeleaf?
简单说, Thymeleaf 是一个模板引擎,它可以完全替代 JSP 。相较于其他的模板引擎,它有如下四个极吸引人的特点:
- 动静结合:Thymeleaf 在有网络和无网络的环境下皆可运行,即它可以让美工在浏览器查看页面的静态效果,也可以让程序员在服务器查看带数据的动态页面效果。这是由于它支持 html 原型,然后在 html 标签里增加额外的属性来达到模板+数据的展示方式。浏览器解释 html 时会忽略未定义的标签属性,所以 thymeleaf 的模板可以静态地运行;当有数据返回到页面时,Thymeleaf 标签会动态地替换掉静态内容,使页面动态显示。
- 开箱即用:它提供标准和spring标准两种方言,可以直接套用模板实现JSTL、 OGNL表达式效果,避免每天套模板、改jstl、改标签的困扰。同时开发人员也可以扩展和创建自定义的方言。
- 多方言支持:Thymeleaf 提供spring标准方言和一个与 SpringMVC 完美集成的可选模块,可以快速的实现表单绑定、属性编辑器、国际化等功能。
- 与SpringBoot完美整合,SpringBoot提供了Thymeleaf的默认配置,并且为Thymeleaf设置了视图解析器,我们可以像以前操作jsp一样来操作Thymeleaf。代码几乎没有任何区别,就是在模板语法上有区别。
接下来,我们就通过入门案例来体会Thymeleaf的魅力:
5.2.提供数据
编写一个controller方法,返回一些用户数据,放入模型中,将来在页面渲染
@GetMapping("/all")
public String all(ModelMap model) {
    // 查询用户
    List<User> users = this.userService.queryAll();
    // 放入模型
    model.addAttribute("users", users);
    // 返回模板名称(就是classpath:/templates/目录下的html文件名)
    return "users";
}
5.3.引入启动器
<dependency>
    <groupId>org.springframework.boot</groupId>
    <artifactId>spring-boot-starter-thymeleaf</artifactId>
</dependency>
SpringBoot会自动为Thymeleaf注册一个视图解析器:
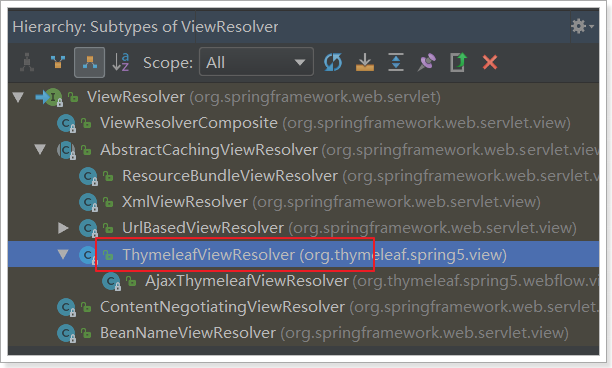
与解析JSP的InternalViewResolver类似,Thymeleaf也会根据前缀和后缀来确定模板文件的位置:
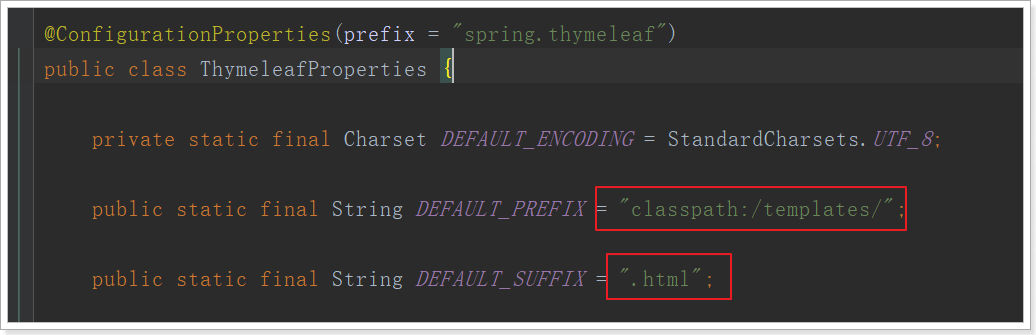
- 默认前缀:
classpath:/templates/ - 默认后缀:
.html
所以如果我们返回视图:users,会指向到 classpath:/templates/users.html
一般我们无需进行修改,默认即可。
5.4.静态页面
根据上面的介绍,模板默认放在classpath下的templates文件夹,我们新建一个html文件放入其中:
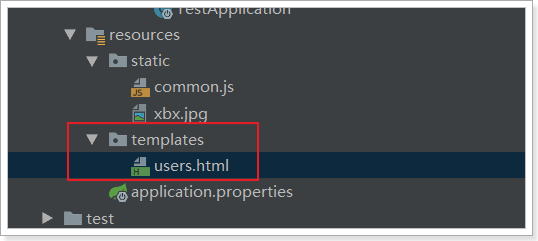
编写html模板,渲染模型中的数据:
注意,把html 的名称空间,改成:xmlns:th="http://www.thymeleaf.org" 会有语法提示。
<!DOCTYPE html>
<html xmlns:th="http://www.thymeleaf.org">
<!DOCTYPE html>
<html xmlns:th="http://www.thymeleaf.org">
<head>
    <meta charset="UTF-8">
    <title>首页</title>
    <style type="text/css">
        table {border-collapse: collapse; font-size: 14px; width: 80%; margin: auto}
        table, th, td {border: 1px solid darkslategray;padding: 10px}
    </style>
</head>
<body>
<div style="text-align: center">
    <span style="color: darkslategray; font-size: 30px">欢迎光临!</span>
    <hr/>
    <table class="list">
        <tr>
            <th>id</th>
            <th>姓名</th>
            <th>用户名</th>
            <th>年龄</th>
            <th>性别</th>
            <th>生日</th>
        </tr>
        <tr th:each="user : ${users}">
            <td th:text="${user.id}">1</td>
            <td th:text="${user.name}">张三</td>
            <td th:text="${user.userName}">zhangsan</td>
            <td th:text="${user.age}">20</td>
            <td th:text="${user.sex}">男</td>
            <td th:text="${user.birthday}">1980-02-30</td>
        </tr>
    </table>
</div>
</body>
</html>
我们看到这里使用了以下语法:
${}:这个类似与el表达式,但其实是ognl的语法,比el表达式更加强大th-指令:th-是利用了Html5中的自定义属性来实现的。如果不支持H5,可以用data-th-来代替th:each:类似于c:foreach遍历集合,但是语法更加简洁th:text:声明标签中的文本- 例如
<td th-text='${user.id}'>1</td>,如果user.id有值,会覆盖默认的1 - 如果没有值,则会显示td中默认的1。这正是thymeleaf能够动静结合的原因,模板解析失败不影响页面的显示效果,因为会显示默认值。
- 例如
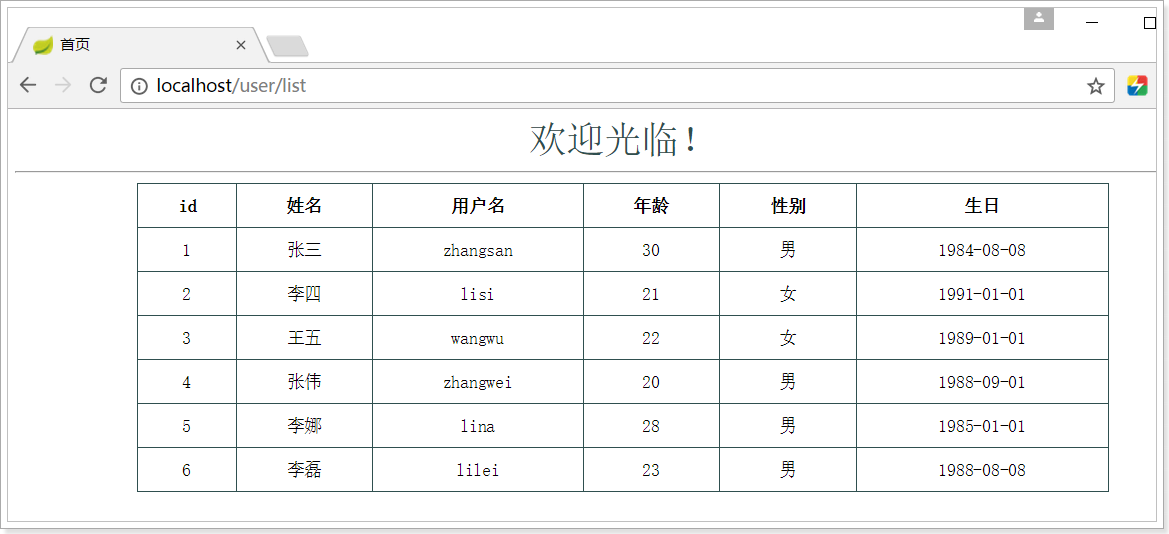
5.5.测试
接下来,我们打开页面测试一下:
5.6.模板缓存
Thymeleaf会在第一次对模板解析之后进行缓存,极大的提高了并发处理能力。但是这给我们开发带来了不便,修改页面后并不会立刻看到效果,我们开发阶段可以关掉缓存使用:
# 开发阶段关闭thymeleaf的模板缓存
spring.thymeleaf.cache=false
在Idea中,我们需要在修改页面后按快捷键:`Ctrl + Shift + F9` 对项目进行rebuild才可以。
========================
end