1、设置Yum存储库
首先,我们需要在我们的系统上配置yum存储库。创建一个新的repo文件/etc/yum.repos.d/wandisco-svn.repo并根据您的操作系统版本添加以下内容。
vim /etc/yum.repos.d/wandisco-svn.repo
添加以下内容:
[WandiscoSVN]
name=Wandisco SVN Repo
baseurl=http://opensource.wandisco.com/centos/$releasever/svn-1.8/RPMS/$basearch/
enabled=1
gpgcheck=0
或:
[Subversion]
name=Wandisco SVN Repo
baseurl=http://opensource.wandisco.com/centos/$releasever/svn-1.9/RPMS/$basearch/
enabled=1
gpgcheck=0
*注:由于我们这里安装的是SVN1.9,在repo文件里配置的是svn-1.9,如果要安装SVN1.8,可以改为svn-1.8
2、安装Subversion包
在安装最新软件包之前,从系统中删除现有的subversion软件包以消除冲突。
yum remove subversion*
现在使用yum命令行包管理器实用程序安装最新的可用Subversion包。
yum clean all
yum install subversion
3、验证SVN版本
在此阶段,您已在系统上成功安装Subversion客户端。让我们使用以下命令来验证svn客户端的版本。
svn --version
显示以下内容:
svn, version 1.8.19 (r1800620)
   compiled Aug 11 2017, 09:34:52 on x86_64-redhat-linux-gnu

Copyright (C) 2017 The Apache Software Foundation.
This software consists of contributions made by many people;
see the NOTICE file for more information.
Subversion is open source software, see http://subversion.apache.org/

The following repository access (RA) modules are available:

* ra_svn : Module for accessing a repository using the svn network protocol.
  - with Cyrus SASL authentication
  - handles 'svn' scheme
* ra_local : Module for accessing a repository on local disk.
  - handles 'file' scheme
* ra_serf : Module for accessing a repository via WebDAV protocol using serf.
  - using serf 1.3.7
  - handles 'http' scheme
  - handles 'https' scheme
4、创建运行SVN服务器所需的用户svn
groupadd svn
useradd -g svn svn
这里之所以要创建svn用户启动SVN服务器,而不使用root用户启动SVN服务器,是因为如果使用root用户启动SVN服务器,通过SVN客户端使用非root账户访问SVN服务器时,会出现
"xxxxxxxx db/txn-current-lock:permission denied"错误。
将svn用户加入sudoers用户中,执行命令:
visudo

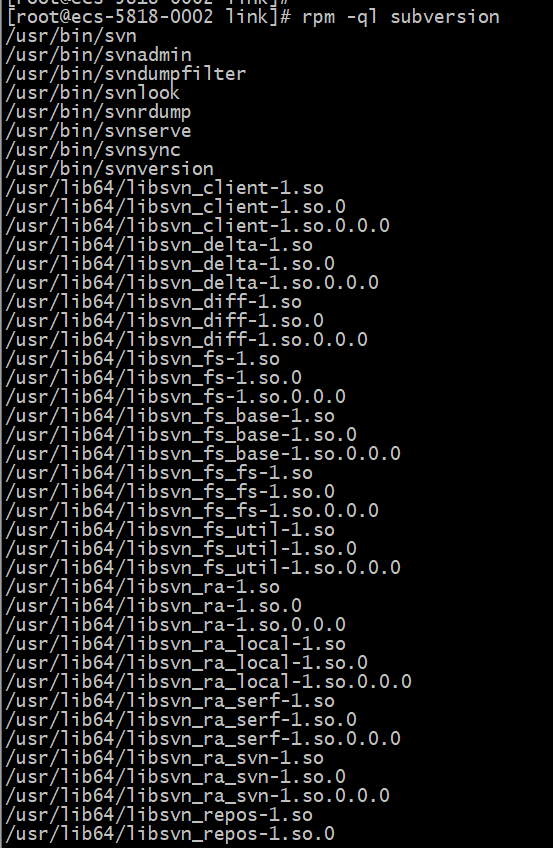
5、执行rpm -ql subversion查看安装位置
rpm -ql subversion
6、创建svn版本库目录
mkdir -p /opt/svnRepos
切换到svn用户,为svn用户添加这个文件夹的访问权限
chmod -R o+rw /opt/svnRepos
su - svn
cd /opt/svnRepos

7、创建版本库
svnadmin create /opt/svnRepos
执行命令后/opt/svnRepos文件夹下新增了一些文件夹
8、删除版本库
rm -rf /opt/svnRepos
9、添加用户密码和访问权限
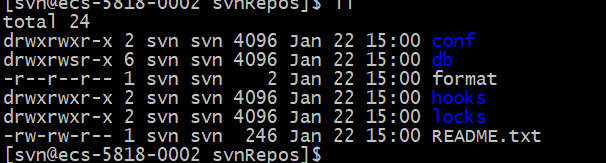
进入conf目录,可以看到以下文件
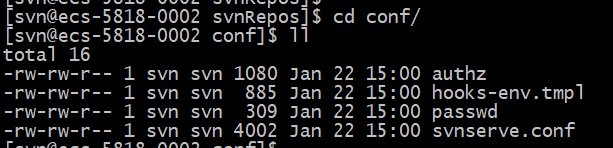
authz 文件是权限控制文件
passwd 是帐号密码文件
svnserve.conf 是SVN服务配置文件
10、设置帐号密码
修改passwd文件,在[users]段添加用户svnuser1和访问密码
在[users]块中添加用户和密码,格式:帐号=密码,如svnuser = linktech
vim passwd
内容如下:
### This file is an example password file for svnserve.
### Its format is similar to that of svnserve.conf. As shown in the
### example below it contains one section labelled [users].
### The name and password for each user follow, one account per line.

[users]
# harry = harryssecret
# sally = sallyssecret
svnuser = linktech
11、设置权限
修改authz文件,在文件最后为svnuser用户添加svn根目录访问权限
vim authz
在末尾添加如下代码:
[/]
svnuser = rw
内容如下:
### This file is an example authorization file for svnserve.
### Its format is identical to that of mod_authz_svn authorization
### files.
### As shown below each section defines authorizations for the path and
### (optional) repository specified by the section name.
### The authorizations follow. An authorization line can refer to:
###  - a single user,
###  - a group of users defined in a special [groups] section,
###  - an alias defined in a special [aliases] section,
###  - all authenticated users, using the '$authenticated' token,
###  - only anonymous users, using the '$anonymous' token,
###  - anyone, using the '*' wildcard.
###
### A match can be inverted by prefixing the rule with '~'. Rules can
### grant read ('r') access, read-write ('rw') access, or no access
### ('').

[aliases]
# joe = /C=XZ/ST=Dessert/L=Snake City/O=Snake Oil, Ltd./OU=Research Institute/CN=Joe Average

[groups]
# harry_and_sally = harry,sally
# harry_sally_and_joe = harry,sally,&joe

# [/foo/bar]
# harry = rw
# &joe = r
# * =

# [repository:/baz/fuz]
# @harry_and_sally = rw
# * = r
[/]
svnuser = rw
*注:这里[/]表示是svn根目录,svnuser=rw说明svnuser用户对根目录有读写权限。如果要限制某些用户对某些文件夹的读写权限, 这里的[/]可以改为具体的文件夹目录,再添加具体的用户权限,这里不再赘述。
12、修改svn配置文件
修改svnserve.conf文件
打开以下几项的注释(图中以红色圈标注)
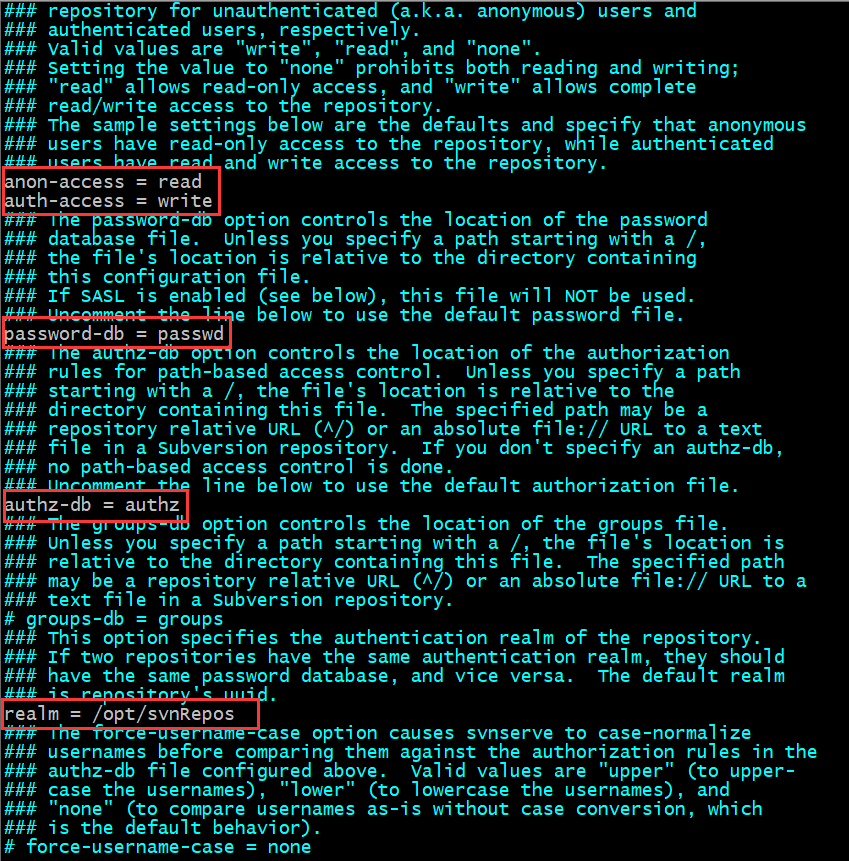
vim svnserve.conf
打开下面的几个注释:
anon-access = read     #匿名用户可读
auth-access = write    #授权用户可写
password-db = passwd   #使用哪个文件作为账号文件
authz-db = authz       #使用哪个文件作为权限文件
realm = /opt/svnRepos  # 认证空间名,版本库所在目录
*注:需要把 anon-access = read 配置修改为 anon-access = none ,如下所示:
[general]
anon-access = none         #控制非鉴权用户访问版本库的权限
auth-access = write        #控制鉴权用户访问版本库的权限
password-db = passwd       #指定用户名口令文件名
authz-db = authz           #指定权限配置文件名
realm = somnus             #指定版本库的认证域,即在登录时提示的认证域名称
13、启动SVN服务器
执行以下命令
svnserve -d -r /opt/svnRepos --config-file=/opt/svnRepos/conf/svnserve.conf
这条指令的参数-d表示以守护进程形式运行Svn服务器,-r表示Svn服务器的根目录,后接SVN的根目录。
--config-file 是Svn服务器启动所引用的配置文件,后接配置文件路径。
svnserve 指令的更多参数可以参考此文
https://linux.die.net/man/8/svnserve
-------------------------------------------------------分割线--------------------------------------------------------------
svnserve [ 选项 ]
描述
svnserve允许使用svn网络协议访问Subversion存储库。它既可以作为独立的服务器进程运行,也可以用完inetd。启动svnserve时必须选择一种操作模式。可识别以下选项:
-d, - damon
        使svnserve以守护进程模式运行。svnserve背景本身并接受并提供svn端口上的TCP / IP连接(默认情况下为3690)。
--listen-port = port
        原因Svnserve的上监听端口在守护进程模式时。
--listen-host = host
        使svnserve侦听host指定的接口,该接口可以是主机名或IP地址。
- 前景
        与-d一起使用时,此选项会使svnserve保持在前台。此选项主要用于调试。
-i, - intd
        使svnserve使用stdin / stdout文件描述符,因为它适用于运行inetd的守护进程。
-h, - help
        显示使用情况摘要并退出。
-version
        打印svnserve的版本和特定svnserve支持的存储库文件系统后端。
-r root,--root = 根
        设置svnserve提供的存储库的虚拟根目录。客户端提供的URL中的路径名将相对于此根进行解释,并且不允许转义此根。
-R --read-only
        强制禁止通过此svnserve实例执行所有写入操作,从而覆盖所有其他访问策略配置。不要使用此选项来设置常规存储库访问策略 - 这就是conf / svnserve.conf存储库配置文件的用途。此选项应仅用于通过调用svnserve的某种方法来限制访问- 例如,允许通过SSH进行写访问,而不是通过svnserve守护进程进行写访问,或者创建仅能够读访问的受限SSH密钥。
-t, -tunnel
        导致svnserve以隧道模式运行,这就像inetd操作模式(通过stdin / stdout提供一个连接),除了连接被认为是使用当前uid的用户名进行预身份验证。客户端在通过隧道代理程序运行时选择此标志。
--tunnel-user = username
        与--tunnel结合使用时,使用提供的用户名覆盖预先验证的用户名。这与ssh authorized_key文件的“command”指令结合使用非常有用,它允许多个提交者使用单个系统帐户,每个提交者都具有不同的ssh标识。
-T, --threads
        在守护程序模式下运行时,会导致svnserve为每个连接生成一个线程而不是一个进程。该svnserve的过程中仍然背景本身在启动时。
--config-file = filename
        指定时,svnserve在程序启动时读取文件名一次,并缓存svnserve配置以及从filename引用的任何密码和授权配置。使用此选项时,svnserve不会读取任何每个存储库的conf / svnserve.conf文件。有关此选项的文件格式的详细信息。
--pid-file = filename
        指定后,svnserve会将其进程ID写入filename。
-X,- 生活一次
        使svnserve接受svn端口上的一个连接,提供它并退出。此选项主要用于调试。
除非--config文件选项是在命令行上指定,一旦客户端通过传递URL选择了一个仓库,svnserve的 读取文件名为CONF / svnserve.conf的存储库中的目录,以确定库特定的设置,例如什么要使用的身份验证数据库以及要应用的授权策略。
repository-path /conf/svnserve.conf
svnserve.conf基于每个存储库控制svnserve守护程序的行为。它位于存储库的conf子目录中。
文件的整体结构与Subversion用户配置文件的结构相同。在顶层是部分,由方括号中的单词指定; 每个部分内部都是“variable = value”形式的变量定义。以“#”开头的行将被忽略。 svnserve.conf目前只使用一个名为“general”的节,并支持以下变量:
anon-access = none | 读 | 写
确定未经身份验证的用户的访问级别。write访问允许所有存储库操作。读访问允许除提交和更改修订版属性之外的所有操作。无访问权限不允许访问。读取默认级别。
auth-access = none | 读 | 写
使用与上述相同的访问级别确定经过身份验证的用户的访问级别。写入默认级别。
password-db = filename
设置密码数据库的位置。filename可能与存储库conf目录相关。没有默认值。密码数据库与此文件具有相同的总体格式。它只使用一个部分“用户”; 该部分中的每个变量都是用户名,每个值都是密码。
authz-db = filename
authz-db选项控制基于路径的访问控制的授权规则的位置。filename可能与存储库conf目录相关。没有默认值。如果未指定authz-db,则不会执行基于路径的访问控制。
realm = 领域名称
设置存储库的身份验证领域。如果两个存储库具有相同的密码数据库,则它们应具有相同的域,反之亦然; 此关联允许客户端为多个存储库使用单个缓存密码。默认领域值是存储库的uuid。
例
以下示例svnserve.conf允许对经过身份验证的用户进行读访问,不允许匿名用户访问,指向同一目录中的passwd数据库,并定义域名。
[一般]
anon-access = none
auth-access =读取
password-db = passwd
realm =我的第一个存储库
文件“passwd”看起来像:
[用户]
joeuser = joepassword
jayrandom = randomjay
-------------------------------------------------------分割线--------------------------------------------------------------
启动后可以查看到svnserve进程已经启动
ps -ef|grep svnserve

SVN默认的打开端口是3690
可以通过下面的命令查看:
netstat -antp | grep svn
tcp 0 0 0.0.0.0:3690 0.0.0.0:* LISTEN 442/svnserve
14、在防火墙上开放SVN服务器端口
SVN服务器默认端口是3690,如果要修改默认端口,可以在运行svnserve命令时添加
--listen-port 参数,后接需要指定的端口号。
执行以下命令在CentOS7系统防火墙上开放SVN服务器端口
firewall-cmd --permanent --add-port=3690/tcp
firewall-cmd --reload
#重启防火墙(正常不需要重启,只需要reload)
systemctl restart firewalld.service
15、在windows上测试
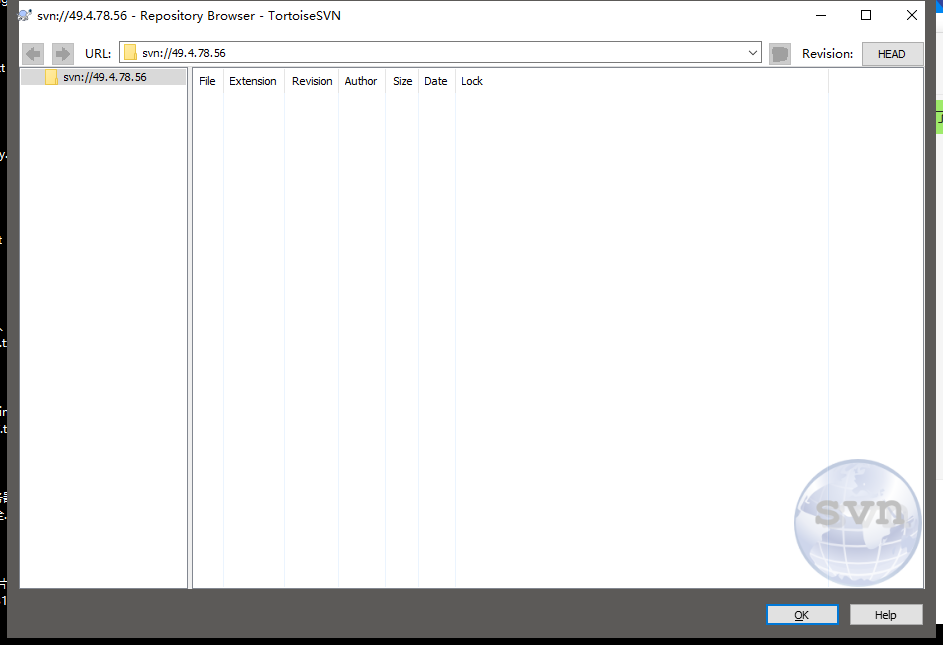
在客户端安装Tortoise SVN 1.9.7,安装完成后新建一个文件夹,在文件夹中右击,在弹出右键菜单中选择[Repo-brower]菜单,在弹出的地址对话框中输入SVN://IP(我们这里是svn://49.4.78.56),再在验证对话框中输入用户名rick和密码,即可以访问SVN根目录,我们使用svnuser用户登录SVN,如下图所示

输入刚才在passwd文件中定义的用户名和密码

我们使用svnuser用户在根目录下新建trunk,tags和branches三个文件夹

16、将SVN服务器设置为开机启动服务
网上有相关文件通过修改/etc/rc.local文件设置SVN服务器开机启动,这种做法在CentOS 7环境下已经过时,我们使用CentOS 7正常添加服务的方式。
我们切换到/usr/lib/systemd/system目录下,创建名为svnserver.service的文件,添加以下内容
cd /usr/lib/systemd/system
vim svnserver.service
添加以下内容
[Unit]
Description=SVN Server service
After=network.target

[Service]
Type=forking
ExecStart= /usr/bin/svnserve -d -r /opt/svnRepos --config-file=/opt/svnRepos/conf/svnserve.conf
ExecStop=  /home/svn/stopSVN.sh
User=svn
Restart=on-abort

[Install]
WantedBy=multi-user.target
这里启动SVN服务器直接使用命令,我试过写一个.sh文件替换,但启动后出现code=exited,status=203/EXEC错误,改用现在这种形式。
stopSVN.sh是用于关闭SVN服务的脚本文件,内容如下:
#!/bin/sh
#查找是否有svnserve对应的进程,有的话关闭进程
ps -ef|grep svnserve |grep -v grep
if [ $? -ne 0 ]
then
   echo "the svn server does not start"
else
   killall -9 sh svnserve
fi
保存svnserver.service文件后,执行以下命令
systemctl daemon-reload
systemctl enable svnserver.service
systemctl start svnserver.service
如果shell窗口没有出现错误信息,表示启动已成功,我们可以执行以下命令检查启动状态
systemctl status svnserver.service

运行以下命令停止服务
systemctl stop svnserver.service
我们这时再运行systemctl stop svnserver.service,可以看到服务已经被停掉
至此SVN服务器在Linux服务器安装成功,再次启动CentOS系统后SVN服务器会开机启动。
17、补充
补充一点,CentOS自带的SELinux默认是Enforcing,处于打开状态,对于自启动的SVN服务,会导致客户端访问SVN服务器时出现Permisson Denied的错误,我们需要手动关闭它,修改/etc/selinux/config文件
vim /etc/selinux/config

# This file controls the state of SELinux on the system.
# SELINUX= can take one of these three values:
#     enforcing - SELinux security policy is enforced.
#     permissive - SELinux prints warnings instead of enforcing.
#     disabled - No SELinux policy is loaded.
SELINUX=disabled
# SELINUXTYPE= can take one of three two values:
#     targeted - Targeted processes are protected,
#     minimum - Modification of targeted policy. Only selected processes are protected.
#     mls - Multi Level Security protection.
SELINUXTYPE=targeted
把SELINUX从enforcing改为disabled,重启系统,SVN服务自启动后,从客户端访问不再出现Permssion Denied错误。
临时关闭:
setenforce 0