版权声明:本文为博主原创文章,遵循 CC 4.0 BY-SA 版权协议,转载请附上原文出处链接和本声明。
1.编辑文件,添加jinja模块
[root@server1 apache]# cat install.sls
install-apache:
  pkg.installed:
    - pkgs:
      - httpd

  file.managed:
    - name: /etc/httpd/conf/httpd.conf
    - source: salt://apache/files/httpd.conf
    - template: jinja				##导入jinja模块
    - context:
      port: 80
      host: 172.25.31.2

  service.running:
    - name: httpd
    - reload: True
    - watch:
      - file: install-apache

[root@server1 apache]# vim files/httpd.conf
 42 Listen {{ host }}:{{ port}}


2.可以在一个文件中定义变量并且在httpd的配置文件中将变量进行导入,操作如下:
[root@server1 apache]# pwd
/srv/salt/apache
[root@server1 apache]# ls
apache.sls  files  install.sls  lib.sls
[root@server1 apache]# cat lib.sls
{% set host = '172.25.31.2' %}
[root@server1 apache]# cat install.sls
install-apache:
  pkg.installed:
    - pkgs:
      - httpd

  file.managed:
    - name: /etc/httpd/conf/httpd.conf
    - source: salt://apache/files/httpd.conf
    - template: jinja
    - context:
      port: 80

  service.running:
    - name: httpd
    - reload: True
    - watch:
      - file: install-apache
[root@server1 apache]# vim files/httpd.conf
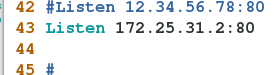
第一行插入:


测试:
[root@server1 apache]# salt server2 state.sls apache.install


server2的http配置文件第一行为空

jinja结合grains的使用
[root@server1 apache]# vim install.sls
[root@server1 apache]# cat install.sls
install-apache:
  pkg.installed:
    - pkgs:
      - httpd

  file.managed:
    - name: /etc/httpd/conf/httpd.conf
    - source: salt://apache/files/httpd.conf
    - template: jinja
    - context:
      port: 80
      host: {{ grains['ipv4'][1] }}

  service.running:
    - name: httpd
    - reload: True
    - watch:
      - file: install-apache
[root@server1 apache]# vim files/httpd.conf
[root@server1 apache]# salt server2 state.sls apache.install


jinja模版结合pillar
[root@server1 apache]# vim install.sls
[root@server1 apache]# cat install.sls
install-apache:
  pkg.installed:
    - pkgs:
      - httpd

  file.managed:
    - name: /etc/httpd/conf/httpd.conf
    - source: salt://apache/files/httpd.conf
    - template: jinja
    - context:
      port: {{ pillar['port'] }}		##引入pillar
      host: {{ pillar['ip'] }}

  service.running:
    - name: httpd
    - reload: True
    - watch:
      - file: install-apache
[root@server1 apache]# vim /srv/pillar/web/vars.sls
[root@server1 apache]# cat  /srv/pillar/web/vars.sls
{% if grains['fqdn'] == 'server2' %}
webserver: httpd
ip: 172.25.31.2
port: 80
{% elif grains['fqdn'] == 'server3' %}
webserver: nginx
ip:172.25.31.3
port: 80
{% endif %}
测试:
[root@server1 apache]# salt server2 state.sls apache.install

