文章目录
LINUX内核编译
1、获取linux内核源代码

在下载目录打开终端,输入命令
sudo tar -xvf linux*.tar.xz -C /usr/src
解压到/usr/src文件夹中
2、选择和启动内核配置程序
打开终端,输入命令cd /usr/src/linux-5.0
(最后一项为你所下载的linux内核源代码文件夹的名称)
准备安装环境,输入命令
sudo apt-get install kernel-package build-essential libncurses5-dev fakeroot
输入命令,sudo make menuconfig(文本选择界面,字符终端)
(ps:请提前安装好make,gcc,bison,flex,libncurses-dev。
安装方式为,sudo apt-get install make(换成对应的名字 即可)
打开后如图
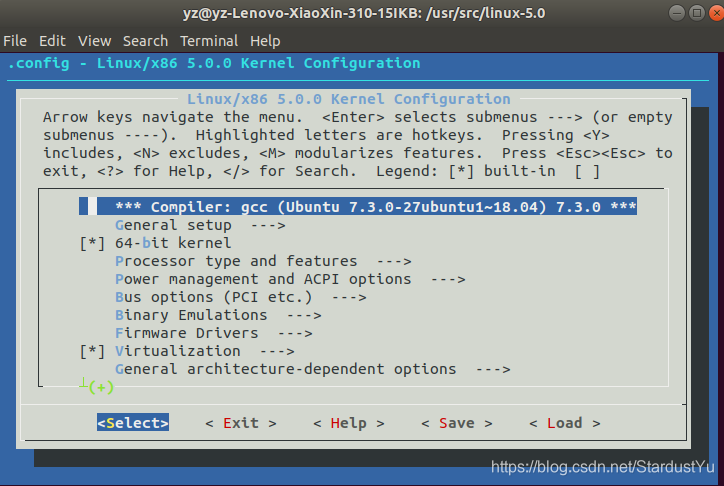
3.根据需要配置内核模块和参数(默认即可)
如需修改, 可参考如下
1 、Loadable module support 设置对可加载模块支持。
Enable loadable module support(y)
Set version info on all module symbols (n)
Kernel module loader(y)
2、 Processor type and features

设置CPU的类型
	Processor family
选择CPU类型
	High Memory Support (n)
	Math emulation (n)
	MTTR support: (n)
	Symmetric multi-processing support (n)
3 General setup
对普通的一些属性进行设置。
		Networking support:(y)
		PCI support(y)
		PCI access mode PCI卡存取模式: BIOS、Direct和Any
		Support for hot-pluggable devices (n)
		PCMCIA/CardBus support (n)
4 Parallel port support 并口支持 (y)
5 Plug and Play configuration:即插即用配置(y)
6 Block devices 块设备支持的选项
   Normal PC floppy disk support 软盘支持(y)
   Network block device support 网络块设备支持(y)
7 Networking options 选取TCP/IP networking选项
8 Network device support 网络设备支持的选项
例如:使用Realtek 8139网卡
	Ethernet(10 or 100Mbit) (y)
	RealTeck RTL-8139 PCI Fast Ethernet Adapter support (y)
9 Mice 鼠标设置选项:串口、PS/2等类型鼠标
10 File systems 文件系统类型。
DOS FAT fs 选项:FAT16, FAT32
NTFS file system support
/proc file system support: (y)
11.Sound 声卡驱动,选项:声卡型号
12.USB support USB接口的支持,根据需要选择。
4、重新编译新的内核
sudo make clean        (清除旧的编译结果
sudo make bzImage
5、编译和安装模块
sudo make modules
sudo make modules_install
(模块被编译且安装到 /usr/lib/<内核版本号> 目录下。
sudo make install
6、启动新内核
配置grub,更新grub启动信息
sudo update-grub
如下配置默认也可
cp bzImage /boot/bzImage
LILO
配置/etc/lilo.conf
image=/boot/bzImage
label=newLinux build by Zhang San Feb.28, 2012
命令 #lilo 使配置生效
GRUB (与发行版本有关)
配置/boot/grub/grub.conf
title newLinux build by Zhang San Feb.28, 2012
root (hd0,1)
kernel /boot/bzImage ro root=/dev/hda2

修改默认启动内核(转
Ubuntu 18.04+windows10双系统中
要将默认内核更改为启动,可以执行以下操作:
1.打开文件/ etc / default / grub。
2.将GRUB_DEFAULT的值更改为您希望选择的菜单选项的索引值。
例如,在启动过程中的GRUB菜单中有:
Ubuntu

Advanced options for Ubuntu

Windows 10 (loader) (on /dev/sda1)

system setup
我的 “Advananced options for Ubuntu” 子菜单如下所示:
Ubuntu, with Linux 4.13.0-26-generic

Ubuntu, with Linux 4.13.0-26-generic (upstart)

Ubuntu, with Linux 4.13.0-26-generic (recovery mode)

Ubuntu, with Linux 4.10.0-42-generic

Ubuntu, with Linux 4.10.0-42-generic (upstart)

Ubuntu, with Linux 4.10.0-42-generic (recovery mode)
grep 'menuentry' /boot/grub/grub.cfg(也可通过这个命令查看
现在,第一个选项是索引0,第二个是1,第三个是2,依此类推。(即GRUB菜单中的 Ubuntu为0,Advanced options for Ubuntu为1,…)
在我的情况下,我想选择 “Advanced options for Ubuntu” 子菜单中的 “Ubuntu, with Linux 4.10.0-42-generic”(“以前旧的内核版本”)
设置 sudo /etc/default/grub
将GRUB_DEFAULT设为:
GRUB_DEFAULT = “1> 3”
使用 '>' 符号来指定有一个子菜单(注意符号 > 和数字 3 之间有空格,所以需要双引号)。在这种情况下,我在主菜单中选择第2个选项(索引1),在子菜单中选择第四个选项(索引3)。
3.一旦对/etc/default/grub进行了更改,请保存并运行以下命令来更新GRUB配置文件(必须,否则不生效):
sudo update-grub
4.重新启动,现在应该默认启动旧的内核版本。
增加系统调用(LINUX-4.4.177为例子
1、增加系统调用函数
进入 cd /usr/src/linux-4.4.177
进入sudo gedit kernel/sys.c编写函数(最下侧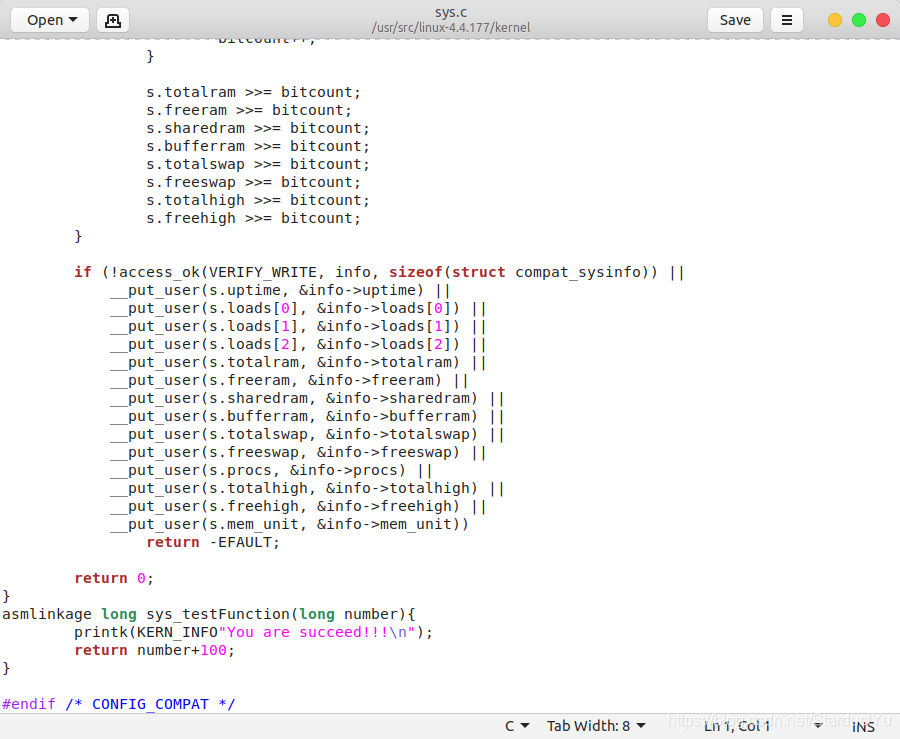
其中,sys_后的名字自己取,本人取得testFuction,记住这个名字
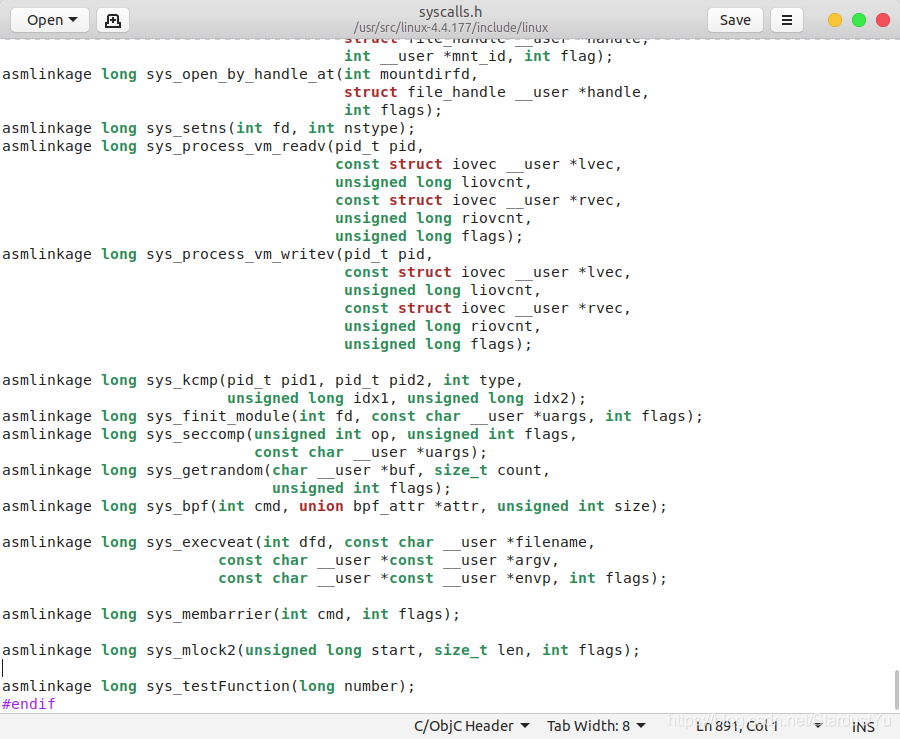
2.修改头文件,增加系统调用声明
修改sudo gedit include/linux/syscalls.h
4.添加系统调用表
修改sudo vim arch/x86/entry/syscalls/syscall_64.tbl
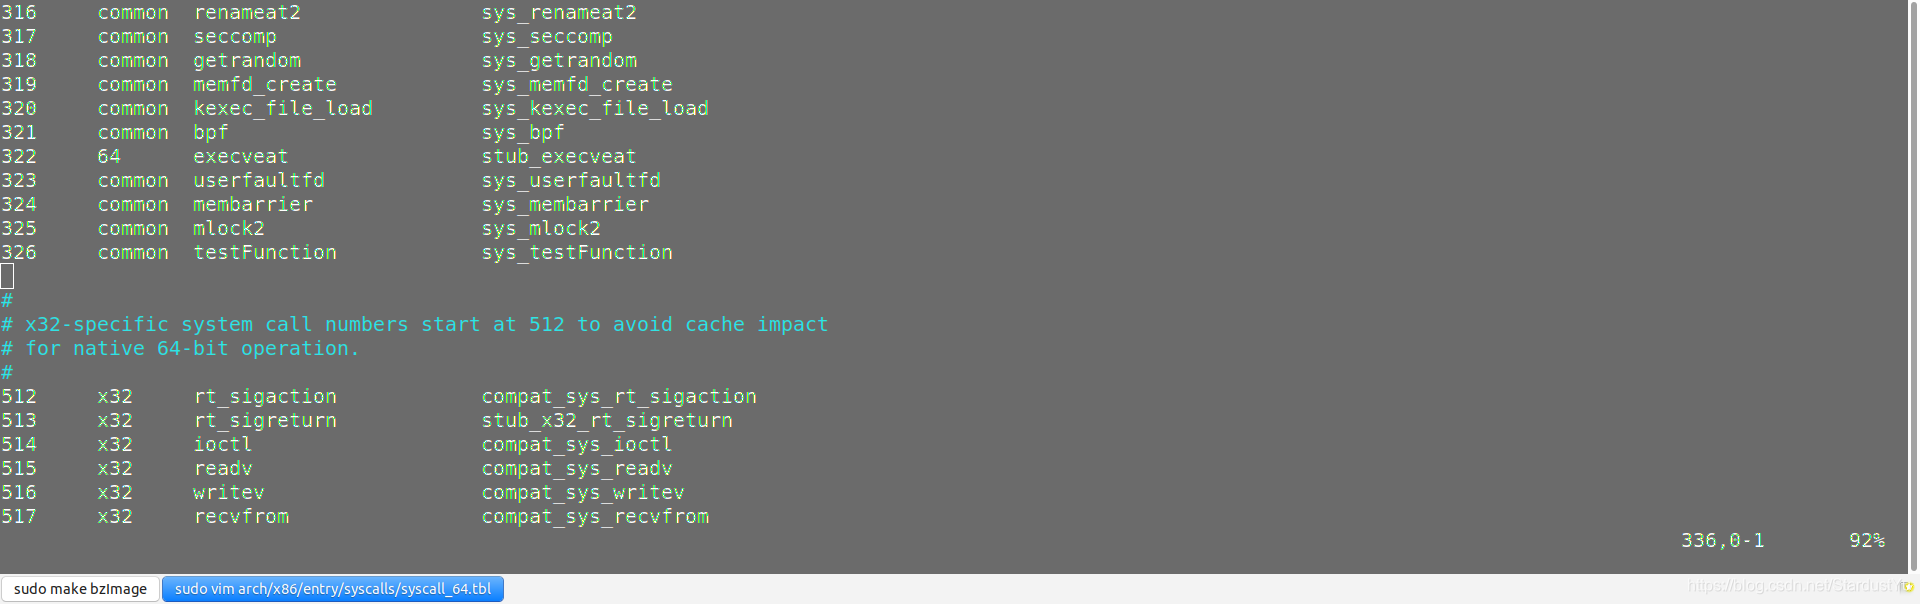
接下来编译新内核即可
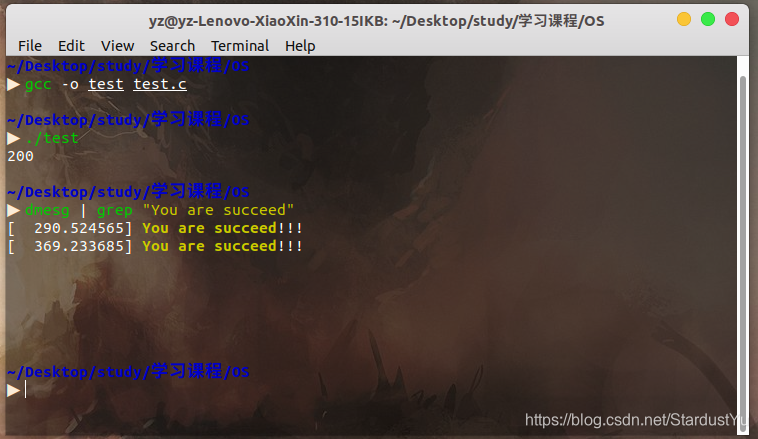
系统调用测试

精简内核
将原来的 make menuconfig 更改为 make localmodconfig 即可完成精简
make localmodconfig 会执行 lsmod 命令查看当前系统中加载了哪些模块 (Modules), 并最后将原来的 .config 中不需要的模块去掉,仅保留前面 lsmod 出来的这些模块,从而简化了内核的配置过程。
删除内核(以4.9.165为例
sudo rm -rf /lib/modules/4.9.165

sudo rm -rf /usr/src/linux-headers-4.9.165

sudo rm /boot/*4.9.165*

sudo rm /var/lib/dpkg/info/linux-headers-4.9.165*

sudo rm -rf /usr/src/linux-4.9.165

sudo update-grub