网上关于tkinter的canvas组件系统的中文教程很少,英文教程未知。要么是专业的参考文档,没有丰富的实例,要么在不同的论坛,博客平台零零散散存在一些canvas的例子,这给学习canvas带来了不便。也许应该从各种canvas的实例着手,结合参考文档,边学习边总结。除此之外从哪里开始也是一个问题,目前对我来说,需求是通过canvas实现自绘按钮,那么就这样开始吧。
1.canvas绘制基本图形的方法
1.1画线(Line)
方法:
create_line(x0,y0,x1,y1,……,xn,yn,*options)
参数x0到yn指定显示中一系列的两点或多点坐标,来描述一条线或一系列线。在数的后面可以是任何数量的选项-值对。每对用户来配置选项。这些相同的选项-值对可以用在itemconfigure调用中修改项的配置。
例子:
from tkinter import *
root=Tk()
cv=Canvas(root,background="white")
cv.pack()

line_point=[(10,10),(12,11),(15,18),
            (20,22),(24,23),(30,39),
            (40,45),(50,60),(60,10),
            (100,101),(110,110),(112,114),
            (116,115),(120,118),(170,200)]
line1=cv.create_line(line_point,fill="orange",dash=(10,6,3),arrow=LAST,smooth=TRUE,width=5)
line2=cv.create_line(line_point,fill="blue",dash=(10,6,3),arrow=LAST,smooth=TRUE,width=5)
line3=cv.create_line(line_point,fill="red",dash=(10,6,3),arrow=LAST,smooth=TRUE,width=5)

cv.coords(line1,20,20,30,10,170,200)
cv.delete(line3)

root.mainloop()

用到的属性
·fill,设置线的填充颜色
·dash,设置为虚线
·arrow,设置线的箭头,默认为None,表示无箭头,还可以设置为FIRST,LAST,BOTH
·smooth,值为布尔值,指出线是否是曲的
·width,设置线宽
其他方法
·coords(item,x0,y0,x1,y1,……,xn,yn
查询或修改一个项的坐标
·delete(item)
删除一项
1.2画矩形(Rectangle)
方法:
create_rectangle(x0,y0,x1,y1,*options)
参数x0,y0,x1,y1指定显示中长方形对坐标(左上角和右下角),在数的后面可以是任何数量的选项-值对。每对用户来配置选项。这些相同的选项-值对可以用在itemconfigure调用中修改项的配置。
例子:
from tkinter import *
root=Tk()
cv=Canvas(root,background="white")
cv.pack()

rt1=cv.create_rectangle(100,50,300,200,outline="green",fill="red",stipple="gray25")
rt2=cv.create_rectangle(100,50,300,200,outline="green",fill="green",stipple="gray25")

cv.coords(rt2,60,70,260,220)

root.mainloop()
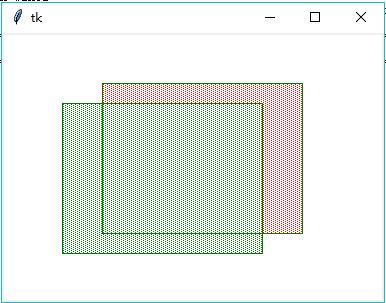
用到的属性
·outline,边界颜色,如果为空则不画边界
·stipple,指出长方形填充点的样式,单位为bitmap
其他方法
coords,delete
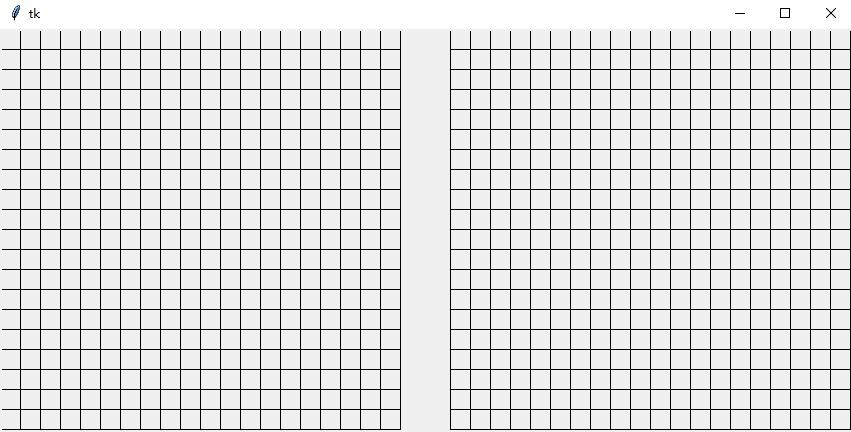
例2:
from tkinter import *
root=Tk()
cv=Canvas(root,width=850,height=400)
cv.pack()
pw=20
for k in range(2):
    for i in range(20):
        for j in range(20):
            cv.create_rectangle(
            k*450+j*pw, i*pw, k*450+(j+1)*pw, (i+1)*pw)

root.mainloop()
1.3画多边形(Polygon)
方法:
create_polygon(x0,y0,x1,y1,*options)
参数x0到yn指定显示中一系列的三点或多点坐标,来描述一个封闭多边形。起点和终点可以相同也可以不同;不管相同与否,Tkinter都画出封闭的多边形。在数的后面可以是任何数量的选项-值对。每对用户来配置选项。这些相同的选项-值对可以用在itemconfigure调用中修改项的配置。
例1:
from tkinter import *
root=Tk()
cv=Canvas(root)
cv.pack()

poly_points=[(0,80),(140,0),(140,40),(270,40),
             (270,120),(140,120),(140,160)]
cv.create_polygon(poly_points,fill="pink")
root.mainloop()
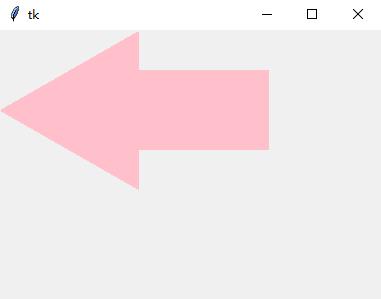
属性有outline,smooth,stipple,tags
其他方法:delete,coords.itemconfigure
扩展阅读Canvas Widgets
以下为节选:
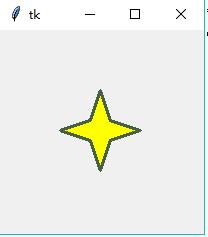
当你看到这里的时候,可能马上就到圣诞节了,也可能没有,我们通过Tkinter创建一些星星来提高下一个圣诞节的氛围。第一颗星星是直接创建的,几乎不使用任何编程的技巧。
from tkinter import *
canvas_width = 200
canvas_height =200
python_green = "#476042"
master = Tk()
w = Canvas(master,
           width=canvas_width,
           height=canvas_height)
w.pack()
points = [100, 140, 110, 110, 140, 100, 110, 90, 100, 60, 90, 90, 60, 100, 90, 110]
w.create_polygon(points, outline=python_green,
            fill='yellow', width=3)
mainloop()
正如我们提及的,这是一种很笨拙的方法。设想如果我们需要改变星星的尺寸或者厚度,我们就必须手动地改变所有的点坐标,这很容易出错而且显得很繁琐。所以我们提供前一个脚本的新版本,将包含更多的编程技能。我们使用函数来生成星星,使用一个起始点和两个表示长度的p和t参数创建星星:
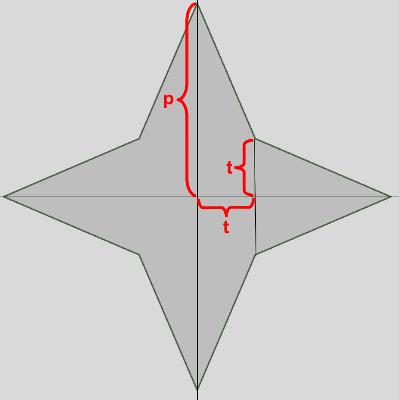
我们改进的程序如下:
from tkinter import *

canvas_width = 400
canvas_height =400
python_green = "#476042"

def polygon_star(canvas, x,y,p,t, outline=python_green, fill='yellow', width = 1):
   points = []
   for i in (1,-1):
      points.extend((x,          y + i*p))
      points.extend((x + i*t, y + i*t))
      points.extend((x + i*p, y))
      points.extend((x + i*t, y - i * t))

   print(points)

   canvas.create_polygon(points, outline=outline,
                         fill=fill, width=width)

master = Tk()

w = Canvas(master,
           width=canvas_width,
           height=canvas_height)
w.pack()

p = 50
t = 15

nsteps = 10
step_x = int(canvas_width / nsteps)
step_y = int(canvas_height / nsteps)

for i in range(1, nsteps):
   polygon_star(w,i*step_x,i*step_y,p,t,outline='red',fill='gold', width=3)
   polygon_star(w,i*step_x,canvas_height - i*step_y,p,t,outline='red',fill='gold', width=3)

mainloop()

1.4画椭圆
方法:
create_oval(x0,y0,x1,y1,*options)
x0,y0,x1,x2给出椭圆的矩形的对角坐标。在坐标之后可以是任何数量的选项-值对。每对用户来配置选项。这些相同的选项-值对可以用在itemconfigure调用中修改项的配置。
例子:
from tkinter import *
root=Tk()

cv=Canvas(root)

cv.create_oval(50,30,300,200,fill="lightblue",outline="",width=3)

cv.pack()
mainloop()

属性有:outline,stipple(貌似无效),tags
其他方法:delete,coords.itemconfigure
1.5画弧形(Arc)
方法:create_arc(x0,y0,x1,y1,*options)
x0,y0,x1,y1给出包含定义弧的椭圆的矩形对角坐标。在坐标之后可以是任何数量的选项-值对。每对用户来配置选项。这些相同的选项-值对可以用在itemconfigure调用中修改项的配置。
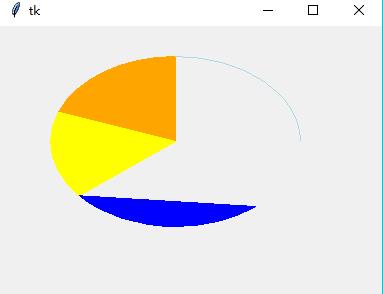
例子:
from tkinter import *
root=Tk()

cv=Canvas(root)

cv.create_arc(50,30,300,200,fill="lightblue",outline="lightblue",style="arc")
cv.create_arc(50,30,300,200,fill="orange",outline="",start=90,extent=70)
cv.create_arc(50,30,300,200,fill="yellow",outline="",start=160,extent=60)
cv.create_arc(50,30,300,200,fill="blue",outline="",start=220,extent=90,style=CHORD)
cv.pack()
mainloop()
用到的属性:
·start,指定弧所占角度起始点,角度是按照顺时针方向测量的,角度大小可以是正,也可以是负
·extent,指出所包含角度的大小,角度从起始点按逆时针方向开始
·style,指定如何画弧,默认是PIESLICE,还可以设置为ARC,CHORD
其他属性:
stipple(未知),outlinestipple(未知),tags等
其他方法:delete,coords
1.6画位图(Bitmap)
方法:create_bitmap(x,y,*options)
参数x,y指定显示中用来定位位图的点的坐标(使用anchor选项)。在坐标后面可以是任何数量的选项-值对。每对用户来配置选项。这些相同的选项-值对可以用在itemconfigure调用中修改项的配置。
例子:
from tkinter import *
root=Tk()

cv=Canvas(root)

bitmaps = ["error", "gray75", "gray50", "gray25", "gray12",
"hourglass", "info", "questhead", "question", "warning"]
for i in range(len(bitmaps)):
    cv.create_bitmap((i+1)*30,30,bitmap=bitmaps[i])

cv.pack()
mainloop()

属性:tags,bitmap
其他方法:delete,coords
1.7画图像(Image)
create_image(x,y,*options)
参数x,y指定显示中用来定位图像的点的坐标(使用anchor选项)。在坐标后面可以是任何数量的选项-值对。每对用户来配置选项。这些相同的选项-值对可以用在itemconfigure调用中修改项的配置。
属性:tags,image
其他方法:delete,coords
1.8文本(Text)
方法:create_text(x,y,*options)
参数x,y指定显示文本的点的坐标,在数的后面可以是任何数量的选项-值对。每对用户来配置选项。这些相同的选项-值对可以用在itemconfigure调用中修改项的配置。
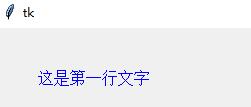
例子:
from tkinter import *
root=Tk()

cv=Canvas(root)

cv.create_text(100,50,text="这是第一行文字",font="黑体,16",fill="Blue",)

cv.pack()
mainloop()
属性:font,justify,tags,text
其他属性:stipple(未知)
其他方法:delete,coords
1.9画窗口
方法:create_window(x,y,*options
参数x,y指定显示窗口的点的坐标,在数的后面可以是任何数量的选项-值对。每对用户来配置选项。这些相同的选项-值对可以用在itemconfigure调用中修改项的配置。
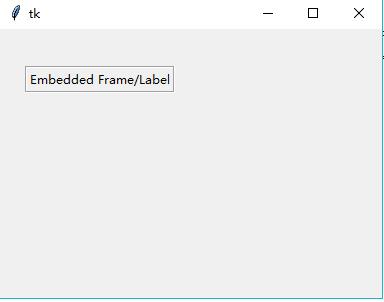
例子:
from tkinter import *
root=Tk()

cv=Canvas(root)

frm=Frame(cv,relief=GROOVE,borderwidth=2)
Label(frm,text="Embedded Frame/Label").pack()
cv.create_window(100,50,window=frm,anchor=CENTER)

cv.pack()
mainloop()
属性:tags,window
其他方法:delete,coords