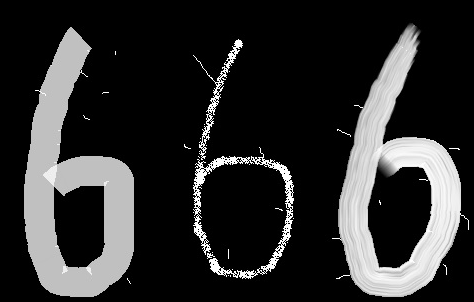
1.腐蚀
腐蚀的效果是把图片"变瘦",其原理是在原图的小区域内取局部最小值。因为是二值化图,只有0和255,所以小区域内有一个是0该像素点就为0:
import cv2
import numpy as np

img = cv2.imread("666.jpg", 0)
kernel = np.ones((3, 3), np.uint8)
erodtion = cv2.erode(img, kernel, iterations=1)

这个核也叫结构元素,因为形态学操作其实也是应用卷积来实现的。结构元素可以是矩形/椭圆/十字形,可以用cv2.getStructuringElement()来生成不同形状的结构元素,比如:
kernel = cv2.getStructuringElement(cv2.MORPH_RECT, (5, 5))  # 矩形结构
kernel = cv2.getStructuringElement(cv2.MORPH_ELLIPSE, (5, 5))  # 椭圆结构
kernel = cv2.getStructuringElement(cv2.MORPH_CROSS, (5, 5))  # 十字形结构

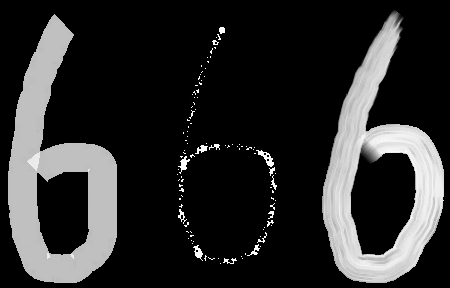
2.膨胀
膨胀与腐蚀相反,取的是局部最大值,效果是把图片"变胖":
import cv2
import numpy as np

img = cv2.imread("666.jpg", 0)
kernel = np.ones((3, 3), np.uint8)
erodtion = cv2.dilate(img, kernel, iterations=1)
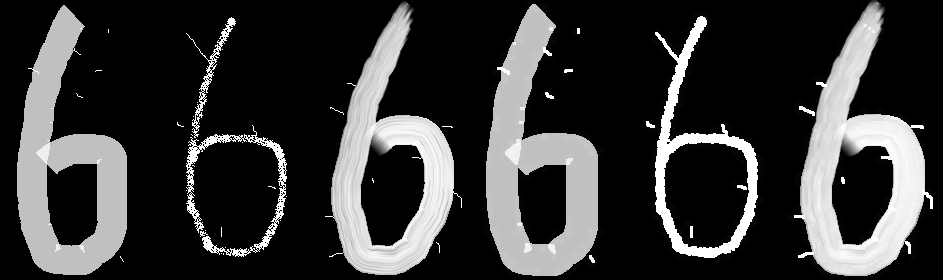
从上边的效果可以看出,先通过腐蚀将边角毛躁去掉再经过膨胀之后就可以大致复原没有毛躁的原图
import cv2
import numpy as np

img = cv2.imread("666.jpg", 0)
cv2.imshow("img", img)
kernel = np.ones((2, 2), np.uint8)
kerne2 = np.ones((7, 7), np.uint8)
erodtion = cv2.erode(img, kernel, iterations=1)
cv2.imshow("erodtion", erodtion)
dilation = cv2.dilate(erodtion, kerne2, iterations=2)
cv2.imshow("dilation", dilation)
cv2.waitKey(-1)