项目链接:https://github.com/cocos-creator/tutorial-first-game/tree/master/polished_project
1.通过脚本属性引用场景节点
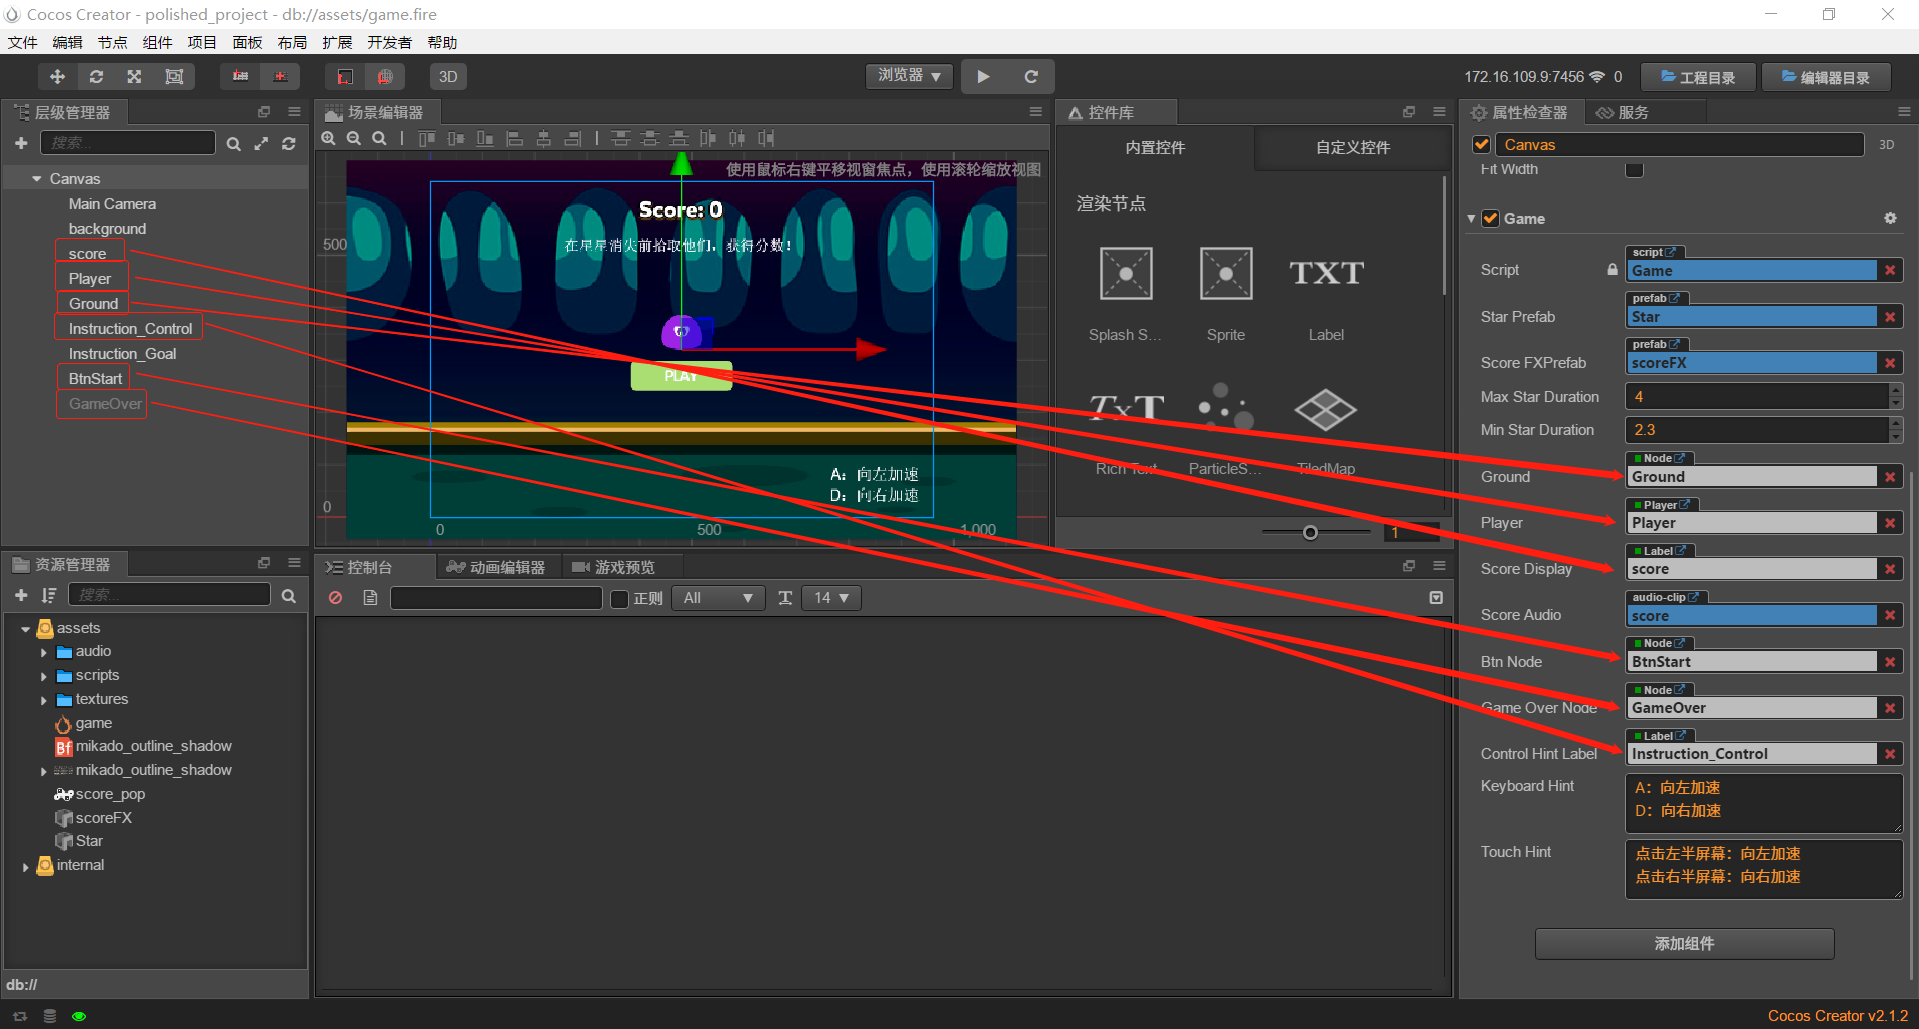
通过脚本显式地暴露属性,从而引用场景中需要用到的节点对象。也就是说场景需要用到的节点资源,通通都要留个属性节点作为入口
2.cc.sys.isMobile
1 // initialize control hint
2 var hintText = cc.sys.isMobile ? this.touchHint : this.keyboardHint;
3 this.controlHintLabel.string = hintText;
cc.sys.isMobile属性用于判断当前系统是否为手机设备
3.NodePool对象缓存池类型
cc.NodePool 是用于管理节点对象的对象缓存池
它可以帮助您提高游戏性能,适用于优化对象的反复创建和销毁
constructor(); 使用构造函数来创建一个节点专用的对象池,您可以传递一个组件类型或名称,用于处理节点回收和复用时的事件逻辑
1 // initialize star and score pool
2 this.starPool = new cc.NodePool('Star');
3 this.scorePool = new cc.NodePool('ScoreFX');
get(); 获取对象池中的对象,如果对象池没有可用对象,则返回空
1 // 使用给定的模板在场景中生成一个新节点
2 if (this.starPool.size() > 0) {
3     newStar = this.starPool.get(this); // this will be passed to Star's reuse method
4 }else {
5     newStar = cc.instantiate(this.starPrefab);
6 }
put(); 向缓冲池中存入一个不再需要的节点对象
1 this.starPool.put(star);
2 this.scorePool.put(scoreFX);
4.node.active属性
this.gameOverNode.active = false;
node.active = true || false;用来显示或隐藏节点
5.node.addChild(newNode);
每次新创建完预制资源以后,记得把新的节点添加到父节点下面
1 // 将新增的节点添加到 Canvas 节点下面
2 this.node.addChild(newStar);
易错点:先设置属性,然后添加到父节点
比如下面这段代码会导致精灵无法摘取星星
1 var newStar = cc.instantiate(this.starPrefab);
2 // 为星星设置一个随机位置
3 newStar.setPosition(this.getNewStarPosition());
4 // pass Game instance to star
5 newStar.getComponent('Star').init(this);
6 // 将新增的节点添加到 Canvas 节点下面
7 this.node.addChild(newStar);
这段代码问题出在this.node.addChild(newStar);精灵之所以无法摘取星星,正是因为newStar节点还没添加到Canvas画布下面,所以newStar还不是Canvas下的子节点,所以newStar.setPosition()、newStar.getComponent()这两个方法执行无效。
只要把this.node.addChild(newStar); 方法放到newStar.setPosition()、newStar.getComponent()这两个方法的前面即可
修改后的代码
1 // 将新增的节点添加到 Canvas 节点下面
2 this.node.addChild(newStar);
3 // 为星星设置一个随机位置
4 newStar.setPosition(this.getNewStarPosition());
5 // pass Game instance to star
6 newStar.getComponent('Star').init(this);
6.如果函数功能不是太多,就不要嵌套太多的函数
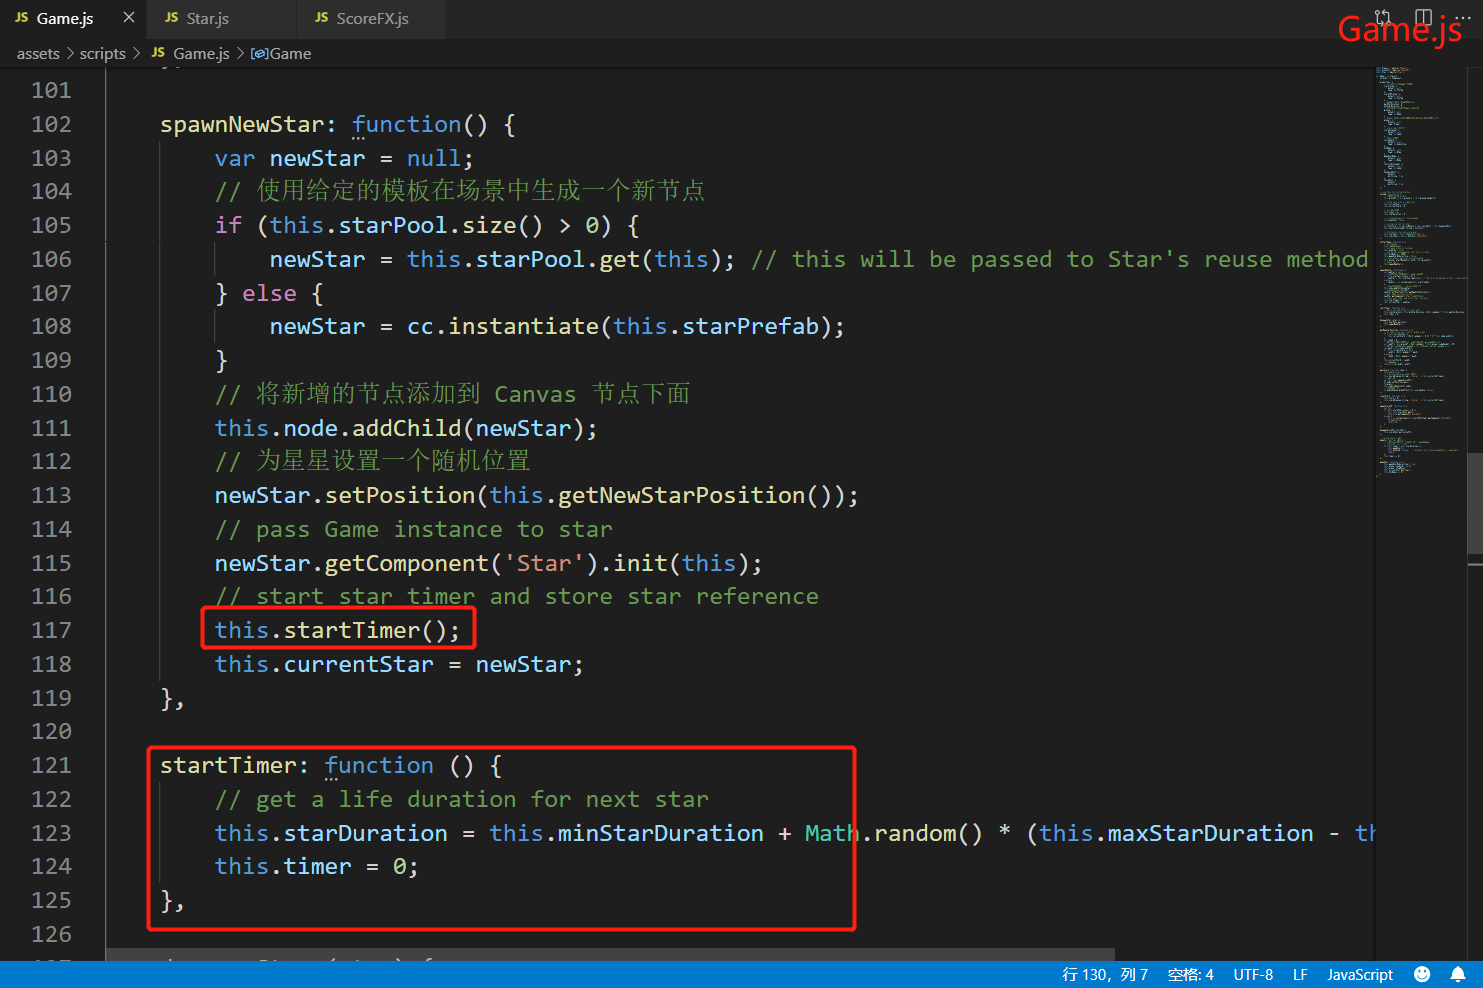
如上代码,startTimer()只有两行代码并且该函数只调用了一次,因此把startTimer()函数合并到spawnNewStar(),从而减少代码的冗余性,增强代码的可读性
7.if...else改写成三目运算符
1 if (this.currentStarX >= 0) {
2     randX = -Math.random() * maxX;
3 }else {
4     randX = Math.random() * maxX;
5 }
修改后的代码
randX=this.currentStarX >= 0?-Math.random() * maxX:Math.random() * maxX
将if…else改写成三目运算符可以减少更多的代码量
8.通过this.enabled属性来控制游戏开始与关闭
Game.js通过this.enabled属性来控制游戏开关
也可以从Game.js调用this.player.enabled = false;来关闭Player.js
9.this.currentStar.destroy();
node.destroy(); 销毁该对象,并释放所有它对其它对象的引用
通常在游戏GameOver的时候调用destroy()方法,释放一些资源
实际销毁操作会延迟到当前帧渲染前执行。从下一帧开始,该对象将不再可用。 您可以在访问对象之前使用 cc.isValid(obj) 来检查对象是否已被销毁
10.Cocos Creator动画系统
动画系统通常用来做些简单的特效,针对节点做的动画,如果是复杂的角色动画,需要借助spine或者db
11.cc.Sprite.spriteFrame
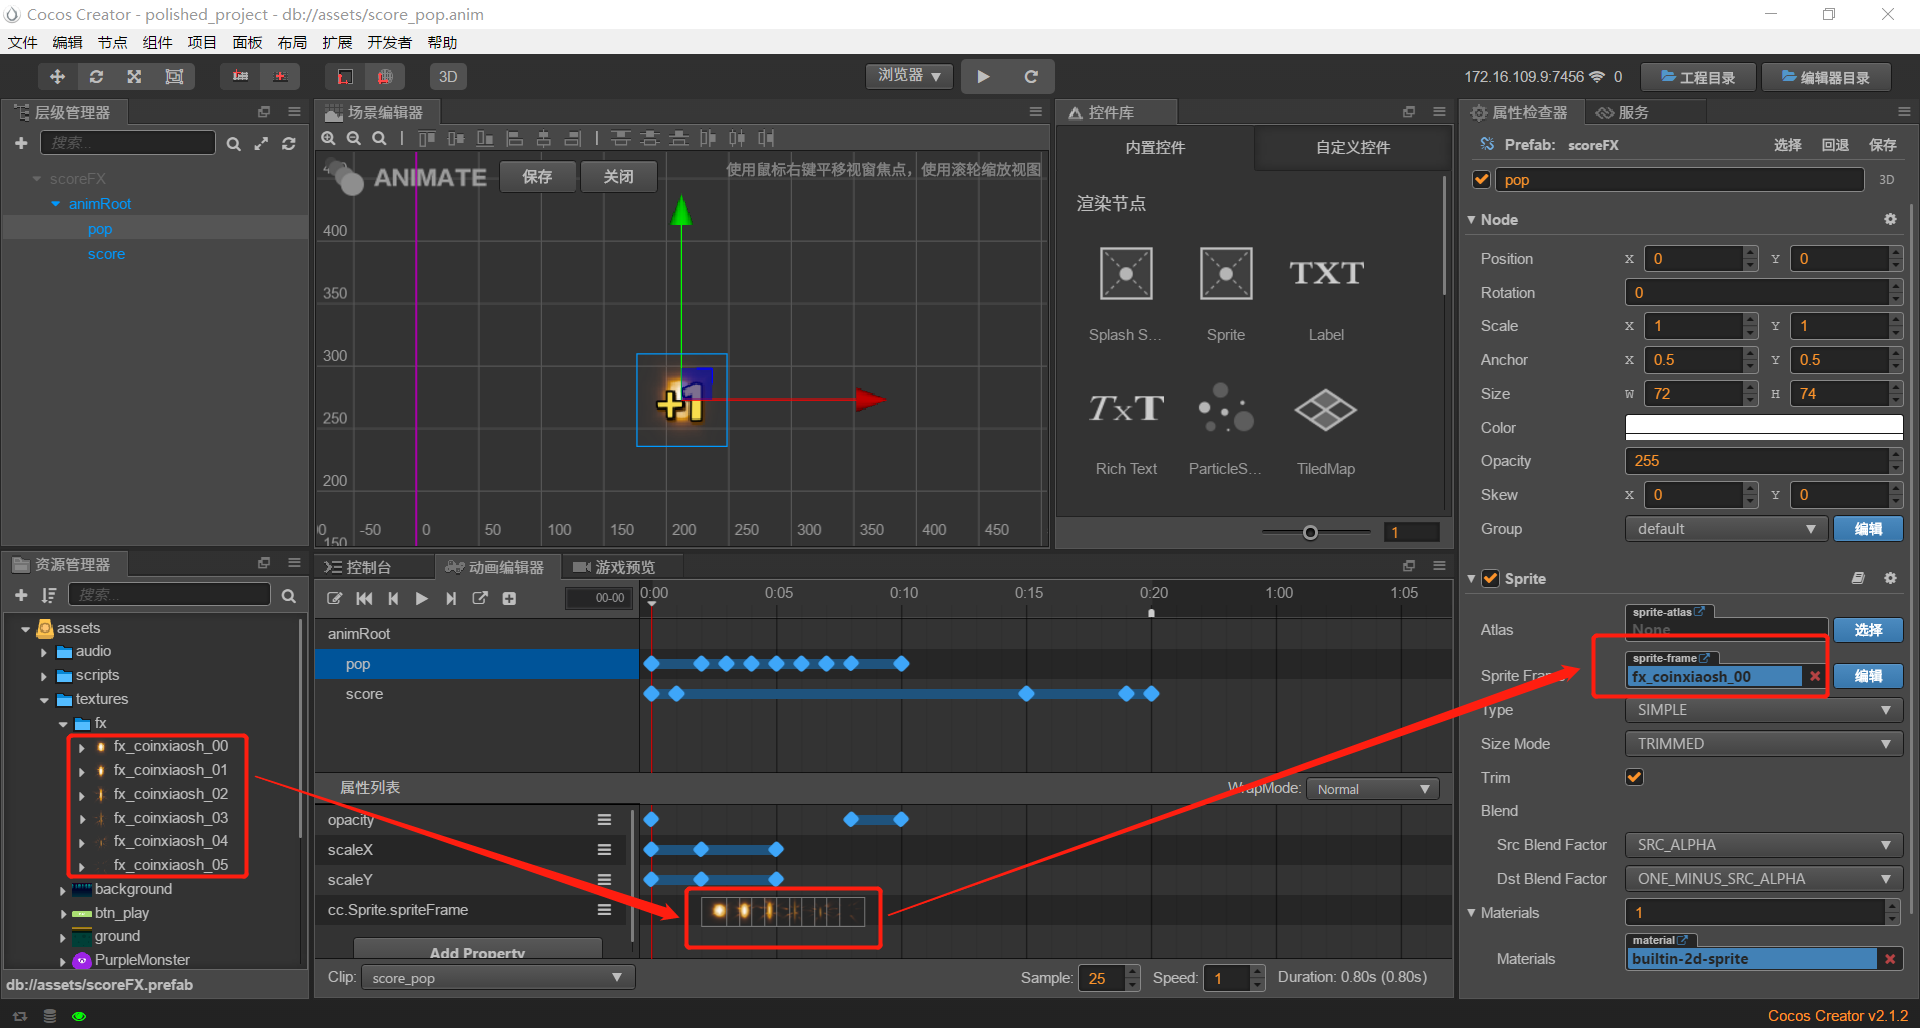
在时间轴上给spriteFrame属性添加关键帧,从而实现帧帧动画
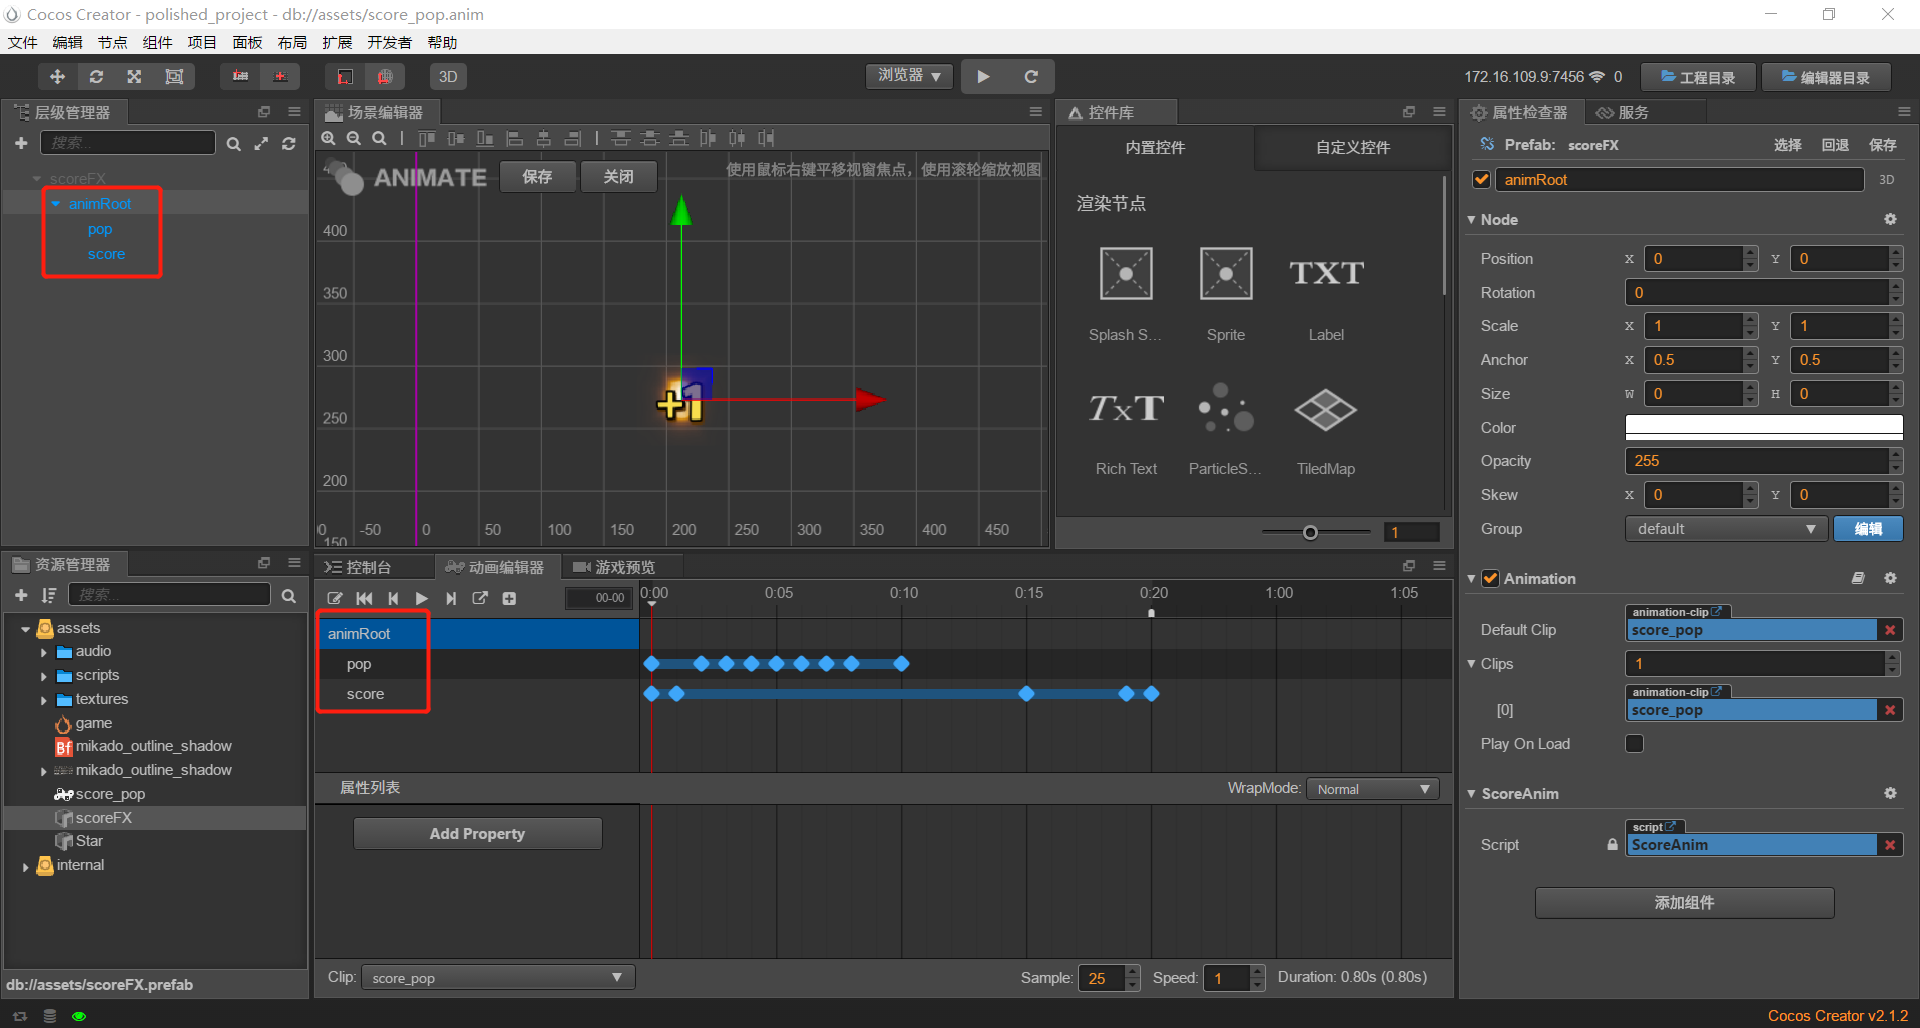
12.Animation、animation-clip的关系

一个节点添加Animation组件使之成为Animation节点,一个Animation节点可以添加多个clip影片剪辑

以Animation节点作为根节点,只有它的子节点才能添加属性、添加动画。给不同的子节点添加不同的动画,这些子节点最终合成一个clip影片剪辑
13.简单的形变效果
1 //压扁
2 var squash = cc.scaleTo(this.squashDuration, 1, 0.6);
3 //拉长
4 var stretch = cc.scaleTo(this.squashDuration, 1, 1.2);
5 //恢复原状
6 var scaleBack = cc.scaleTo(this.squashDuration, 1, 1);
通过cc.scaleTo();这样一个方法改变Y轴大小,从而实现精灵球从压扁到弹跳再到恢复原状这么一个过程
14.node.parent属性或node.getParent()方法获得父节点
1 // screen boundaries
2 this.minPosX = -this.node.parent.width/2;
3 this.maxPosX = this.node.parent.width/2;
有时需要通过父节点获得一些信息供子节点使用
15.初始化触屏输入监听
初始化触屏输入监听,与键盘输入监听类似
 1 // 初始化触屏输入监听
 2 var touchReceiver = cc.Canvas.instance.node;
 3 touchReceiver.on('touchstart', this.onTouchStart, this);
 4 touchReceiver.on('touchend', this.onTouchEnd, this);
 5
 6 onTouchStart (event) {
 7     var touchLoc = event.getLocation();
 8     if (touchLoc.x >= cc.winSize.width/2) {
 9         this.accLeft = false;
10         this.accRight = true;
11     } else {
12          this.accLeft = true;
13          this.accRight = false;
14     }
15 },
向onTouchStart()方法传入参数event,通过event参数获得当前屏幕点击的位置
1 var touchLoc = event.getLocation();
2 cc.log(touchLoc.x);
cc.winSize(); 为当前的游戏窗口的大小
16.相同动作的case可以合并
 1 onKeyDown (event) {
 2     switch(event.keyCode) {
 3         case cc.macro.KEY.a:
 4             this.accLeft = true;
 5             this.accRight = false;
 6             break;
 7         case cc.macro.KEY.d:
 8             this.accLeft = false;
 9             this.accRight = true;
10             break;
11         case cc.macro.KEY.left:
12             this.accLeft = true;
13             this.accRight = false;
14             break;
15         case cc.macro.KEY.right:
16             this.accLeft = false;
17             this.accRight = true;
18             break;
19     }
20 },
如上代码case cc.macro.KEY.a和case cc.macro.KEY.left具有相同的行为,case cc.macro.KEY.d和case cc.macro.KEY.right也具有相同的行为,因此可以把相同行为的case合并。修改后的代码如下
 1 onKeyDown (event) {
 2     switch(event.keyCode) {
 3         case cc.macro.KEY.a:
 4         case cc.macro.KEY.left:
 5             this.accLeft = true;
 6             this.accRight = false;
 7             break;
 8         case cc.macro.KEY.d:
 9         case cc.macro.KEY.right:
10             this.accLeft = false;
11             this.accRight = true;
12             break;
13     }
14 },
把case cc.macro.KEY.a和case cc.macro.KEY.left合并,case cc.macro.KEY.d和case cc.macro.KEY.right合并之后,又减少了更多的代码
17.update()方法中,什么时候需要乘上dt
update()方法中,dt是一个重要的时间变量,dt的使用对物体运动的速度有很大的影响

从以上代码得出一些结论,末速度Vt = V0+at; 路程S = Vt;
因此,我们只要根据物理常识,就知道什么时候需要乘上dt