前言
此篇博客讲解MediaExtractor将一个视频文件分离视频与音频,如果你对MediaExtractor还没有一个笼统的概念建议先了解我的另一篇入门博客:https://www.cnblogs.com/guanxinjing/p/11378133.html
直接上代码
已经大量注释了就不另外切分讲解了... 另外注意,实际项目里请将这些放到线程中操作.
private void separate() {
        mFile = new File(getExternalCacheDir(), "demo.mp4");
        if (!mFile.exists()) {
            Log.e(TAG, "mp4文件不存在");
            return;
        }
        MediaExtractor extractor = new MediaExtractor();//实例一个MediaExtractor
        try {
            extractor.setDataSource(mFile.getAbsolutePath());//设置添加MP4文件路径
        } catch (IOException e) {
            e.printStackTrace();
        }
        int trackCount = extractor.getTrackCount();//获得通道数量
        int videoTrackIndex = 0;//视频轨道索引
        MediaFormat videoMediaFormat = null;//视频格式
        int audioTrackIndex = 0;//音频轨道索引
        MediaFormat audioMediaFormat = null;

        /**
         * 查找需要的视频轨道与音频轨道index
         */
        for (int i = 0; i < trackCount; i++) { //遍历所以轨道
            MediaFormat itemMediaFormat = extractor.getTrackFormat(i);
            String itemMime = itemMediaFormat.getString(MediaFormat.KEY_MIME);
            if (itemMime.startsWith("video")) { //获取视频轨道位置
                videoTrackIndex = i;
                videoMediaFormat = itemMediaFormat;
                continue;
            }
            if (itemMime.startsWith("audio")) { //获取音频轨道位置
                audioTrackIndex = i;
                audioMediaFormat = itemMediaFormat;
                continue;
            }
        }

        File videoFile = new File(getExternalCacheDir(), "video.h264");
        File audioFile = new File(getExternalCacheDir(), "audio.acc");
        if (videoFile.exists()) {
            videoFile.delete();
        }
        if (audioFile.exists()) {
            audioFile.delete();
        }

        try {
            FileOutputStream videoOutputStream = new FileOutputStream(videoFile);
            FileOutputStream audioOutputStream = new FileOutputStream(audioFile);

            /**
             * 分离视频
             */
            int maxVideoBufferCount = videoMediaFormat.getInteger(MediaFormat.KEY_MAX_INPUT_SIZE);//获取视频的输出缓存的最大大小
            ByteBuffer videoByteBuffer = ByteBuffer.allocate(maxVideoBufferCount);
            extractor.selectTrack(videoTrackIndex);//选择到视频轨道
            int len = 0;
            while ((len = extractor.readSampleData(videoByteBuffer, 0)) != -1) {
                byte[] bytes = new byte[len];
                videoByteBuffer.get(bytes);//获取字节
                videoOutputStream.write(bytes);//写入字节
                videoByteBuffer.clear();
                extractor.advance();//跳到下一帧数据
            }
            videoOutputStream.flush();
            videoOutputStream.close();
            extractor.unselectTrack(videoTrackIndex);//取消选择视频轨道

            /**
             * 分离音频
             */
            int maxAudioBufferCount = audioMediaFormat.getInteger(MediaFormat.KEY_MAX_INPUT_SIZE);//获取音频的输出缓存的最大大小
            ByteBuffer audioByteBuffer = ByteBuffer.allocate(maxAudioBufferCount);
            extractor.selectTrack(audioTrackIndex);//选择音频轨道
            len = 0;
            while ((len = extractor.readSampleData(audioByteBuffer, 0)) != -1) {
                byte[] bytes = new byte[len];
                audioByteBuffer.get(bytes);
                audioOutputStream.write(bytes);
                audioByteBuffer.clear();
                extractor.advance();
            }

            audioOutputStream.flush();
            audioOutputStream.close();


        } catch (FileNotFoundException e) {
            Log.e(TAG, "separate: 错误原因=" + e);
            e.printStackTrace();
        } catch (IOException e) {
            e.printStackTrace();
        }

        extractor.release();//释放资源
    }
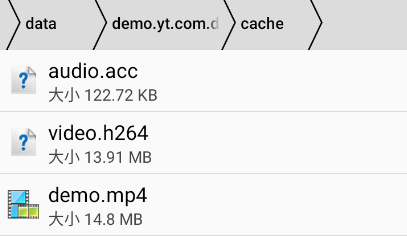
结果:
一些你可能会碰到的坑
坑1.
在上面的代码中,有下面2行代码会坑...ByteBuffer.allocate();的值,不是跟创建byte[] 一样随便输一个固定值.... 因为视频或者音频流的一帧字节大小是强制输出固定大小的.. 如果你ByteBuffer.allocate(1*1024);写成这样肯定会报错,因为极有可能在执行extractor.readSampleData()时放不下输出的一帧流字节而报错... 所以最正确的方式是使用videoMediaFormat.getInteger(MediaFormat.KEY_MAX_INPUT_SIZE);获取当前输出一帧的流的字节大小.. 这样既不会因为申请过量内存而浪费也不会因为申请内存太小而报错
int maxVideoBufferCount = videoMediaFormat.getInteger(MediaFormat.KEY_MAX_INPUT_SIZE);//获取视频的输出缓存的最大大小
ByteBuffer videoByteBuffer = ByteBuffer.allocate(maxVideoBufferCount);
坑2.
请无视extractor.readSampleData(videoByteBuffer, 0)这个方法里的第二个参数,因为只需要输入0,根本不需要设置.注释里也没有这个参数的说明,真实情况是使用extractor.advance();方法来跳到下一帧的数据.. 简直莫名其妙....
end