一、Spring的第一种注入方式,是使用property这个标签配合Bean类属性的set方法进行注入,代码如下:
为了测试我创建了一个maven项目,并且在pom.xml中引入了以下依赖包:(日志系统不需要使用到)
 1     <dependencies>
 2         <!--springframewok模板-->
 3         <dependency>
 4             <groupId>org.springframework</groupId>
 5             <artifactId>spring-context</artifactId>
 6             <version>4.3.13.RELEASE</version>
 7         </dependency>
 8         <!--日志系统-->
 9         <dependency>
10             <groupId>log4j</groupId>
11             <artifactId>log4j</artifactId>
12             <version>1.2.17</version>
13         </dependency>
14         <!--测试-->
15         <dependency>
16             <groupId>org.springframework</groupId>
17             <artifactId>spring-test</artifactId>
18             <version>4.3.13.RELEASE</version>
19         </dependency>
20         <!--junit单元测试-->
21         <dependency>
22             <groupId>junit</groupId>
23             <artifactId>junit</artifactId>
24             <version>4.12</version>
25         </dependency>
26     </dependencies>
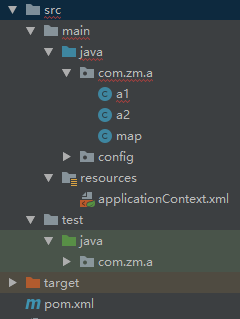
在java包下创建一个包,这里我创建的是com.zm.a,再创建两个测试类a1类和a2类,(这里的构造方法不写的话在构造器注入那里会报错)代码如下
 1 package com.zm.a;
 2
 3
 4 public class a1 {
 5     public a1() {
 6         super();
 7         System.out.println("a1的无参构造方法");
 8     }
 9
10     private a2 a2;
11
12   //使用set方法配合xml的property标签进行注入装配
13     public void setA2(com.zm.a.a2 a2) {
14         this.a2 = a2;
15     }
16
17     public void play(){
18         System.out.println("a1的play方法");
19         a2.play();
20     }
21 }
 1 package com.zm.a;
 2
 3 public class a2 {
 4     public a2() {
 5         super();
 6         System.out.println("a2的无参构造方法");
 7     }
 8
 9     public void play(){
10         System.out.println("a2的play()方法");
11     }
12 }
在resources包下创建一个applicationContext.xml的配置文件
下面是set方法注入的xml的配置,把a2注入到a1中,set方法和构造器的注入使用配置xml的方式:
1 <?xml version="1.0" encoding="UTF-8"?>
2 <beans xmlns="http://www.springframework.org/schema/beans"
3        xmlns:xsi="http://www.w3.org/2001/XMLSchema-instance"
4        xsi:schemaLocation="http://www.springframework.org/schema/beans http://www.springframework.org/schema/beans/spring-beans.xsd">
5         <bean id="a1" class="com.zm.a.a1">
6                 <property name="a2" ref="a2"></property>
7         </bean>
8         <bean id="a2" class="com.zm.a.a2"></bean>
9 </beans>
最后我们在test下的java包下创建一个com.zm.a的包,并且创建一个测试类进行单元测试,代码如下:
 1 package com.zm.a;
 2 import org.junit.Test;
 3 import org.junit.runner.RunWith;
 4 import org.springframework.beans.factory.annotation.Autowired;
 5 import org.springframework.test.context.ContextConfiguration;
 6 import org.springframework.test.context.junit4.SpringJUnit4ClassRunner;
 7
 8 @RunWith(SpringJUnit4ClassRunner.class)
 9 @ContextConfiguration("classpath:applicationContext.xml")
10 public class TestA {
11
12
13     @Autowired
14     private a1 a1;
15
16     @Test
17     public void test(){
18         a1.play();
19     }
20 }
第二种方法:使用构造器配合constructor-arg进行注入,只需要修改a1和a2类还有xml的代码,如下
 1 package com.zm.a;
 2
 3
 4 public class a1 {
 5     public a1() {
 6         super();
 7         System.out.println("a1的无参构造方法");
 8     }
 9
10     private a2 a2;
11
12     //使用构造器配合xml的constructor-arg进行注入装配
13     public a1(com.zm.a.a2 a2) {
14         this.a2 = a2;
15     }
16
17     public void play(){
18         System.out.println("a1的play方法");
19         a2.play();
20     }
21 }
 1 package com.zm.a;
 2
 3 public class a2 {
 4     public a2() {
 5         super();
 6         System.out.println("a2的无参构造方法");
 7     }
 8
 9     public void play(){
10         System.out.println("a2的play()方法");
11     }
12 }
1 <?xml version="1.0" encoding="UTF-8"?>
2 <beans xmlns="http://www.springframework.org/schema/beans"
3        xmlns:xsi="http://www.w3.org/2001/XMLSchema-instance"
4        xsi:schemaLocation="http://www.springframework.org/schema/beans http://www.springframework.org/schema/beans/spring-beans.xsd">
5         <bean id="a1" class="com.zm.a.a1">
6                 <constructor-arg ref="a2"></constructor-arg>
7         </bean>
8         <bean id="a2" class="com.zm.a.a2"></bean>
9 </beans>
第三种方法,使用注解实现自动注入装配,代码如下:
 1 package com.zm.a;
 2
 3 import org.springframework.beans.factory.annotation.Autowired;
 4 import org.springframework.stereotype.Component;
 5
 6 @Component
 7 public class a1 {
 8     public a1() {
 9         super();
10         System.out.println("a1的无参构造方法");
11     }
12     @Autowired
13     private a2 a2;
14
15     public void play(){
16         System.out.println("a1的play方法");
17         a2.play();
18     }
19 }
 1 package com.zm.a;
 2
 3 import org.springframework.stereotype.Component;
 4
 5 @Component
 6 public class a2 {
 7     public a2() {
 8         super();
 9         System.out.println("a2的无参构造方法");
10     }
11
12     public void play(){
13         System.out.println("a2的play()方法");
14     }
15 }
 1 package com.zm.a;
 2 import config.AppConfig;
 3 import org.junit.Test;
 4 import org.junit.runner.RunWith;
 5 import org.springframework.beans.factory.annotation.Autowired;
 6 import org.springframework.test.context.ContextConfiguration;
 7 import org.springframework.test.context.junit4.SpringJUnit4ClassRunner;
 8
 9 @RunWith(SpringJUnit4ClassRunner.class)
10 @ContextConfiguration(classes = AppConfig.class)
11 public class TestA {
12
13
14     @Autowired
15     private a1 a1;
16
17     @Test
18     public void test(){
19         a1.play();
20     }
21 }
因为不使用xml配置bean,所以需要一个容器类,我们在com.zm.config包下创建一个AppConfig类,然后通过扫描指定包下的组件进行注入装配,
这里使用的是com.zm.a,所以指定了com.zm.a包
1 package config;
2
3 import org.springframework.context.annotation.ComponentScan;
4 import org.springframework.context.annotation.Configuration;
5
6 @Configuration
7 @ComponentScan("com.zm.a")
8 public class AppConfig {
9 }
构造器注入和set注入还可以在xml中导入p,c命名空间简化代码,具体怎么实现我也不写了

当然我是为了简单测试一下才没有使用分层结构,在实际开发中,比如dao下的接口的实现类会出现多个,这个时候需要涉及到
@Primary@Qualifier@Resource这些注解了,这些注解主要是指定需要装配的类。看不懂就算了。