1.开始写之前想说的话
本人小白,最近在研究identity server4,在研究到device flow时发现,几乎搜不到任何相关的文章,所以决定简单的记一下我实现device flow这个demo的过程。
2.预备知识
- https://tools.ietf.org/html/draft-ietf-oauth-device-flow-07#section-3.2 OAuth2.0 Device Flow官方文档
- Device flow的应用场景:针对没有浏览器的一些设备(如物联网设备、native app等),所以本文都是使用postman模拟请求。【除了中间用户交互过程需要使用浏览器】
- 在访问 http://localhost:6001/.well-known/openid-configuration后得到的几个需要用到的Endpoin
token_endpoint: "http://localhost:6001/connect/token"
userinfo_endpoint: "http://localhost:6001/connect/userinfo"
device_authorization_endpoint: "http://localhost:6001/connect/deviceauthorization"
3. 配置Identity server
这里不是入门教程,所以就只放client的配置代码。
// device client
new Client
{
    ClientId = "device_id",
    ClientName = "client for device",
    AllowedGrantTypes = GrantTypes.DeviceFlow,
    ClientSecrets = new List<Secret>
    {
        new Secret("device_secret".Sha256())
    },
    AccessTokenType = AccessTokenType.Jwt,
    AllowedScopes = new List<string>{"openid", "profile", "api1"},
}
4. 配置被保护的资源
services.AddAuthentication("Bearer")//添加认证服务到DI,并且配置“Bearer”作为默认的认证方案
.AddJwtBearer("Bearer", options => {
    options.Authority = "http://localhost:6001";// base url of Authorization server
    options.RequireHttpsMetadata = false;
    options.Audience = "api1";//audience 听众
});
app.UseAuthentication();//添加认真中间件到pipeline,这样认证将在每次每次调用进行。
被保护资源的controller:
[Route("identity")]
[Authorize]
public class IdentityController : ControllerBase
{
    [HttpGet]
    public IActionResult Get()
    {
        return new JsonResult(from c in User.Claims select new { c.Type, c.Value });
    }
}
被保护资源的访问地址为:http://localhost:5001/identity
5. 启动项目测试
OAuth2.0官方文件说的请求格式:

我通过postman测试,发现不起作用,最终测试发现请求时还需要传client_secret这个参数,请求如下:
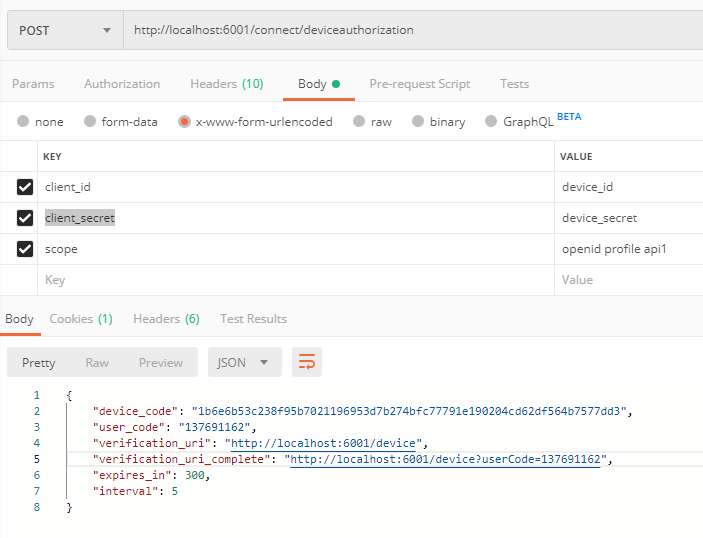
测试会返回给我们device_code,现在我们使用device_code到token端点(http://localhost:6001/connect/token)请求token,是会提示:authorization_pending,这是因为这个device_code还没有得到用户的许可,所以会提示正在等待授权。正如官方文档所说:

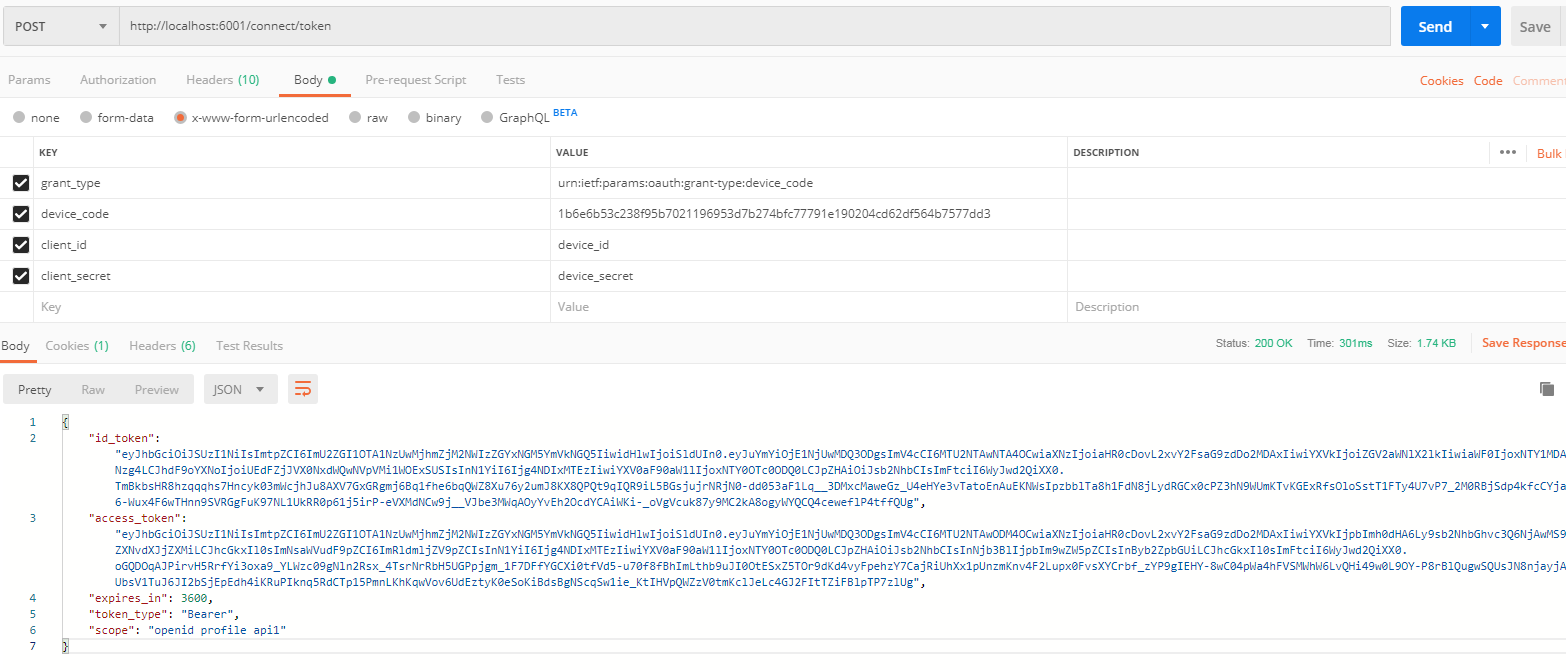
所以,现在需要一个用户交互的流程,在浏览器中访问verification_url里的地址,然后登陆,会提示是否授权,选择授权即可。授权后,测试就可以到token端点(http://localhost:6001/connect/token)请求token了,如下图:
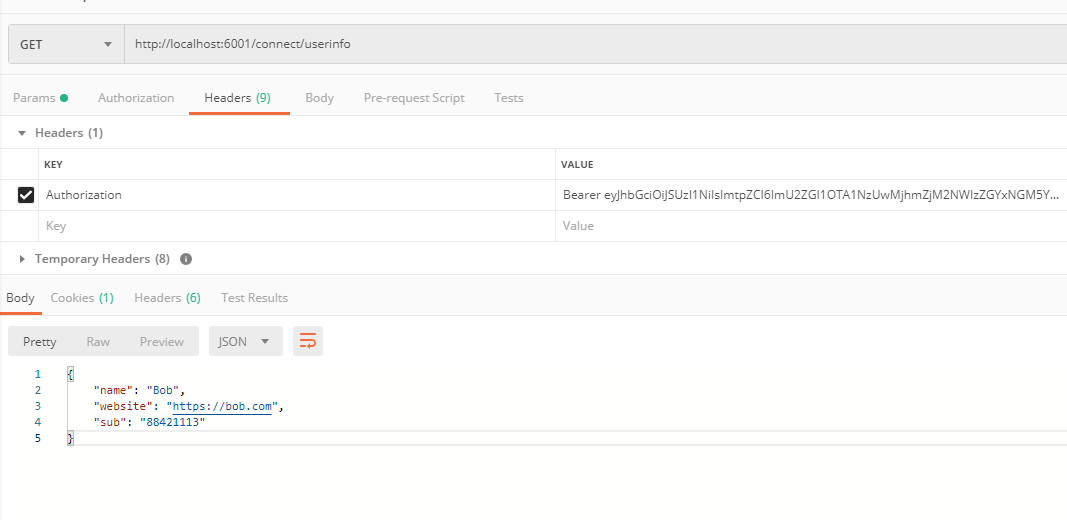
有了token后,就可以访问被保护的资源了(用Access_token):

同时也可以用id_token到userinfo端点访问用户信息了:
至此,关于device flow简单的介绍完毕。