Git分布式版本控制系统(下)
3. GIT分支管理
3.1 分支的结构概述
在实际的项目开发中,尽量保证master分支稳定,仅用于发布新版本,平时不要随便直接修改里面的数据文件。
那在哪干活呢?干活都在dev分支上。每个人从dev分支创建自己个人分支,开发完合并到dev分支,最后dev分支合并到master分支。
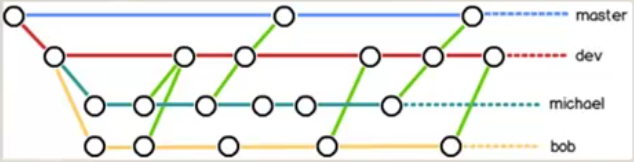
所以,团队的合作分支看起来会像下图那样。
分支管理工作流程:
- 在工作中,为了保证master分支稳定,产品经理通常会从master分支上复制一份代码作为dev分支;
- 然后成员开发A在从dev分支上复制一份代码叫做michael;
- 然后成员开发B再从dev分支上复制一份代码叫做bob;
- 平时开发A和开发B推送和拉取代码都在自己的个人分支michael和bob上。
- 当一个新功能开发完毕,或者一个bug修改完毕以后。开发人员会先将代码变更推送到自己的个人分支,然后再把个人分支的变更合并到dev分支里;
- 当开发经理和测试人员拉取dev分支的代码进行测试以后,如果没问题,那么开发经理会把dev分支的变更合并进master版本;
- 最后,由于master版本新增了测试过的新功能,那么就需要进行项目发布或者代码上线了。
3.2 GIT本地分支管理
3.2.1 本地分支的创建与切换
- git branch : 查看当前分支情况,当前分支前有*号
- git branch dev : 创建分支
- git checkout: 检查本地分支与远程分支的变更差异
- git checkout dev:切换分支
#检查当前分支情况
[root@Git01 mycode]# pwd
/mycode
[root@Git01 mycode]# git branch
* master           #当前所处分支
[root@Git01 mycode]# git branch dev       #创建dev分支

[root@Git01 mycode]# git branch
  dev
* master           #当前所处分支
[root@Git01 mycode]# git checkout dev     #切换到dev分支
切换到分支 'dev'
[root@Git01 mycode]# git branch
* dev              #当前所处分支
  master
3.2.2 尝试在linux本地分支进行代码提交
[root@Git01 mycode]# git branch
* dev
  master

[root@Git01 mycode]# cat benet.txt
www
www
www
[root@Git01 mycode]# echo "dev分支新增一行" >> benet.txt
[root@Git01 mycode]# cat benet.txt
www
www
www
dev分支新增一行

[root@Git01 mycode]# git add *
[root@Git01 mycode]# git status
位于分支 dev
要提交的变更:
  (使用 "git reset HEAD <文件>..." 以取消暂存)

    修改:     benet.txt
#此时我们先将改变提交到本地dev分支以后在切换分支
#将变更提交到本地dev分支
[root@Git01 mycode]# git branch
* dev
master
[root@Git01 mycode]# git commit -m "dev第一次提交"
[dev 083024b] dev第一次提交
1 file changed, 4 insertions(+)
[root@Git01 mycode]# cat benet.txt
www
www
www
dev分支新增一行 #dev分支比master分支新增一行数据
[root@Git01 mycode]# git checkout master
切换到分支 'master'
您的分支与上游分支 'test/master' 一致。
[root@Git01 mycode]# git branch
dev
* master
[root@Git01 mycode]# cat benet.txt
www
www
www说明:
- 我们发现切换分支以后,在linux分支修改过的文件数据,完全还原成了master分支的文件内容
- 但是这里存在一个问题,假如我们在linux分支下,修改了文件,但是并未提交到本地仓库linux分支,而只是放到了暂存区就切换到master分支的话,那么会发生什么呢?
#切换到dev分支
[root@Git01 mycode]# git checkout dev
切换到分支 'dev'
[root@Git01 mycode]# git branch
* dev
  master
[root@Git01 mycode]# cat benet.txt
www
www
www
dev分支新增一行

#再次新增一行数据
[root@Git01 mycode]# echo "dev分支新增第二行" >> benet.txt
[root@Git01 mycode]# cat benet.txt
www
www
www
dev分支新增一行
dev分支新增第二行

#文件变更添加到暂存区
[root@Git01 mycode]# git add *
[root@Git01 mycode]# git status
位于分支 dev
要提交的变更:
  (使用 "git reset HEAD <文件>..." 以取消暂存)

    修改:     benet.txt
#切换分支master,但由于没有提交暂存区的改变,因此切换分支失败
[root@Git01 mycode]# git checkout master
error: Your local changes to the following files would be overwritten by checkout:
benet.txt
Please commit your changes or stash them before you switch branches.
终止中
[root@Git01 mycode]# git branch
* dev #依旧在dev分支
master说明:
- 当linux的本地分支仓库和master本地分支仓库的代码不同时,如果你没把变更从暂存区提交到分支仓库,那么默认是不能切换分支的。
- 但是,这里还有一个问题,假如linux分支和master分支的本地仓库的代码相同,但是我仍旧没把linux分支的变更提交到本地linux分支仓库,那么能直接切换master分支吗?
#将本地分支master和dev的代码保存为一致。
[root@Git01 mycode]# git branch
  dev
* master
[root@Git01 mycode]# cat benet.txt
www
www
www

[root@Git01 mycode]# git checkout dev
切换到分支 'dev'
[root@Git01 mycode]# git branch
* dev
  master
[root@Git01 mycode]# cat benet.txt
www
www
www
#在linux分支修改benet.txt文件
[root@Git01 mycode]# git branch
* dev #当前在dev分支
master
[root@Git01 mycode]# echo "dev第一次修改" >> benet.txt
[root@Git01 mycode]# cat benet.txt
www
www
www
dev第一次修改
[root@Git01 mycode]# git add *
[root@Git01 mycode]# git status
位于分支 dev
要提交的变更:
(使用 "git reset HEAD <文件>..." 以取消暂存)
修改: benet.txt#切换到master分支
[root@Git01 mycode]# git checkout master
M benet.txt
切换到分支 'master'
您的分支与上游分支 'test/master' 一致。
[root@Git01 mycode]# git branch
dev
* master #当前在master分支
[root@Git01 mycode]# cat benet.txt
www
www
www
dev第一次修改 #之前的修改仍旧存在
[root@Git01 mycode]# git status #切换分支前的暂存区内容还在
位于分支 master
您的分支与上游分支 'test/master' 一致。
要提交的变更:
(使用 "git reset HEAD <文件>..." 以取消暂存)
修改: benet.txt
说明:
- 如果本地分支仓库间的代码一致,那么就算不把变更提交到本地分支仓库,那么也可以切换分支,这点要注意。
- 在工作中,为了避免意外,在切换分支前,务必要先将暂存区提交或者清空。
#清空暂存区内容
[root@Git01 mycode]# git status
位于分支 master
您的分支与上游分支 'test/master' 一致。
要提交的变更:
  (使用 "git reset HEAD <文件>..." 以取消暂存)

    修改:     benet.txt


[root@Git01 mycode]# git reset     #清空暂存区内容
重置后取消暂存的变更:
M   benet.txt


[root@Git01 mycode]# git status
位于分支 master
您的分支与上游分支 'test/master' 一致。
尚未暂存以备提交的变更:
  (使用 "git add <文件>..." 更新要提交的内容)
  (使用 "git checkout -- <文件>..." 丢弃工作区的改动)

    修改:     benet.txt

修改尚未加入提交(使用 "git add" 和/或 "git commit -a")
3.3 本地分支的合并与删除
- 想把linux的工作成果合并到master分支上;
- 先切换到master分支
- git merge dev : 合并dev分支到master
- git branch -d dev :确定合并完成后,可以放心的删除dev分支。
3.3.1 自动合并本地分支
[root@Git01 mycode]# git branch
* dev              #处于dev分支
  master
[root@Git01 mycode]# cat benet.txt
www
www
www
dev分支新增一行
[root@Git01 mycode]# git checkout master
切换到分支 'master'
您的分支与上游分支 'test/master' 一致。


[root@Git01 mycode]# git checkout master
切换到分支 'master'
您的分支与上游分支 'test/master' 一致。
[root@Git01 mycode]# git branch
  dev
* master           #处于master分支
[root@Git01 mycode]# cat benet.txt
www
www
www
#将分支dev的变更合并到当前分支
[root@Git01 mycode]# git merge dev
更新 98db11e..83bc53d
Fast-forward
benet.txt | 1 +
1 file changed, 1 insertion(+)
[root@Git01 mycode]# cat benet.txt
www
www
www
dev分支新增一行3.3.2 本地分支的删除
#将dev分支删除(当前不能在dev分支上)
[root@Git01 mycode]# git branch
  dev
* master
[root@Git01 mycode]# git branch -d dev
已删除分支 dev(曾为 83bc53d)。
[root@Git01 mycode]# git branch
* master
#假如dev分支的变更没有合并到当前分支,那么必须用-D参数强制删除分支
[root@Git01 mycode]# git branch
dev
* master
[root@Git01 mycode]# git branch -d dev
error: 分支 'dev' 没有完全合并。
如果您确认要删除它,执行 'git branch -D dev'。
[root@Git01 mycode]# git branch -D dev
已删除分支 dev(曾为 83bc53d)。3.3.3 手动合并本地分支===>本地分支代码冲突解决方案
- 当本地分支之间的同名目录-同名文件-同一行内容不同时,在进行分支合并时就会产生冲突,故为了解决代码冲突,就需要进行人工手动合并;
- 在工作中,为了尽量避免冲突,一般开发人员之间尽可能不负责相同的功能模块,也就不至于同时修改同一个文件。
#在Git01上进行操作,让dev分支和master分支产生文件代码冲突
[root@Git01 mycode]# git branch
* dev
  master
[root@Git01 mycode]# cat benet.txt
www
www
www
dev        #本地dev分支benet.txt文件的第四行是dev
[root@Git01 mycode]# git status      #查看文件状态,已经提交暂存区无内容
位于分支 dev
nothing to commit, working tree clean
#切换到master分支
[root@Git01 mycode]# git checkout master
切换到分支 'master'
您的分支与上游分支 'test/master' 一致。
[root@Git01 mycode]# cat benet.txt
www
www
www
master 本地master分支benet.txt文件的第四行是master
[root@Git01 mycode]# git status
位于分支 master
您的分支与上游分支 'test/master' 一致。
nothing to commit, working tree clean说明:由上可知,本地dev分支的benet.txt文件和本地master分支的benet.txt文件的第四行代码产生冲突。如果此时,我们将本地dev分支的变更合并到本地master分支中,那么就会产生代码冲突。
#合并本地dev分支
[root@Git01 mycode]# git branch
  dev
* master
[root@Git01 mycode]# git merge dev
自动合并 benet.txt
冲突(内容):合并冲突于 benet.txt    #报错说明,冲突在benet.txt文件
自动合并失败,修正冲突然后提交修正的结果。


#找出文件冲突内容,并修改。(此时冲突的benet.txt文件里已经被标注了冲突内容)
[root@Git01 mycode]# cat benet.txt
www
www
www
<<<<<<< HEAD                #HEAD:表示当前所在的分支
master                      #此行表示当前所在分支本行的master和下边的linux所在分支的linux冲突
=======                     #隔离符号
dev                         #和上边的master内容冲突
>>>>>>> dev                 #dev分支
#到了这里我们只能手动排除,选择保留后的内容,假如我们要保留dev分支的内容,然后再将工作目录中的变更提交即可人工解决代码冲突,并完成分支合并
[root@Git01 mycode]# vim benet.txt
[root@Git01 mycode]# cat benet.txt
www
www
www
dev
[root@Git01 mycode]# git add *
[root@Git01 mycode]# git commit -m "修改了一个分支冲突"
[master 001ef0b] 修改了一个分支冲突
[root@Git01 mycode]# git status
位于分支 master
您的分支领先 'test/master' 共 1 个提交。
(使用 "git push" 来发布您的本地提交)
nothing to commit, working tree clean3.4 GIT远程分支管理
3.4.1 将linux本地分支代码和标签推送到github远程仓库的dev分支
#在Git01上,创建本地分支dev,复制master分支代码。
[root@Git01 mycode]# git branch
* master
[root@Git01 mycode]# git status
位于分支 master
您的分支与上游分支 'test/master' 一致。
nothing to commit, working tree clean


#创建本地dev分支
[root@Git01 mycode]# git branch dev
[root@Git01 mycode]# git checkout dev
切换到分支 'dev'
[root@Git01 mycode]# git branch
* dev
  master
#将工作目录代码的benet.txt文件修改后提交到本地dev分支
[root@Git01 mycode]# cat benet.txt
www
www
www
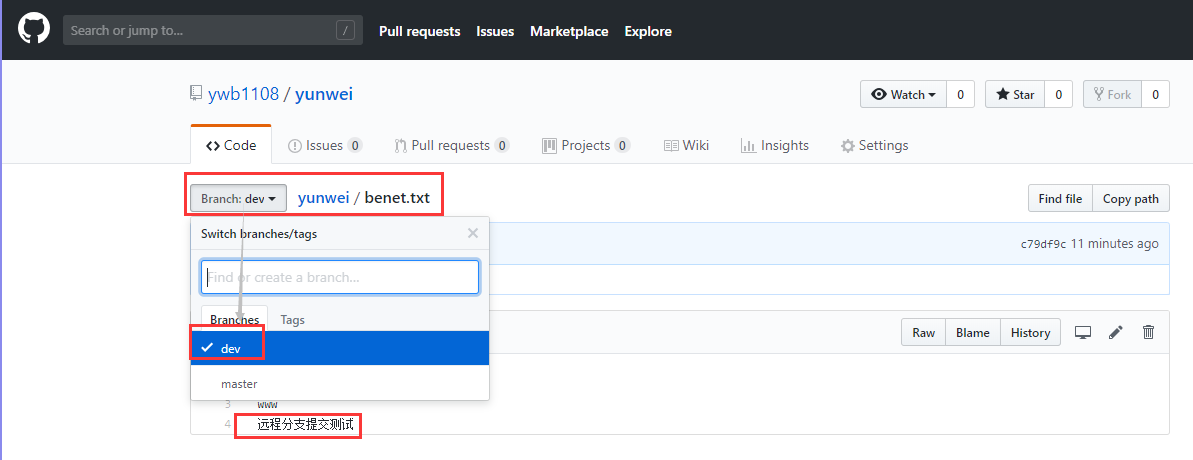
[root@Git01 mycode]# echo "远程分支提交测试" >> benet.txt
[root@Git01 mycode]# cat benet.txt
www
www
www
远程分支提交测试
[root@Git01 mycode]# git add *
[root@Git01 mycode]# git commit -m "远程分支提交测试"
[dev c79df9c] 远程分支提交测试
1 file changed, 1 insertion(+)
[root@Git01 mycode]# git status
位于分支 dev
nothing to commit, working tree clean#将本地dev分支推送到远程github的dev分支
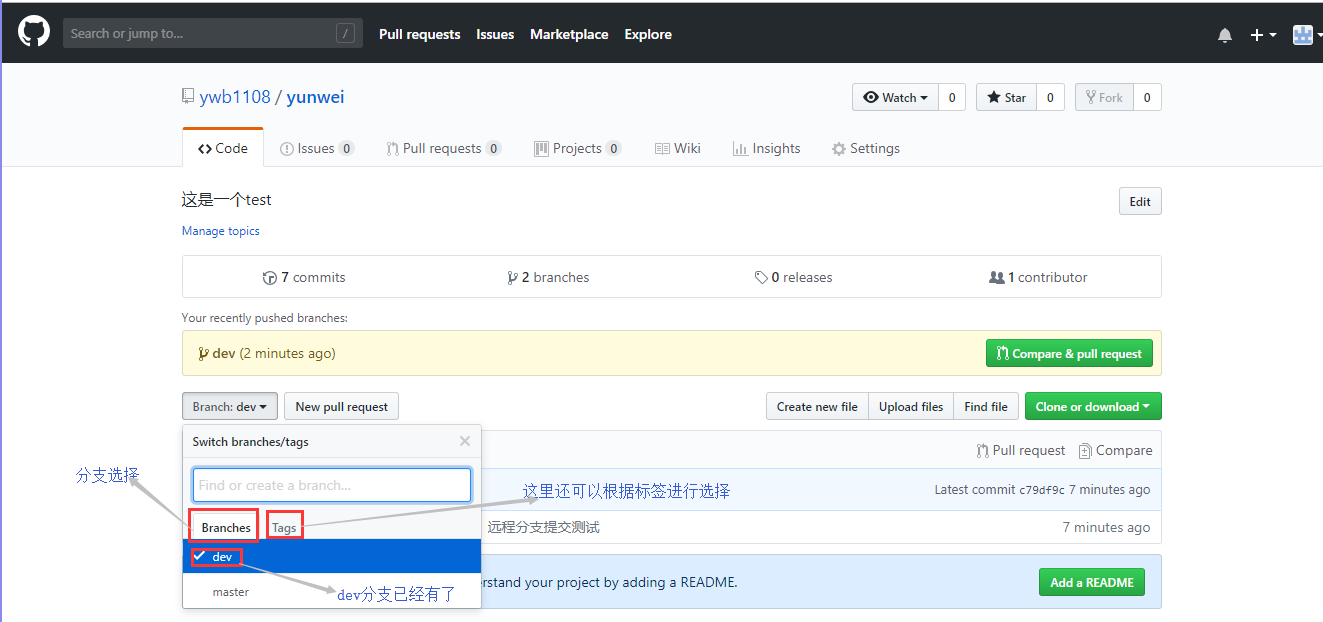
[root@Git01 mycode]# git push test dev
Username for 'https://github.com': [email protected]
Password for 'https://[email protected]@github.com': ywb971108
对象计数中: 3, 完成.
写入对象中: 100% (3/3), 306 bytes | 0 bytes/s, 完成.
Total 3 (delta 0), reused 0 (delta 0)
remote:
remote: Create a pull request for 'dev' on GitHub by visiting:
remote: https://github.com/ywb1108/yunwei/pull/new/dev
remote:
To https://github.com/ywb1108/yunwei.git
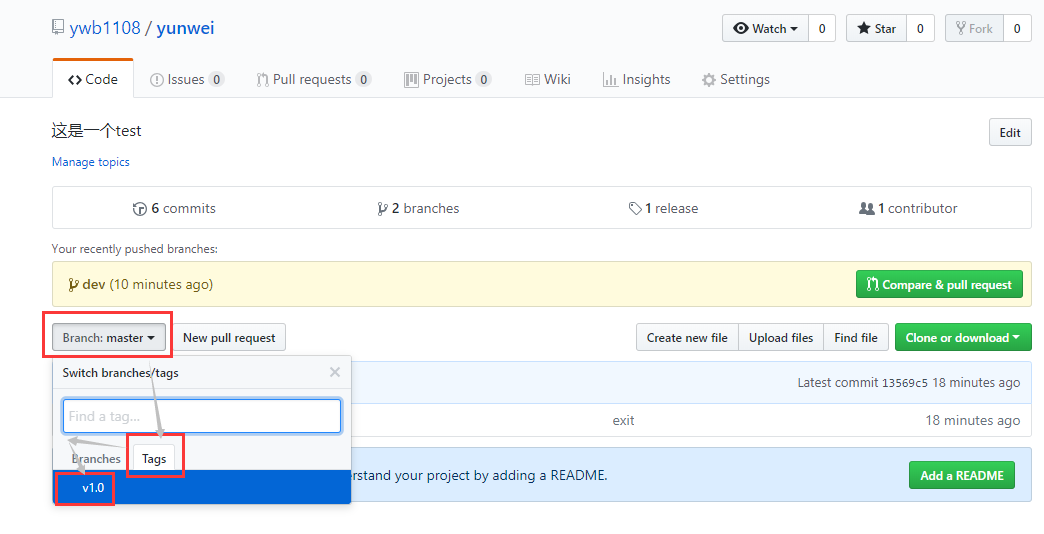
* [new branch] dev -> dev浏览器访问:https://github.com
#创建本地标签,并推送到github
[root@Git01 mycode]# git tag v1.0 -m "这就是一个测试"
[root@Git01 mycode]# git tag
v1.0

[root@Git01 mycode]# git push test v1.0
Username for 'https://github.com': [email protected]
Password for 'https://[email protected]@github.com':
对象计数中: 1, 完成.
写入对象中: 100% (1/1), 185 bytes | 0 bytes/s, 完成.
Total 1 (delta 0), reused 0 (delta 0)
To https://github.com/ywb1108/yunwei.git
 * [new tag]         v1.0 -> v1.0
浏览器访问:https://github.com
3.4.2 从github远程仓库克隆一个dev分支到本地dev分支
(1)克隆远程仓库master分支后,通过checkout切换成远程dev分支
#在Git02上进行操作
[root@Git02 /]# mkdir mycode2
[root@Git02 /]# cd mycode2/
[root@Git02 mycode2]# git init
初始化空的 Git 仓库于 /mycode2/.git/

#克隆远程仓库到本地
[root@Git02 mycode2]# git clone https://github.com/ywb1108/yunwei.git
正克隆到 'yunwei'...
remote: Enumerating objects: 20, done.
remote: Counting objects: 100% (20/20), done.
remote: Compressing objects: 100% (8/8), done.
remote: Total 20 (delta 1), reused 19 (delta 0), pack-reused 0
展开对象中: 100% (20/20), 完成.
检查连接... 完成。

[root@Git02 mycode2]# ls
yunwei
[root@Git02 mycode2]# cd yunwei/
[root@Git02 yunwei]# ls
benet.txt
[root@Git02 yunwei]# cat benet.txt    #不是之前上传的dev分支版本
www
www
www

[root@Git02 yunwei]# git branch
* master          #克隆下来的是master分支
说明:如果clone时不用-b dev指定分支进行克隆那么默认克隆的都是master分支;我们可以通过checkout切换远程分支的方式对于已经下载下来的master工作目录进行代码替换。
#查看github远程仓库分支情况
[root@Git02 yunwei]# git branch -a
* master
  remotes/origin/HEAD -> origin/master    #当前分支为origin/master分支
  remotes/origin/dev
  remotes/origin/master


#检查origin/dev远程分支
[root@Git02 yunwei]# git checkout origin/dev
Note: checking out 'origin/dev'.

You are in 'detached HEAD' state. You can look around, make experimental
changes and commit them, and you can discard any commits you make in this
state without impacting any branches by performing another checkout.

If you want to create a new branch to retain commits you create, you may
do so (now or later) by using -b with the checkout command again. Example:

  git checkout -b <new-branch-name>

HEAD 目前位于 c79df9c... 远程分支提交测试
[root@Git02 yunwei]# cat benet.txt
www
www
www
远程分支提交测试     #文件内容已经变了
[root@Git02 yunwei]# git branch
* (头指针分离于 origin/dev) #当前分支是origin/dev分支
master
[root@Git02 yunwei]# git branch dev #创建本地dev分支
[root@Git02 yunwei]# git branch
* (头指针分离于 origin/dev)
dev
master
[root@Git02 yunwei]# git checkout dev #切换到本地dev分支
切换到分支 'dev'
[root@Git02 yunwei]# git branch
* dev
master #当前工作目录代码已经作为本地dev分支代码(2)通过git clone -b linux URL直接指定远程仓库分支进行克隆
#克隆一个远程分支dev到本地工作目录(-b dev指定分支)
[root@Git02 mycode2]# git clone -b dev https://github.com/ywb1108/yunwei.git
正克隆到 'yunwei'...
remote: Enumerating objects: 20, done.
remote: Counting objects: 100% (20/20), done.
remote: Compressing objects: 100% (8/8), done.
remote: Total 20 (delta 1), reused 19 (delta 0), pack-reused 0
展开对象中: 100% (20/20), 完成.
检查连接... 完成。

[root@Git02 mycode2]# cat yunwei/benet.txt
www
www
www
远程分支提交测试
4. GitLab服务器
前面我们已经知道Git人人都是中心,那他们怎么交互数据呢?
- 使用GitHub或者码云等公共代码仓库
- 使用GitLab私有仓库
4.1 GitLab是什么?
是一个用于仓库管理系统的开源项目,使用Git作为代码管理工具,并在此基础上搭建起来的web服务。基础功能免费,高级功能收费。
4.2 为什么要使用GitLab?
- 基础功能开源,可自行搭建
- 可以进行权限控制,使得代码对部分人可见
- gitlab使用方便
4.3 GitLab安装
| 主机名 | IP | 备注 | 特殊要求 |
|---|---|---|---|
| Git01 | 192.168.200.52 | Git客户端 | 无 |
| Git02 | 192.168.200.53 | GitLab服务器 | 内存2G |
官方安装文档:https://about.gitlab.com/installation/#centos-7
GitLab国内源下载地址:https://mirrors.tuna.tsinghua.edu.cn/gitlab-ce/yum/el7/
#在Git02上安装GitLab
#初始环境
[root@Git02 ~]# cat /etc/redhat-release
CentOS Linux release 7.5.1804 (Core)
[root@Git02 ~]# uname -r
3.10.0-862.el7.x86_64
[root@Git02 ~]# echo "Git02 127.0.0.1" >> /etc/hosts
[root@Git02 ~]# tail -1 /etc/hosts
Git02 127.0.0.1

[root@Git02 yuanmabao]# pwd
/root/yuanmabao
[root@Git02 yuanmabao]# tree
.
├── git-2.9.5.tar.gz
├── gitlab-11-2-stable-zh.tar.gz    #GitLab-11.2.3版汉化包
├── jdk-8u171-linux-x64.tar.gz
└── Python-3.5.2.tgz

0 directories, 4 files

[root@Git02 rpm]# pwd
/root/rpm
[root@Git02 rpm]# tree
.
└── gitlab-ce-11.2.3-ce.0.el7.x86_64.rpm  #GitLab-11.2.3版安装包

0 directories, 1 file
#下载GitLab最新版本安装包
[root@Git02 ~]# wget https://mirrors.tuna.tsinghua.edu.cn/gitlab-ce/yum/el7/gitlab-ce-11.2.3-ce.0.el7.x86_64.rpm
[root@Git02 ~]# yum localinstall gitlab-ce-11.2.3-ce.0.el7.x86_64.rpm -y
重要说明:
yum localinstall 利用yum安装本地指定的rpm包,好处是自动解决依赖问题#初始化GitLab,只需要执行一次
[root@Git02 ~]# gitlab-ctl reconfigure
#查看gitlab启动状态
[root@Git02 ~]# gitlab-ctl status
run: alertmanager: (pid 6379) 189s; run: log: (pid 6386) 189s
run: gitaly: (pid 6323) 200s; run: log: (pid 6332) 199s
run: gitlab-monitor: (pid 6347) 196s; run: log: (pid 6349) 195s
run: gitlab-workhorse: (pid 6307) 202s; run: log: (pid 6309) 202s
run: logrotate: (pid 4976) 922s; run: log: (pid 6315) 201s
run: nginx: (pid 4958) 927s; run: log: (pid 6314) 201s
run: node-exporter: (pid 5056) 909s; run: log: (pid 6337) 199s
run: postgres-exporter: (pid 6394) 188s; run: log: (pid 6399) 188s
run: postgresql: (pid 4692) 1032s; run: log: (pid 6291) 206s
run: prometheus: (pid 6359) 195s; run: log: (pid 6363) 194s
run: redis: (pid 4630) 1044s; run: log: (pid 6276) 213s
run: redis-exporter: (pid 5160) 898s; run: log: (pid 6350) 196s
run: sidekiq: (pid 4928) 941s; run: log: (pid 6295) 205s
run: unicorn: (pid 4891) 947s; run: log: (pid 6293) 206s
#查看GitLab版本号
[root@Git02 ~]# cat /opt/gitlab/embedded/service/gitlab-rails/VERSION
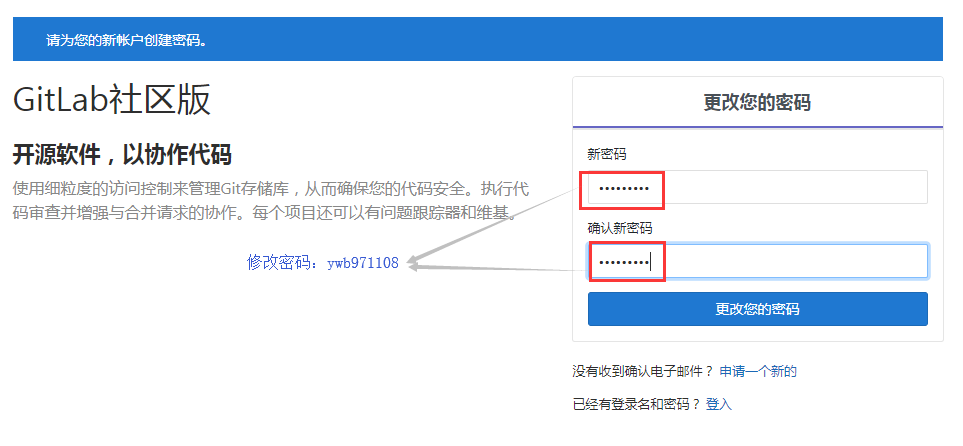
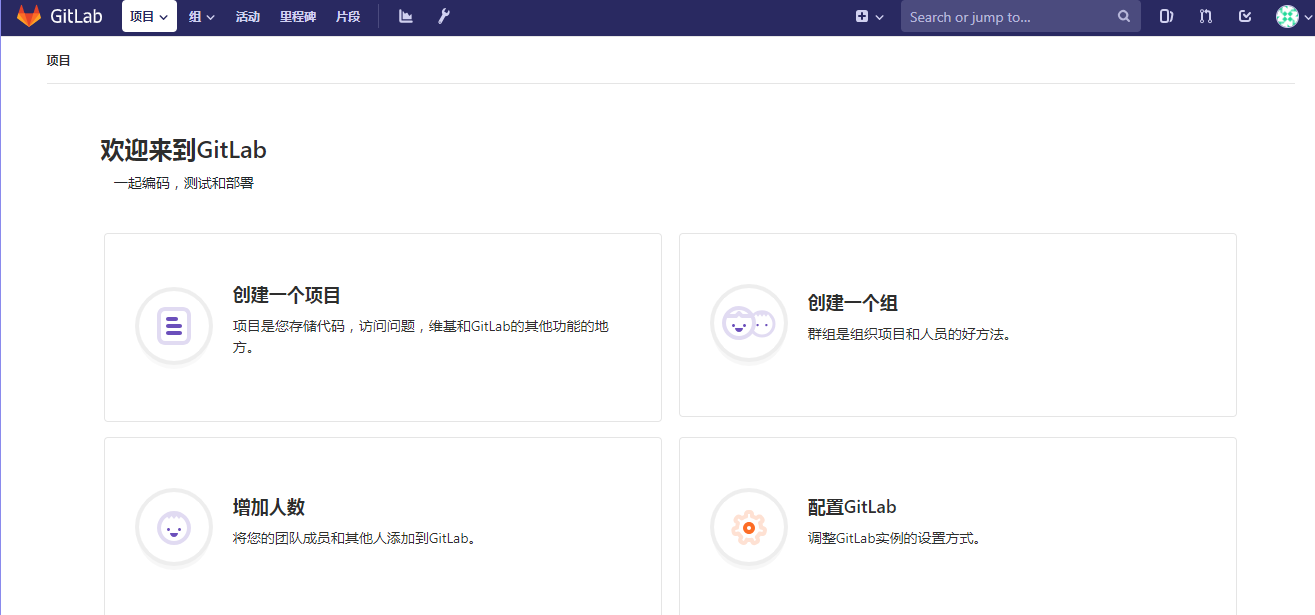
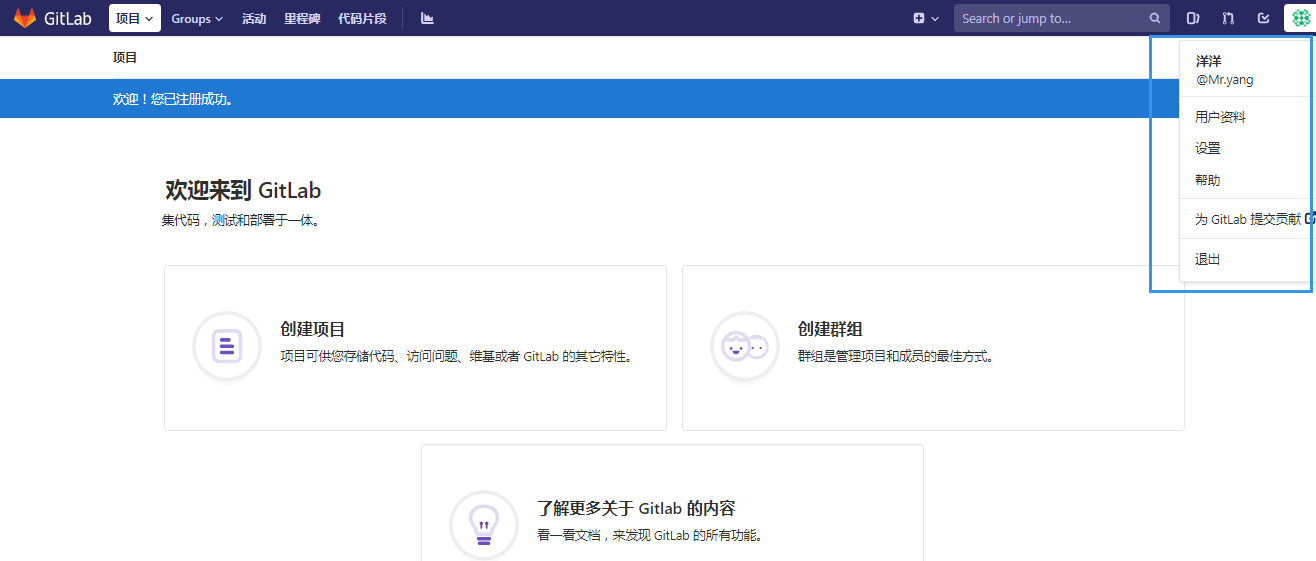
11.2.3在宿主机输入http://192.168.200.53地址就可以访问了
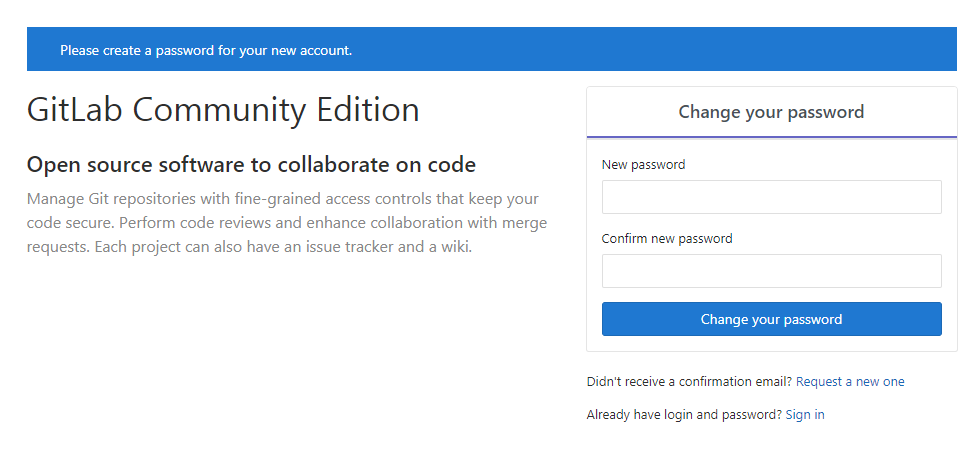
接下来我们设定管理员初始密码,最少8位
登陆后,我们就可以选择如下功能使用了
4.4 GitLab中文社区版补丁包安装
GitLab中文社区:https://gitlab.com/xhang/gitlab/tree/11-2-stable-zh
#解压GitLab中文版补丁包
[root@Git02 ~]# tar xf gitlab-11-2-stable-zh.tar.gz

#查看系统已经安装的GitLab版本号
[root@Git02 ~]# cat /opt/gitlab/embedded/service/gitlab-rails/VERSION
11.2.3

#查看解压后的补丁包版本号
[root@Git02 ~]# cat gitlab-11-2-stable-zh/VERSION
11.2.3

说明:补丁包版本号和安装的GitLab版本号需要一致
#备份英文版GitLab
[root@Git02 ~]# cp -r /opt/gitlab/embedded/service/gitlab-rails{,.bak}
#将中文补丁包的内容覆盖英文版
[root@Git02 yuanmabao]# pwd
/root/yuanmabao
[root@Git02 ~]# /bin/cp -rf gitlab-11-2-stable-zh/* /opt/gitlab/embedded/service/gitlab-rails/
/bin/cp: 无法以目录"gitlab-11-2-stable-zh/log" 来覆盖非目录"/opt/gitlab/embedded/service/gitlab-rails/log"
/bin/cp: 无法以目录"gitlab-11-2-stable-zh/tmp" 来覆盖非目录"/opt/gitlab/embedded/service/gitlab-rails/tmp"
说明:此报错不用管,因为已经设置过root密码,登陆过,所以会报错
#重新配置GitLab
[root@Git02 ~]# gitlab-ctl reconfigure
#重新启动GitLab
[root@Git02 ~]# gitlab-ctl restart重新刷新浏览器访问GitLab http://192.168.200.53

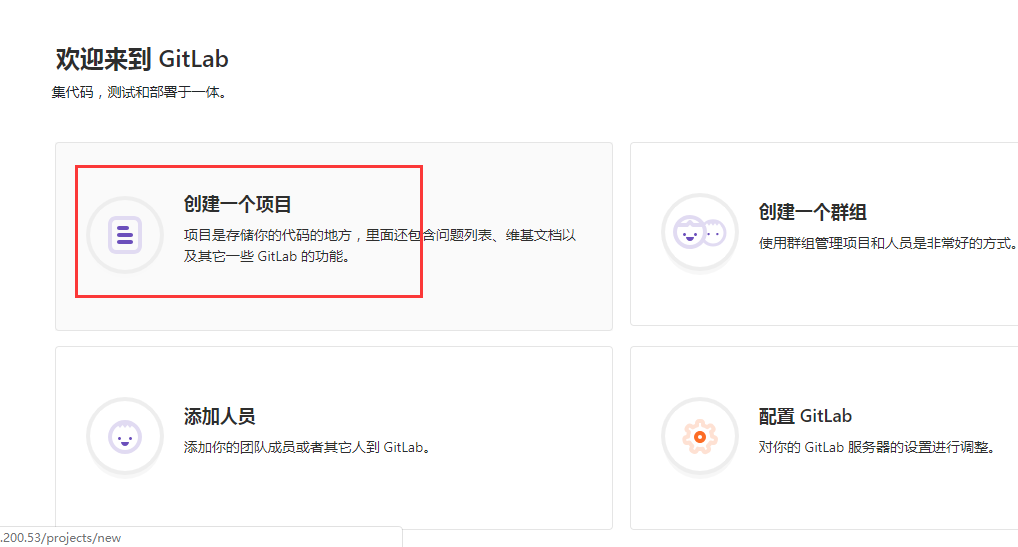
4.5 使用GitLab
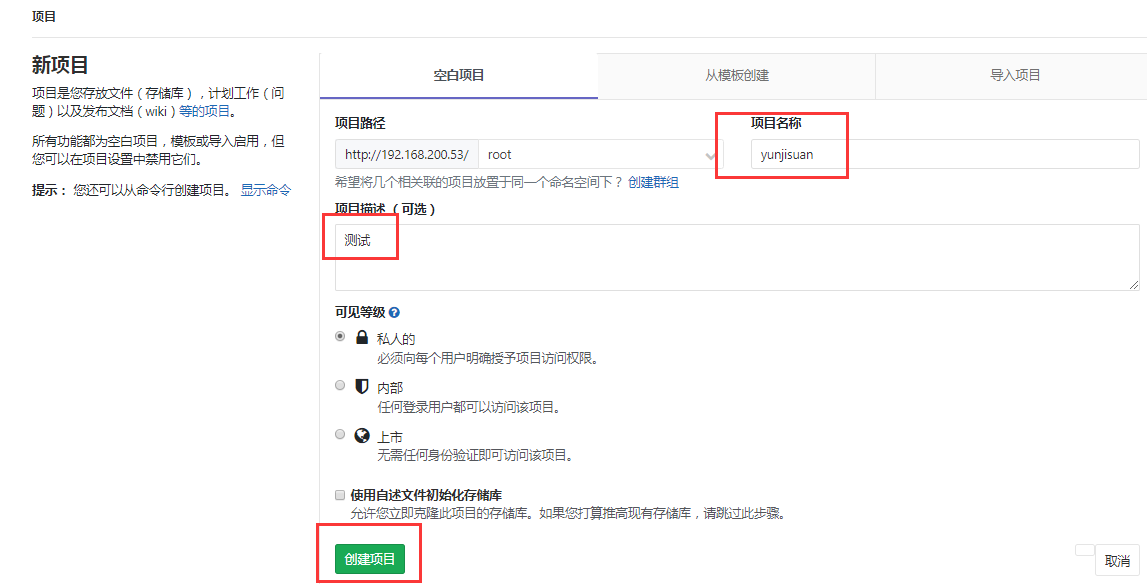
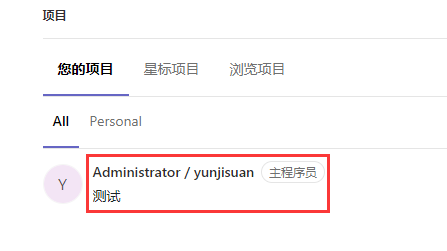
4.5.1 创建一个新项目
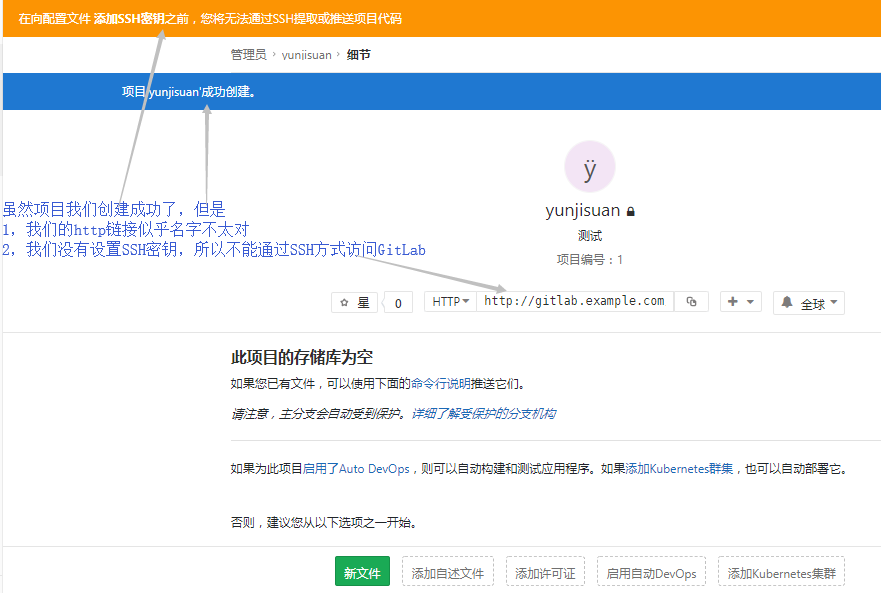
4.5.2 修改GitLab配置文件/etc/gitlab/gitlab.rb
我们需要修改GitLab的默认访问域名(因为我们是在内网搭建的GitLab)
GitLab默认的监听端口为80,但是在企业中,这个端口经常被别的服务占用,所以我们还需要更换端口号
[root@Git02 ~]# cp /etc/gitlab/gitlab.rb /etc/gitlab/gitlab.rb.bak

[root@Git02 ~]# cat -n /etc/gitlab/gitlab.rb | sed -n '13p;943p'
    13  external_url 'http://192.168.200.53:8888'
   943  nginx['listen_port'] = 8888

#重新配置GitLab
[root@Git02 ~]# gitlab-ctl reconfigure

#重启动GitLab
[root@Git02 ~]# gitlab-ctl restart
重新访问浏览器http://192.168.200.53:8888

4.5.3 尝试将本地仓库代码推送到私有GitLab
#在Git01客户端上
[root@Git01 mycode]# pwd
/mycode
[root@Git01 mycode]# git branch
  linux
* master        #当前在master分支

#添加远程GitLab仓库管理
[root@Git01 mycode]# git remote add origin http://192.168.200.53:8888/root/yunjisuan.git
[root@Git01 mycode]# git remote -v
origin  http://192.168.200.53:8888/root/yunjisuan.git (fetch)
origin  http://192.168.200.53:8888/root/yunjisuan.git (push)
test    https://github.com/ywb1108/yunwei.git (fetch)
test    https://github.com/ywb1108/yunwei.git (push)

#推送本地仓库master分支到远程仓库GitLab上
[root@Git01 mycode]# git push origin master
Username for 'http://192.168.200.53:8888': root
Password for 'http://[email protected]:8888': ywb971108
对象计数中: 16, 完成.
Delta compression using up to 2 threads.
压缩对象中: 100% (6/6), 完成.
写入对象中: 100% (16/16), 1.19 KiB | 0 bytes/s, 完成.
Total 16 (delta 1), reused 0 (delta 0)
To http://192.168.200.53:8888/root/yunjisuan.git
 * [new branch]      master -> master
#推送本地仓库dev分支到远程仓库GitLab上
[root@Git01 mycode]# git branch
dev
* master
[root@Git01 mycode]# git checkout dev
切换到分支 'dev'
[root@Git01 mycode]# git branch
* dev
master
[root@Git01 mycode]# git push origin dev
Username for 'http://192.168.200.53:8888': root
Password for 'http://[email protected]:8888': ywb971108
对象计数中: 3, 完成.
写入对象中: 100% (3/3), 306 bytes | 0 bytes/s, 完成.
Total 3 (delta 0), reused 0 (delta 0)
remote:
remote: To create a merge request for dev, visit:
remote: http://192.168.200.53:8888/root/yunjisuan/merge_requests/new?merge_request%5Bsource_branch%5D=dev
remote:
To http://192.168.200.53:8888/root/yunjisuan.git
* [new branch] dev -> dev#推送本地仓库标签V1.0到远程仓库GitLab上
[root@Git01 mycode]# git tag
v1.0
[root@Git01 mycode]# git push origin v1.0
Username for 'http://192.168.200.53:8888': root
Password for 'http://[email protected]:8888':
对象计数中: 1, 完成.
写入对象中: 100% (1/1), 185 bytes | 0 bytes/s, 完成.
Total 1 (delta 0), reused 0 (delta 0)
To http://192.168.200.53:8888/root/yunjisuan.git
* [new tag] v1.0 -> v1.0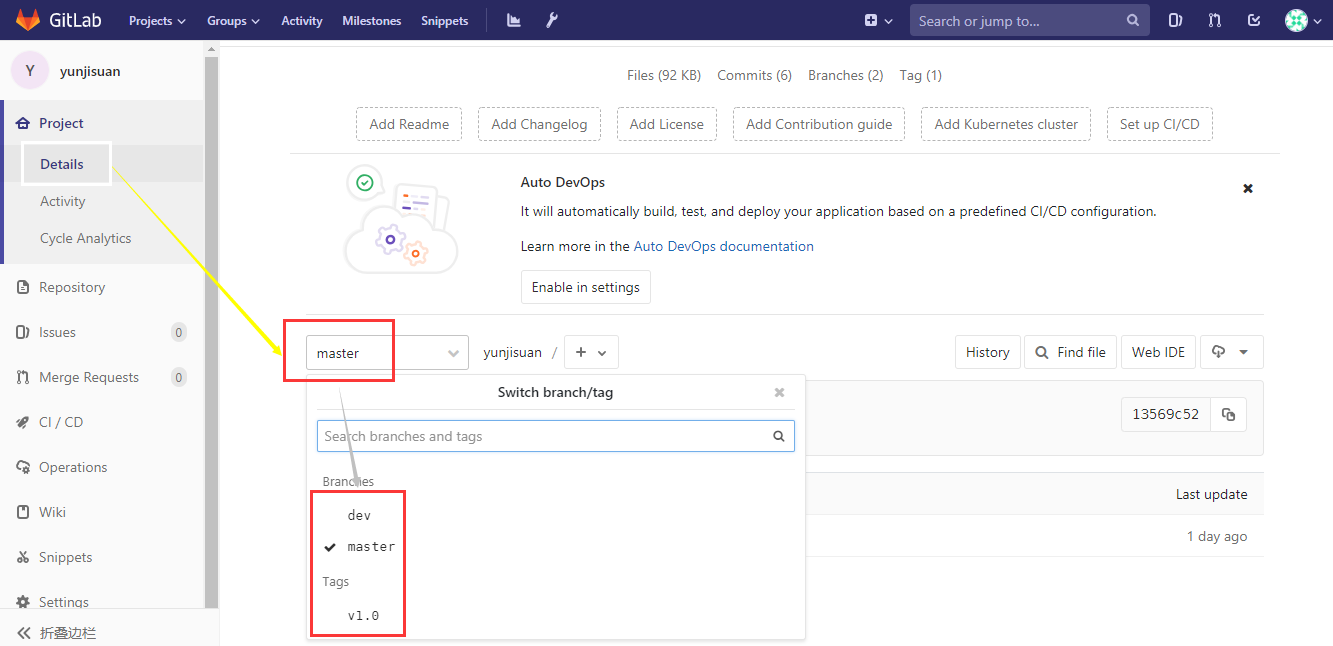
4.5.4 尝试在本地仓库克隆GitLab的项目dev分支到本地仓库
#创建Git工作目录
[root@Git01 ~]# mkdir -p /GitLab
[root@Git01 ~]# cd /GitLab
[root@Git01 GitLab]# git init
初始化空的 Git 仓库于 /GitLab/.git/
#克隆远程仓库GitLab的Linux分支
[root@Git01 GitLab]# git clone -b dev http://192.168.200.53:8888/root/yunjisuan.git
正克隆到 'yunjisuan'...
Username for 'http://192.168.200.53:8888': root
Password for 'http://[email protected]:8888':
remote: Enumerating objects: 20, done.
remote: Counting objects: 100% (20/20), done.
remote: Compressing objects: 100% (8/8), done.
remote: Total 20 (delta 1), reused 0 (delta 0)
展开对象中: 100% (20/20), 完成.
检查连接... 完成。[root@Git01 GitLab]# ls
yunjisuan
[root@Git01 GitLab]# cd yunjisuan/
[root@Git01 yunjisuan]# ls
benet.txt
[root@Git01 yunjisuan]# cat benet.txt
www
www
www
远程分支提交测试
[root@Git01 yunjisuan]# git branch
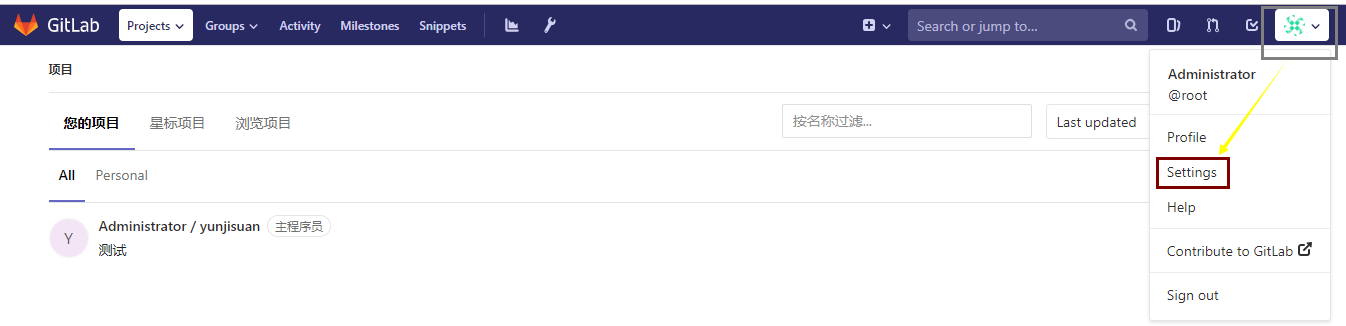
* dev4.5.5 配置GitLab的SSH密钥连接方式
#在Git01客户端生成密钥对
[root@Git01 ~]# ssh-keygen -t rsa -C '[email protected]'
Generating public/private rsa key pair.
Enter file in which to save the key (/root/.ssh/id_rsa):
Created directory '/root/.ssh'.
Enter passphrase (empty for no passphrase):
Enter same passphrase again:
Your identification has been saved in /root/.ssh/id_rsa.
Your public key has been saved in /root/.ssh/id_rsa.pub.
The key fingerprint is:
SHA256:m1F7R3PI9FTjaLU1nMtapqKwt0jOVeOjm//kL1i6bME [email protected]
The key's randomart image is:
+---[RSA 2048]----+
| o+*|
| o+*=|
| . o*o+|
| . ... B |
| S oo. * |
| . +oE.= |
| .=..o*. |
| +.oo+++. |
| +.==+ooo. |
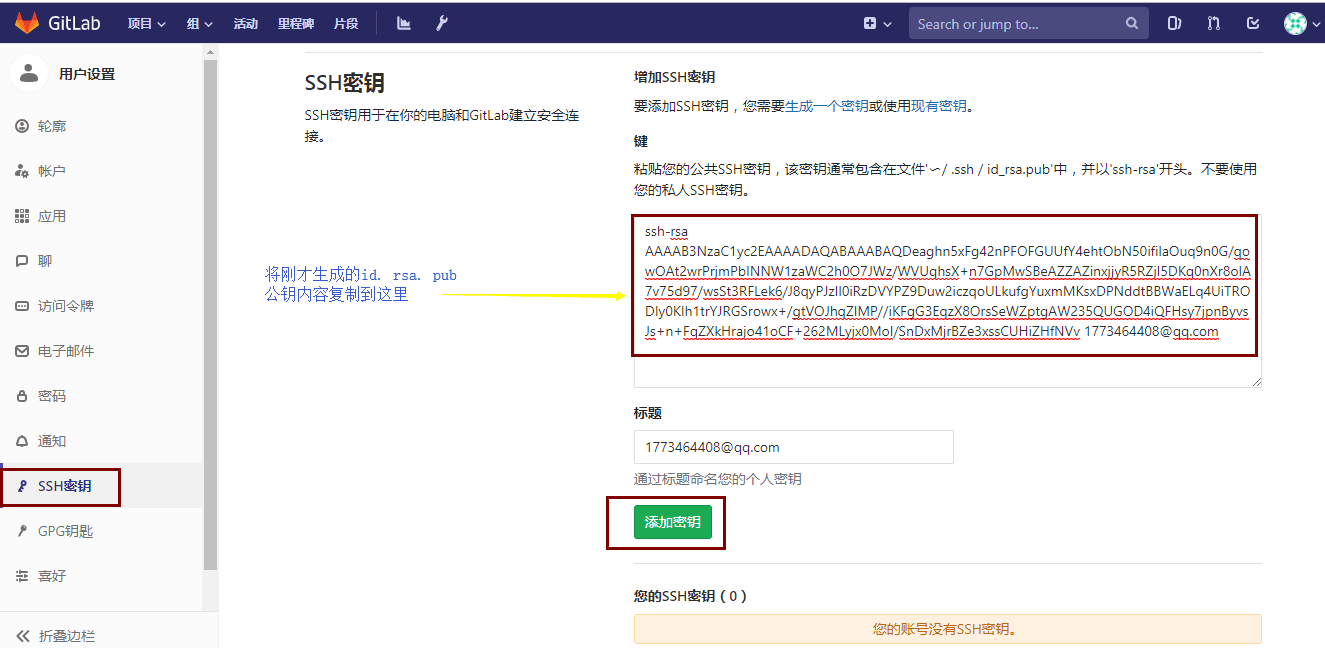
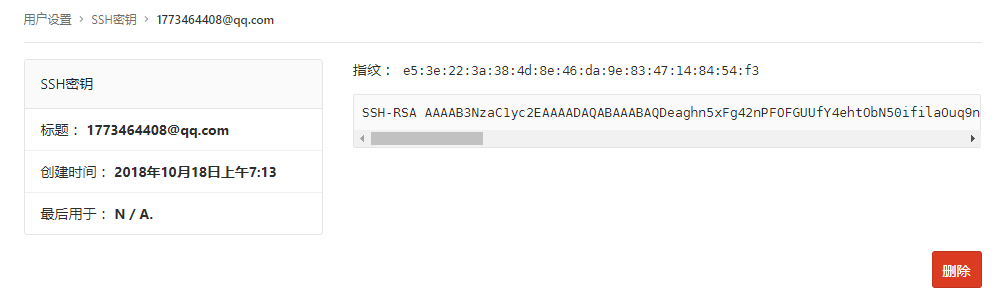
+----[SHA256]-----+[root@Git01 ~]# cat /root/.ssh/id_rsa.pub #公钥内容,复制到GitLab上
ssh-rsa AAAAB3NzaC1yc2EAAAADAQABAAABAQDeaghn5xFg42nPFOFGUUfY4ehtObN50ifilaOuq9n0G/qowOAt2wrPrjmPbINNW1zaWC2h0O7JWz/WVUqhsX+n7GpMwSBeAZZAZinxjjyR5RZjI5DKq0nXr8olA7v75d97/wsSt3RFLek6/J8qyPJzIl0iRzDVYPZ9Duw2iczqoULkufgYuxmMKsxDPNddtBBWaELq4UiTRODIy0KIh1trYJRGSrowx+/gtVOJhqZlMP//iKFgG3EqzX8OrsSeWZptgAW235QUGOD4iQFHsy7jpnByvsJs+n+FqZXkHrajo41oCF+262MLyjx0Mol/SnDxMjrBZe3xssCUHiZHfNVv [email protected]在浏览器端打开GitLab http://192.168.200.53:8888
4.5.6 利用ssh方式克隆GitLab上的一个项目
[root@Git01 ~]# mkdir -p /test
[root@Git01 ~]# cd /test
[root@Git01 test]# git init
初始化空的 Git 仓库于 /test/.git/
#将远程GitLab的Linux分支克隆到本地
[root@Git01 test]# git clone -b dev [email protected]:root/yunjisuan.git
正克隆到 'yunjisuan'...
The authenticity of host '192.168.200.53 (192.168.200.53)' can't be established.
ECDSA key fingerprint is SHA256:YffccmTao7pfkcNGKqlEIhoCLAFpLhu2pQqzcXH9XzQ.
ECDSA key fingerprint is MD5:2b:fc:d4:4a:50:dd:3d:3e:f2:42:14:9a:57:12:2b:b8.
Are you sure you want to continue connecting (yes/no)? yes #首次登录
Warning: Permanently added '192.168.200.53' (ECDSA) to the list of known hosts.
remote: Enumerating objects: 20, done.
remote: Counting objects: 100% (20/20), done.
remote: Compressing objects: 100% (8/8), done.
remote: Total 20 (delta 1), reused 0 (delta 0)
接收对象中: 100% (20/20), 完成.
处理 delta 中: 100% (1/1), 完成.
检查连接... 完成。[root@Git01 test]# ls
yunjisuan
[root@Git01 test]# cd yunjisuan/
[root@Git01 yunjisuan]# ls
benet.txt
[root@Git01 yunjisuan]# cat benet.txt
www
www
www
远程分支提交测试
[root@Git01 yunjisuan]# git branch
* dev4.6 配置GitLab邮件服务
配置邮箱服务的用途:
- 有合并请求时,邮件通知
- 账号注册时,邮件验证
- 修改密码时,通过邮件修改
配置步骤:
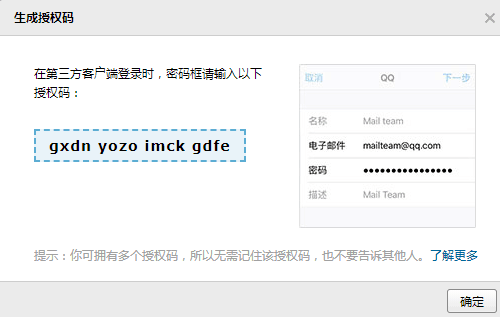
- 开启QQ邮箱的smtp服务
- 修改gitlab配置
- 测试邮件服务是否正常
4.6.1 开启GitLab服务postfix服务并开启QQ邮箱的smtp服务
[root@Git02 ~]# systemctl start postfix
[root@Git02 ~]# systemctl enable postfix
[root@Git02 ~]# systemctl status postfix
#以下省略。。。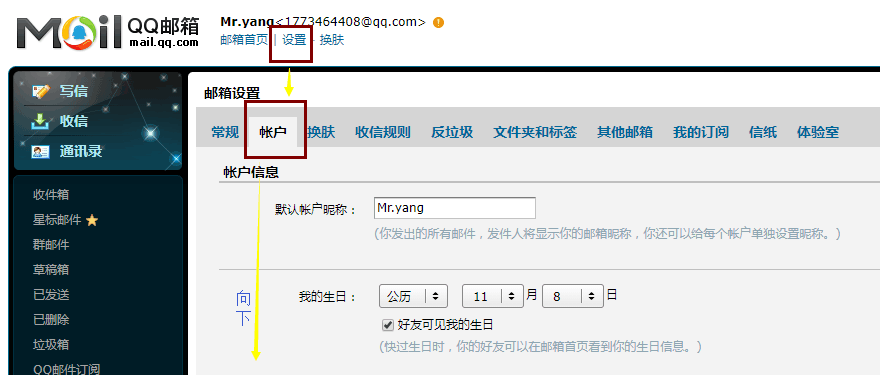

4.6.2 修改gitlab配置文件/etc/gitlab/gitlab.rb
[root@Git02 ~]# cat -n /etc/gitlab/gitlab.rb | sed -n '53p;472,480p;618p'
    53  gitlab_rails['gitlab_email_from'] = '[email protected]'         #GitLab默认邮箱
   472  gitlab_rails['smtp_enable'] = true               #开启功能
   473  gitlab_rails['smtp_address'] = "smtp.qq.com"     #QQ的smtp服务
   474  gitlab_rails['smtp_port'] = 465
   475  gitlab_rails['smtp_user_name'] = "[email protected]"            #smtp用户邮箱
   476  gitlab_rails['smtp_password'] = "gxdnyozoimckgdfe"  #开通QQsmtp时返回的字符串
   477  gitlab_rails['smtp_domain'] = "qq.com"           #smtp域名
   478  gitlab_rails['smtp_authentication'] = "login"
   479  gitlab_rails['smtp_enable_starttls_auto'] = true
   480  gitlab_rails['smtp_tls'] = true
   618  user['git_user_email'] = "[email protected]"     #git用户邮箱
#重新加载GitLab配置文件
[root@Git02 ~]# gitlab-ctl reconfigure
#重启动GitLab服务
[root@Git02 ~]# gitlab-ctl restart
#进入GitLab控制台进行邮件发送测试
[root@Git02 ~]# gitlab-rails console #开启GitLab控制台
-------------------------------------------------------------------------------------
GitLab: 11.2.3 (06cbee3)
GitLab Shell: 8.1.1
postgresql: 9.6.8
-------------------------------------------------------------------------------------
Loading production environment (Rails 4.2.10)
irb(main):001:0> Notify.test_email('[email protected]','this is title','hello,杨哥!').deliver_now
#以下省略。。。
特别说明:Notify.test_email('收件人邮箱','邮件标题','邮件内容')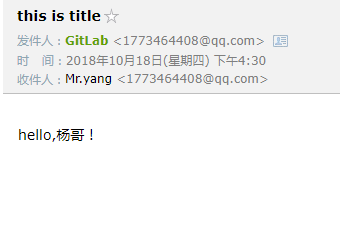
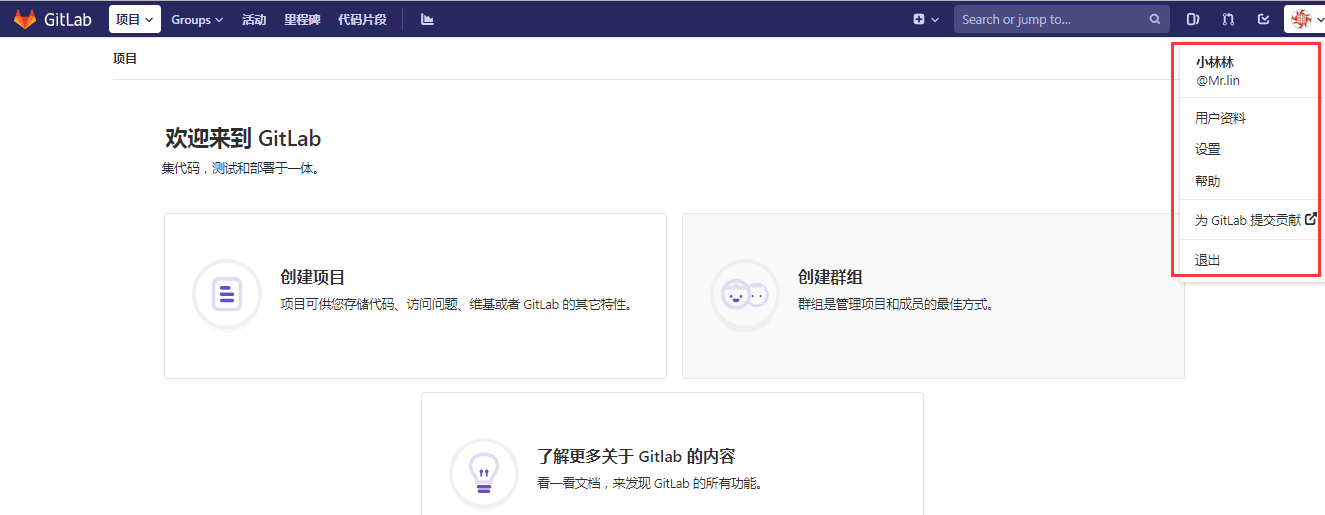
4.7 GitLab的账号注册及分组
4.7.1 账户注册测试
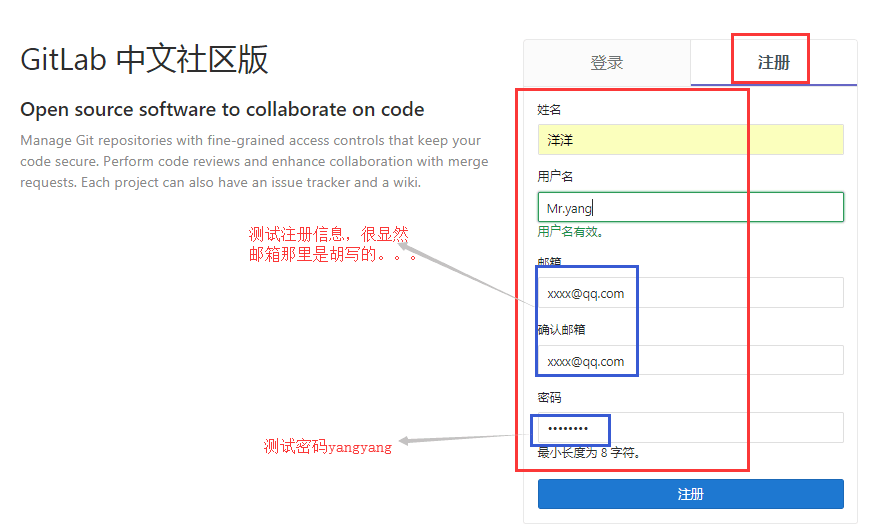
我们再注册的时候,用的是乱写的邮箱都能注册并登陆;
显然这在企业里是绝对不允许的。
4.7.2 开启GitLab邮箱验证功能
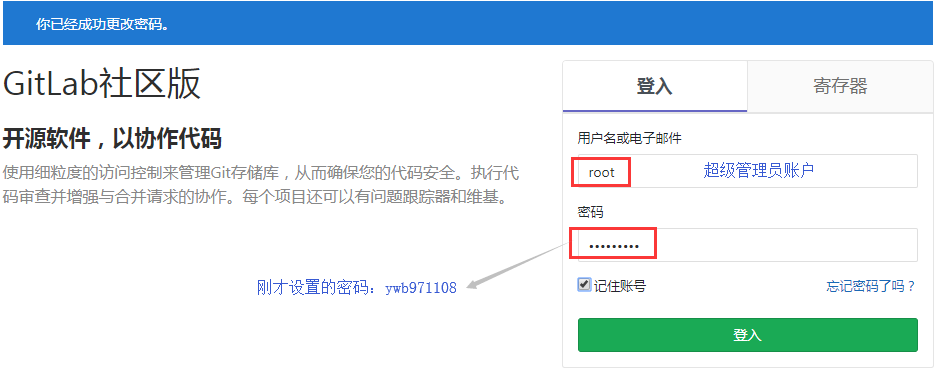
重新登陆管理员用户root,密码:ywb971108 ,我们进行如下操作
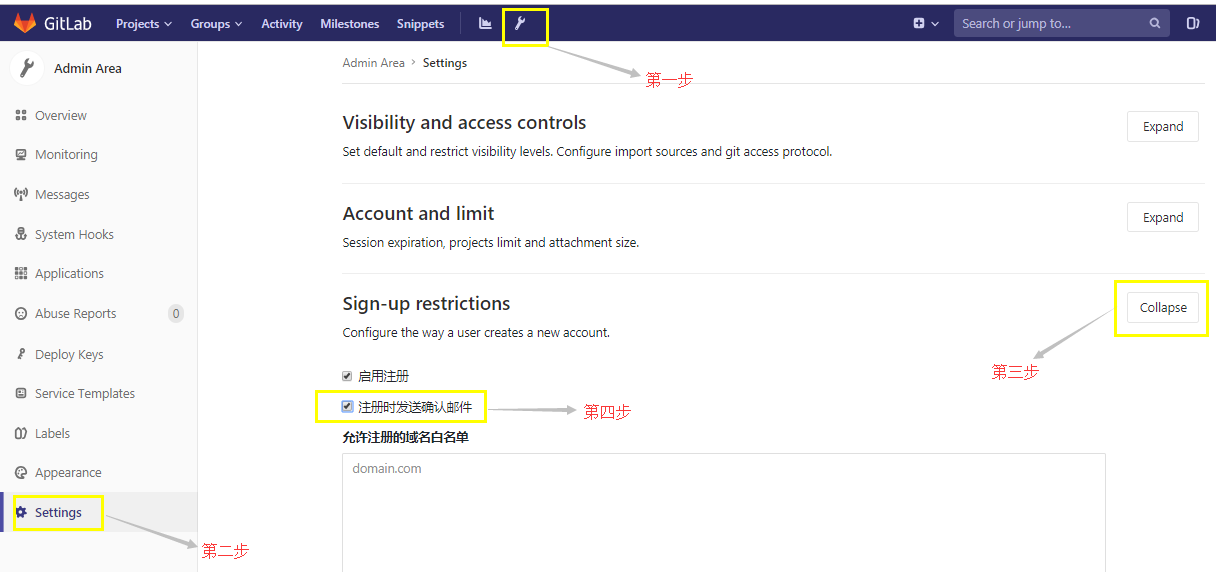
退出时别忘了保存修改的设置如下图

然后我们退出管理员的登陆,重新进行重新注册
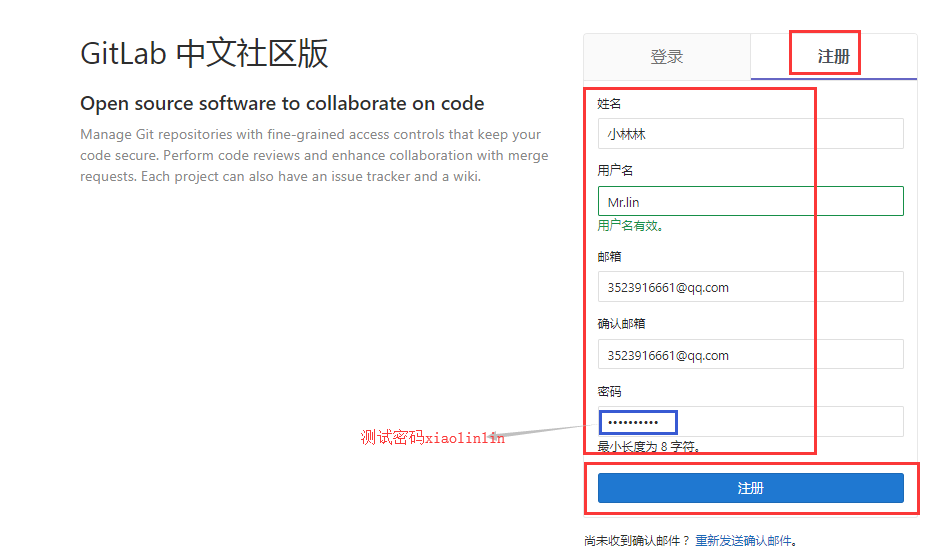
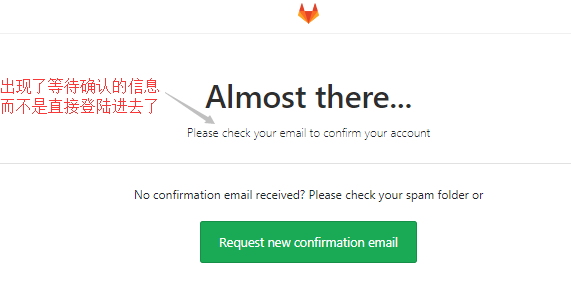
由上图,我们发现,此时注册用户,已经进不去GitLab了;
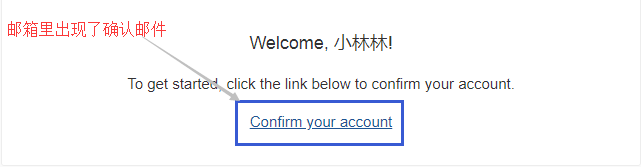
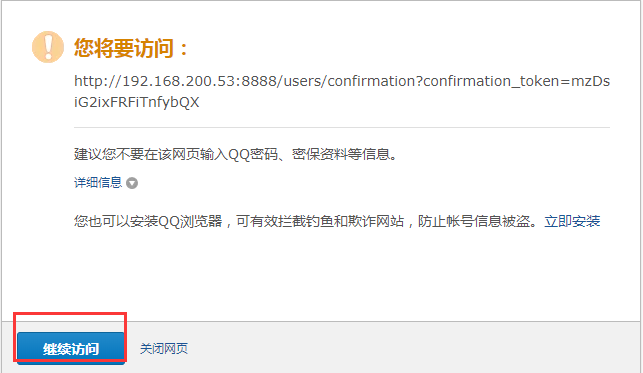
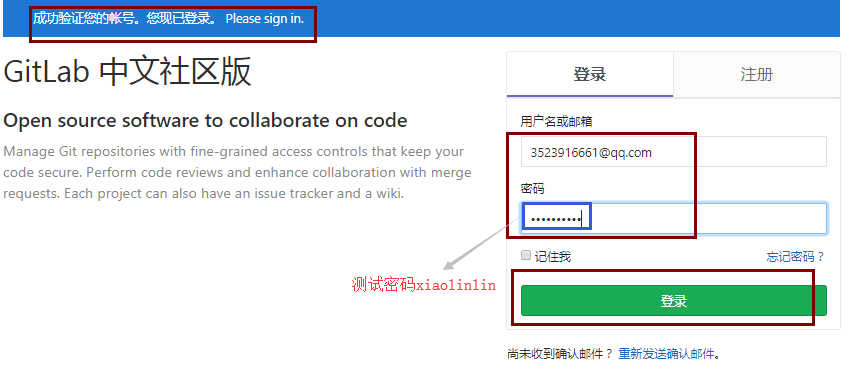
这是因为GitLab已经自动发了一封邮件给注册用户的邮箱,需要用户进行邮件确认后,方可登陆
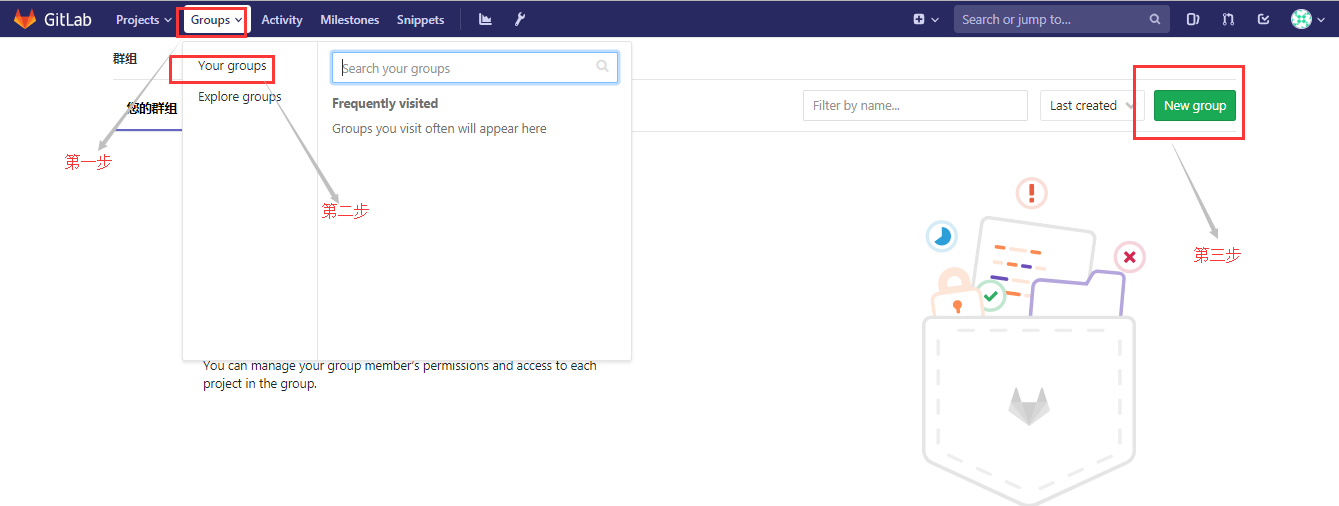
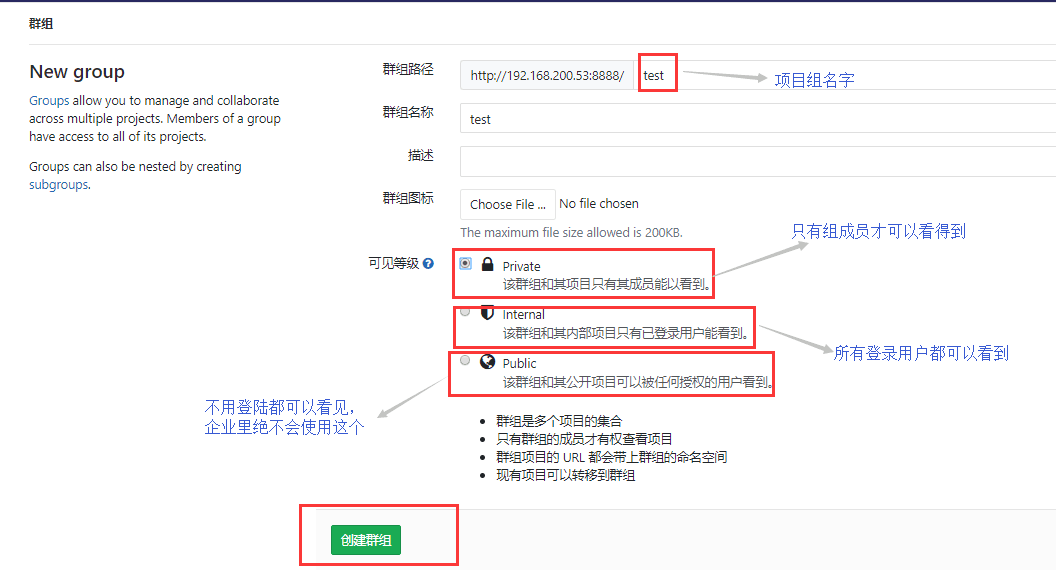
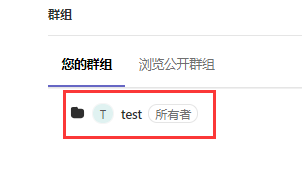
4.7.3 创建一个项目组
4.7.4 给组添加成员并授权
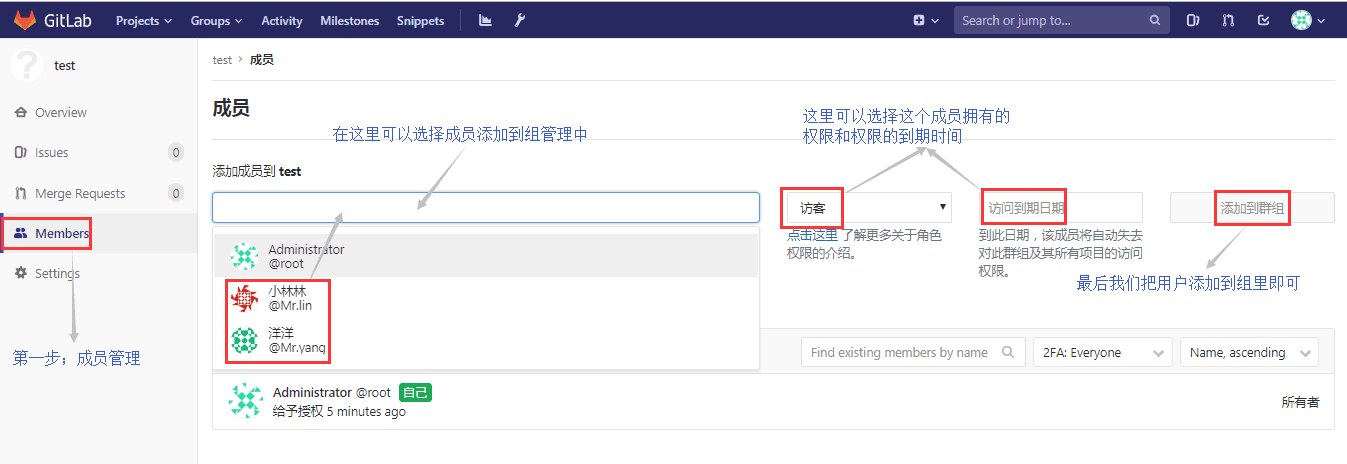
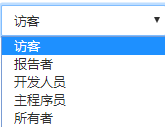
- Guest访客: 只能发表评论,不能读写项目库
- Reporter报告者: 只能克隆代码(读),不能提交代码(修改)(产品测试)
- Developer开发人员: 可以进行代码的读写(普通程序员)
- Master主程序员: 可以添加项目成员,添加标签,创建和保护分支(产品经理)
- Owner所有者: 拥有所有权限(一般不用此权限)
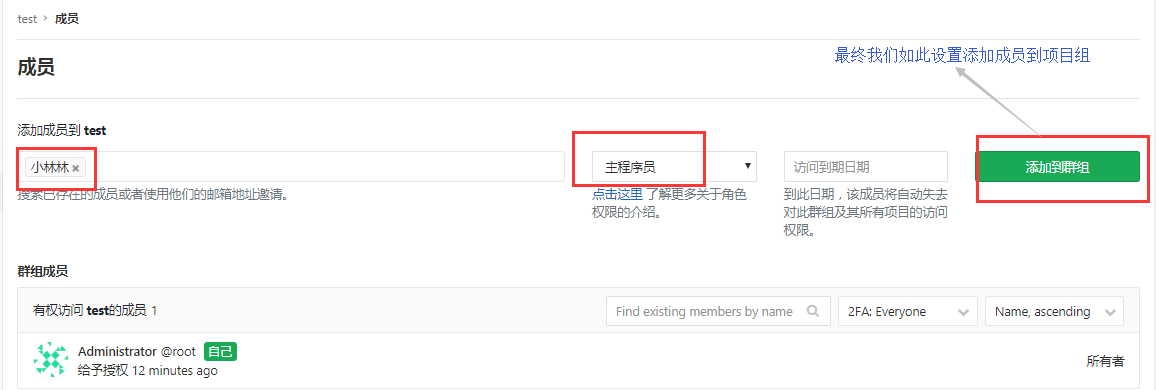
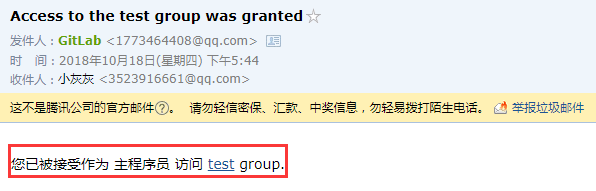
添加权限成功后,GitLab会自动邮件通知这个用户
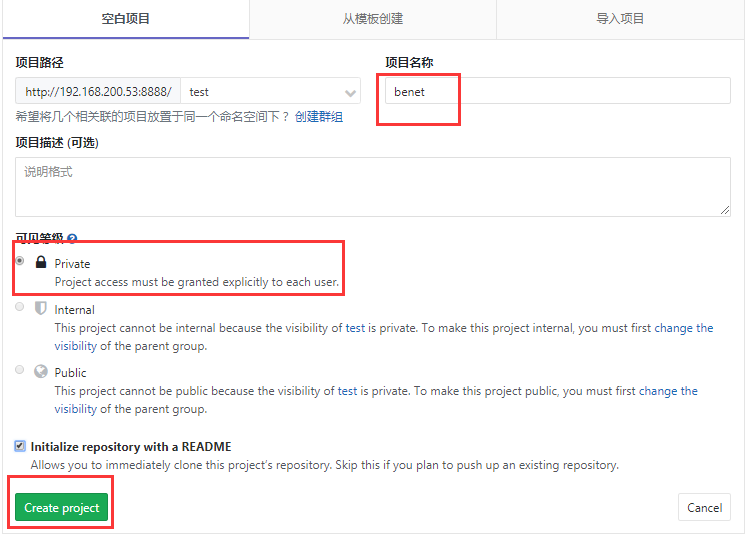
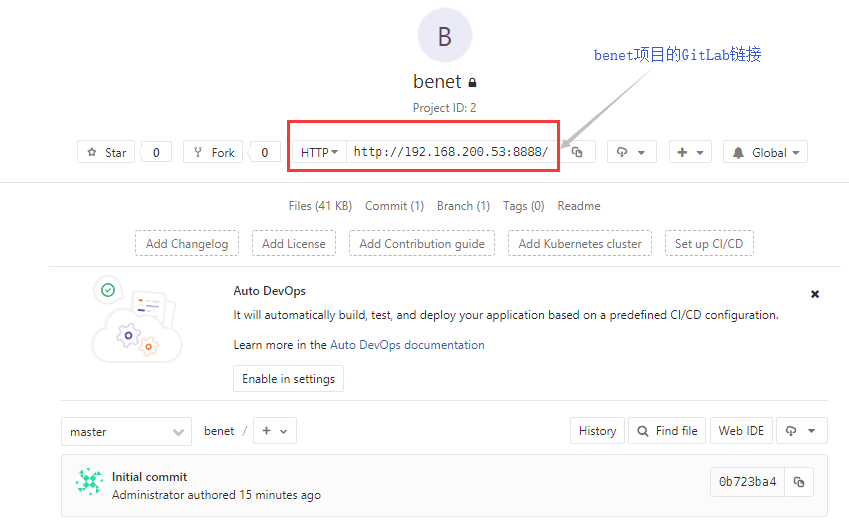
4.7.5 给项目组创建一个新项目
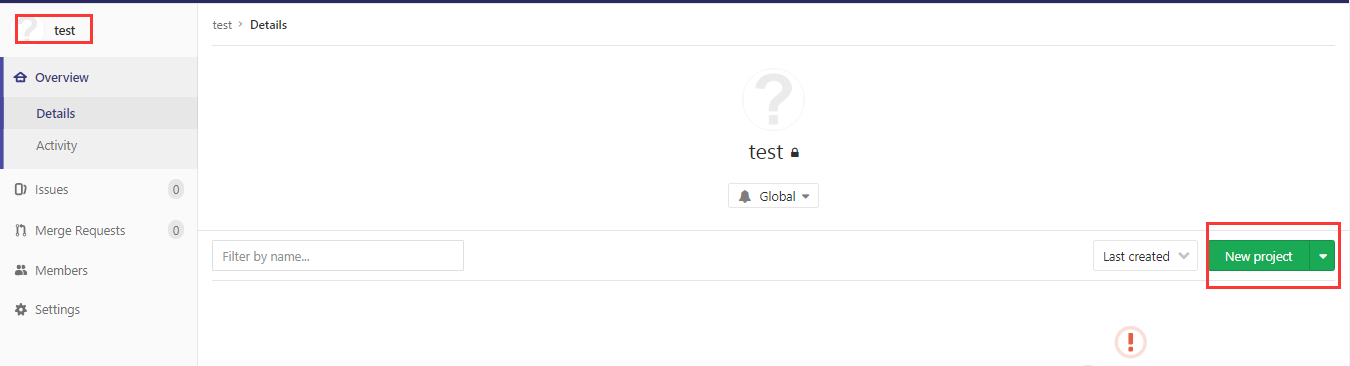
4.7.5 进行组成员的项目提交和克隆测试
#进行组成员代码提交测试
[root@Git01 /]# mkdir benet
[root@Git01 /]# cd benet/
[root@Git01 benet]# git init
初始化空的 Git 仓库于 /benet/.git/
#进行克隆测试
[root@Git01 benet]# git clone http://192.168.200.53:8888/test/benet.git
正克隆到 'benet'...
Username for 'http://192.168.200.53:8888': [email protected]
Password for 'http://[email protected]@192.168.200.53:8888': xiaolinlin
remote: Enumerating objects: 3, done.
remote: Counting objects: 100% (3/3), done.
remote: Total 3 (delta 0), reused 0 (delta 0)
展开对象中: 100% (3/3), 完成.
检查连接... 完成。
[root@Git01 benet]# ls
benet
[root@Git01 benet]# cd benet/
[root@Git01 benet]# ls
README.md
[root@Git01 benet]# cat README.md
# benet
#推送代码到远程GitLab
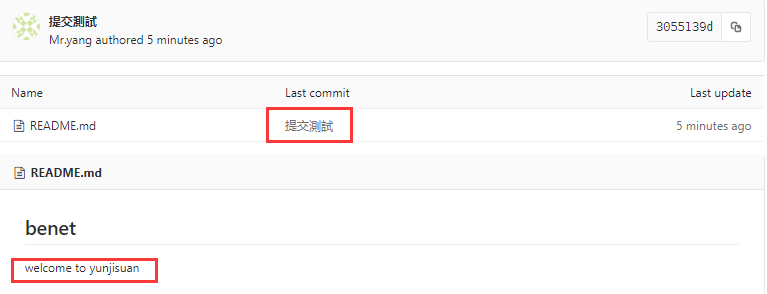
[root@Git01 benet]# echo "welcome to yunjisuan" >> README.md
[root@Git01 benet]# cat README.md
# benet
welcome to yunjisuan
[root@Git01 benet]# git add *
[root@Git01 benet]# git commit -m "提交測試"
[master 3055139] 提交測試
1 file changed, 1 insertion(+)
[root@Git01 benet]# git remote -v
origin http://192.168.200.53:8888/test/benet.git (fetch)
origin http://192.168.200.53:8888/test/benet.git (push)
[root@Git01 benet]# git push http://192.168.200.53:8888/test/benet.git
Username for 'http://192.168.200.53:8888': [email protected]
Password for 'http://[email protected]@192.168.200.53:8888': xiaolinlin
对象计数中: 3, 完成.
写入对象中: 100% (3/3), 285 bytes | 0 bytes/s, 完成.
Total 3 (delta 0), reused 0 (delta 0)
To http://192.168.200.53:8888/test/benet.git
0b723ba..3055139 master -> master