相对来说windows比较好安装,直接上linux版本吧
准备:1.虚拟机vmware ; 2. redhat 6.5系统; 3. 更换redhat的yum源程序(因为redhat的yum是收费的,缓存centos版本,然后安装完yum,用yum install安装是安装5.1版本的mysql所以弃掉这个了,直接用rpm安装,rpm安装会有很多依赖包比较恶心)4.去官网下载mysql5.7的.tar文件这个里面包含很多rpm包,保证rpm的时候缺少的依赖包都在里面。
上面的操作,自行搞一下吧,我相信网络上很多这个安装的教程,我就不说了,直接玩起基础的命令吧
1. 安装完成后进行如下操作:
权限设置: chown mysql:mysql -R /var/lib/mysql
初始化 MySQL: mysqld --initialize
启动 MySQL:systemctl start mysqld x (6版本的系统,启动是service mysqld start)
查看 MySQL 运行状态:systemctl status mysqld
然而我操作的时候发生了好多错误啊:
[root@localhost lib]# mysqld initialize
2019-07-04T10:26:48.489489Z 0 [Warning] TIMESTAMP with implicit DEFAULT value is deprecated. Please use --explicit_defaults_for_timestamp server option (see documentation for more details).
2019-07-04T10:26:48.514630Z 0 [Note] mysqld (mysqld 5.7.26) starting as process 40610 ...
2019-07-04T10:26:48.532526Z 0 [ERROR] Fatal error: Please read "Security" section of the manual to find out how to run mysqld as root!
2019-07-04T10:26:48.532606Z 0 [ERROR] Aborting
2019-07-04T10:26:48.533289Z 0 [Note] Binlog end
2019-07-04T10:26:48.534863Z 0 [Note] mysqld: Shutdown complete
然后试着切换到mysql用户初始化why?
[root@localhost lib]# ps -ef|grep mysql
root 42516 18145 4 03:28 pts/1 00:00:00 grep mysql
[root@localhost lib]# su - mysql
-bash-4.1$ mysqld initalize
-bash-4.1$ ps -ef|grep mysql
root 42517 18145 0 03:29 pts/1 00:00:00 su - mysql
mysql 42518 42517 0 03:29 pts/1 00:00:00 -bash
mysql 42558 42518 1 03:29 pts/1 00:00:00 ps -ef
mysql 42559 42518 0 03:29 pts/1 00:00:00 grep mysql
最后查了一下看到其他人是这么说的 :
这是因为在测试的时候,使用root来启动的。而从安全角度来讲,不建议用root用户启动。
解决方案:
/usr/sbin/mysqld --skip-grant-tables --skip-networking --user=root &
启动mysql
[root@localhost lib]# service mysqld start
Starting mysqld: [ OK ]
查询mysql运行状态
[root@localhost lib]# service mysqld status
mysqld (pid 42668) is running...
验证 MySQL 安装
在成功安装 MySQL 后,一些基础表会表初始化,在服务器启动后,你可以通过简单的测试来验证 MySQL 是否工作正常。
使用 mysqladmin 工具来获取服务器状态:
使用 mysqladmin 命令来检查服务器的版本, 在 linux 上该二进制文件位于 /usr/bin 目录,在 Windows 上该二进制文件位于C:\mysql\bin 。
[root@localhost lib]# mysqladmin --version
mysqladmin Ver 8.42 Distrib 5.7.26, for Linux on x86_64
使用 MySQL Client(Mysql客户端) 执行简单的SQL命令
你可以在 MySQL Client(Mysql客户端) 使用 mysql 命令连接到 MySQL 服务器上,默认情况下 MySQL 服务器的登录密码为空,所以本操作不需要输入密码。
命令如下:
[root@host]# mysql
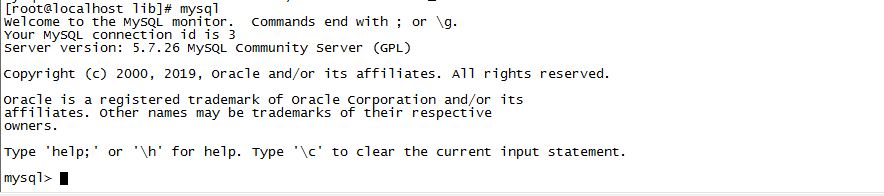
以上命令执行后会输出 mysql>提示符,这说明你已经成功连接到Mysql服务器上,你可以在 mysql> 提示符执行SQL命令:
mysql> show databases
-> ;
+--------------------+
| Database |
+--------------------+
| information_schema |
+--------------------+
1 row in set (0.00 sec)
Mysql安装后需要做的
Mysql安装成功后,默认的root用户密码为空,你可以使用以下命令来创建root用户的密码:
[root@host]# mysqladmin -u root password "new_password";
现在你可以通过以下命令来连接到Mysql服务器:
[root@host]# mysql -u root -p Enter password:*******
[root@localhost lib]# mysqladmin -u root password root
mysqladmin: [Warning] Using a password on the command line interface can be insecure.
Warning: Since password will be sent to server in plain text, use ssl connection to ensure password safety.
mysqladmin:
You cannot use 'password' command as mysqld runs
with grant tables disabled (was started with --skip-grant-tables).
Use: "mysqladmin flush-privileges password '*'" instead