目录
首发日期:2019-06-27
使用的技术
vue.js+element UI+mock.js
- vue.js是核心
- element UI是一个支持vue.js的UI组件库
- mock.js:由于没有后端接口,所以需要使用本地数据来假装成后端的数据。
温馨提示:如果以下内容超出了你的知识面,可以考虑参考我写的关于Vue的基础学习的博客来补充知识
后端开发者的Vue学习之路(四)
后端开发者的Vue学习之路(五)。
基础但不好版
1.初始化项目
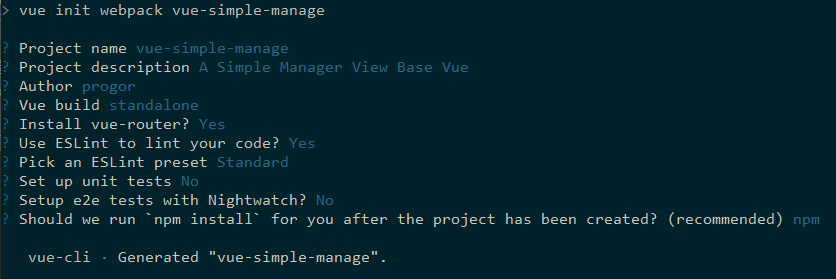
1.1 首先使用vue-cli初始化一个项目结构【如果你还没有安装vue-cli,那么需要npm install -g vue-cli】
命令:vue init webpack 项目名
1.2 注意一下这个项目的初始化结构:
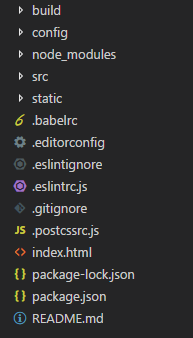
这里不介绍项目结构,如果有需要可以参考一篇博客中的一个小节:项目结构分析
1.3 留心文件index.html,里面有个<div id="app"></div>,这里面的app将对应最基础的component。可以说index.html就是初始页了。
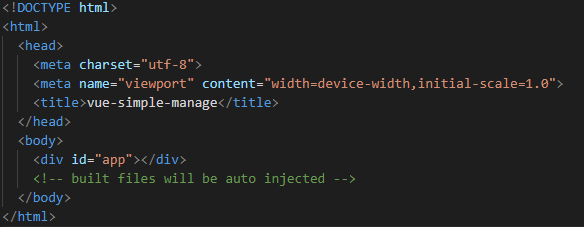
1.4 留心文件src/App.vue:在src/main.js中声明了index.html的app对应的组件将使用App组件,而App组件定义在App.vue中。【也就是说如果我们修改App.vue,将会对应修改初始页的内容】

App.vue的初始代码如下:
<template>
  <div id="app">
    <img src="./assets/logo.png">
    <router-view/>
  </div>
</template>

<script>
export default {
  name: 'App'
}
</script>

<style>
#app {
  font-family: 'Avenir', Helvetica, Arial, sans-serif;
  -webkit-font-smoothing: antialiased;
  -moz-osx-font-smoothing: grayscale;
  text-align: center;
  color: #2c3e50;
  margin-top: 60px;
}
</style>
2.实现初始页内容自定义
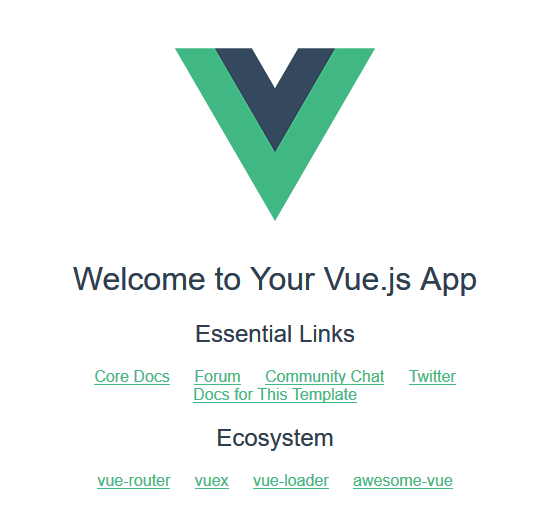
初始化项目后,可以在项目目录执行npm start命令,这样可以把项目部署起来。访问localhost:8080可以得到以下界面:
原始的App.vue代码是:
<template>
  <div id="app">
    <img src="./assets/logo.png">
    <router-view/>
  </div>
</template>我们可以尝试删除<img src="./assets/logo.png">,来测试是否可以通过修改App.vue来达到修改初始页的效果。
3.使用路由
在App.vue中有一个<router-view/>,如果你已经学过路由了,那么你应该会想到通过进入不同的路由来修改初始页的内容了吧。
原始代码
src/router/index.js的原始代码如下,代码说明了路由/渲染的初始页中图片下面的文字内容对应哪个Component,它从'@/components/HelloWorld'中导入HelloWorld再定义到路由中的。
import Vue from 'vue'
import Router from 'vue-router'
import HelloWorld from '@/components/HelloWorld'

Vue.use(Router)

export default new Router({
  routes: [
    {
      path: '/',
      name: 'HelloWorld',
      component: HelloWorld
    }
  ]
})
自建页面
由于路由跳转的是面向component的,如果我们要进行路由跳转,那么首先需要定义几个component。
下面在src/components中定义以下几个component:
- Login.vue:与路由
/对应,默认访问项目首页是会渲染出登录页(Login.vue) - AdminIndex.vue:与路由
/admin对应,登录成功后,会进入后台管理的首页 - ProductManage.vue:与路由
/product对应,点击产品管理菜单将进入产品菜单页面 - ClientManage.vue:与路由
/client对应,点击客户管理菜单将进入客户菜单页面
在设计这几个component时,我们使用Element UI作为我们的UI库,首先我们对其进行导入。
执行命令:npm install element-ui --save
然后在main.js中添加下列代码,这样就可以在所有的组件中使用elmenent UI中的所有组件了:
import ElementUI from 'element-ui'
import 'element-ui/lib/theme-chalk/index.css'
Vue.use(ElementUI)
设计component的时候注意修改App.vue中style的一个margin-top,不然你可能会发现界面的顶部有一片空白。
创建Login.vue:
<template>
  <div>
    <h3>这是登录页面,由于功能尚未完善,<br>
      所以此处忽略登录功能,直接通过点击进入后台管理首页</h3>
    <router-link to="/admin">进入后台管理首页</router-link>
  </div>
</template>
<script>
export default {
  name: 'Login'
}
</script>
修改后台管理首页AdminIndex.vue:
<template>
  <el-container>
    <!-- 页面顶部 -->
    <el-header>
      LOGO
    </el-header>
    <!-- 页面左侧菜单 -->
    <el-aside width="200px"
              style="background-color: rgb(238, 241, 246)">
      <el-menu router='true'>
        <!-- 开启菜单中的router=true之后,点击菜单会把index作为路由跳转路径 -->
        <el-menu-item index="product">
          <i class="el-icon-setting"></i>产品管理
        </el-menu-item>
        <el-menu-item index="client">
          <i class="el-icon-setting"></i>客户管理
        </el-menu-item>
      </el-menu>
    </el-aside>
    <el-container>
      <el-main>
        <!-- 下面内容是中间空白区域的内容,你可以自定义 -->
        这是后台管理首页的内容
      </el-main>
    </el-container>
  </el-container>
</template>

<style>
.el-header {
  background-color: #c1cbd8;
  color: #333;
  line-height: 60px;
}

.el-aside {
  color: #333;
}
</style>

<script>
export default {
  name: 'AdminIndex'
}
</script>
修改客户管理页面ClientManage.vue:
<template>
  <el-container>
    <el-header>
      LOGO
    </el-header>
    <el-aside width="200px"
              style="background-color: rgb(238, 241, 246)">
      <el-menu router='true'>
        <!-- 开启菜单中的router=true之后,点击菜单会把index作为路由跳转路径 -->
        <el-menu-item index="product">
          <i class="el-icon-setting"></i>产品管理
        </el-menu-item>
        <el-menu-item index="client">
          <i class="el-icon-setting"></i>客户管理
        </el-menu-item>
      </el-menu>
    </el-aside>

    <el-container>
      <el-main>
        这是客户管理页
      </el-main>
    </el-container>
  </el-container>
</template>

<style>
.el-header {
  background-color: #c1cbd8;
  color: #333;
  line-height: 60px;
}

.el-aside {
  color: #333;
}
</style>

<script>
export default {
  name: 'ClientManage'
}
</script>
修改产品管理页面ProductManage.vue:
<template>
  <el-container>
    <el-header>
      LOGO
    </el-header>
    <el-aside width="200px"
              style="background-color: rgb(238, 241, 246)">
      <el-menu router='true'>
        <!-- 开启菜单中的router=true之后,点击菜单会把index作为路由跳转路径 -->
        <el-menu-item index="product">
          <i class="el-icon-setting"></i>产品管理
        </el-menu-item>
        <el-menu-item index="client">
          <i class="el-icon-setting"></i>客户管理
        </el-menu-item>
      </el-menu>
    </el-aside>
    <el-container>
      <el-main>
        这是产品管理页
      </el-main>
    </el-container>
  </el-container>
</template>

<style>
.el-header {
  background-color: #c1cbd8;
  color: #333;
  line-height: 60px;
}

.el-aside {
  color: #333;
}
</style>

<script>
export default {
  name: 'ProductManage'
}
</script>
修改路由
import Vue from 'vue'
import Router from 'vue-router'
import Login from '@/components/Login'
import AdminIndex from '@/components/AdminIndex'
import ProductManage from '@/components/ProductManage'
import ClientManage from '@/components/ClientManage'

Vue.use(Router)

export default new Router({
  routes: [
    {
      path: '/',
      name: 'Login',
      component: Login
    },
    {
      path: '/admin',
      name: 'AdminIndex',
      component: AdminIndex
    },
    {
      path: '/product',
      name: 'ProductManage',
      component: ProductManage
    },
    {
      path: '/client',
      name: 'ClientManage',
      component: ClientManage
    }
  ]
})
4.测试路由跳转
一个普通的通过路由跳转来渲染页面的功能到此就基本完成了。
如下gif所示,如果想要自己完善这个后台管理系统的具体界面,那只需要在每一个component中自定义内容并添加自定义路由就可以逐渐完善这个后台管理系统了。
补充
但上面的页面有一个严重的问题,你可能也留意到了,Component的代码有些重复了几次。有些人可能会想到在component引入其他component来进行“组件复用”,但其实可以通过“子路由”来解决,下面将演示如何解决这个问题。
子路由版
在上面的界面中,我们重复地写了很多左侧菜单栏的代码。
实际上,点击菜单时,我们可能只需要修改中间的内容区域的内容而已。
这个功能可以通过子路由来实现。
嵌套router-view
首先,我们在AdminIndex.vue中修改中间区域的代码,保留左侧菜单的代码不变:
    <el-container>
      <el-main>
        <!-- 仅仅修改中间区域的代码,其他与之前不变 -->
        <router-view />
      </el-main>
</el-container>你看到了我使用了一个<router-view />,没错的,可以通过嵌套路由来嵌套显示一些内容,而渲染子内容的时候不会影响父路由的已经渲染的内容【这不就解决了上面的问题了吗?】。
定义子路由
定义子路由使用children:
export default new Router({
  routes: [
    {
      path: '/',
      name: 'Login',
      component: Login
    },
    {
      path: '/admin',
      name: 'AdminIndex',
      component: AdminIndex,
      children: [
        // { // 这里可以写直接访问父路由时渲染哪个component
        //   path: '',
        //   component: Statictis
        // },
        {
          path: 'product',
          name: 'ProductManage',
          component: ProductManage
        },
        {
          path: 'client',
          name: 'ClientManage',
          component: ClientManage
        }
      ]
    }
  ]
})
修改菜单
将左侧菜单栏中的菜单对应的路由修改成新的路由。
    <!-- 页面左侧菜单 -->
    <el-aside width="200px"
              style="background-color: rgb(238, 241, 246)">
      <el-menu router='true'>
        <!-- 开启菜单中的router=true之后,点击菜单会把index作为路由跳转路径 -->
        <el-menu-item index="/admin/product">
          <i class="el-icon-setting"></i>产品管理
        </el-menu-item>
        <el-menu-item index="/admin/client">
          <i class="el-icon-setting"></i>客户管理
        </el-menu-item>
      </el-menu>
    </el-aside>
修改component
此时其他的component不再需要重复写左侧菜单栏的代码了,所以需要修改component的代码:
大概如下,把重复的代码去除,只保留中间内容区域的代码
<template>
  <div>
    这是客户管理页
  </div>
</template>

<script>
export default {
  name: 'ClientManage'
}
</script>
补充
- 上面的版本就减少了使用重复的代码。基本完成了基础的页面跳转问题。
带请求版
在学习这里时,我假设你已经了解axios了,如果没有,那么可以参考后端开发者的Vue学习之路(五)
首先,安装axios:npm install --save axios
统一配置axios实例
- 在给axios实例传入一个与请求相关的对象的时候,可以发起请求。
- 由于我们访问后端接口一般都是固定的url前缀的,我们可以预创建一个axios实例,
下面的代码创建在src/plugin/axios/index.js中:
import axios from 'axios'
// 可以配置一些基本参数,由于这里使用mock假装获取数据,所以请不要配置baseURL
const instance = axios.create({
  // baseURL: 'http://localhost:8080'
})

export default instance // 记得导出
定义API调用信息
下面的代码创建在src/api/product.js中:
// 导入axios实例
import instance from '@/plugin/axios'

export function getproducts () {
  // instance()中传入确切的url信息时,将发起请求
  // (当然,首先是这个方法要被调用,此处只是声明)
  return instance({
    url: '/api/products', // 这里访问本地数据来假装获取后端接口数据
    method: 'get'
  })
}

// 其他示例代码:
// export function login (data) {
//   return request({
//     url: '/login.action',
//     method: 'post',
//     data: data
//   })
// }上面的代码可能有时候还需要涉及传参等问题,如果不了解可以考虑参考我的博客后端开发者的Vue学习之路(五)。
调用API
在component中引入方法,然后调用API:
<template>
  <div>
    这是产品管理页
    <!-- 输出值 -->
    {{ this.content }}
  </div>
</template>

<script>
// 导入api
import { getproducts } from '@/api/product'
export default {
  name: 'ProductManage',
  data () {
    return {
      content: ''
    }
  },
  created () {
    this.getProductsApi()
  },
  methods: {
    getProductsApi () {
      // 调用API
      getproducts().then(response => {
        // 这里应该有一步是关于返回的数据是否可被直接渲染的判断
        // 赋值给本地变量,然后渲染。
        this.content = response.data
      }).catch(error => {
        // 当请求错误时,提示错误信息
        this.$message(error)
      })
    }
  }
}
</script>
使用mock
由于这里要获取后端的数据来渲染,我们使用mock.js来假装获取后端的数据,也就是使用我们定义的数据来进行返回。
1.首先,安装mock.js:npm install mockjs --save-dev
2.在main.js中引入mock.js:
import '@/mock.js'//引入3.在src目录下创建mock.js:
import Mock from 'mockjs'

const redata = function () {
  return {
    code: 1,
    data: [
      {
        name: 'bao bao jinshui',
        cost: 18
      },
      {
        name: 'wangzai niunai',
        cost: 12
      }
    ]
  }
}

// 格式: Mock.mock( url, post/get , 返回的数据);
Mock.mock('/api/products', 'get', redata)
export default Mock
最终效果如图所示:

上面的代码演示了如何调用API,其中值得注意的是,经常会给axios实例配置一些具体的参数,例如baseURL。
代码
代码已经推送到github上了,vue-simple-manage,具体如图下:

未涉及问题
1.路由传参问题。(常见场景:点击一个按钮,跳转到一个界面,携带一些参数渲染页面。)
2.静态资源问题。(常见场景:页面使用静态资源,如图片)
3.数据存储问题。(常见场景:由于前后端分离了,所以前端可能需要存储一些数据来帮助渲染(如当前用户名和用户级别等,这些数据不应该时常从后端获取,一般都存储到store中),而浏览器刷新的时候,会清除store中存储的数据,所以需要将数据存储到localStorge中)
4.其他。。。