微信JS-SDK
前端需要实现一个功能,如录音,拍照,分享,地理位置等,前端想要实现这些功能的调用,必须要通过调用JS-SDK的方式来实现,那么如何使用呢,本文进行简单的介绍(新手第一次开发总结,不对的地方望大家指正)
1.前期准备
因为是第一次开发,看了很多文档,包括官方文档,看了很多遍,仍然是一头雾水,那些东西该前端配,哪些东西该后端做,没有一点概念。经过了一番与后端的尝试与合作,终于调用成功!
企业微信里有个应用与小程序,里面的自建应用开发同公众号开发,后端设置略微有些不同
后端:根据企业微信里我的企业选项最下面的企业id和应用与小程序里的自建应用的Secret获取token,并计算签名等一系列操作,具体官方文档网上都很详细,这里就不多说;
配置
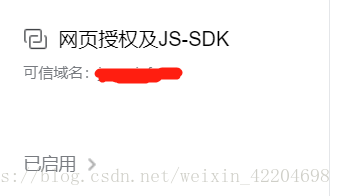
需要在企业微信的自建程序里设置域名:此域名为前端写代码的外网网页域名,也就是最后呈现的网页域名(前端写完代码给后端,后端根据项目地址我的是gitLab配置外网域名),第一次配置需要启动,所以要和后端配合好,启动时有一个txt文件,前端需要打包给后端,后端配置到根目录并确保可以访问到txt文件
说明:此域名的配置是必要的,只有配置此域名才可以使用此域名调用JS-SDK,可以使用微信开发者工具的公众号开发选项进行在线调试域名,注意:只可以调试你打包到线上的外网ip

前端代码撰写
安装并在组建里引入wx
import wx from 'weixin-js-sdk';
const _this = wx;
要想在一个组件使用在当前组件引入就行,引入完成就是使用,在页面调用接口之前必须完成注册等逻辑,因为录音功能是手动触发执行,所以在vue中可以写个函数在mounted钩子函数中执行完成注册,代码如下:
methods: {
      getConfig() {
        const self=this;
        const data=self.qs.stringify({url: location.href.split('#')[0]});//需要传的地址为#前面的地址
        console.log(data);
        self.axios({
          method: 'post',
          url: '',//获取签名等信息的地址
          headers: {'Content-Type': 'application/json'},
          data:data  //向服务端提供授权url参数,并且不需要#后面的部分
        }).then((res) => {
           let list = res.data.data;
          	_this.config({
            debug: false, // 开启调试模式,调用的所有api的返回值会在客户端alert出来,若要查看传入的参数,可以在pc端打开,参数信息会通过log打出,仅在pc端时才会打印。
            appId: list.appId, // 必填,公众号的唯一标识
            timestamp: list.timestamp, // 必填,生成签名的时间戳
            nonceStr: list.noncestr, // 必填,生成签名的随机串
            signature: list.signature, // 必填,签名
            jsApiList: [
              'startRecord', //开始录音接口
              'stopRecord',// 停止录音接口
              'playVoice', //播放语音接口
              'pauseVoice',//暂停播放接口
              'stopVoice', //停止播放接口
              'uploadVoice',//上传语音接口
              'downloadVoice', //下载语音接口
              'onVoicePlayEnd', // 监听语音播放完毕api
              'translateVoice'
            ] // 必填,需要使用的JS接口列表
          });
          _this.ready(() => {
// config信息验证后会执行ready方法,所有接口调用都必须在config接口获得结果之后,config是一个客户端的异步操作,所以如果需要在页面加载时就调用相关接口,则须把相关接口放在ready函数中调用来确保正确执行。对于用户触发时才调用的接口,则可以直接调用,不需要放在ready函数中。
          })
          // 微信sdk错误返回问题
          _this.error((res) => {
            alert('出错了:' + res.errMsg)// 这个地方的好处就是wx.config配置错误,会弹出窗口哪里错误,然后根据微信文档查询即可。
          })
        }).catch((error) => {
          console.log(error)
        })
      },
      // 开始录音
      start(e) {
        let that = this;
        that.stop();
        that.time = 0;
        if(!localStorage.rainAllowRecord || localStorage.rainAllowRecord !== 'true'){
          _this.startRecord({
            success: function () {
              /*console.log('成功开始调起录音')*/
               	that.timer = setInterval(() => {
                that.time++
              }, 1000)
              that.vicoeEnd()
            },
            fail: function () {
            /*console.log('开始录音失败')*/
            },
            cancel: function () {
              alert('用户拒绝授权录音')
            }
          })
        }
      },
      // 停止录音
      stop() {
        let that = this
          _this.stopRecord({
          success: function (res) {
            if(that.time<0.5){
              return
            }
            // alert('暂停成功')
            /*console.log(res, "停止成功");*/
            clearInterval(that.timer)
            that.localId = res.localId
            /*that.upVoice()*/
          },
          fail: function (error) {
            /*console.log(error, "停止失败")*/
          }
        })
      },
      //取消录音判断
      isCancel(e) {
          this.cancel()
      },
      // 取消录音
      cancel() {
        _this.stopRecord({
          success: (res) => {
            /*console.log("取消录音成功");*/
          },
          fail:function (error) {
            console.log("取消录音失败");
          }
        })
      },
      // 60秒监听
      vicoeEnd() {
        let that = this
        _this.onVoiceRecordEnd({
          // 录音时间超过一分钟没有停止的时候会执行 complete 回调
          complete: function (res) {
            alert('60秒停止录音')
            that.localId = res.localId
            clearInterval(that.timer);
            /*that.upVoice()*/
          }
        })
      },
      // 合并
      merge() {
        let that = this
        this.axios({
          method: 'post',
          url: '',
          headers: {'Content-Type': 'application/json'},
          data: {url: location.href.split('#')[0]}
        })
          .then((ser) => {
            console.log(ser)
            that.$refs.allRecord.src = ser.data
          })
          .catch((error) => {
            console.log(error)
          })
      },
      // // 播放
      // play () {
      //   let that = this
      //   console.log(that.localId)
      //   _this.playVoice({
      //     localId: that.localId // 需要播放的音频的本地ID,由stopRecord接口获得
      //   })
      // },
      // // 暂停
      // pausePlay () {
      //   let that = this
      //   _this.pauseVoice({
      //     localId: that.localId // 需要暂停的音频的本地ID,由stopRecord接口获得
      //   })
      // },
      // // 停止
      // stopPlay () {
      //   let that = this
      //   _this.stopVoice({
      //     localId: that.localId // 需要停止的音频的本地ID,由stopRecord接口获得
      //   })
      // },

      //结束录音并识别语音
      translate() {
        const that = this;
        _this.stopRecord({
          success: function (res) {
            /*console.log(res,"翻译前停止录音");*/
            that.localId = res.localId;
            _this.translateVoice({
              localId: that.localId,
              complete: function (res) {
                console.log(res,"调用翻译完成时");
              }
            });
          },
          fail: function (res) {
            console.log(res,"调用停止失败");
          }
        });
      },
      // 上传语音
      upVoice() {
        let that = this
        _this.uploadVoice({
          localId: that.localId, // 需要上传的音频的本地ID,由stopRecord接口获得
          isShowProgressTips: 1, // 默认为1,显示进度提示
          success: function (res) {
            var apiUrl = window.location.href
            /*alert('上传成功')*/
            that.serverId = res.serverId // 返回音频的服务器端ID
            that.axios({
              method: 'post',
              url: 'http://my.service.com/index.php/opcode/6002',
              headers: {'Content-Type': 'application/json'},
              data: {
                serverId: res.serverId,
                url: location.href.split('#')[0]
              }
            })
              .then((data) => {
                console.log(data)
                that.$refs.player.src = data.data
              })
              .catch((error) => {
                console.log(error)
              })
          }
        })
      }
      // 下载语音
      // downVoice () {
      //   let that = this
      //   _this.downloadVoice({
      //     serverId: that.serverId, // 需要下载的音频的服务器端ID,由uploadVoice接口获得
      //     isShowProgressTips: 1, // 默认为1,显示进度提示
      //     success: function (res) {
      //       alert('下载成功')
      //       that.downLoadId = res.localId // 返回音频的本地ID
      //       console.log(res)
      //       console.log(that.downLoadId)
      //     }
      //   })
      // },
      // 模拟上传语音
      // fake () {
      //   var apiUrl = window.location.href
      //   this.axios({
      //     method: 'post',
      //     url: 'api',
      //     headers: {'Content-Type': 'application/json'},
      //     data: {
      //       serverId: '',
      //       url: apiUrl
      //     }
      //   })
      //     .then((res) => {
      //       console.log(res)
      //       this.$refs.player.src = res.data
      //     })
      //     .catch((error) => {
      //       console.log(error)
      //     })
      // }
    },
这里样式代码根据需要进行编写就行,哪个按钮需要调用录音开始,哪个按钮调用录音结束,哪个需要翻译,需要用到哪个功能,直接调用methods里面的对应方法即可,(如果调用其它JS-SDK,原理等同,注册时给jsApiList数组添加你需要的功能字段微信公众号API文档可查就可以引用了), 需要对应方法执行成功后做的事情在对应方法里写就ok啦
是不是很简单呢,代码撰写完毕就是打包代码提交代码了,后台更新代码到线上,就可以看到效果了。注意:由于微信开发者工具是模拟调试,所以只能有一条模拟的录音结果返回,真正的语音及翻译结果还得发送网址到微信里打开查看
好了,微信JS-SDK接口调用就介绍到这里了,新手初写,希望能帮助到大家,也请大家多多指导