一 概要
Spring Security,这是一种基于 Spring AOP 和 Servlet 过滤器的安全框架。它提供全面的安全性解决方案,同时在 Web 请求级和方法调用级处理身份确认和授权。这里过多的spring security解释和作用就不在这里赘述了,请自行搜索。目前最新版本的Spring Security为4.2.2,但是我这里用了稳定版本3.1.3。下面例子为一个简单的Spring Security配置应用。
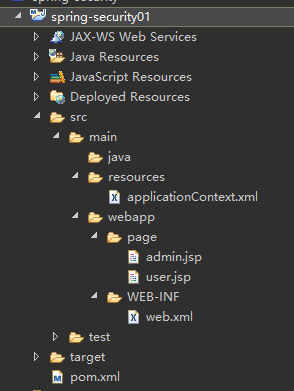
二 新建一个web maven项目
新建好项目之后在webapp/page目录下添加了两个jsp文件,admin.jsp和user.jsp。
admin.jsp只有那些拥有ROLE_ADMIN,ROLE_USER其中一种权限的用户才能访问,
user.jsp只允许那些拥有ROLE_USER权限的用户才能访问。
admin.jsp
<%@ page language="java" contentType="text/html; charset=UTF-8" pageEncoding="UTF-8"%>
<!DOCTYPE html PUBLIC "-//W3C//DTD HTML 4.01 Transitional//EN" "http://www.w3.org/TR/html4/loose.dtd">
<html>
    <head>
        <meta http-equiv="Content-Type" content="text/html; charset=UTF-8">
        <title>Insert title here</title>
    </head>
    <body>
        <h1>Admin Page</h1>
    </body>
</html>
user.jsp
<%@ page language="java" contentType="text/html; charset=UTF-8" pageEncoding="UTF-8"%>
<!DOCTYPE html PUBLIC "-//W3C//DTD HTML 4.01 Transitional//EN" "http://www.w3.org/TR/html4/loose.dtd">
<html>
    <head>
        <meta http-equiv="Content-Type" content="text/html; charset=UTF-8">
        <title>Insert title here</title>
    </head>
    <body>
        <h1>User Page</h1>
    </body>
</html>
三 配置过滤器
为了在项目中使用Spring Security控制权限,首先要在web.xml中配置过滤器,这样我们就可以控制对这个项目的每个请求了。
web.xml
<?xml version="1.0" encoding="UTF-8"?>
<web-app xmlns:xsi="http://www.w3.org/2001/XMLSchema-instance"
    xmlns="http://java.sun.com/xml/ns/javaee" xmlns:web="http://java.sun.com/xml/ns/javaee/web-app_2_5.xsd"
    xsi:schemaLocation="http://java.sun.com/xml/ns/javaee
     http://java.sun.com/xml/ns/javaee/web-app_3_0.xsd" version="3.0">
    <display-name>SpringSecurity</display-name>

    <!-- 加载配置文件 -->
    <context-param>
        <param-name>contextConfigLocation</param-name>
        <param-value>classpath:spring-*.xml</param-value>
    </context-param>
    <!-- spring security 的过滤器配置 -->
    <filter>
        <filter-name>springSecurityFilterChain</filter-name>
        <filter-class>org.springframework.web.filter.DelegatingFilterProxy</filter-class>
    </filter>
    <filter-mapping>
        <filter-name>springSecurityFilterChain</filter-name>
        <url-pattern>/*</url-pattern>
    </filter-mapping>

    <listener>
        <listener-class>org.springframework.web.context.ContextLoaderListener</listener-class>
    </listener>

    <!-- 欢迎页面列表 -->
    <welcome-file-list>
        <welcome-file>/page/admin.jsp</welcome-file>
    </welcome-file-list>

</web-app>
四 Spring Security的配置
在WEB-INF/config/下新建applicationContext.xml,配置如下
<?xml version="1.0" encoding="UTF-8"?>
<beans:beans xmlns="http://www.springframework.org/schema/security"
    xmlns:beans="http://www.springframework.org/schema/beans" xmlns:xsi="http://www.w3.org/2001/XMLSchema-instance"
    xsi:schemaLocation="http://www.springframework.org/schema/beans
                        http://www.springframework.org/schema/beans/spring-beans-3.0.xsd
                        http://www.springframework.org/schema/context
                        http://www.springframework.org/schema/context/spring-context-3.1.xsd
                        http://www.springframework.org/schema/tx
                        http://www.springframework.org/schema/tx/spring-tx-3.0.xsd
                        http://www.springframework.org/schema/security
                        http://www.springframework.org/schema/security/spring-security.xsd">
    <!--
    1.http部分配置如何拦截用户请求。auto-config='true'将自动配置几种常用的权限控制机制,包括form, anonymous, rememberMe。
    2.利用intercept-url来判断用户需要具有何种权限才能访问对应的url资源,可以在pattern中指定一个特定的url资源,也可以使用通配符指定一组
    类似的url资源。例子中定义的两个intercepter-url,第一个用来控制对/admin.jsp的访问,第二个使用了通配符/**,说明它将控制对系统中所有
    url资源的访问。
    3.在实际使用中,Spring Security采用的是一种就近原则,就是说当用户访问的url资源满足多个intercepter-url时,系统将使用第一个符合
    条件的intercept-url进行权限控制。在我们这个例子中就是,当用户访问/admin.jsp时,虽然两个intercept-url都满足要求,但因为第一个
    intercept-url排在上面,所以Spring Security会使用第一个intercept-url中的配置处理对/adminPage.jsp的请求,也就是说
    只有那些拥有了ROLE_ADMIN权限的用户才能访问/admin.jsp。
    4.access指定的权限都是以ROLE_开头的,实际上这与Spring Security中的Voter机制有着千丝万缕的联系,只有包含了特定前缀的字符串才会
    被Spring Security处理。
     -->
    <http auto-config='true'>
        <intercept-url pattern="/page/admin.jsp" access="ROLE_ADMIN" />
        <intercept-url pattern="/**" access="ROLE_USER" />
    </http>

    <!--
    1.user-service中定义了两个用户,admin和user。为了简便起见,我们使用明文定义了两个用户对应的密码,这只是为了当前演示的方便,之后的例子中
    我们会使用Spring Security提供的加密方式,避免用户密码被他人窃取
    2.最重要的部分是authorities,这里定义了这个用户登陆之后将会拥有的权限,它与上面intercept-url中定义的权限内容一一对应。每个用户可以同时
    拥有多个权限,例子中的admin用户就拥有ROLE_ADMIN和ROLE_USER两种权限,这使得admin用户在登陆之后可以访问ROLE_ADMIN和ROLE_USER
    允许访问的所有资源。与之对应的是,user用户就只拥有ROLE_USER权限,所以他只能访问ROLE_USER允许访问的资源,而不能访问ROLE_ADMIN允许访问
    的资源。
     -->
    <authentication-manager>
        <authentication-provider>
            <user-service>
                <user name="admin" password="123" authorities="ROLE_USER, ROLE_ADMIN" />
                <user name="user" password="123" authorities="ROLE_USER" />
            </user-service>
        </authentication-provider>
    </authentication-manager>
</beans:beans>
五 pom.xml文件
<project xmlns="http://maven.apache.org/POM/4.0.0" xmlns:xsi="http://www.w3.org/2001/XMLSchema-instance"
    xsi:schemaLocation="http://maven.apache.org/POM/4.0.0 http://maven.apache.org/xsd/maven-4.0.0.xsd">
    <modelVersion>4.0.0</modelVersion>
    <!-- 父工程 -->
    <parent>
        <groupId>com.sunny</groupId>
        <artifactId>spring</artifactId>
        <version>0.0.1-SNAPSHOT</version>
    </parent>
    <artifactId>spring-security</artifactId>
    <packaging>pom</packaging>

    <!-- 子模块 -->
    <modules>
        <module>spring-security01</module>
    </modules>

    <!-- 配置属性 -->
    <properties>
        <project.build.sourceEncoding>UTF-8</project.build.sourceEncoding>
        <project.build.sourceEncoding>UTF-8</project.build.sourceEncoding>
        <java-version>1.7</java-version>
        <org.springframework-version>3.2.2.RELEASE</org.springframework-version>
        <org.aspectj-version>1.6.10</org.aspectj-version>
        <org.slf4j-version>1.6.1</org.slf4j-version>
    </properties>

    <!-- 依赖管理 -->
    <dependencyManagement>
        <dependencies>
            <!-- Spring -->
            <dependency>
                <groupId>org.springframework</groupId>
                <artifactId>spring-context</artifactId>
                <version>${org.springframework-version}</version>
            </dependency>
            <dependency>
                <groupId>org.springframework</groupId>
                <artifactId>spring-webmvc</artifactId>
                <version>${org.springframework-version}</version>
            </dependency>
            <dependency>
                <groupId>org.springframework</groupId>
                <artifactId>spring-context-support</artifactId>
                <version>${org.springframework-version}</version>
            </dependency>
            <dependency>
                <groupId>commons-logging</groupId>
                <artifactId>commons-logging</artifactId>
                <version>1.1.3</version>
            </dependency>
            <!-- Spring security -->
            <dependency>
                <groupId>org.springframework.security</groupId>
                <artifactId>spring-security-core</artifactId>
                <version>3.1.4.RELEASE</version>
            </dependency>
            <dependency>
                <groupId>org.springframework.security</groupId>
                <artifactId>spring-security-web</artifactId>
                <version>3.1.3.RELEASE</version>
            </dependency>
            <dependency>
                <groupId>org.springframework.security</groupId>
                <artifactId>spring-security-config</artifactId>
                <version>3.1.3.RELEASE</version>
            </dependency>
            <dependency>
                <groupId>org.springframework.security</groupId>
                <artifactId>spring-security-crypto</artifactId>
                <version>3.1.3.RELEASE</version>
            </dependency>
            <dependency>
                <groupId>org.springframework.security</groupId>
                <artifactId>spring-security-taglibs</artifactId>
                <version>3.1.3.RELEASE</version>
            </dependency>
            <!-- JUnit -->
            <dependency>
                <groupId>junit</groupId>
                <artifactId>junit</artifactId>
                <version>3.8.1</version>
                <scope>test</scope>
            </dependency>
        </dependencies>
    </dependencyManagement>

</project>
注意,pom文件为父工程文件,需要在子工程中添加引用,不多说
这样一个项目就构建完成了,部署到tomcat进行测试。
六 结果
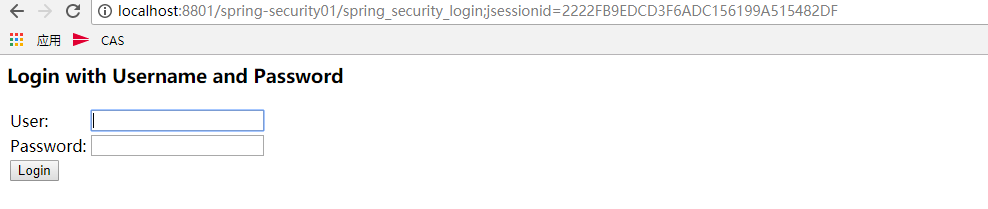
在浏览器上输入:http://localhost:8801/spring-security01,因为没有登陆,所以无法访问index.jsp页面,这个时候spring security就起作用了,对资源进行拦截,因为没有符合权限的用户登陆,所以就跳转到登陆页面,其中这个登陆页面是Spring Security自动生成的,这也是auto-config=”true”起的作用之一。

然后输入用户名和密码,成功跳转到admin.jsp页面。
这里因为admin用户有ROLE_ADMIN和ROLE_USER权限,而user.jsp页面ROLE_USER权限即可访问,所以admin用户可以成功访问index.jsp和adminPage.jsp页面。
下面再来测试用户user,注意已经登陆了的话,应该重启浏览器,要不然会一直记住用户,无法做测试。
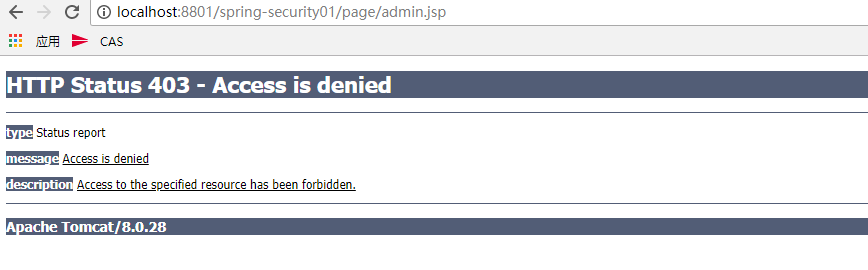
从上图中可以看到,登陆用户user,可以访问index.jsp页面但是无法访问adminPage.jsp。这是因为user用户只有ROLE_USER权限,而adminPage.jsp页面需要ROLE_USER权限,所以就拒绝访问。
以上就是一个简单的spring security配置应用。