实现功能:
使用myeclipse新建javaweb项目,配置springmvc,实现简单的控制器来访问视图页面
一、新建javaweb项目


创建成功:

二、导入jar包
在WEB-INF文件夹新建lib文件夹:
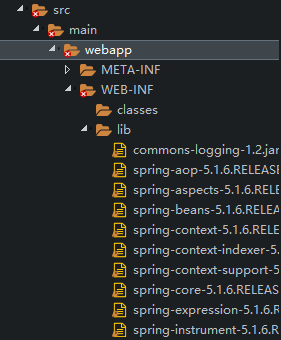
导入spring jar包:
下载地址:https://github.com/joytom/spring_jarhttps://github.com/joytom/spring_jar
三、新建视图文件
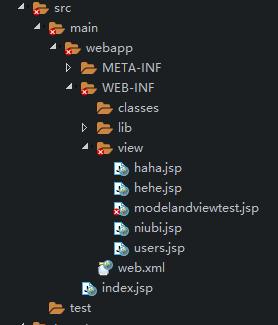
新建一个hehe.jsp就行了:
<%@ page language="java" import="java.util.*" pageEncoding="UTF-8"%>
<%
String path = request.getContextPath();
String basePath = request.getScheme()+"://"+request.getServerName()+":"+request.getServerPort()+path+"/";
%>

<!DOCTYPE HTML PUBLIC "-//W3C//DTD HTML 4.01 Transitional//EN">
<html>
  <head>
    <base href="<%=basePath%>">

    <title>My JSP 'hehe.jsp' starting page</title>

	<meta http-equiv="pragma" content="no-cache">
	<meta http-equiv="cache-control" content="no-cache">
	<meta http-equiv="expires" content="0">
	<meta http-equiv="keywords" content="keyword1,keyword2,keyword3">
	<meta http-equiv="description" content="This is my page">
	<!--
	<link rel="stylesheet" type="text/css" href="styles.css">
	-->

  </head>

  <body>
    This is my JSP page. 12312312<br>
  </body>
</html>
四、新建控制器
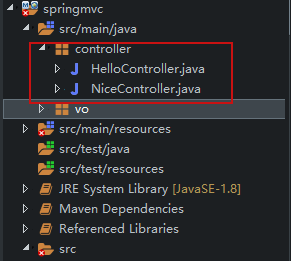
新建一个HelloController就行:
package controller;

import org.springframework.stereotype.Controller;
import org.springframework.ui.Model;
import org.springframework.web.bind.annotation.GetMapping;
import org.springframework.web.bind.annotation.RequestMapping;
import org.springframework.web.bind.annotation.RequestMethod;
import org.springframework.web.bind.annotation.RequestParam;
import org.springframework.web.servlet.ModelAndView;

import vo.User;
@Controller
@RequestMapping("/hello")
public class HelloController {
    @RequestMapping("/hehe")
    public String hehe()
    {
        System.out.println(123);
        return "hehe";
    }
}
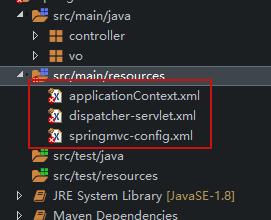
五、引入配置文件
引入两个就行
applicationContext.xml:
<?xml version="1.0" encoding="UTF-8"?>
<beans xmlns="http://www.springframework.org/schema/beans"
       xmlns:xsi="http://www.w3.org/2001/XMLSchema-instance"
       xmlns:context="http://www.springframework.org/schema/context"
       xsi:schemaLocation="http://www.springframework.org/schema/beans
       http://www.springframework.org/schema/beans/spring-beans.xsd
       http://www.springframework.org/schema/context
       http://www.springframework.org/schema/context/spring-context.xsd">
    <!-- 1.指定扫面的包,该配置会扫描指定的包及其子包下所有的Java类 ,并把匹配的Java类注册成Bean,这样就不需要再Java类中进行实例化操作了-->
    <context:component-scan base-package="controller"></context:component-scan>
</beans>
springmvc-config.xml:
<?xml version="1.0" encoding="UTF-8"?>
<beans xmlns="http://www.springframework.org/schema/beans"
       xmlns:xsi="http://www.w3.org/2001/XMLSchema-instance"
       xmlns:context="http://www.springframework.org/schema/context"
       xsi:schemaLocation="http://www.springframework.org/schema/beans
       http://www.springframework.org/schema/beans/spring-beans.xsd
       http://www.springframework.org/schema/context
       http://www.springframework.org/schema/context/spring-context.xsd">
    <!-- 自定义扫描控制器的包 -->
    <context:component-scan base-package="controller"></context:component-scan>
    <!-- 定义视图的前缀和后缀 -->
    <bean class="org.springframework.web.servlet.view.InternalResourceViewResolver">
        <!-- 前缀 -->
        <property name="prefix" value="/WEB-INF/view/" />
        <!-- 后缀 -->
        <property name="suffix" value=".jsp" />
    </bean>
</beans>
六、web.xml的配置
web.xml:
<web-app version="3.0" xmlns="http://java.sun.com/xml/ns/javaee"

         xmlns:xsi="http://www.w3.org/2001/XMLSchema-instance"

         xsi:schemaLocation="http://java.sun.com/xml/ns/javaee

        http://java.sun.com/xml/ns/javaee/web-app_3_0.xsd">

  <display-name>Archetype Created Web Application</display-name>
  <!-- 整个项目的全局变量,项目启动时自动加载 -->
  <context-param>
    <!-- 参数名字:使用改名字定义Spring配置文件 -->
    <param-name>contextConfigLocation</param-name>
    <param-value>classpath:applicationContext.xml</param-value>
  </context-param>
  <listener>
    <!-- Spring的监听器,当WEB容器启动时自动将context-Param指定的名和对应的值进行装配(加载) -->
    <listener-class>org.springframework.web.context.ContextLoaderListener</listener-class>
  </listener>
  <!-- 定义一个Servlet 映射DispatchServlet -->
  <servlet>
    <servlet-name>dispatcher</servlet-name>
    <servlet-class>org.springframework.web.servlet.DispatcherServlet</servlet-class>

    <init-param>
      <param-name>contextConfigLocation</param-name>
      <param-value>classpath:springmvc-config.xml</param-value>
    </init-param>

    <load-on-startup>1</load-on-startup>
  </servlet>
  <servlet-mapping>
    <servlet-name>dispatcher</servlet-name>
    <!-- 所有的请求都会被拦截 -->
    <url-pattern>/</url-pattern>
  </servlet-mapping>
</web-app>
七、浏览器访问
