我们都知道,使用spring框架时,不用再使用new来实例化对象了,直接可以通过spring容器来注入即可。
而注入bean有两种方式:
一种是通过XML来配置的,分别有属性注入、构造函数注入和工厂方法注入;
另一种是通过注解的方式注入,有@Autowired和@Resource
我们先来讲通过注解的方式:
@Autowired和@Resource都是对引用对象的注入,它们有什么区别呢?
(1)@Autowired是先是匹配引用的类型(就算没有匹配到),再匹配对象,@Resource是先匹配对象(就算没有匹配到),再匹配引用的类型;
(2)它们两者的提供者不一样,@Autowired是spring提供的,而@Resource是JavaEE提供的。
下面我们直接通过例子来说明(我就当大家都对spring有点理解了,只写出部分代码)
@Autowired是怎么注入呢?
spring.xml
<?xml version="1.0" encoding="UTF-8" ?>
<beans   xmlns="http://www.springframework.org/schema/beans"
         xmlns:xsi="http://www.w3.org/2001/XMLSchema-instance"
         xsi:schemaLocation="http://www.springframework.org/schema/beans
         http://www.springframework.org/schema/beans/spring-beans-3.0.xsd">
     <bean id="hello" class="com.service.imple.SayHelloImpl"></bean>
</beans>
JunitTest.java
package com.test;

import org.junit.Test;
import org.junit.runner.RunWith;
import org.springframework.beans.factory.annotation.Autowired;
import org.springframework.test.context.ContextConfiguration;
import org.springframework.test.context.junit4.SpringJUnit4ClassRunner;

import com.service.ISayHello;

@RunWith(SpringJUnit4ClassRunner.class)
@ContextConfiguration(locations="classpath:spring.xml")
public class JunitTest {
    @Autowired
    private ISayHello sayhello;

    @Test
    public void test() {
        sayhello.sayHello();
    }
}
JunitTest.java中的@Autowired是怎么把对象给注入进来的呢?
先找到spring.xml的文件,找到<bean>标签,先查找<bean>标签中的class属性,找到接口为 ISayHello的实现类,然后把对应的对象给注入进来。
但是有个问题,要是有两个相同的class属性了,系统就会报错,比如:

运行结果:

系统找到两个对象,一个是hello,一个是hello1,系统不知道要注入哪个,所以就报错了。这时候这么办呢?
很简单,有两种解决方案:
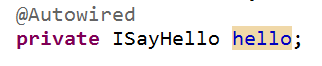
一种是直接在引用的地方,把名称改为实例化中bean中某一个名称,如下图:
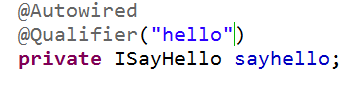
另一种是在@Autowired前提下,再添加@Qualifier("hello")注解,在该注解指定对象的名称,如下图:
@Resource是怎么注入的呢?
@Resource是先匹配对象的名称(hello),找到后就直接注入进来

但是,类似于@Autowired,如果有想听的名称,但有两个实现类的话,会出现什么问题?如下图:

运行结果:

解决方案:在引用的地方,直接指定对象的名称,如下图:

我们来讲一下bean和spring容器的关系:
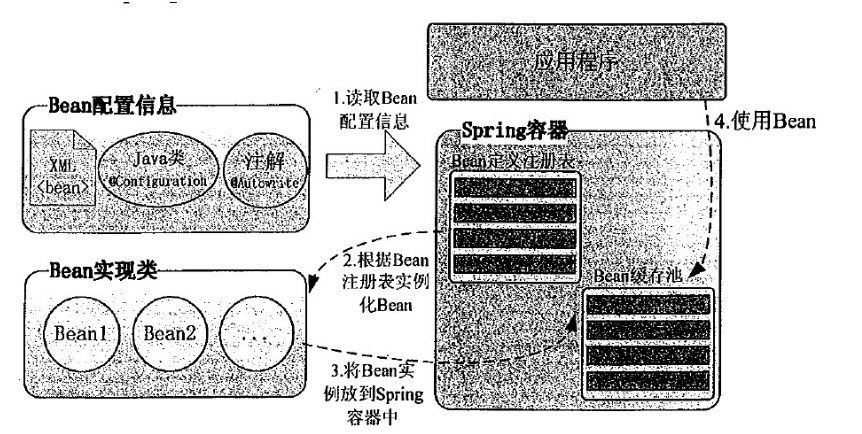
工作原理:
(1)spring容器会根据含有Bean配置的XML文件(spring.xml),把配置文件的Bean配置信息与spring容器中Bean定义注册表相对应起来;
(2)spring容器根据Bean注册表实例化Bean;
(3)通过Bean的实现类,把实例化过的Bean放到spring容器中的Bean缓存池中;
(4)某个模块要是使用的话,通过注解或者xml配置,让spring把Bean缓存池中的实例Bean注入到该模块当中;
Bean通过XMl配置注入
(1)属性注入
属性注入即通过setXxx()方法注入Bean的属性值或依赖对象,由于属性注入方式具有可选择性和灵活性高的优点,因此属性注入是实际应用中最常采用的注入方式。
属性注入要求Bean提供一个默认的构造函数,并为需要注入的属性提供对应的Setter方法。Spring先调用Bean的默认构造函数实例化Bean对象,然后通过反射的方式调用Setter方法注入属性值。
废话不多说,直接上代码:
spring.xml
<?xml version="1.0" encoding="UTF-8" ?>
<beans   xmlns="http://www.springframework.org/schema/beans"
         xmlns:xsi="http://www.w3.org/2001/XMLSchema-instance"
         xsi:schemaLocation="http://www.springframework.org/schema/beans
         http://www.springframework.org/schema/beans/spring-beans-3.0.xsd">
     <bean id="hello" class="com.service.imple.SayHelloImpl">
     <property name="name" value="小明"></property>
     </bean>

</beans>
其中:属性注入时,要在<bean>标签里添加<property>标签,该标签里name属性是对应的属性的名称,value属性是赋值。
SayHelloImpl.java
package com.service.imple;

import com.service.ISayHello;

public class SayHelloImpl implements ISayHello{
    private String name;

    @Override
    public void sayHello() {
        System.out.println(name+"你好啊!!!程序员");
    }
    public String getName() {
        return name;
    }
    public void setName(String name) {
        this.name = name;
    }
}
(2)构造方法注入