版权声明:本文为博主原创文章,未经博主允许不得转载。 https://blog.csdn.net/SDDDLLL/article/details/86628155
AspectJ其实是基于AOP思想的一个框架,在之前的通知顾问等等各种技术,在AspectJ同样能够实现。并且实现的更加方便和简单。平时开发的时候,就是使用这种方式进行开发的,
在AspectJ中常见的通知有五种类型,比之前的增加了一个最终通知。
- 前置通知
- 后置通知
- 环绕通知
- 异常通知
- 最终通知
最终通知是指,无论程序执行是否正常,这个通知都会执行,类似于finally语句。
并且AspectJ除了提供五种通知以外,还定义了专门的表达式指定切入点。因为切入点是一个函数名,一个目标类可能有很多个切入点(函数),我们在顾问中指定切入点,如果一个一个列出那就太麻烦。这时候我们可以使用AspectJ提供的表达式:
execution (

    [modifies-pattern]:访问权限类型
    ret-type-pattern:返回值类型
    [declaring-type-pattern]:全限定类名
    name-pattern:方法名
    [throws-pattern]:抛出的异常类型
)
切入点表达式要匹配的就是目标方法的方法名。所以execution表达式中明显就是方法的签名。
好了,说了这么多看看AspectJ是如何使用的。
一、开发环境搭建
1、导入jar包(或者是maven构建依赖)
这里需要提供的是两个jar

2、更换配置文件的约束
<?xml version="1.0" encoding="UTF-8"?>
<beans xmlns="http://www.springframework.org/schema/beans"
    xmlns:xsi="http://www.w3.org/2001/XMLSchema-instance"
    xmlns:aop="http://www.springframework.org/schema/aop" xsi:schemaLocation="
        http://www.springframework.org/schema/beans
        http://www.springframework.org/schema/beans/spring-beans.xsd
        http://www.springframework.org/schema/aop
        http://www.springframework.org/schema/aop/spring-aop.xsd">

</beans>
二、基于注解的AOP实现
1、定义接口
//主目标接口
public interface ISomeService {
	//目标方法
	void doFirst();
	String doSecond();
	void doThird();
}
2、接口实现类
package com.fdd.annotation;
public class SomeServiceImpl implements ISomeService {

	public void doFirst() {
		System.out.println("doFirst");
	}

	public String doSecond() {
		System.out.println("doSecond");
		return "abcde";
	}

	@Override
	public void doThird() {
		System.out.println("doThird"+3/0);
	}

}
3、定义一个POJO类,也就是切面
@Aspect
public class MyAspect {

	@Before(value = "execution(* *..ISomeService.doFirst(..))")
	public void myBefore(){
		System.out.println("执行前置通知");
	}

	@Before(value = "execution(* *..ISomeService.doFirst(..))")
	public void myBefore(JoinPoint jp){
		System.out.println("执行前置通知 jp= "+jp);
	}

	@AfterReturning(value = "execution(* *..ISomeService.doSecond(..))")
	public void myAfterReturning(){
		System.out.println("执行后置通知 ");
	}

	@AfterReturning(value = "execution(* *..ISomeService.doSecond(..))",returning="result")
	public void myAfterReturning(Object result){
		System.out.println("执行后置通知 result= "+result);
	}

	@Around(value = "execution(* *..ISomeService.doSecond(..))")
	public Object myAround(ProceedingJoinPoint pjp) throws Throwable{
		System.out.println("环绕通知:目标方法执行之前执行");

		Object result=pjp.proceed();

		System.out.println("环绕通知:目标方法执行之后执行");
		//在这里,可以对中间结果进行一些其他的操作
		if(result!=null){
			result=((String)result).toUpperCase();
		}
		return result;
	}

	@AfterThrowing(value = "execution(* *..ISomeService.doThird(..))")
	public void myAfterThrowing(){
		System.out.println("执行异常通知");
	}

	@AfterThrowing(value = "execution(* *..ISomeService.doThird(..))",throwing="ex")
	public void myAfterThrowing(Exception ex){
		System.out.println("执行异常通知 ex= "+ex.getMessage());
	}

	//自定义异常只需要把Exception更改就可以了改成UserNameException或者是其他自定义的类名

	@After(value = "doThirdPointcut()")
	public void myAfter(){
		System.out.println("----执行最终通知,在异常通知之前");
	}

	//定义了一个切入点 叫做doThirdPointcut
	@Pointcut(value = "execution(* *..ISomeService.doThird(..))")
	public void doThirdPointcut(){

	}

}
(0)在类前添加@Aspect
(1)前置通知@Before
里面包含一个JointPoint类型参数。这个参数含有切入点表达式、方法签名、目标对象等等数据
(2)后置通知@AfterReturning
里面含有returning属性,表示获取返回值
(3)环绕通知@Around
里面有ProceedingJointPoint参数。这个参数有一个proceed方法,用于执行目标方法,若目标方法有返回值,则可以直接获得。并将结果返回,其实就是可以修改目标方法的返回值,也就是拦截了目标方法的执行。
(4)@AfterThrowing异常通知
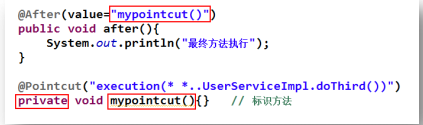
(5)@After最终通知
(6)@Pointcut定义切入点
这个方法是用于切入点表达式的编写,这是因为如果使用多个execution相同时,那么程序的编写和维护就会很麻烦,
4、配置文件
<?xml version="1.0" encoding="UTF-8"?>
<beans xmlns="http://www.springframework.org/schema/beans"
    xmlns:xsi="http://www.w3.org/2001/XMLSchema-instance"
    xmlns:aop="http://www.springframework.org/schema/aop" xsi:schemaLocation="
        http://www.springframework.org/schema/beans
        http://www.springframework.org/schema/beans/spring-beans.xsd
        http://www.springframework.org/schema/aop
        http://www.springframework.org/schema/aop/spring-aop.xsd">

     <!-- 注册切面 -->
  	<bean id="myAspect" class="com.fdd.annotation.MyAspect"></bean>
	<!-- 注册目标对象 -->
	<bean id="someService" class="com.fdd.annotation.SomeServiceImpl"></bean>
	<!-- 注册Aspectj的自动代理 -->
	<aop:aspectj-autoproxy/>
</beans>
5、测试
	@Test
	public void test01(){
		String resource = "com/fdd/annotation/applicationContext.xml";
		ApplicationContext ac = new ClassPathXmlApplicationContext(resource);
        //这里是目标对象的id
		ISomeService service =(ISomeService) ac.getBean("someService");

		service.doFirst();
		System.out.println("==========");
		service.doSecond();
		System.out.println("==========");
		service.doThird();
	}
三、基于XML的AOP实现
1、定义接口
//主目标接口
public interface ISomeService {
	//目标方法
	void doFirst();
	String doSecond();
	void doThird();
}
2、接口实现类
package com.fdd.xml;
public class SomeServiceImpl implements ISomeService {

	public void doFirst() {
		System.out.println("doFirst");
	}

	public String doSecond() {
		System.out.println("doSecond");
		return "abcde";
	}

	@Override
	public void doThird() {
		System.out.println("doThird"+3/0);
	}

}
3、定义切面
public class MyAspect {

	public void myBefore(){
		System.out.println("执行前置通知");
	}

	public void myBefore(JoinPoint jp){
		System.out.println("执行前置通知 jp= "+jp);
	}

	public void myAfterReturning(){
		System.out.println("执行后置通知 ");
	}

	public void myAfterReturning(Object result){
		System.out.println("执行后置通知 result= "+result);
	}

	public Object myAround(ProceedingJoinPoint pjp) throws Throwable{
		System.out.println("环绕通知:目标方法执行之前执行");

		Object result=pjp.proceed();

		System.out.println("环绕通知:目标方法执行之后执行");
		//在这里,可以对中间结果进行一些其他的操作
		if(result!=null){
			result=((String)result).toUpperCase();
		}
		return result;
	}

	public void myAfterThrowing(){
		System.out.println("执行异常通知");
	}

	public void myAfterThrowing(Exception ex){
		System.out.println("执行异常通知 ex= "+ex.getMessage());
	}

	//自定义异常只需要把Exception更改就可以了改成UserNameException或者是其他自定义的类名

	public void myAfter(){
		System.out.println("----执行最终通知,在异常通知之前");
	}

	public void doThirdPointcut(){

	}

}
4、定义配置文件
<?xml version="1.0" encoding="UTF-8"?>
<beans xmlns="http://www.springframework.org/schema/beans"
    xmlns:xsi="http://www.w3.org/2001/XMLSchema-instance"
    xmlns:aop="http://www.springframework.org/schema/aop" xsi:schemaLocation="
        http://www.springframework.org/schema/beans
        http://www.springframework.org/schema/beans/spring-beans.xsd
        http://www.springframework.org/schema/aop
        http://www.springframework.org/schema/aop/spring-aop.xsd">

     <!-- 注册切面 -->
  	<bean id="myAspect" class="com.fdd.xml.MyAspect"></bean>
	<!-- 注册目标对象 -->
	<bean id="someService" class="com.fdd.xml.SomeServiceImpl"></bean>

	<!-- AOP配置 -->
	<aop:config>
		<aop:pointcut expression="execution(* *..ISomeService.doFirst(..))" id="doFirstPointcut"/>
		<aop:pointcut expression="execution(* *..ISomeService.doSecond(..))" id="doSecondPointcut"/>
		<aop:pointcut expression="execution(* *..ISomeService.doThird(..))" id="doThirdPointcut"/>
		<aop:aspect ref="myAspect" id="myAspect" >
			<aop:before method="myBefore" pointcut-ref="doFirstPointcut"/>
			<aop:before method="myBefore(org.aspectj.lang.JoinPoint)" pointcut-ref="doFirstPointcut"/>
			<aop:after-returning method="myAfterReturning" pointcut-ref="doSecondPointcut"/>
			<aop:after-returning method="myAfterReturning(java.lang.Object)"  pointcut-ref="doSecondPointcut" returning="result"/>
			<aop:around method="myAround" pointcut-ref="doSecondPointcut"/>
			<aop:after-throwing method="myAfterThrowing" pointcut-ref="doThirdPointcut"/>
			<aop:after method="myAfter" pointcut-ref="doFirstPointcut"/>
		</aop:aspect>
	</aop:config>

</beans>
5、测试
	@Test
	public void test01(){
		String resource = "com/fdd/xml/applicationContext.xml";
		ApplicationContext ac = new ClassPathXmlApplicationContext(resource);
		ISomeService service =(ISomeService) ac.getBean("someService");

		service.doFirst();
		System.out.println("==========");
		service.doSecond();
		System.out.println("==========");
		service.doThird();
	}