前言:
基于版本2.1.5
Spring Boot使创建独立的、基于生产级Spring的应用程序变得很容易的一个脚手架,让开发的人更加关注业务实现。由于基于Spring的基础之上,可以添加很少的Spring配置实现项目的开发。
特点:
- 创建独立的Spring应用
- 直接内嵌tomcat。jetty或者Undertow 服务器,不需要像之前一样打包war文件然后放到服务器应用目录下面。
- 提供可选则的starter插件依赖来简化构建配置
- 在需要的时候,自动配置Spring和第三方jar包库
- 提供可用于生产的特性,如度量标准、健康检查和外部配置
- 不需要代码生成,也不需要xml配置
SpringBoot的魅力点:
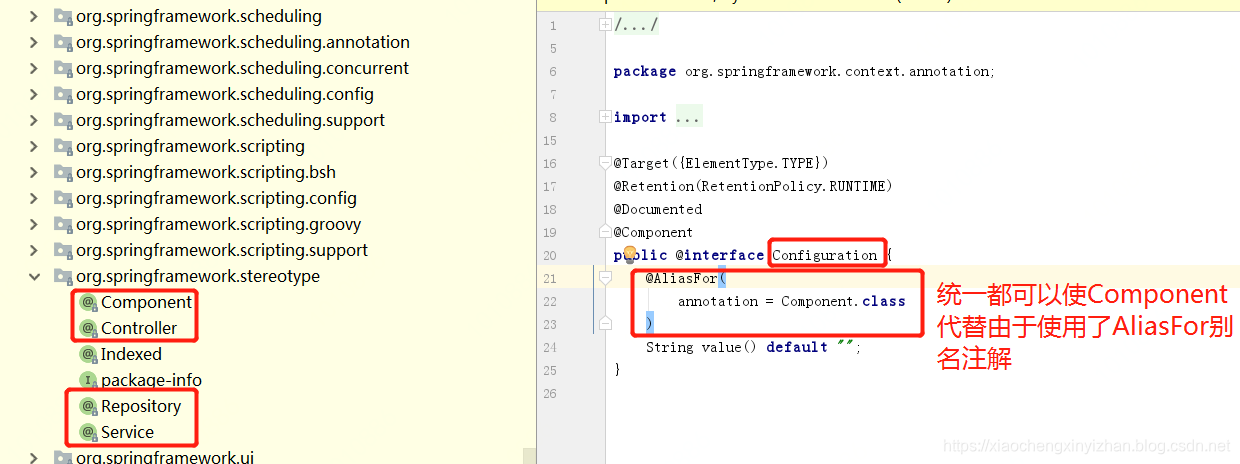
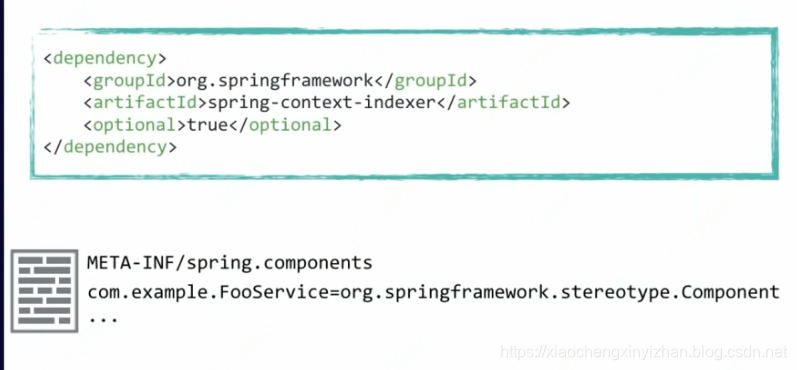
1)Component的意义(可以代替如下图所有注解):
关于别名AliasFor的使用和解释
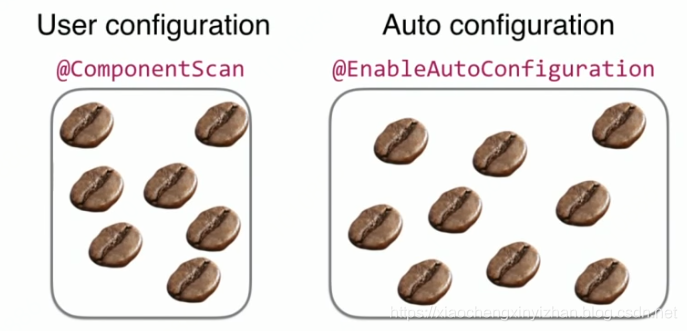
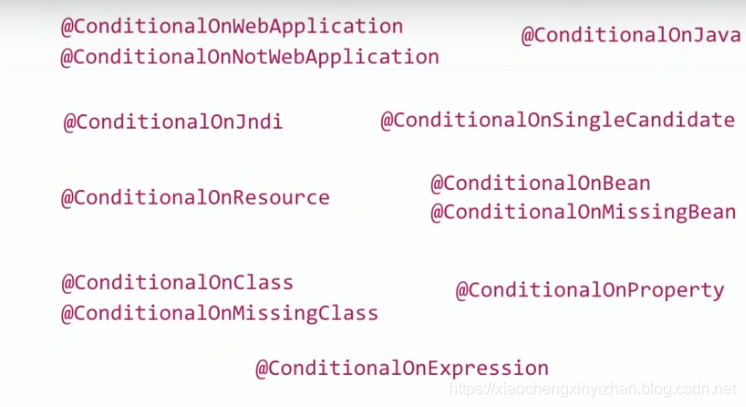
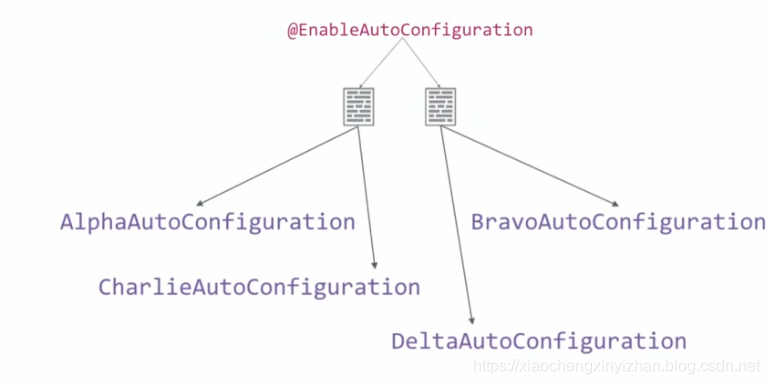
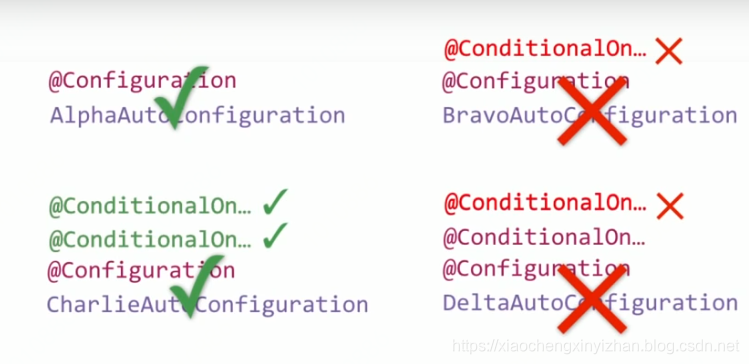
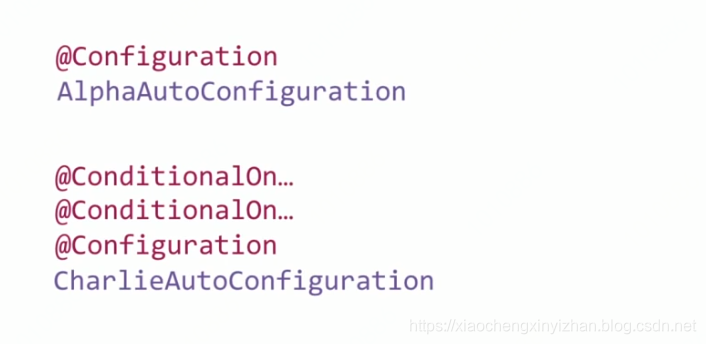
2)EnableAutoConfiguration的意义:
一个@SpringBootApplication注释可以用来启用这三个特性,即:
- @EnableAutoConfiguration: 使SpringBoot应用自动配置机制
- @ComponentScan: 使 @Component 应用注解就近原则被扫描到
- @Configuration:允许在上下文中注册额外的bean或导入额外的配置类
@SpringBootApplication注释相当于使用@Configuration、@EnableAutoConfiguration和@ComponentScan及其默认属性,如下面的示例所示
package com.example.myapplication;

import org.springframework.boot.SpringApplication;
import org.springframework.boot.autoconfigure.SpringBootApplication;

@SpringBootApplication // same as @Configuration @EnableAutoConfiguration @ComponentScan
public class Application {

	public static void main(String[] args) {
		SpringApplication.run(Application.class, args);
	}

}
@SpringBootApplication还提供别名来定制@EnableAutoConfiguration和@ComponentScan的属性
上面说的这些特性都不是强制性的,用它支持的任何特性都可以替换这个注释。例如,不希望在应用程序中使用组件扫描可以如下例子:
package com.example.myapplication;

import org.springframework.boot.SpringApplication;
import org.springframework.context.annotation.ComponentScan
import org.springframework.context.annotation.Configuration;
import org.springframework.context.annotation.Import;

@Configuration
@EnableAutoConfiguration
@Import({ MyConfig.class, MyAnotherConfig.class })
public class Application {

	public static void main(String[] args) {
			SpringApplication.run(Application.class, args);
	}

}
在本例中,应用程序与任何其他Spring引导应用程序一样,
只是没有自动检测到@Component-annotated类,
并且显式地导入了用户定义的bean(请参见@Import)
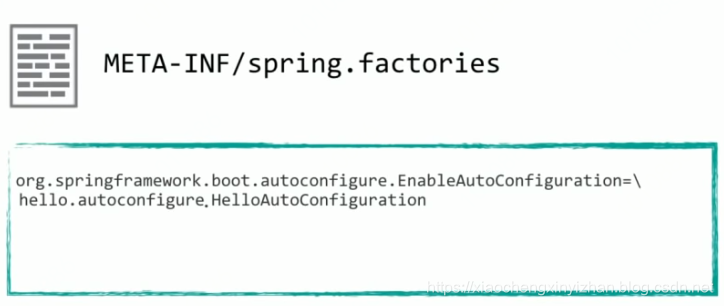
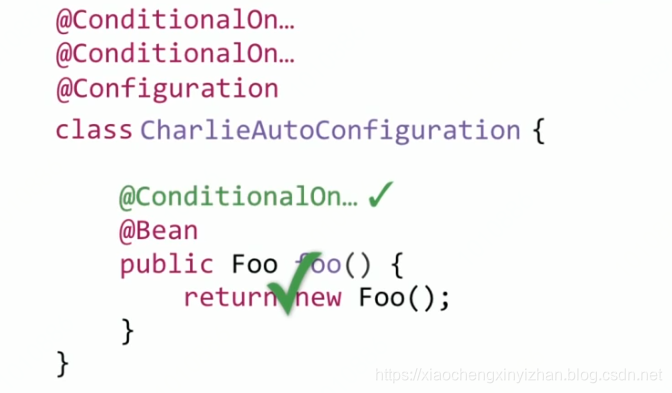
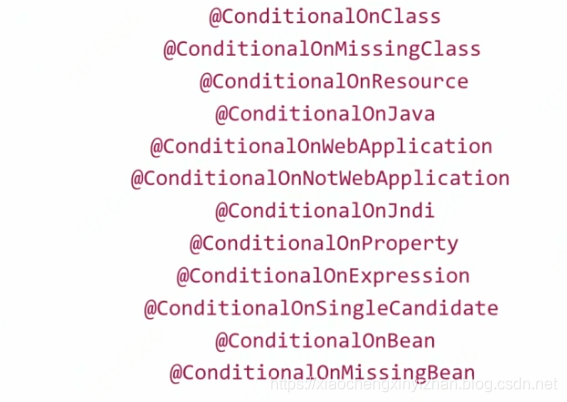
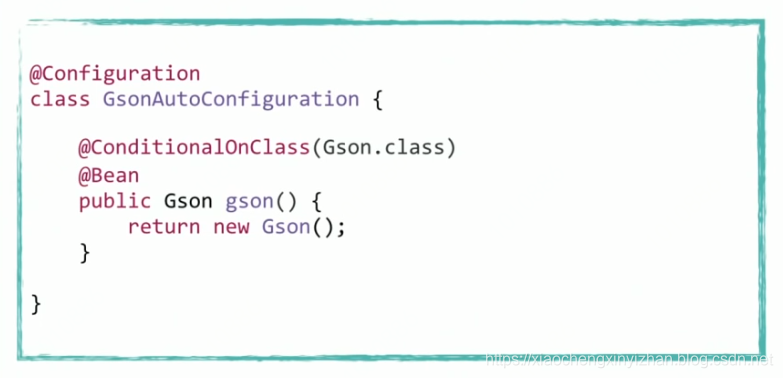
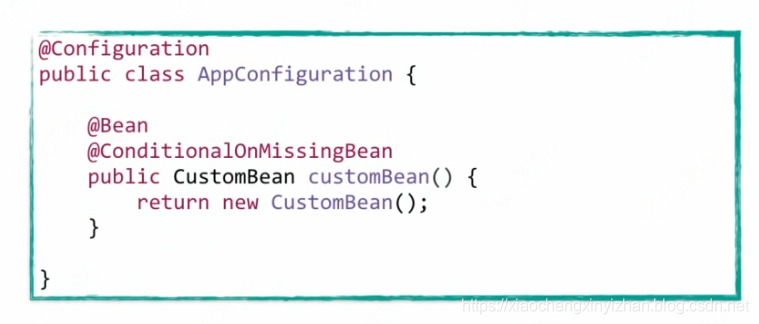
3)定制私有化自动配置

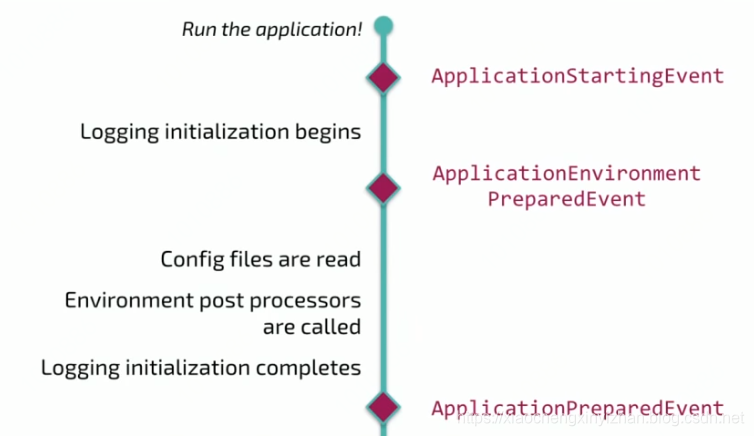
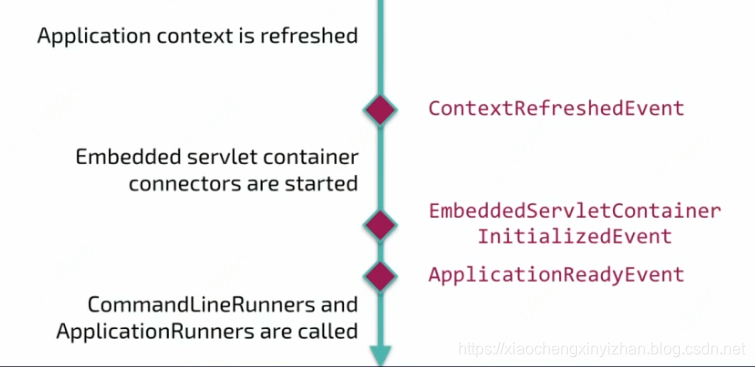
SpringBoot事件
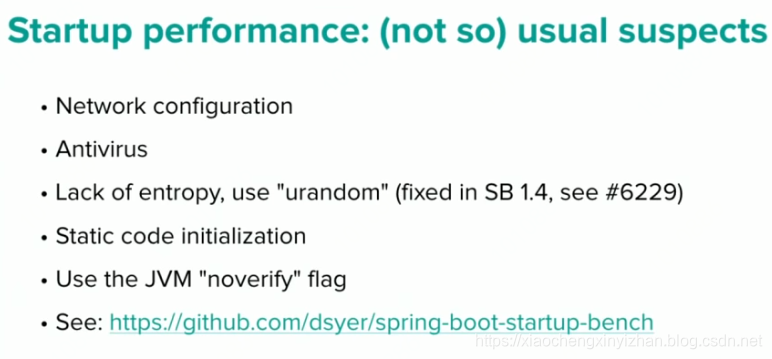
失败信息的优化:
不再以堆栈形式存在输出,而是以简短的信息提示你应该如何修复它。
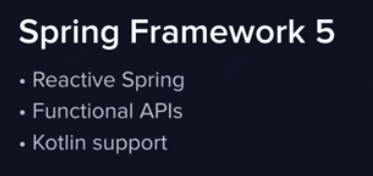
SpringBoot2.0的新特性:
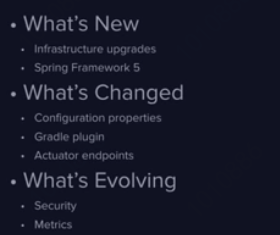
What’s New


What’s Changed
What’s evolving
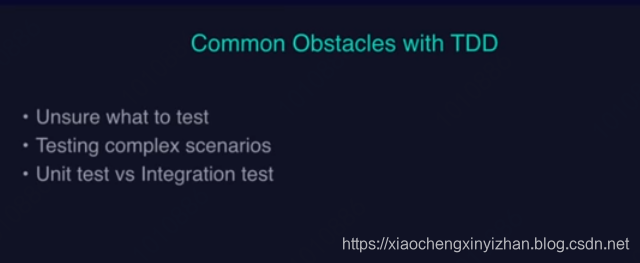
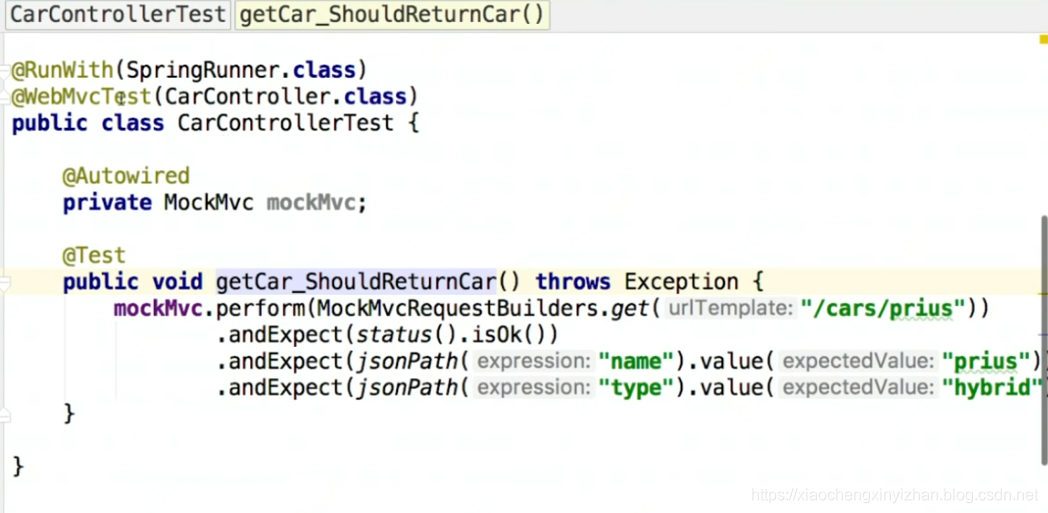
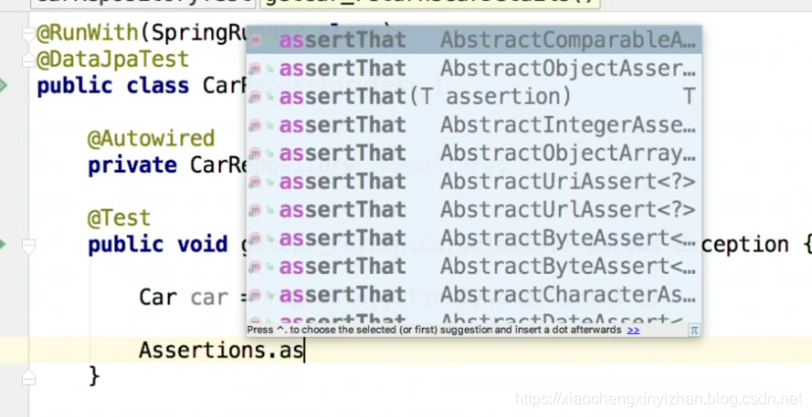
测试驱动开发:


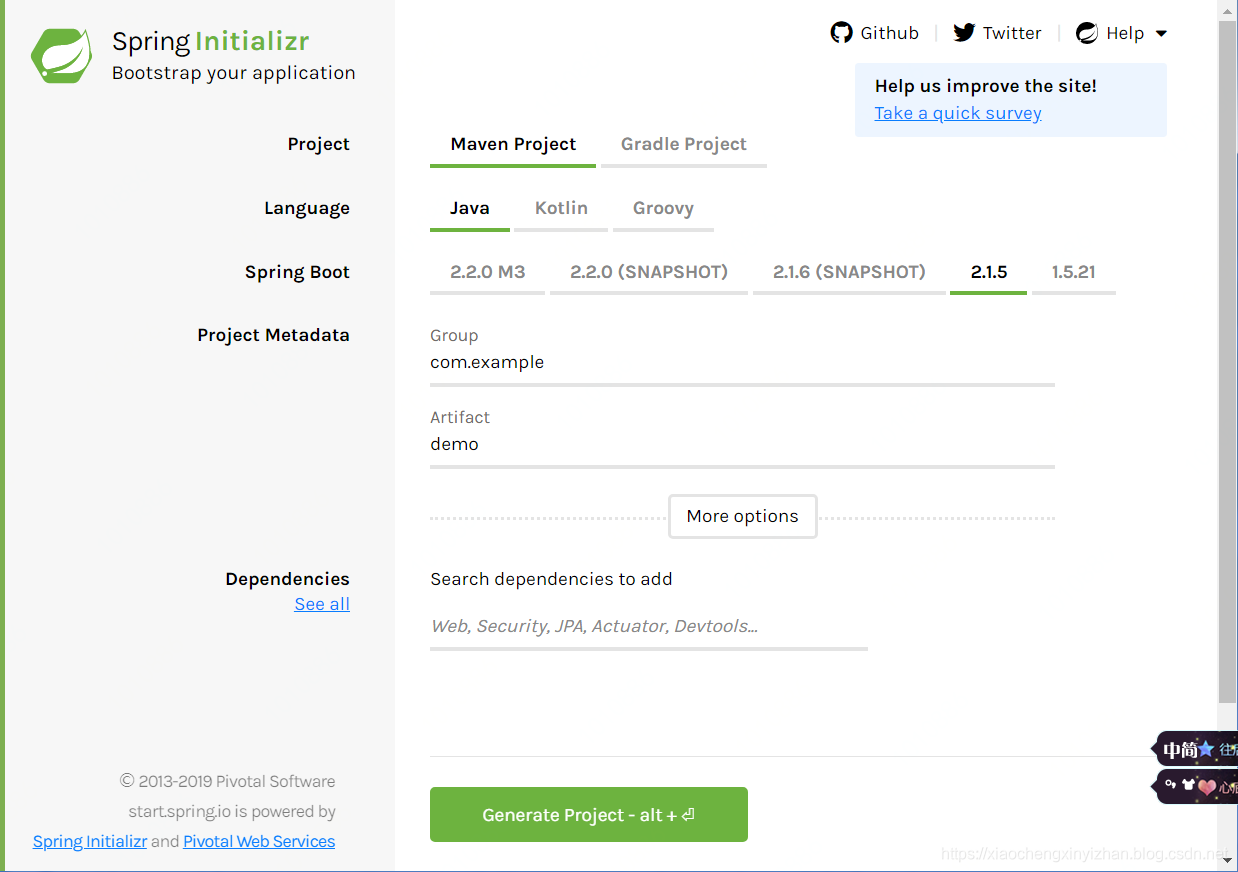
初始化自己的SpringBoot项目:
1)点击这里初始化:初始化项目页面
2)
点击绿色的既可以打包生成自己的项目。当然也可以选择自己喜欢的语言java、Kotlin或者groovy和构建工具maven或者gradle。
参考资料:
SpringBoot的魔法魅力
SpringBoot2.x的新特性
SpringBoot的介绍
使用Spring Boot进行测试驱动开发
SpringBoot从零基础到最佳实践