使用脚手架新建一个angular项目
cnpm new todo-ng
cd todo-ng
ng serve
// cnpm start
下载模板文件
git clone https://github.com/tastejs/todomvc-app-template.git --depth 1
如果不想下载的话,我已经把模板文件拷贝在这里(index.html)
<!doctype html>
<html lang="en">
	<head>
		<meta charset="utf-8">
		<meta name="viewport" content="width=device-width, initial-scale=1">
		<title>Template • TodoMVC</title>
		<link rel="stylesheet" href="node_modules/todomvc-common/base.css">
		<link rel="stylesheet" href="node_modules/todomvc-app-css/index.css">
		<!-- CSS overrides - remove if you don't need it -->
		<link rel="stylesheet" href="css/app.css">
	</head>
	<body>
		<section class="todoapp">
			<header class="header">
				<h1>todos</h1>
				<input class="new-todo" placeholder="What needs to be done?" autofocus>
			</header>
			<!-- This section should be hidden by default and shown when there are todos -->
			<section class="main">
				<input id="toggle-all" class="toggle-all" type="checkbox">
				<label for="toggle-all">Mark all as complete</label>
				<ul class="todo-list">
					<!-- These are here just to show the structure of the list items -->
					<!-- List items should get the class `editing` when editing and `completed` when marked as completed -->
					<li class="completed">
						<div class="view">
							<input class="toggle" type="checkbox" checked>
							<label>Taste JavaScript</label>
							<button class="destroy"></button>
						</div>
						<input class="edit" value="Create a TodoMVC template">
					</li>
					<li>
						<div class="view">
							<input class="toggle" type="checkbox">
							<label>Buy a unicorn</label>
							<button class="destroy"></button>
						</div>
						<input class="edit" value="Rule the web">
					</li>
				</ul>
			</section>
			<!-- This footer should hidden by default and shown when there are todos -->
			<footer class="footer">
				<!-- This should be `0 items left` by default -->
				<span class="todo-count"><strong>0</strong> item left</span>
				<!-- Remove this if you don't implement routing -->
				<ul class="filters">
					<li>
						<a class="selected" href="#/">All</a>
					</li>
					<li>
						<a href="#/active">Active</a>
					</li>
					<li>
						<a href="#/completed">Completed</a>
					</li>
				</ul>
				<!-- Hidden if no completed items are left ↓ -->
				<button class="clear-completed">Clear completed</button>
			</footer>
		</section>
		<footer class="info">
			<p>Double-click to edit a todo</p>
			<!-- Remove the below line ↓ -->
			<p>Template by <a href="http://sindresorhus.com">Sindre Sorhus</a></p>
			<!-- Change this out with your name and url ↓ -->
			<p>Created by <a href="http://todomvc.com">you</a></p>
			<p>Part of <a href="http://todomvc.com">TodoMVC</a></p>
		</footer>
		<!-- Scripts here. Don't remove ↓ -->
		<script src="node_modules/todomvc-common/base.js"></script>
		<script src="js/app.js"></script>
	</body>
</html>
当然你也可以选择自己写…
移植栽培
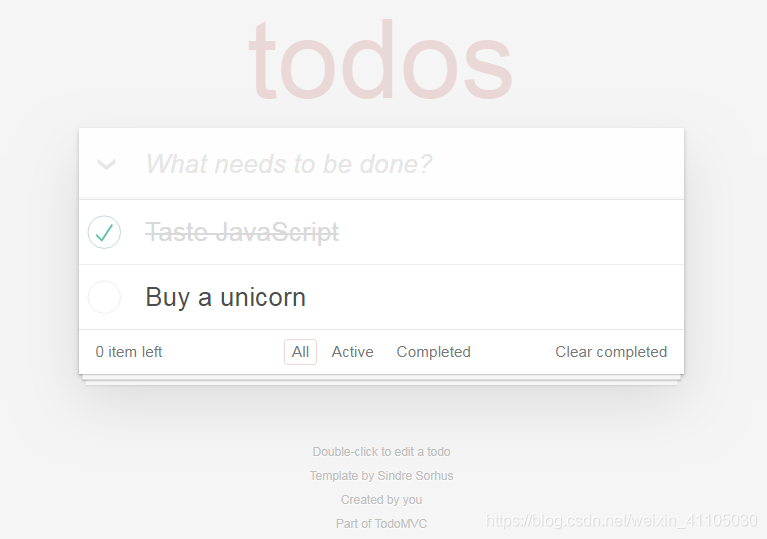
将下载模板的html代码移植到我们的项目中(app文件夹下的app.component.html)
<section class="todoapp">
  <header class="header">
    <h1>todos</h1>
    <input class="new-todo" placeholder="What needs to be done?" autofocus>
  </header>
  <!-- This section should be hidden by default and shown when there are todos -->
  <section class="main">
    <input id="toggle-all" class="toggle-all" type="checkbox">
    <label for="toggle-all">Mark all as complete</label>
    <ul class="todo-list">
      <!-- These are here just to show the structure of the list items -->
      <!-- List items should get the class `editing` when editing and `completed` when marked as completed -->
      <li class="completed">
        <div class="view">
          <input class="toggle" type="checkbox" checked>
          <label>Taste JavaScript</label>
          <button class="destroy"></button>
        </div>
        <input class="edit" value="Create a TodoMVC template">
      </li>
      <li>
        <div class="view">
          <input class="toggle" type="checkbox">
          <label>Buy a unicorn</label>
          <button class="destroy"></button>
        </div>
        <input class="edit" value="Rule the web">
      </li>
    </ul>
  </section>
  <!-- This footer should hidden by default and shown when there are todos -->
  <footer class="footer">
    <!-- This should be `0 items left` by default -->
    <span class="todo-count"><strong>0</strong> item left</span>
    <!-- Remove this if you don't implement routing -->
    <ul class="filters">
      <li>
        <a class="selected" href="#/">All</a>
      </li>
      <li>
        <a href="#/active">Active</a>
      </li>
      <li>
        <a href="#/completed">Completed</a>
      </li>
    </ul>
    <!-- Hidden if no completed items are left ↓ -->
    <button class="clear-completed">Clear completed</button>
  </footer>
</section>
<footer class="info">
  <p>Double-click to edit a todo</p>
  <!-- Remove the below line ↓ -->
  <p>Template by <a href="http://sindresorhus.com">Sindre Sorhus</a></p>
  <!-- Change this out with your name and url ↓ -->
  <p>Created by <a href="http://todomvc.com">you</a></p>
  <p>Part of <a href="http://todomvc.com">TodoMVC</a></p>
</footer>
接下来将我们的样式下载并导入进去(我这里使用less:styles.less)
cnpm i todomvc-common todomvc-app-css
/* You can add global styles to this file, and also import other style files */
@import url('todomvc-common/base.css');
@import url('todomvc-app-css/index.css');
实现项目逻辑
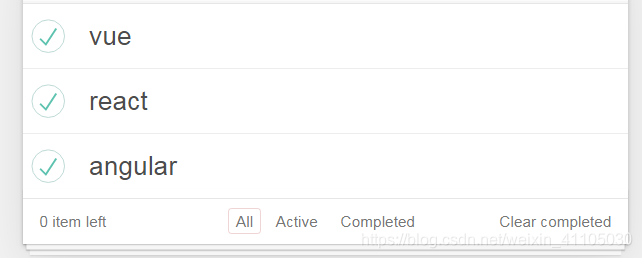
模拟数据使用ngFor渲染到界面测试一下(数据列表展示–有数据)
- 遍历一个对象数组(app.component.ts定义一个对象数组)
import { Component } from '@angular/core';
const todos = [
  {
    id:1,
    skill:'vue',
    bool: true
  },
  {
    id:2,
    skill:'react',
    bool: true
  },
  {
    id:3,
    skill:'angular',
    bool: true
  }
]
@Component({
  selector: 'app-root',
  templateUrl: './app.component.html',
  styleUrls: ['./app.component.less']
})
export class AppComponent {
  public todos:{
    id:number,
    skill:string,
    bool:boolean
  }[] = todos
}
- app.component.html的每个li是一个项(使用
*ngFor进行循环数组)
<!-- These are here just to show the structure of the list items -->
...
    <ul class="todo-list">
      <li *ngFor="let todo of todos">
        <div class="view">
          <input class="toggle" type="checkbox" checked>
          <label>{{todo.skill}}</label>
          <button class="destroy"></button>
        </div>
        <input class="edit" value="Create a TodoMVC template">
      </li>
    </ul>
...
- 不同的类状态不同
<!-- List items should get the class `editing` when editing and `completed` when marked as completed -->
completed:该类是完成状态
editing:该类是编辑状态
没有添加任何类:正常状态
隐藏我们的内容(数据列表展示–无数据)
- 有数据我们展示,没有数据我们将内容隐藏掉;
- 使用*ngIf条件渲染;使用
ng-template避免产生额外的标签
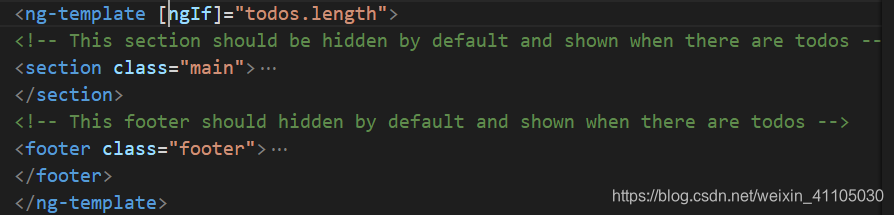
- 测试一下
export class AppComponent {
  public todos:{
    id:number,
    skill:string,
    bool:boolean
  }[] = []
}
添加任务
- 在文本框输入文字回车后将该条数据添加到列表中
- 使用
()绑定事件
<input class="new-todo" placeholder="What needs to be done?" autofocus (keyup.enter)='addTodo($event)'>
- 处理业务逻辑
export class AppComponent {
...
  addTodo(e):void {
    const inpVal = e.target.value
    if(!inpVal.length){
      return;
    }
    let id = this.todos[this.todos.length-1].id+1
    this.todos.push({id,skill:inpVal,bool:false})
    e.target.value = ''
    console.log(todos)
  }
}
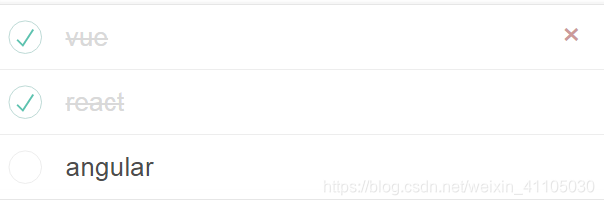
- 点击选择按钮切换完成和正常状态
- 实现数据双向绑定,根据bool的值来给其是否添加completed(表示以完成)该类
      <li *ngFor="let todo of todos" [ngClass]='{completed:todo.bool}'>
        <div class="view">
          <input class="toggle" type="checkbox" [(ngModel)]="todo.bool">
          <label>{{todo.skill}}</label>
          <button class="destroy"></button>
        </div>
        <input class="edit" value="Create a TodoMVC template">
      </li>
- 我们需要配置双向绑定(app.module.ts)
...
import { FormsModule } from '@angular/forms';
...
  imports: [
    BrowserModule,
    AppRoutingModule,
    FormsModule
  ],
...
实现#toggle-all选择框的全选与反选
- 当所有的todo,每一条都是已完成(即bool:true)时,那么
checkbox(即左上角的小图标高亮显示)
  get toggleAll () {
    return this.todos.every(t => t.bool)
  }
<input id="toggle-all" class="toggle-all" type="checkbox" [checked]="toggleAll">
- 点击该选择按钮时,当该按钮为true,每一条todo都需要选中,反之亦然…
<input id="toggle-all" class="toggle-all" type="checkbox" [checked]="toggleAll" (change)="toggleAll=$event.target.checked">
  set toggleAll(val:boolean) {
    console.log(val)
    this.todos.forEach(t=>t.bool=val)
  }
删除单个todo
- 可以根据id删除,也可以根据索引值删除;使用splice或则filter进行删除都可以,我们高档一点,使用
filter+索引值
      <li *ngFor="let todo of todos; let i = index;" [ngClass]='{completed:todo.bool}'>
        <div class="view">
          <input class="toggle" type="checkbox" [(ngModel)]="todo.bool">
          <label>{{todo.skill}}</label>
          <button class="destroy" (click)='removeTodo(i)'></button>
        </div>
        <input class="edit" value="Create a TodoMVC template">
      </li>
  removeTodo(index){
    this.todos = this.todos.filter((t,i)=>{
      if(i==index){
        return false
      }
      return true
    })
  }
编辑功能
- 定义该条编辑项
...
  public currentEditing: {
    id: number,
    skill: string,
    done: boolean
  } = null
...
- 双击可以编辑该条todo
- 离开不选中
      <li *ngFor="let todo of todos; let i = index;"
      [ngClass]='{completed:todo.bool,editing: currentEditing === todo}'>
        <div class="view">
          <input class="toggle" type="checkbox" [(ngModel)]="todo.bool">
          <label (dblclick)='currentEditing = todo'>{{todo.skill}}</label>
          <button class="destroy" (click)='removeTodo(i)'></button>
        </div>
        <input class="edit" [value]="todo.skill" (blur)="saveEdit(todo)">
      </li>
  saveEdit(t){
    this.currentEditing = null
  }
- 保存编辑
        <input
        class="edit"
        [value]="todo.skill"
        (keyup.enter)="saveEdit(todo, $event)"
        (blur)="saveEdit(todo,$event)">
  saveEdit(t,e){
    t.skill = e.target.value
    this.currentEditing = null
  }
- 取消编辑
...(keyup)="handleEditKeyUp($event)"...
...
  handleEditKeyUp(e){
    const {keyCode,target} = e
    if (keyCode === 27) {
      // 取消编辑
      target.value = this.currentEditing.skill
      this.currentEditing = null
    }
  }
item lift
<span class="todo-count"><strong>{{remaningCount}}</strong> item left</span>
  get remaningCount (){
    return this.todos.filter(t=>!t.bool).length
  }
切换按钮(All、Active、Completed)
<ul class="todo-list">
      <li *ngFor="let todo of filterTodos; let i = index;"
      [ngClass]='{completed:todo.bool,editing: currentEditing === todo}'>
      ...
    <ul class="filters">
      <li>
        <a [ngClass]="{selected:'all'===visibility}" href="#/">All</a>
      </li>
      <li>
        <a [ngClass]="{selected: visibility === 'active'}" href="#/active">Active</a>
      </li>
      <li>
        <a [ngClass]="{selected: visibility === 'completed'}" href="#/completed">Completed</a>
      </li>
    </ul>
 public visibility: string = 'all'
  hashchangeHandler () {
    // 当用户点击了锚点的时候,我们需要获取当前的锚点标识
      // 然后动态的将根组件中的 visibility 设置为当前点击的锚点标识
    const hash = window.location.hash.substr(1)
    switch (hash) {
      case '/':
        this.visibility = 'all'
        break;
      case '/active':
        this.visibility = 'active'
        break;
      case '/completed':
        this.visibility = 'completed'
        break;
    }
  }
  get filterTodos () {
    if (this.visibility === 'all') {
      return this.todos
    } else if (this.visibility === 'active') {
      return this.todos.filter(t => !t.bool)
    } else if (this.visibility === 'completed') {
      return this.todos.filter(t => t.bool)
    }
  }
  ngOnInit () {
    // 初始化的时候手动调用一次
    this.hashchangeHandler()

    // 注意:这里要 bind this绑定
    window.onhashchange = this.hashchangeHandler.bind(this)
  }
数据持久化
export class AppComponent {
  public todos:{
    id:number,
    skill:string,
    bool:boolean
  }[] = JSON.parse(localStorage.getItem('todos') || '[]')
...
  public visibility: string = 'all'
  ngDoCheck() {
    window.localStorage.setItem('todos', JSON.stringify(this.todos))
  }
}