参考文档
生命周期函数的学习
生命周期函数
组件的创建,运行、销毁总是伴随着各种各样的事件;这些在组件特定时期,触发的事件,叫做组件的生命周期函数;也是生命周期钩子
onLoad()
页面加载时触发。一个页面只会调用一次,可以在 onLoad 的参数中获取打开当前页面路径中的参数。
我们在demo页面定义一个navigator路由导航
<navigator url="/pages/demo1/demo1?title=demo">去到demo1页面</navigator>
最后接着我们在demo1的逻辑层使用onLoad
  onLoad: function (options) {
    console.log(options)
  },
当页面还没有显示完成,数据已经加载触发了打印了{title: "demo"};所以,比如我们需要对data数据初始化或则重新设置,都可以在onLoad里面设置.但是还不能操作视图层
onShow()和onHide()
监听页面的显示和隐藏
onShow页面显示/切入前台时触发。但不是代表页面已经渲染完成
onHide页面隐藏/切入后台时触发。 如 wx.navigateTo 或底部 tab 切换到其他页面,小程序切入后台等。
onReady()
页面初次渲染完成时触发。一个页面只会调用一次,代表页面已经准备妥当,可以和视图层进行交互。注意:对界面内容进行设置的 API 如wx.setNavigationBarTitle,请在onReady之后进行。
onUnload()
监听页面卸载。如wx.redirectTo或wx.navigateBack到其他页面时。
 <navigator
    url="/pages/demo1/demo1?title=demo"
  open-type='redirect'>去到demo1页面</navigator>
我们点击按钮时,跳转到其它界面;但是不会出现返回按钮了。证明当前页面已经被关闭了。所以当跳转到其它页面,历史记录不存在当前页面,就会触发该事件
onPullDownRefresh()和onReachBottom()
监听用户下拉刷新事件
当然需要在app.json进行启动下拉功能
  "window": {
    "enablePullDownRefresh": true
  },
  onPullDownRefresh: function () {
    console.log(' onPullDownRefresh')
  },
onReachBottom:页面上拉触底事件的处理函数
onPageScroll()
监听用户滑动页面事件。
onShareAppMessage(Object object)
监听用户点击页面内转发按钮( 组件 open-type=“share”)或右上角菜单“转发”按钮的行为,并自定义转发内容。
<button open-type='share'>share</button>
当点击button就会触发该事件
图解

我们创建一个todos组件
page文件夹下一个todos组件,我们创建好后发现js文件已经把生命周期函数写进去了;美滋滋。其它组件删除不要了
{
  "pages": [
    "pages/todos/todos"
  ],
  "window": {
    "backgroundTextStyle": "dark",
    "navigationBarBackgroundColor": "#fff",
    "navigationBarTitleText": "TODOS",
    "navigationBarTextStyle": "black",
    "enablePullDownRefresh": true
  },
  "sitemapLocation": "sitemap.json"
}
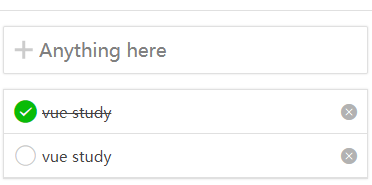
我先把静态模板文件写了出来
- 其实就是使用小程序提供的组件:view、icon、text
- 样式的话使用伸缩布局和rpx单位,可以根据屏幕宽度进行自适应。
- rpx其实就是屏幕的物理像素
<view class="container">
  <view class='header'>
      <image src='../../assets/plus.png'></image>
      <input type="text" placeholder='Anything here'></input>
  </view>
  <view class='todo_list'>
      <view class='todo_item'>
          <view class='item_con'>
            <icon type="success" />
            <text class='completed'>vue study</text>
          </view>
          <icon type='clear' size="16"></icon>
      </view>
      <view class='todo_item'>
          <view class='item_con'>
            <icon type="circle" />
            <text>vue study</text>
          </view>
          <icon type='clear' size="16"></icon>
      </view>
  </view>
    <view class='footer'>
    <text>Toggle all</text>
    <text>items lift</text>
    <text>clear completed</text>
  </view>
</view>
.container {
  border-top: 1rpx solid #e0e0e0;
}

.header {
  display: flex;
  align-items: center;
  margin: 20rpx;
  padding: 20rpx;
  border: 1rpx solid #e0e0e0;
  border-radius: 5rpx;
  box-shadow: 0 0 5rpx #e0e0e0;
}

.header image {
  width: 40rpx;
  height: 40rpx;
  margin-right: 20rpx;
}

.todos {
  margin: 20rpx;
  border: 1rpx solid #e0e0e0;
  border-radius: 5rpx;
  box-shadow: 0 0 5rpx #e0e0e0;
}

.todos .item {
  display: flex;
  align-items: center;
  padding: 20rpx;
  border-bottom: 1rpx solid #e0e0e0;
}

.todos .item:last-child {
  border-bottom: 0;
}

.todos .item text {
  flex: 1;
  margin-left: 20rpx;
  font-size: 30rpx;
  color: #444;
}

.todo_list .todo_item .item_con text.completed{
  color: #888;
  text-decoration: line-through;
}

.footer {
  display: flex;
  justify-content: space-between;
  margin: 20rpx;
  font-size: 30rpx;
  color: #333;
}
列表渲染
模拟数据
  data: {
    inpMsg:'',
    lift:1,
    todos:[
      { id: 1, name: 'vue learning', completed: false },
      { id: 2, name: 'mini learning', completed: true },
      { id: 3, name: 'react learning', completed: false },
      { id: 4, name: 'angular learning', completed: false },
    ]
  },
将列表渲染到界面上,这里展示部分代码,其它是使用mustache语法进行绑定,补充完整即可
  <view class='todo_list'>
      <view class='todo_item' wx:for="{{todos}}" wx:key="{{index}}">
          <view class='item_con'>
            <icon type='{{item.completed?"success":"circle"}}' />
            <text class='{{item.completed?"completed":""}}'>{{item.name}}</text>
          </view>
          <icon type='clear' size="16"></icon>
      </view>
  </view>

添加一条数据
点击添加按钮(图片功能),向界面添加一条数据
- 首先判断文本框是否有内容
this.data.inpMsg,当文本框为空时,禁止添加; - 当文本框有内容时,监听文本框的变化
bindinput,通过event事件对象e.detail,value获取文本框的内容;点击添加按钮,向todos添加一条数据(当然可以用dataset来获取) - 数据格式和todos保持一致,初始化completed是未完成,id为递增,name为文本框内容
  <view class='header'>
      <image src='../../assets/plus.png' bindtap='addTodoHandle'></image>
      <input
      type="text"
      placeholder='Anything here'
      value='{{inpMsg}}'
      bindinput='getTodoHandle'
      ></input>
  </view>
  getTodoHandle(e){
    this.setData({
      inpMsg:e.detail.value
    })
  },
  addTodoHandle(){
    // 判断文本框
    let msg = this.data.inpMsg
    if (!msg.length){
      return;
    }
    let todos = this.data.todos
    let id = todos.length?todos[todos.length-1].id+1:1
    todos.push({name:msg,id,completed:false})
    this.setData({
      todos,
      inpMsg:''
    })
  },
点击切换completed完成或未完成状态
- 给icon绑定一个点击事件
bindtap - 给icon添加一个属性,并绑定当前的索引值
- 点击根据索引值,切换completed的布尔值
this.setData({})设置数据
            <icon
            type='{{item.completed?"success":"circle"}}'
            bindtap='changeCompleted'
            data-index='{{index}}'
            />
  changeCompleted(e){
    // 获取点击时当前的索引值(该索引值也是data数据的索引值)
    let index = e.currentTarget.dataset.index
    let todos = this.data.todos
    todos[index].completed = !todos[index].completed
    this.setData({
      todos
    })
  },
点击clear按钮删除该条数据
- 给清除按钮添加一个点击事件,绑定index索引值
- 处理函数:根据index进行删除该条数据,可以使用splice,也可以使用filter
- 记得需要使用this.setData({})设置数据
          <icon
          type='clear'
          size="16"
          bindtap='clearHandle'
          data-index='{{index}}'
          ></icon>
  clearHandle(e){
    let index = e.currentTarget.dataset.index
    let todos = this.data.todos
    todos = todos.filter((item, i)=>index !== i)
    this.setData({
      todos
    })
  },
Toggle all 切换所有完成状态
- 绑定点击事件
- 只要有一个是未完成状态
completed:false,全部切换为已完成。如果全部是已完成,则切换为全部未完成
<text bindtap='toggleAllHandle'>Toggle all</text>
  toggleAllHandle(){
    let todos = this.data.todos
    let togBool = todos.some(item => !item.completed)//只要有一个未完成,它都返回true,togBool=true;否则返回false
    todos = todos.map(item=>{
      item.completed = togBool
      return item
    })
    this.setData({
      todos
    })
  },
渲染未完成的数量
- 当页面加载时,渲染
lift,即未完成的todos;也就是completed:false
  onLoad: function (options) {
    this.setData({
      lift: this.data.todos.filter(item => !item.completed).length
    })
  },
- 根据页面变化重新渲染数据,之前有setData都加上该条数据,例如删除一条数据的函数,其它自行加上
  clearHandle(e){
    let index = e.currentTarget.dataset.index
    let todos = this.data.todos
    todos = todos.filter((item, i)=>index !== i)
    let lift = todos.filter(item => !item.completed).length
    this.setData({
      todos,
      lift
    })
  },
- 因为我们小程序没有像react那样有生命周期函数
shouldComponentUpdate(nextProps, nextState)可以监听数据变化,直接一次性加。所以只能一步步加lift
<text>{{lift}} items left</text>
清除已经完成的数据
- 绑定点击事件
<text bindtap='clearCompletedHandle'>clear completed</text>
- 根据completed删除数据
  clearCompletedHandle(){
    let todos = this.data.todos
    todos = todos.filter(item=>!item.completed)
    this.setData({
      todos
    })
  },
数据持久化
- 上面关于todos的业务逻辑已经处理完成,接下来我们要本地存储数据
- 当页面进入时,获取本地储存的,初始化todos
  onLoad: function (options) {
    let todos = []
    wx.getStorage({
      key: 'todos',
      success:res=>{
        todos = res.data
        this.setData({
          lift: todos.filter(item => !item.completed).length,
          todos
        })
      }
    })
  },
- 在每一步改变数据的操作后存储本地数据
    wx.setStorage({
      key: 'todos',
      data: todos,
    })
改进和建议
- 使用less相比于css会更加提高我们的开发效率;我们可以使用
koala来编译我们的less文件 - 因为生命周期函数和我们绑定的函数都是一起的,不像vue是写在
methods里外的;所以我们可以在命名的时加个handle,区分开来。 - 最好加个双击编辑功能,可以直接改数据
- 当然我们每个函数都要定义todos,可以全局设置定义一个
app.globalData