非mvn项目转为mvn项目并构建mvn私服
一.背景
公司里的系统是老系统,没有使用mvn,但是现在准备使用持续集成(CI),就要用到mvn,所以现在需要将老项目转为mvn项目,并且非mvn项目也是不好构建和拓展的。
构建自己的mvn私服,是因为项目里面有一些jar是在中央仓库里面无法下载的,所以我需要在公司的服务器上构建自己的私服仓库,并把这些jar传到私服上。
二.非mvn项目转mvn项目
1.非mvn和mvn项目最直观的区别当然是pom.xml了,所以现在我们需要在项目上自己创建一个pom文件.
2.我使用的是idea工具,我直接右键pom文件,add mvn项目即可,其余的事就是工具的事情了.
3.现在需要把以前的项目的jar全部写在pom文件里面,这里面的水还是比较深的,首先jar就比较多,其次是很多可能你找不到什么的,或者依赖版本的问题,反正这个要花一定的时间。
当你发现有一部分jar包在mvn中央仓库里面怎么都找不到,你可能要意识到这个jar包可能本来就没有,所以需要我们使用私服来上传自己的jar文件。
三.私服的安装
1.在网站下载免费版的nexus:https://www.sonatype.com/download-oss-sonatype:
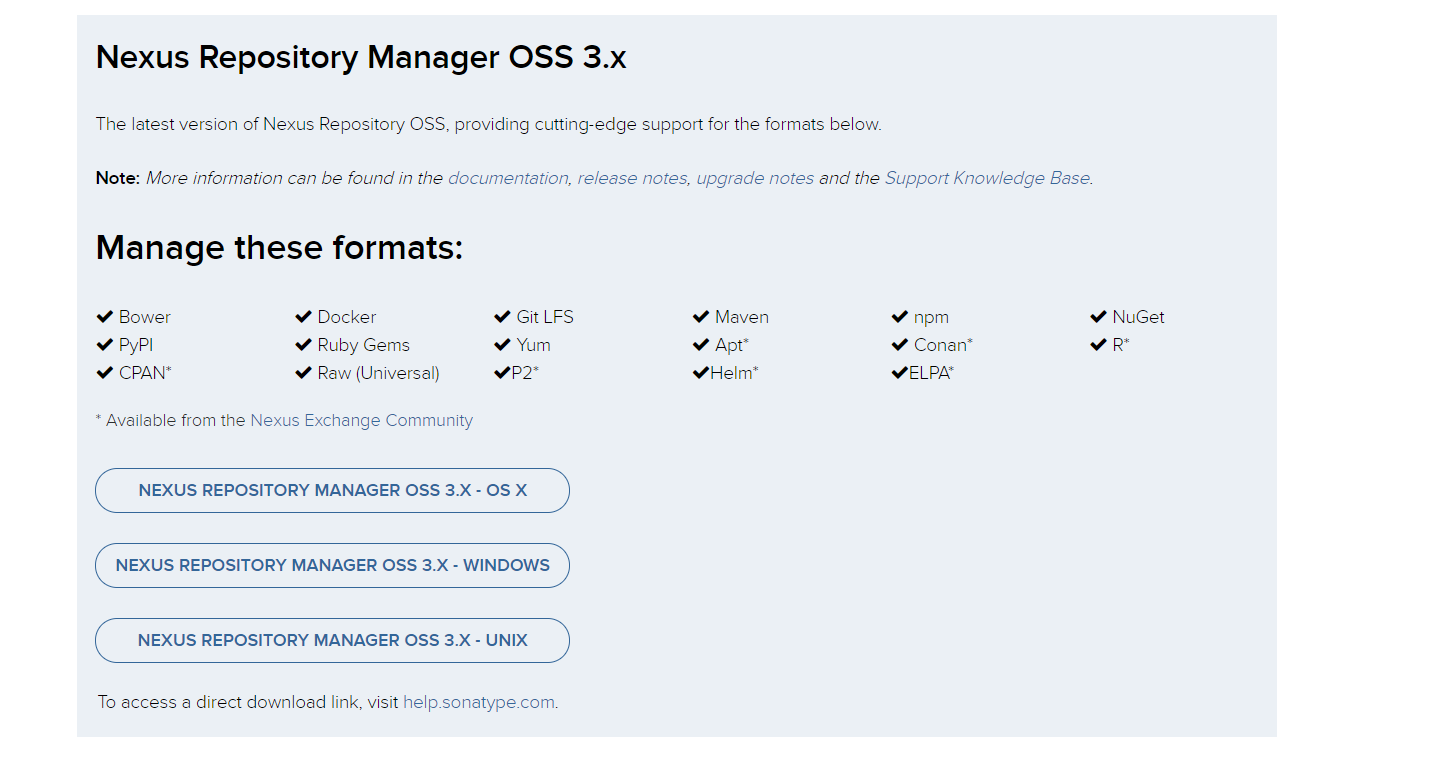
根据自己项目需求选择版本2还是版本3,下载成功过后,自己安装。安装成功启动过后就可以在页面上看到下面的信息了:

初始的登录账号/密码是:admin/admin123,端口8080,都是可以在config配置里面自己修改的,这里就不多说了。
四.配置项目
1.修改本地mvn仓库和mvn的settings.xml
找到你所安装使用的mvn插件,在安装路径里的config里面的settings.xml文件进行修改:
<servers>
    <!-- server
     | Specifies the authentication information to use when connecting to a particular server, identified by
     | a unique name within the system (referred to by the 'id' attribute below).
     |
     | NOTE: You should either specify username/password OR privateKey/passphrase, since these pairings are
     |       used together.
     |
    <server>
      <id>deploymentRepo</id>
      <username>repouser</username>
      <password>repopwd</password>
    </server>
    -->
    <server>
        <id>central</id>
        <username>admin</username>
        <password>admin123</password>
    </server>
    <server>
        <id>thirdparty</id>
        <username>admin</username>
        <password>admin123</password>
    </server>

    <!-- Another sample, using keys to authenticate.
    <server>
      <id>siteServer</id>
      <privateKey>/path/to/private/key</privateKey>
      <passphrase>optional; leave empty if not used.</passphrase>
    </server>
    -->
  </servers>
<mirrors>
    <!-- mirror
     | Specifies a repository mirror site to use instead of a given repository. The repository that
     | this mirror serves has an ID that matches the mirrorOf element of this mirror. IDs are used
     | for inheritance and direct lookup purposes, and must be unique across the set of mirrors.
     |
    <mirror>
      <id>mirrorId</id>
      <mirrorOf>repositoryId</mirrorOf>
      <name>Human Readable Name for this Mirror.</name>
      <url>http://my.repository.com/repo/path</url>
    </mirror>

     -->
     <mirror>
        <id>nexus-releases</id>
        <url>http://192.168.50.191:8081/nexus/content/groups/public/</url>
        <mirrorOf>*</mirrorOf>
    </mirror>
    <mirror>
        <id>nexus-snapshots</id>
        <url>http://192.168.50.191:8081/nexus/content/groups/public//</url>
        <mirrorOf>*</mirrorOf>
    </mirror>
  </mirrors>
在pom文件里面添加:
    <repositories>
        <repository>
            <id>central</id>
            <name>Central</name>
            <url>http://192.168.50.191:8081/nexus/content/repositories/central/</url>
        </repository>
        <repository>
            <id>thirdparty</id>
            <name>3rd party</name>
            <url>http://192.168.50.191:8081/nexus/content/repositories/thirdparty/</url>
        </repository>
    </repositories>
五.上传jar包到mvn私服
这里面有2种方式(命令和页面操作)
1.页面操作
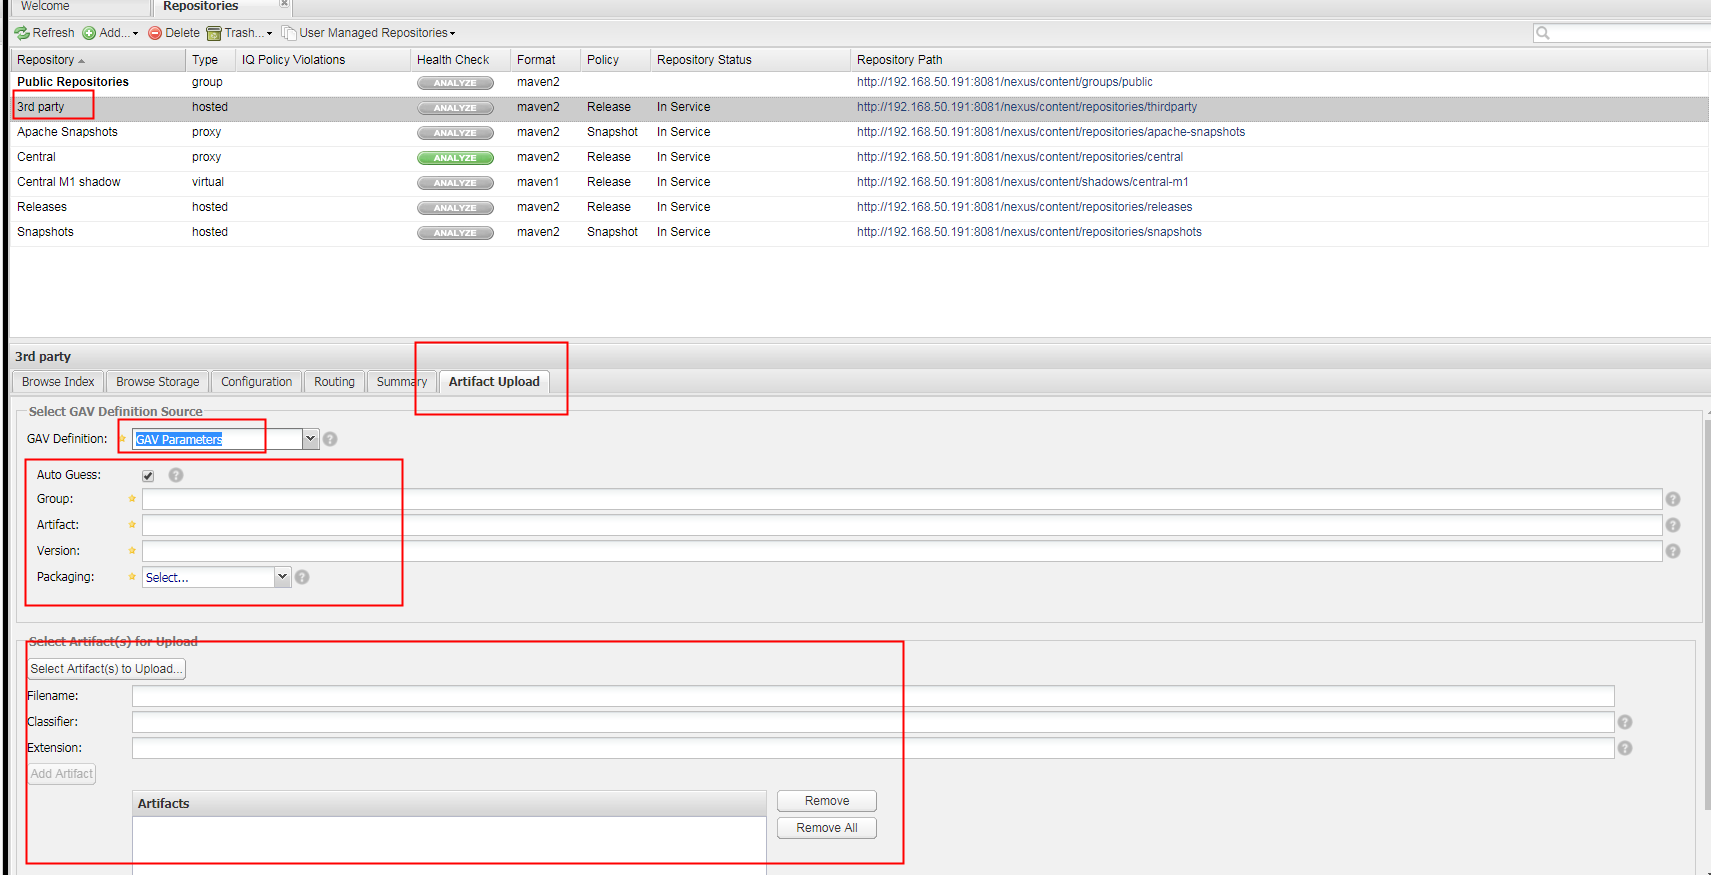
这个就不用多说了,就是界面点点点
2.命令上传
在你的项目pom文件目录,cmd执行上传:
mvn deploy:deploy-file -DgroupId=com.fh -DartifactId=servlet-api -Dversion=1.0 -Dpackaging=jar -Dfile=E:\workspace\BPM\WebRoot\WEB-INF\lib\servlet-api.jar -Durl=http://192.168.50.191:8081/nexus/content/repositories/thirdparty/ -DrepositoryId=thirdparty
mvn私服是公司里面必备的技能之一,可以多多学习下。