因为害怕token泄露出现问题,所以从未在项目中使用jwt。但这玩意现在真的很火,趁有空还是研究了一下。
在aspnetcore中实现jwt很简单,感觉微软把很多工作都做了,虽然开发效率上去了,但是使得c#的程序员变得很傻,很多事情都是知其然而不知其所以然,只能绑死在微软这条大船上越行越远,唉~~
jwt一般在webapi的项目使用比较多,但我下面的代码都是在MVC环境上测试的,用法上应该没什么区别。
一、添加和配置JWT
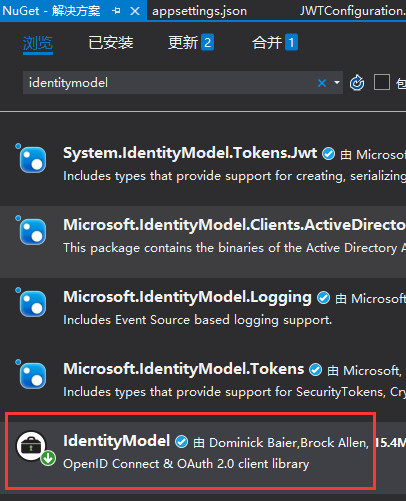
1、引入nuget包
VS中点击 工具 > 管理解决方案 NuGet 程序包,搜索 IdentityModel,安装到项目
2、添加JWT配置项
打开 appsettings.json ,添加节点
"Authentication": {
    "JwtBearer": {
        "IsEnabled": "true",
        "SecurityKey": "JWTStudyWebsite_DI20DXU3",
        "Issuer": "JWTStudy",
        "Audience": "JWTStudyWebsite"
    }
}
3、新建 JWTConfiguration.cs 文件,内容如下:
using Microsoft.Extensions.Configuration;
using Microsoft.Extensions.DependencyInjection;
using Microsoft.IdentityModel.Tokens;
using System;
using System.Text;

namespace JWTStudent.Website.Extensions
{
    public static class JwtConfiguration
    {
        public static void AddJwtConfiguration(this IServiceCollection services, IConfiguration configuration)
        {
            if (bool.Parse(configuration["Authentication:JwtBearer:IsEnabled"]))
            {
                services.AddAuthentication(options => {
                    options.DefaultAuthenticateScheme = "JwtBearer";
                    options.DefaultChallengeScheme = "JwtBearer";
                }).AddJwtBearer("JwtBearer", options =>
                {
                    options.Audience = configuration["Authentication:JwtBearer:Audience"];

                    options.TokenValidationParameters = new TokenValidationParameters
                    {
                        // The signing key must match!
                        ValidateIssuerSigningKey = true,
                        IssuerSigningKey = new SymmetricSecurityKey(
                            Encoding.ASCII.GetBytes(configuration["Authentication:JwtBearer:SecurityKey"])),

                        // Validate the JWT Issuer (iss) claim
                        ValidateIssuer = true,
                        ValidIssuer = configuration["Authentication:JwtBearer:Issuer"],

                        // Validate the JWT Audience (aud) claim
                        ValidateAudience = true,
                        ValidAudience = configuration["Authentication:JwtBearer:Audience"],

                        // Validate the token expiry
                        ValidateLifetime = true,

                        // If you want to allow a certain amount of clock drift, set that here
                        ClockSkew = TimeSpan.Zero
                    };
                });
            }
        }
    }
}
4、在StartUp.cs的ConfigurationServices方法内,添加如下代码:
services.AddJwtConfiguration(Configuration);
二、创建AccessTokenController,用于申请和发放JWT
public IActionResult Post([FromBody]LoginModel model)
{
    var user = TempData.Users.FirstOrDefault(m => m.Account == model.Account && m.Pw == model.Pw);

    if (user != null)
    {
        var claims = new[]
        {
            new Claim(ClaimTypes.Name, user.Account),
            new Claim(ClaimTypes.Role, user.Role)
        };

        var key = new SymmetricSecurityKey(
            Encoding.UTF8.GetBytes(_configuration["Authentication:JwtBearer:SecurityKey"]));
        var credentials = new SigningCredentials(key, SecurityAlgorithms.HmacSha256);

        var token = new JwtSecurityToken(
            _configuration["Authentication:JwtBearer:Issuer"],
            _configuration["Authentication:JwtBearer:Audience"],
            claims,
            expires: DateTime.Now.AddMinutes(30),
            signingCredentials: credentials
        );

        return Ok(new AccessTokenResult {Token = new JwtSecurityTokenHandler().WriteToken(token), Code = 200});
    }

    return Ok(new AccessTokenResult {Code = 0, Token = ""});
}
LoginModel是自定义的登录模型,很简单,仅包含用户名和密码两个字段。AccessTokenResult是自定义的返回结果,int类型的Code,登录成功则返回200,失败为0,Token是生成的JWT
三、测试
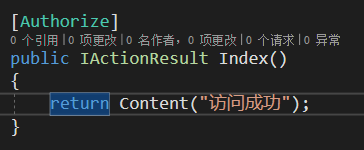
1、创建TestController,并为其添加 Authorization 描述
2、运行程序,打开Postman,访问 http://localhost:5000/test
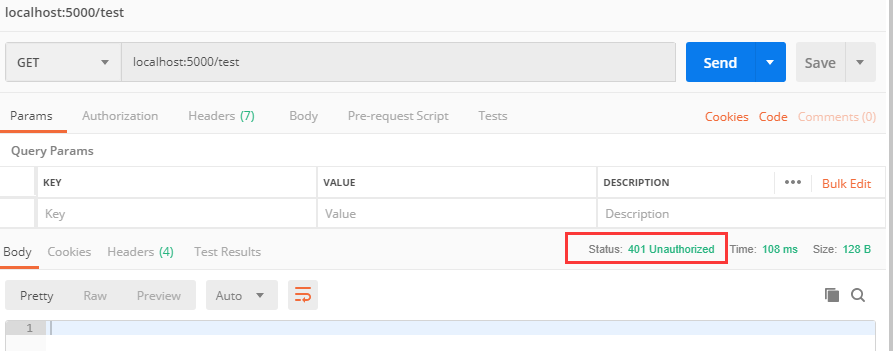
不出所料,访问被拒绝,提示没有授权。
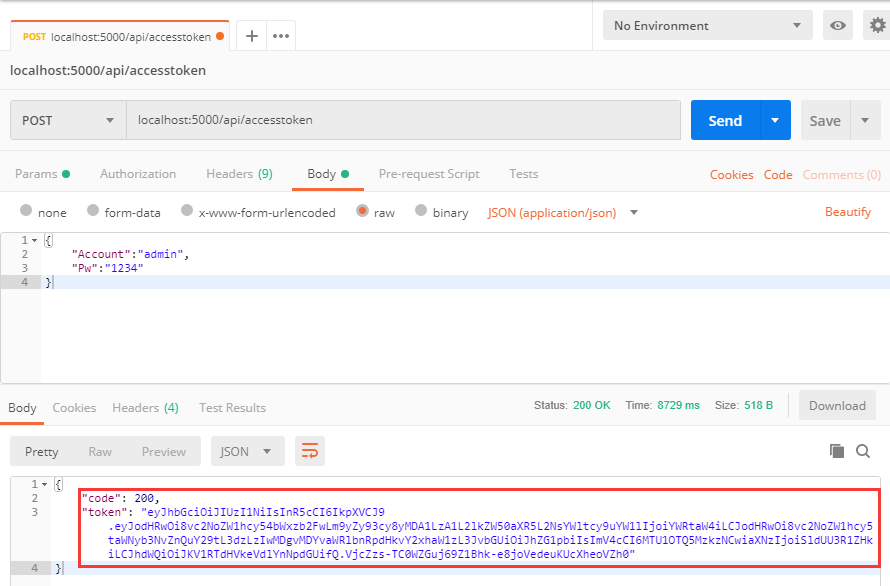
3、获取JWT
访问 http://localhost:5000/api/accesstoken
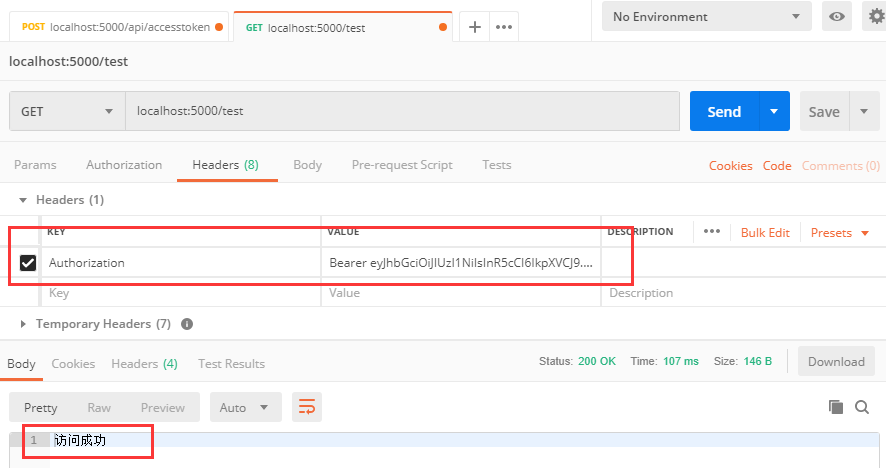
4、使用Token重新访问受限的Action
拷贝token的值,重新请求 http://localhost:5000/test,在Headers上添加一项,KEY 为 Authorization,VALUE 为 Bear+空格+token值