这个是在学习过程中,网上看到的代码
因为只有部分代码,学习过程中浪费了太多时间
现总结记录下,所有步骤记录。方便以后查看
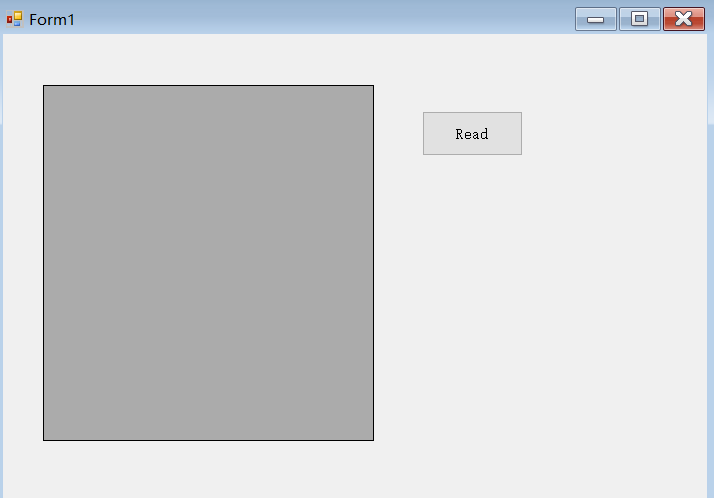
1、新建一个项目
2、添加一个 button
3、添加一个dataGridView
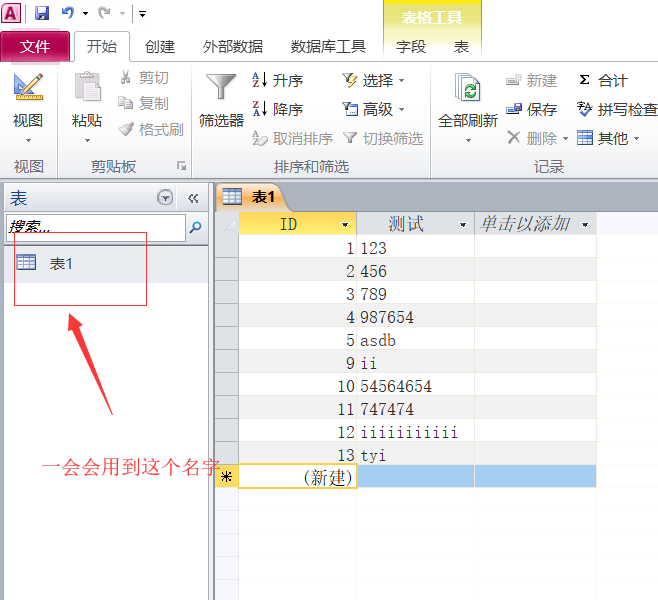
4、打开Microsoft access,新建一个表格 表1(后面会用到这个名字)
将Database.mdb放在项目的Debug目录下
string constr = @"Provider = Microsoft.Jet.OLEDB.4.0; Data Source = " + Application.StartupPath + @"\Database.mdb";
using System;
using System.Collections.Generic;
using System.ComponentModel;
using System.Data;
using System.Drawing;
using System.Linq;
using System.Text;
using System.Threading.Tasks;
using System.Windows.Forms;
using System.Data.OleDb;

namespace Read_Write_SQL
{
    public partial class Form1 : Form
    {
        //声明
        OleDbConnection conn = null;
        OleDbDataAdapter adt = null;
        DataTable dt = null;
        OleDbCommandBuilder cmd = null;
        //string constr =Properties.Settings.Default.Accon;

        //----------------------------------------------------------
        //此项需要重新设置
        //----------------------------------------------------------
        //string constr = @"Provider = Microsoft.Jet.OLEDB.4.0; Data Source = D:\00-Mywork\11-c#程序库\00-C#读取数据库ACCESS\Read_Write_SQL\Read_Write_SQL\bin\Debug\Database.mdb";

        string constr = @"Provider = Microsoft.Jet.OLEDB.4.0; Data Source = " + Application.StartupPath + @"\Database.mdb";
        public Form1()
        {
            InitializeComponent();

            //连接数据库,需要传递连接字符串
            var conn = new OleDbConnection(constr);
            //"Select * from Sourse"为SQL语句,意思是从数据库中选择叫做“表1”的表,“constr”为连接字符串
            adt = new OleDbDataAdapter("Select * from 表1", constr);
            //在内存中创建一个DataTable,用来存放、修改数据库表
            dt = new DataTable();
            //CommandBuilder对应的是数据适配器,需要传递参数
            var cmd = new OleDbCommandBuilder(adt);
            //打开数据库连接
            conn.Open();
            //通过适配器把表的数据填充到内存dt
            adt.Fill(dt);
        }

        private void dataGridView1_CellContentClick(object sender, DataGridViewCellEventArgs e)
        {
            ;
        }

        private void Form1_Load(object sender, EventArgs e)
        {
            dataGridView1.DataSource = dt.DefaultView;//把数据显示到屏幕
        }


        private void btn1_Click_1(object sender, EventArgs e)
        {
            try
            {
                //按下按钮后,把内存中修改的部分传递给适配器,再通过适配器传递给数据库
                adt.Update(dt);
                //清楚内存中存放的表数据
                dt.Clear();
                //再次读取已经改变过的表数据
                adt.Fill(dt);

            }
            catch (Exception ex)
            {
                MessageBox.Show(ex.Message);
            }
            finally
            {
                //conn.Close();
                //conn.Dispose();
            }
        }
    }
}
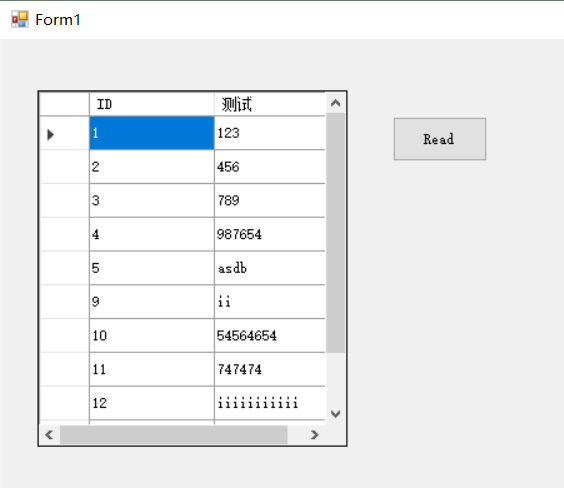
5 运行效果