一.Apache的基础简介
阿帕奇用来提供超文本传输协议:http://
阿帕奇的基础信息
主配置目录: /etc/httpd/conf
主配置文件: /etc/httpd/conf/httpd.conf
子配置目录: /etc/httpd/conf.d/
子配置文件: /etc/httpd/conf.d/*.conf ## 在子配置目录中所有的以.conf结尾的文件
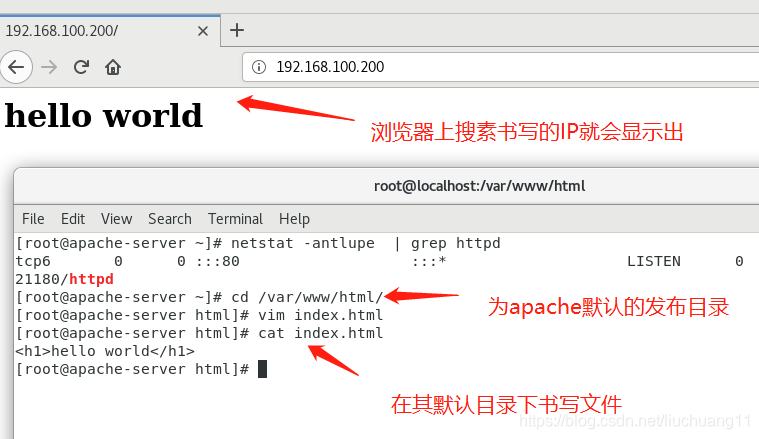
默认发布目录: /var/www/html
默认发布文件: /var/www/html/index.html ##默认发布目录中index.html文件名称固定
默认端口: 80
二.阿帕奇的安装与测试
前提条件:在阿帕器服务器安装前必须保证强制和级selinux处于开启状态,yum源正常,火墙处于打开状态
[root@server ~]# getenforce
Enforcing 打开selinux
[root@server ~]# yum install httpd.x86_64 -y 下载httpd网络
[root@server ~]# yum repolist 查看yum源正常
Loaded plugins: langpacks, product-id, search-disabled-repos, subscription-manager
This system is not registered with an entitlement server. You can use subscription-manager to register.
repo id repo name status
xoxo xoxo 5,152
repolist: 5,152
[root@server ~]# systemctl start firewalld 打开防火墙
[root@server ~]# systemctl start httpd.service 开启httpd服务
[root@server ~]# systemctl enable httpd.service
Created symlink from /etc/systemd/system/multi-user.target.wants/httpd.service to /usr/lib/systemd/system/httpd.service.
[root@server ~]# firewall-cmd --list-all
public (active)
target: default
icmp-block-inversion: no
interfaces: ens33
sources:
services: ssh dhcpv6-client
ports:
protocols:
masquerade: no
forward-ports:
source-ports:
icmp-blocks:
rich rules:
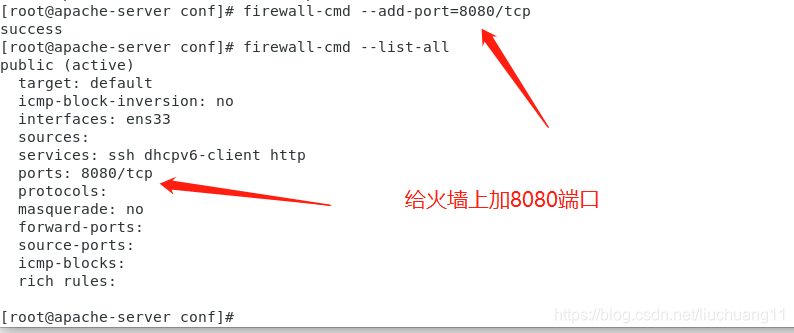
[root@server ~]# firewall-cmd --permanent --add-service=http 将httpd服务永久加在火墙上
success
[root@server ~]# firewall-cmd --reload 重启服务
success

apache默认端口的修改
- 修改http端口时分为两种情况,一种是修改为本身允许存在的端口;另一种是修改为不存在的端口
1 默认端口为80
[root@apache-server ~]# netstat -antlupe  | grep httpd
tcp6       0      0 :::80                   :::*                    LISTEN      0          86593      21180/httpd
2 修改端口为8080
[root@apache-server html]# cd /etc/httpd/conf        这个是主配置文件的目录
[root@apache-server conf]# vim httpd.conf  编辑端口
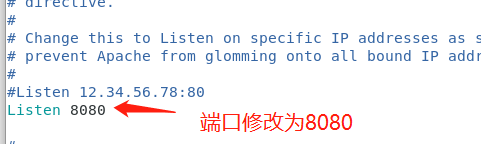
[root@apache-server conf]# systemctl restart httpd.service 重启httpd服务
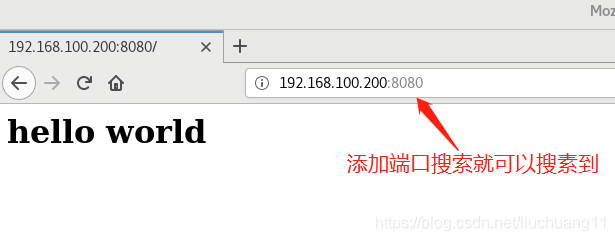
[root@apache-server conf]# netstat -antlupe | grep httpd 查看端口已经更改为 8080
tcp6 0 0 :::8080 :::* LISTEN 0 145682 69786/httpd
3 修改默认端口为6666
文件修改默认端口
[root@apache-server conf]# vim httpd.conf
\[root@apache-server conf]#systemctl restart httpd.service

[root@apache-server conf]# semanage port -a -t http_port_t  -p  tcp 6666        给这个端口强制加6666 的这个端口
[root@apache-server conf]# getenforce         查看selinux级别
Enfo[root@apache-server conf]# firewall-cmd --add-port=6666/tcp          给防火墙上加载6666的这个端口,让防火墙识别可以通过
success
[root@apache-server conf]# firewall-cmd --list-all
public (active)
  target: default
  icmp-block-inversion: no
  interfaces: ens33
  sources:
  services: ssh dhcpv6-client http
  ports: 8080/tcp 6666/tcp               查看到是已经有了6666的这个端口
  protocols:
  masquerade: no
  forward-ports:
  source-ports:
  icmp-blocks:
  rich rules: rcing
[root@apache-server conf]# semanage port -l | grep http
http_cache_port_t              tcp      8080, 8118, 8123, 10001-10010
http_cache_port_t              udp      3130
http_port_t                    tcp      6666, 80, 81, 443, 488, 8008, 8009, 8443, 9000          查看6666这个的端口添加成功
pegasus_http_port_t            tcp      5988
pegasus_https_port_t           tcp      5989
测试
在浏览器中查看
第一次没有加端口的情况是不能查看的
第二次加了 6666端口就可以查看了

扫描二维码关注公众号,回复:
6225477 查看本文章

apache默认发布目录的修改
- 环境配置
将的默认端口改为vim /etc/httpd/conf/httpd.confListen 80 wq退出保存
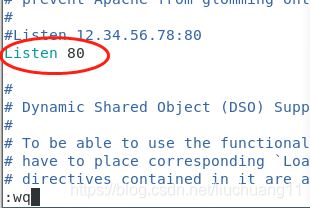
systemctl restart httpd 重启服务
更改
[root@apache-server conf]# cd /var/www/html/
[root@apache-server html]# ls
index.html
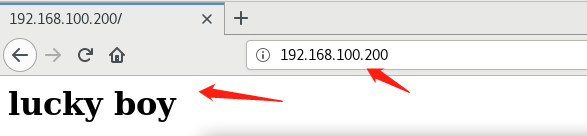
[root@apache-server html]# vim test 编辑新的文件
[root@apache-server html]# cat test
<h1>lucky boy</h1>
在firefox 浏览器上搜素查看

[root@apache-server html]# vim /etc/httpd/conf/httpd.conf 更改发布顺序
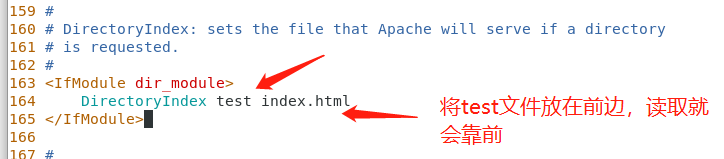
[root@apache-server html]# systemctl restart httpd.service
- 重新查看之后显示的就是test 里边的发布内容
更改默认的发布目录
更改发布目录就需要建立一个新的默认发布目录
[root@server ~]# mkdir /kk/pp -p 建立新的目录
[root@server ~]# semanage fcontext -a -t httpd_sys_content_t '/kk/pp(/.*)?' 因为是开启了selinux 的,所以要强制改变该目录的安全上下文,才可以变为默认的发布目录
[root@server ~]# restorecon -FvvR /kk/ 刷新才可以正式的改变目录
restorecon reset /kk context unconfined_u:object_r:default_t:s0->system_u:object_r:default_t:s0
restorecon reset /kk/pp context unconfined_u:object_r:default_t:s0->system_u:object_r:httpd_sys_content_t:s0
[root@server ~]# ls -Zd /kk/pp
drwxr-xr-x. root root system_u:object_r:httpd_sys_content_t:s0 /kk/pp 查看是该目录的安全上下文与原文已经一样
[root@server pp]# vim index.html 编辑默认发布默认里边的发布内容
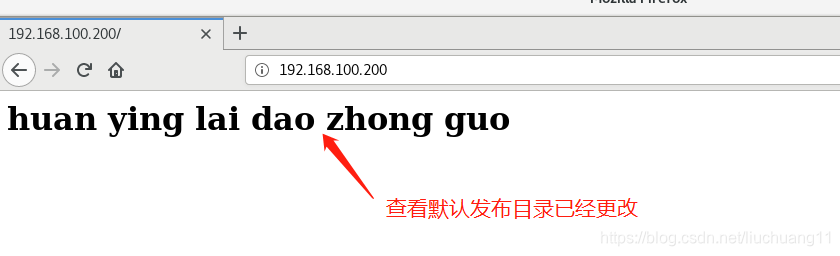
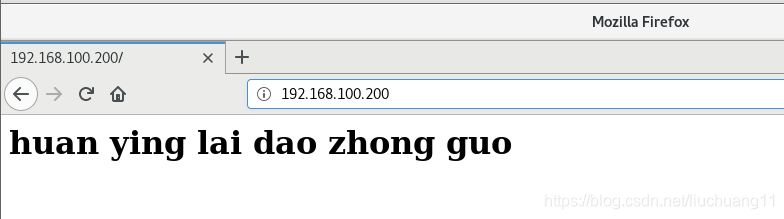
[root@server pp]# cat index.html
<h1>huan ying lai dao zhong guo</h1>
root@server ~]# vim /etc/httpd/conf/httpd.conf 修改主配置文件
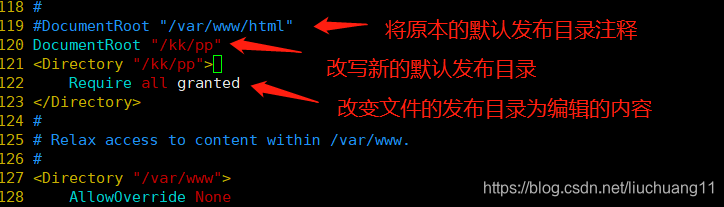
[root@server ~]# systemctl restart httpd.service 重启
测试:
apache内部的访问控制
1、针对与主机的访问控制(使用IP的情况下)
[root@server ~]# vim /etc/httpd/conf/httpd.conf 编辑文件内容

[root@server ~]# systemctl restart httpd.service 重启服务
测试:
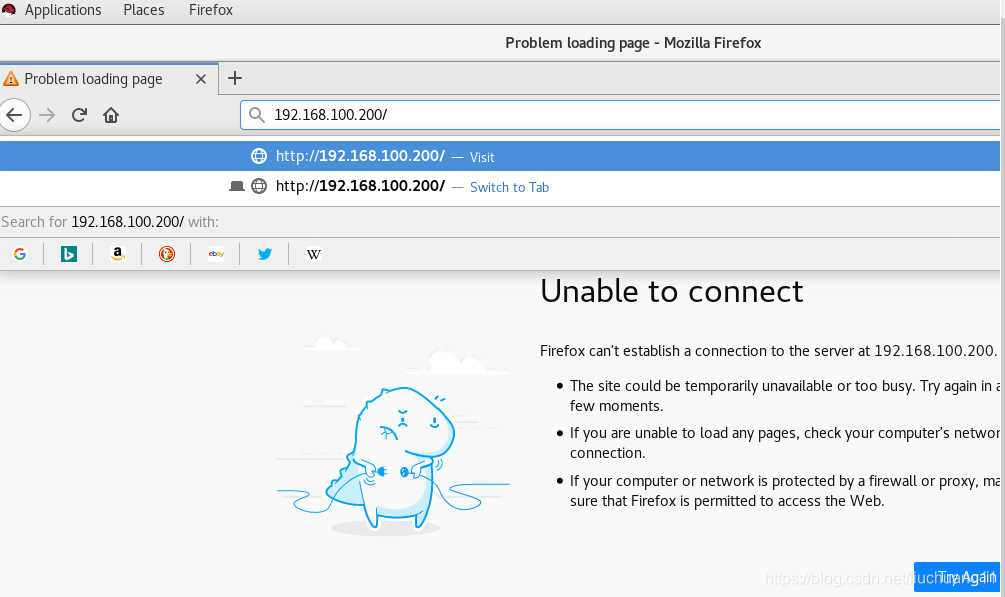
用192.168.100.180这个主机访问,访问不到
 用其他的主机访问这个就可以正常访问的
2 针对用户之间的访问控制使用情况
创建新的用户
[root@server httpd]# htpasswd  -cm .koko  admin       创建新的用户 并且输入密码
New password:
Re-type new password:
Adding password for user admin
[root@server httpd]# htpasswd  -m .koko  admin1         第二此创建新的用户 不需要加  C 直接 -m  就可以的
New password:
Re-type new password:
Adding password for user admin1
编写文件
[root@server httpd]# vim /etc/httpd/conf/httpd.conf
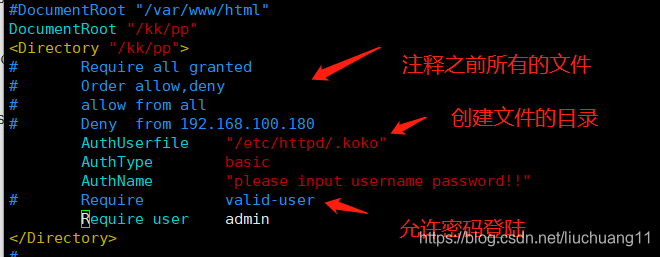
systemctl restart httpd.service重启服务
- 测试端:
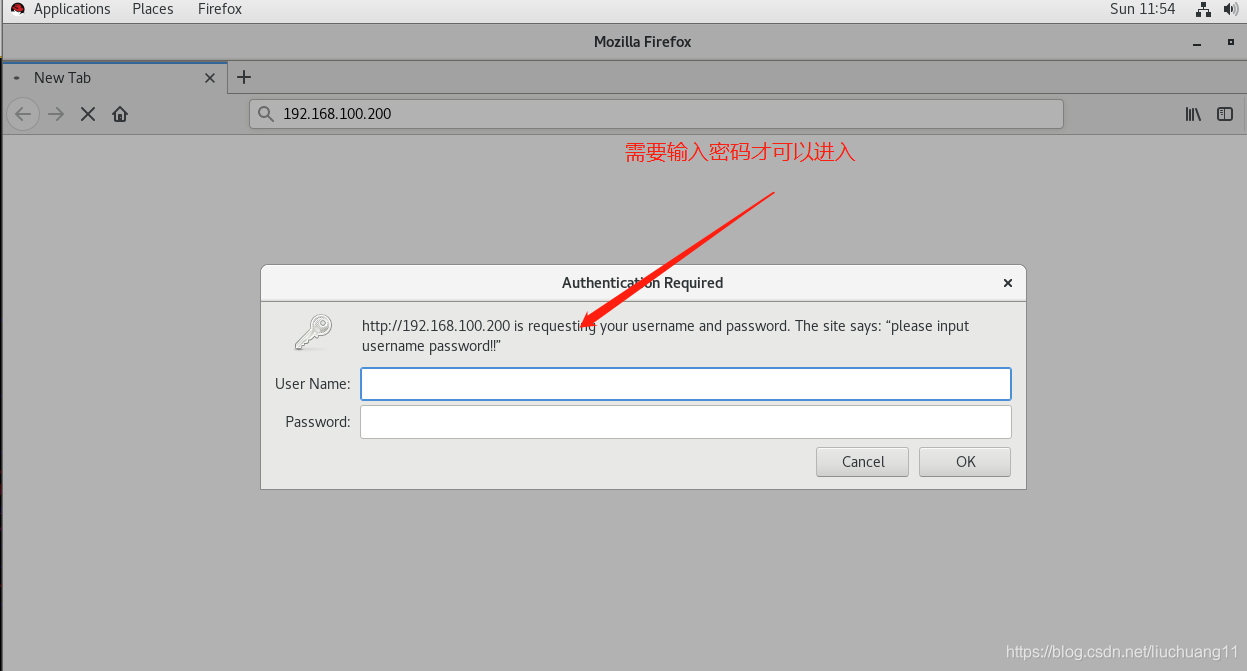
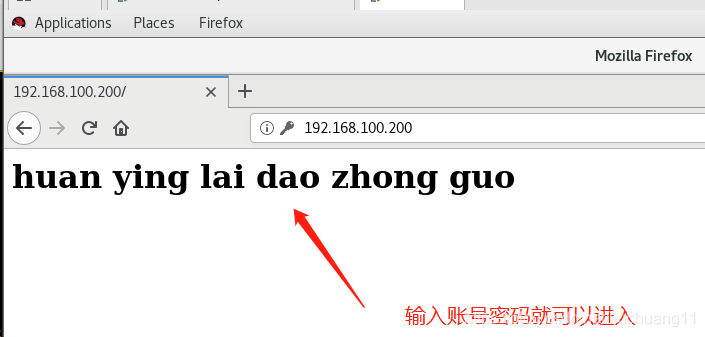
允许用户和密码中的就是可以登陆