2.4使用@componentscan方式启动
2.4.1 @EnableAutoConfiguration 默认只扫描当前类
@EnableAutoConfiguration 默认只扫描当前类,如果再新建一个indexcontroller类,将无法被扫描。
新建indexcontroller类:
/**
* 测试index类
* @author admin
*
*/
@RestController
public class IndexController {
@RequestMapping("/index")
public String index() {
return "index info";
}
}
启动TestController类中的main函数,首先访问http://localhost:8080/test
没有问题,再访问http://localhost:8080/index
报错信息如下:
Whitelabel Error Page
This application has no explicit mapping for /error, so you are seeing this as a fallback.
Sun Apr 14 22:25:20 CST 2019
There was an unexpected error (type=Not Found, status=404).
No message available
2.4.2 @ComponentScan指定扫描范围(7)
为了方便维护和规范化,将启动类和controller类分离开,新建一个IndexController类。启动类修改如下:
//@RestController
//@SpringBootApplication //或使用@EnableAutoConfiguration配置
@EnableAutoConfiguration //自动配置,根据pom文件引入的依赖信息,自动配置对应的组件;扫包范围,默认在当前类中
@ComponentScan("com.springboot2demo") //指定扫描范围
public class FirstApplication {

    /**
     * 程序入口
     *  SpringApplication.run 相当于java代码创建内置tomcat,加载springmvc注解启动
     * @param args
     */
    public static void main(String[] args) {
        SpringApplication.run(FirstApplication.class, args);
    }

}
IndexController为:
/**
 * 仅 @EnableAutoConfiguration注解方式下启动(默认只扫描当前类),/index 访问报错
 * @author admin
 */
@RestController
public class IndexController {

    @RequestMapping("/index")
    public String index() {
        return "index info";
    }

    @RequestMapping("/test")
    public String test(){
        return "springboot2.0 first application";
    }

}
启动springboot启动类
访问http://localhost:8080/index 成功返回:index info
访问http://localhost:8080/test成功返回:springboot2.0 first application
2.4.3 @SpringBootApplication方式启动(8)
1多个controller包的@componentscan多包扫描
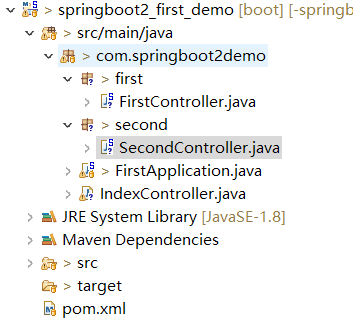
FirstController类:
@RestController
public class FirstController {

    @RequestMapping("/firstIndex")
    public String index() {
        return "firstIndex info";
    }

}
SecondController类:
@RestController
public class SecondController {

    @RequestMapping("/secondIndex")
    public String index() {
        return "secondIndex info";
    }

}
启动类修改为:
//@RestController
//@SpringBootApplication //或使用@EnableAutoConfiguration配置
@EnableAutoConfiguration //自动配置,根据pom文件引入的依赖信息,自动配置对应的组件;扫包范围,默认在当前类中
//@ComponentScan("com.springboot2demo") //指定扫描范围
@ComponentScan(basePackages= {"com.springboot2demo.first","com.springboot2demo.second"}) //多包扫描
public class FirstApplication {
2 @SpringbootApplication注解启动
等同于@EnableAutoConfiguation+@ComponentScan
且扫描范围默认为类所在当前包下所有包(包括子包)
在原有代码基础上修改启动类
//@RestController
//@EnableAutoConfiguration //自动配置,根据pom文件引入的依赖信息,自动配置对应的组件;扫包范围,默认在当前类中
//@ComponentScan("com.springboot2demo") //指定扫描范围
//@ComponentScan(basePackages= {"com.springboot2demo.first","com.springboot2demo.second"}) //多包扫描
@SpringBootApplication //或使用@EnableAutoConfiguration+@ComponentScan配置
public class FirstApplication {
git代码:https://github.com/cslj2013/-springboot2.0_first_demo.git