初识
POM
<parent>
  <groupId>org.springframework.boot</groupId>
  <artifactId>spring-boot-starter-parent</artifactId>
  <version>2.1.4.RELEASE</version>
</parent>
<!-- Add typical dependencies for a web application -->
<dependencies>
  <dependency>
    <groupId>org.springframework.boot</groupId>
    <artifactId>spring-boot-starter-web</artifactId>
  </dependency>
</dependencies>
@RestController
@EnableAutoConfiguration   //自动配置
public class Example {
    @RequestMapping("/")
    String home(){
        return "Hello Boot";
    }

    public static void main(String[] args){
        SpringApplication.run(Example.class, args);
    }
}
在resource下 application.properties
server.port=8522
server.servlet.context-path=/api
或者yml式配置
server:
  port: 8532
  servlet:
    context-path: /api
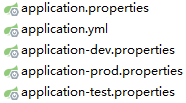
多测试环境配置
spring.profiles.active=dev
使用该配置后,优先使用prod内的配置
读取自定义的配置信息
boot.name= bboott
boot.location= China
@Value("${boot.name}")
private String name;
@Value("${boot.location}")
private String location;
或者
@Component
@ConfigurationProperties("boot")
public class ConfigInfo {
    private String name;
    private String location;

    public String getName() { return name; }

    public void setName(String name) { this.name = name; }

    public String getLocation() { return location; }

    public void setLocation(String location) {this.location = location; }
}
@Autowired
private ConfigInfo configInfo;
@RestController
@RestController即使使用 @Controller和@ResponseBody的组合,它会返回字符串 或者 json 。在做前后端分离时,我们会使用这个。
@RestController
public class MVCController {
    @RequestMapping("/user")
    public User test03(){
        User user = new User("黎明", 12);
        return user;
    }
}
@xxMapping
有 Get, Post, Put, Delete
和 RequestMapping(methods=Request.xx) 一样
Restful URL
@RequestMapping("/user/{id}")
public Object getTeacher(@PathVariable("id") int id){
    Teacher teacher = teacherService.get(id);
    return teacher;
}
Spring-boot 集成Mybatis
POM
<dependencies>
    <!--spring boot web-->
    <dependency>
        <groupId>org.springframework.boot</groupId>
        <artifactId>spring-boot-starter-web</artifactId>
    </dependency>
    <!--mybatis-->
    <dependency>
        <groupId>org.mybatis.spring.boot</groupId>
        <artifactId>mybatis-spring-boot-starter</artifactId>
        <version>2.0.1</version>
    </dependency>
    <!--connector driver-->
    <dependency>
        <groupId>mysql</groupId>
        <artifactId>mysql-connector-java</artifactId>
    </dependency>
</dependencies>
在写好的dao层mapper上
mapper
@Mapper
public interface TeacherMapper {。。。}
或者可以用mapper-scan
Application
@SpringBootApplication
@MapperScan("com.xx.mapper")
public class application {
    public static void main(String[] args){
        SpringApplication.run(application.class, args);
    }
}
Service
@Service
public class TeacherServiceImpl implements TeacherService {
    @Autowired
    private TeacherMapper teacherMapper;

    @Override
    public List<Teacher> getAll() {
        List<Teacher> teachers = teacherMapper.selectAll();
        return teachers;
    }
}
Controller
@RestController
public class MyController {
    @Autowired
    private TeacherService teacherService;

    @RequestMapping("/tea")
    public Object teacher(){
        return teacherService.getAll();
    }
}
idea环境下开发,不会把静态资源弄到输出文件,所以运行会出问题
可以在pom下加入来解决
<resources>
    <resource>
        <directory>src/main/java</directory>
        <includes><include>**/*.xml</include></includes>
    </resource>
    <resource>
        <directory>src/main/resources</directory>
        <includes><include>**/*.*</include></includes>
    </resource>
    <resource>
        <directory>src/main/webapp</directory>
        <targetPath>META-INF/resources</targetPath>
        <includes><include>**/*.*</include></includes>
    </resource>
</resources>
Spring-boot Transaction
1、在入口类中使用注解@EnableTransactionManagement
@EnableTransactionManagement
public class application {
    public static void main(String[] args){
        SpringApplication.run(application.class, args);
    }
}
2、在数据库访问的service上添加注解
@Transactional
@Override
public int update(int id){
    Teacher teacher = new Teacher();
    teacher.setAge(12);
    teacher.setName("zhangsantt");
    teacher.setLesson("bootttt");
    int i = teacherMapper.updateByPrimaryKeySelective(teacher);
    int a = 10/0;
    return i;
}
热部署插件
<dependency>
    <groupId>org.springframework.boot</groupId>
    <artifactId>spring-boot-devtools</artifactId>
    <optional>true</optional>
</dependency>
集成Redis
<dependency>
    <groupId>org.springframework.boot</groupId>
    <artifactId>spring-boot-starter-data-redis</artifactId>
</dependency>
spring.redis.host=localhost
spring.redis.port=6379
spring.redis.password=password
@Autowired
private RedisTemplate<Object, Object> redisTemplate;
@Override
public List<Teacher> getR(int id) {
    RedisSerializer redisSerializer = new StringRedisSerializer();
    redisTemplate.setKeySerializer(redisSerializer);
    List<Teacher> teachers = (List<Teacher>) redisTemplate.opsForValue().get("allteachers");
    synchronized (this){
        teachers = (List<Teacher>) redisTemplate.opsForValue().get("allteachers");
        if (teachers == null) {
            teachers = teacherMapper.selectAll();
            redisTemplate.opsForValue().set("allteachers", teachers);
        }
    }
    return  teachers;
}
集成Dubbo
开发dubbo服务接口
简单的写个service
public interface UserService {
    public String sayHi(String name);
    public User getUser(int id);
}
用maven打成jar包(install)
开发提供者
1.创建springboot项目,并加入相关依赖(web)
2.加入springboot与dubbo集成的起步依赖
<dependency>
    <groupId>com.alibaba.spring.boot</groupId>
    <artifactId>dubbo-spring-boot-starter</artifactId>
    <version>2.0.0</version>
</dependency>
3.在application.properties中配置zookeeper
spring.dubbo.appname=springboot-dubbo-provider
spring.dubbo.registry=zookeeper://192.168.2.241:2181
pom中加入zookeeper依赖
<groupId>com.101tec</groupId>
<artifactId>zkclient</artifactId>
<version>0.11</version>
4.实现Service
@Component  //spring的组件
@Service(version="0.0.1", timeout = 10000) //dubbo的注解
public class UserServiceImpl implements UserService{
    public String sayHi(String s) {return "hi"; }
    public User getUser(int i) { return new User("大傻逼"); }
}
为了可以implement需要在pom中导入我们在interface中创建的jar包
<dependency>
    <groupId>com.xx</groupId>
    <artifactId>xx-interface</artifactId>
    <version>0.0.1</version>
</dependency>
application入口开启自动配置
@EnableDubboConfiguration //开启dubbo的自动配置
开发消费者
1.创建springboot项目,配置依赖
2.配置dubbo,同上
3.写controller
@RestController
public class UserController {
    @Reference(version="0.0.1")// <dubbo:reference id="" interface="">
    private UserService userService;
    @RequestMapping("User")
    public Object getStudent(@RequestParam("id") Integer id){
        return userService.getUser(id);
    }
}
4.application同样要开启dubbo自动配置,同上
集成拦截器
@Configuration
public class WebConfig implements WebMvcConfigurer {
    public void addInterceptors(InterceptorRegistry registry) {
        String[] addPathPatterns = {
                "/boot/user"
        };
        String[] excludePathPatterns = {
                "/boot/login"
        };
        registry.addInterceptor(new myInterceptor()).addPathPatterns(addPathPatterns).excludePathPatterns(excludePathPatterns);
    }
}
集成Servlet
方式一:
servlet注解创建servlet后, application上注解扫描servlet
@WebServlet(urlPatterns = "/login")
public class myServlet extends HttpServlet {
    @Override
    protected void doGet(HttpServletRequest req, HttpServletResponse resp) throws ServletException, IOException {}
    @Override
    protected void doPost(HttpServletRequest req, HttpServletResponse resp) throws ServletException, IOException {}
}
@ServletComponentScan(basePackages = "com.xx.Servlet")
方式二:
不使用注解的servlet,略
使用Configure配置servlet
@Configuration
public class ServletConfig {
    @Bean
    public ServletRegistrationBean whoServletRegistrationBean(){
        return new ServletRegistrationBean(new whoServlet(), "/whoServlet");
    }
}
集成filter
方式一:使用注解WebFilte
@WebFilter(urlPatterns = "/*")
组件扫描
@ServletComponentScan(basePackages = {"com.xx.Servlet", "com.xx.Filter"})
方式二:同集成Servlet
编码
使用Spring提供的字符编码过滤器
@Configuration
public class filterConfig {
    @Bean
    public FilterRegistrationBean method01(){
        FilterRegistrationBean registrationBean = new FilterRegistrationBean();
        CharacterEncodingFilter characterEncodingFilter = new CharacterEncodingFilter();
        characterEncodingFilter.setForceEncoding(true);
        characterEncodingFilter.setEncoding("UTF-8");
        registrationBean.setFilter(characterEncodingFilter);
        registrationBean.addUrlPatterns("/*");
        return registrationBean;
    }
注意application扫描filter
只有当spring.http.encoding.enabled=false时,以上配置才可用
其实可以更简单
spring.http.encoding.charset=UTF-8
spring.http.encoding.enabled=true
spring.http.encoding.force=true
写纯java项目
<dependency>
    <groupId>org.springframework.boot</groupId>
    <artifactId>spring-boot-starter</artifactId>
    <version>2.1.4.RELEASE</version>
</dependency>
public static void main(String[] args) {
    ConfigurableApplicationContext ctx = SpringApplication.run(application.class, args);
    UserService userService = (UserService)ctx.getBean("userServiceImpl");
    String hi = userService.sayHi("Spring java");
    System.out.println(hi);
}
或者在入口类实现 CommandLineRunner
关掉log中的banner
public static void main(String[] args) {
    SpringApplication app = new SpringApplication(application.class);
    app.setBannerMode(Banner.Mode.OFF);
    app.run(args);
}
发布war包
继承SpringBootServletInitializer
@SpringBootApplication
public class application extends SpringBootServletInitializer {
    public static void main(String[] args) {
        SpringApplication.run(application.class,args);
    }
    @Override
    protected SpringApplicationBuilder configure(SpringApplicationBuilder builder) {
        return builder.sources(application.class);
    }
}
修改pom配置
<packaging>war</packaging>
然后 maven-install
jar包类似