版权声明:本文为博主原创文章,未经博主允许不得转载。 https://blog.csdn.net/qq_26981333/article/details/89981519
- 原文地址:https://github.com/shirayner/java-knowledge-hierarchy/tree/master/doc/spring-boot
- 此系列博客是站在大牛的肩膀上所做的总结,主要是方便建立自己的知识体系。所参考的文章会在每篇博客的参考资料部分列出
文章目录
前言
这一节主要记录 SpringBoot 整合 Thymeleaf 的过程,关于Thymeleaf 用法请参见Thymeleaf总结
一、SpringBoot 整合Thymeleaf
1.创建子模块
这里我们创建一个子模块,创建步骤同 SpringBoot_01_入门示例
group = 'com.ray.study'
artifact ='spring-boot-03-thymeleaf'
2.引入依赖
2.1 继承父工程依赖
在父工程spring-boot-seeds 的 settings.gradle加入子工程
rootProject.name = 'spring-boot-seeds'
include 'spring-boot-01-helloworld'
include 'spring-boot-02-restful-test'
include 'spring-boot-03-thymeleaf'
这样,子工程spring-boot-03-thymeleaf就会自动继承父工程中subprojects `函数里声明的依赖,主要包含如下依赖:
        implementation 'org.springframework.boot:spring-boot-starter-web'
        testImplementation 'org.springframework.boot:spring-boot-starter-test'

        compileOnly 'org.projectlombok:lombok'
        annotationProcessor 'org.projectlombok:lombok'
2.2 引入thymeleaf依赖
直接依赖 spring-boot-starter-thymeleaf即可
将子模块spring-boot-03-thymeleaf 的build.gradle修改为如下内容:
dependencies {
    implementation 'org.springframework.boot:spring-boot-starter-thymeleaf'
}
3.修改配置
3.1 thymeleaf默认配置
ThymeleafProperties类中设置了 thymeleaf默认配置,如下所示:
@ConfigurationProperties(prefix = "spring.thymeleaf")
public class ThymeleafProperties {

	private static final Charset DEFAULT_ENCODING = StandardCharsets.UTF_8;

	public static final String DEFAULT_PREFIX = "classpath:/templates/";

	public static final String DEFAULT_SUFFIX = ".html";

	/**
	 * Whether to check that the template exists before rendering it.
	 */
	private boolean checkTemplate = true;

	/**
	 * Whether to check that the templates location exists.
	 */
	private boolean checkTemplateLocation = true;

	/**
	 * Prefix that gets prepended to view names when building a URL.
	 */
	private String prefix = DEFAULT_PREFIX;

	/**
	 * Suffix that gets appended to view names when building a URL.
	 */
	private String suffix = DEFAULT_SUFFIX;

	/**
	 * Template mode to be applied to templates. See also Thymeleaf's TemplateMode enum.
	 */
	private String mode = "HTML";

	/**
	 * Template files encoding.
	 */
	private Charset encoding = DEFAULT_ENCODING;

	/**
	 * Whether to enable template caching.
	 */
	private boolean cache = true;
由ThymeleafProperties类可看出,默认配置了
- 模板文件编码:
UTF-8- 模板文件前缀:
classpath:/templates/- 模板文件后缀:
.html,由前缀和后缀可得出模板文件路径为:src/main/resources/templates/{viewName}.html- 开启了模板缓存:由于开发时,需要经常修改模板,模板缓存会使我们的修改无法及时生效,因此开发时需要禁用模板缓存
- 设置了模板模式为
HTML:我们会将此修改为HTML5
3.2 修改application.yml
server:
  port: 8088
  servlet:
    context-path: /

# ThymeLeaf配置
## 默认配置见 ThymeleafProperties
spring:
  thymeleaf:
    mode: HTML5     # 设置模板模式,支持 HTML, XML TEXT JAVASCRIPT
    cache: false    # 禁用模板缓存:开发配置为false,避免修改模板还要重启服务器
4.业务实现
所谓模板引擎,就是模板+数据
这里我们将实现一个显示用户列表的功能
4.1 准备数据
4.1.1 model
package com.ray.study.springboot03thymeleaf.model;


import lombok.AllArgsConstructor;
import lombok.Data;
import lombok.NoArgsConstructor;

/**
 * description
 *
 * @author shira 2019/04/28 15:01
 */
@Data
@NoArgsConstructor
@AllArgsConstructor
public class User {

	private Long id;

	private String name;

	private Integer age;
}
4.1.2 controller
package com.ray.study.springboot03thymeleaf.controller;


import com.ray.study.springboot03thymeleaf.model.User;
import org.springframework.stereotype.Controller;
import org.springframework.ui.Model;
import org.springframework.web.bind.annotation.GetMapping;
import org.springframework.web.bind.annotation.RequestMapping;
import org.springframework.web.servlet.ModelAndView;

import java.util.ArrayList;
import java.util.List;

/**
 * UserController
 *
 * @author shira 2019/04/28 15:45
 */
@Controller
@RequestMapping(value = "/users")     // 通过这里配置使下面的映射都在/users下
public class UserController {


	@GetMapping("/index1")
	public ModelAndView index1() {

		List<User> userList = listUser();

		ModelAndView view = new ModelAndView();
		// 设置跳转的视图 默认映射到 src/main/resources/templates/{viewName}.html
		view.setViewName("index");

		// 设置属性
		view.addObject("title", "SpringBoot 整合 Thymeleaf");
		view.addObject("userList", userList);

		return view;
	}


	@GetMapping("/index2")
	public String index2(Model model) {
		List<User> userList = listUser();

		model.addAttribute("title", "SpringBoot 整合 Thymeleaf");
		model.addAttribute("userList", userList);

		// 设置跳转的视图 默认映射到 src/main/resources/templates/{viewName}.html
		return "index";
	}


	private List<User> listUser(){
		List<User> userList = new ArrayList<>();
		for (int i=0 ; i<3; i++){
			userList.add(new User(1L+i,"tom"+i,21+i));
		}

		return userList;
	}

}
4.2 准备模板
在src/main/resources下创建templates目录,并在此目录下创建index.html,内容如下:
<!DOCTYPE html>
<!--
  description
  @author shira 2019/05/07 12:41
-->
<html lang="en" xmlns:th="http://www.thymeleaf.org">
<head>
    <meta charset="UTF-8">
    <title th:text="${title}"></title>
</head>
<body>
    <h1 th:text="${title}"></h1>

    <table>
        <tr>
            <th>id</th>
            <th>name</th>
            <th>age</th>
        </tr>
        <tr th:each="user : ${userList}">
            <td th:text="${user.id}">id</td>
            <td th:text="${user.name}">userName</td>
            <td th:text="${user.age}">age</td>
        </tr>
    </table>


</body>
</html>
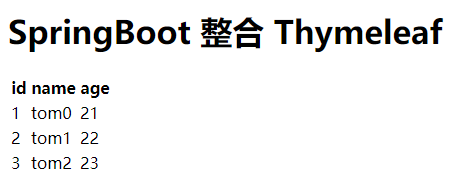
5.最终效果
启动项目,然后访问如下两个网址
会出现下图页面: