在cmd.exe进入MongoDB的方法,首先需要进入MongoDB的安装目录的bin下
输入:
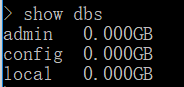
mongo

显示数据库:
show dbs
连接MongoDB
import pymongo
client=pymongo.MongoClient(host="localhost",port=27017)  #方法一
client=pymongo.MongoClient("mongodb://localhost:27017/") #方法二
指定数据库
db=client.test     #方法一
db=client["test"]  #方法二
指定集合
MongoDB的每个数据库又包含许多集合,它们类似于关系型数据库中的表。
collection=db.students    #方法一
collection=db["students"] #方法二
插入数据
insert_one插入一条数据
import pymongo
student={
    "id":"20170101",
    "name":"Bob",
    "age":20,
    "gender":"male"
}
client=pymongo.MongoClient(host="localhost",port=27017)
db=client["test"]
collection=db["students"]
result=collection.insert_one(student)
print(result)
输出:<pymongo.results.InsertOneResult object at 0x000002C7A1185A08>
每条数据都有一个_id属性来唯一标识,是ObjectId类型的。
insert_many插入多条数据
import pymongo
student1={
    "id":"20170102",
    "name":"Wu",
    "age":21,
    "gender":"male"
}
student2={
    "id":"20170103",
    "name":"Chen",
    "age":22,
    "gender":"male"
}
client=pymongo.MongoClient(host="localhost",port=27017)
db=client["test"]
collection=db["students"]
result=collection.insert_many([student1,student2])
print(result)
可以调用inserted_id属性获取_id
查询
find_one()查询得到单个结果,find()返回一个生成器对象
import pymongo
client=pymongo.MongoClient(host="localhost",port=27017)
db=client["test"]
collection=db["students"]
result=collection.find_one({"name":"Bob"})
print(result)
输出:{’_id’: ObjectId(‘5ca71f450f9c262d4460c9a0’), ‘id’: ‘20170101’, ‘name’: ‘Bob’, ‘age’: 20, ‘gender’: ‘male’}
可以根据ObjectId来查询,需要使用bson库中的objectId
比较符号
查询年龄大于20岁的人
import pymongo
client=pymongo.MongoClient(host="localhost",port=27017)
db=client["test"]
collection=db["students"]
result=collection.find({"age":{"$gt":20}})
print(result)
for row in result:
    print(row)
输出:
<pymongo.cursor.Cursor object at 0x000002A1B350D048>
{'_id': ObjectId('5ca7200c0f9c262714d02730'), 'id': '20170102', 'name': 'Wu', 'age': 21, 'gender': 'male'}
{'_id': ObjectId('5ca7200c0f9c262714d02731'), 'id': '20170103', 'name': 'Chen', 'age': 22, 'gender': 'male'}

$regex可以用来指定正则表达式

计数
result=collection.find({"age":{"$gt":18}}).count()
排序
pymongo.ASCENDING指定升序,DESCENDING指定降序
result=collection.find().sort("name",pymongo.ASCENDING)
for row in result:
    print(row)
偏移
skip()方法偏移几个位置,limit()方法指定要取的结果个数
data=collection.find().skip(2)
for row in data:
    print(row)
查询出的所有结果是:
{'_id': ObjectId('5ca71f450f9c262d4460c9a0'), 'id': '20170101', 'name': 'Bob', 'age': 20, 'gender': 'male'}
{'_id': ObjectId('5ca7200c0f9c262714d02730'), 'id': '20170102', 'name': 'Wu', 'age': 21, 'gender': 'male'}
{'_id': ObjectId('5ca7200c0f9c262714d02731'), 'id': '20170103', 'name': 'Chen', 'age': 22, 'gender': 'male'}
{'_id': ObjectId('5ca720af0f9c26228487e8eb'), 'id': '20170101', 'name': 'Bob', 'age': 20, 'gender': 'male'}
使用skip()偏移之后从偏移数量的后一位开始取:
{'_id': ObjectId('5ca7200c0f9c262714d02731'), 'id': '20170103', 'name': 'Chen', 'age': 22, 'gender': 'male'}
{'_id': ObjectId('5ca720af0f9c26228487e8eb'), 'id': '20170101', 'name': 'Bob', 'age': 20, 'gender': 'male'}
更新
返回结果是UpdateResult类型,matched_count获得匹配的数据条数,modified_count影响的数据条数
import pymongo
client=pymongo.MongoClient(host="localhost",port=27017)
db=client.test
collection=db.students
condition={"name":"Bob"}
student=collection.find_one(condition)
student["age"]=29
result=collection.update_one(condition,{"$set":student})
print(result)
print(result.matched_count,result.modified_count)
输出:
<pymongo.results.UpdateResult object at 0x0000021A98961348>
1 1
删除
delete_one()删除第一个符合条件的,delete_many()删除所有符合条件的
import pymongo
client=pymongo.MongoClient(host="localhost",port=27017)
db=client.test
collection=db.students
result=collection.delete_many({"name":"Bob"})
print(result)
print(result.deleted_count)
输出:
<pymongo.results.DeleteResult object at 0x000002B676A96048>
2