一、控制缩放、旋转、位移并贴图混合Shader实例
// Upgrade NOTE: replaced '_Object2World' with 'unity_ObjectToWorld'

Shader "Image/ImageShader"
{
	Properties
	{
		_MainTex("Texture", 2D) = "white" {}
		_DampTex("DampTex", 2D) = "white" {}
		_DampOffset("DampOffset", Range(0.0,1.0)) = 0.0
		_Position("Position", vector) = (0,0,0)
		_Rotate("Rotate", vector) = (0,0,0)
		_Scale("Scale", vector) = (1,1,1)
	}
		SubShader
		{
			Tags { "Queue" = "Transparent" "RenderType" = "Transparent" }
			// No culling or depth
			Cull Off ZWrite Off ZTest Always
			Blend SrcAlpha OneMinusSrcAlpha
			Pass
			{
				CGPROGRAM
				#pragma vertex vert
				#pragma fragment frag

				#include "UnityCG.cginc"

				struct appdata
				{
					float4 vertex : POSITION;
					float2 uv : TEXCOORD0;
				};

				struct v2f
				{
					float2 uv : TEXCOORD0;
					float4 vertex : SV_POSITION;
				};

				sampler2D _MainTex;
				sampler2D _DampTex;
				fixed _DampOffset;
				float4 _Position;
				float4 _Rotate;
				float4 _Scale;

				v2f vert(appdata v)
				{
					v2f o;
					// 缩放 -> 旋转 ->平移
					float4x4 matScale ={
						_Scale.x,0,0,0,
						0,_Scale.y,0,0,
						0,0,_Scale.z,0,
						0,0,0,1
					};
					float4x4 matRotateX ={
						1,0,0,0,
						0,cos(_Rotate.x),-sin(_Rotate.x),0,
						0,sin(_Rotate.x),cos(_Rotate.x),0,
						0,0,0,1
					};
					float4x4 matRotateY ={
						cos(_Rotate.y),0,sin(_Rotate.y),0,
						0,1,0,0,
						-sin(_Rotate.y),0,cos(_Rotate.y),0,
						0,0,0,1
					};
					float4x4 matRotateZ ={
						cos(_Rotate.z),-sin(_Rotate.z),0,0,
						sin(_Rotate.z),cos(_Rotate.z),0,0,
						0,0,1,0,
						0,0,0,1
					};
					float4x4 matPosition = {
						1,0,0,_Position.x,
						0,1,0,_Position.y,
						0,0,1,_Position.z,
						0,0,0,1
					};
					fixed4 o2w_vertex = mul(matScale, v.vertex);
					o2w_vertex = mul(matRotateX, o2w_vertex);
					o2w_vertex = mul(matRotateY, o2w_vertex);
					o2w_vertex = mul(matRotateZ, o2w_vertex);
					o2w_vertex = mul(matPosition, o2w_vertex);
					o.vertex = mul(UNITY_MATRIX_VP, o2w_vertex);
					o.uv = v.uv;
					return o;
				}

				fixed4 frag(v2f i) : SV_Target
				{
					fixed4 col = tex2D(_MainTex, i.uv);
					//底图偏移值 = Cos余弦值周期变化
					_DampOffset = _CosTime.w;
					//直接加到uv上即可偏移
					fixed4 damp_col = tex2D(_DampTex, i.uv + _DampOffset);
					//颜色混合权重 = Sin正弦值周期变化
					fixed w = _SinTime.w + 0.5;
					//底图damp削弱w倍 混合 原图削弱1-w倍,即w越大原图颜色越深,底图颜色越浅
					fixed4 out_col = damp_col * (1 - w) + col * w;
					return out_col;
				}
				ENDCG
			}
		}
}
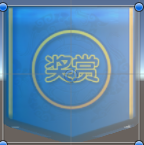
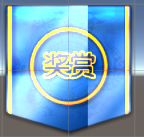
上述代码,控制缩放、旋转、平移都是通过将模型空间的顶点坐标乘以一个4*4矩阵(固定写法),而贴图混合是在frag片元函数中将底图颜色值和原图颜色值fixed4相加即可,混合的算法有很多种,上面只是其中一种混合算法。
相关截图:

二、消融效果
 Shader "Image/RemoveShader"
{
	Properties
	{
		_MainTex ("Texture", 2D) = "white" {}
	}
	SubShader
	{
		// No culling or depth
		Tags { "Queue" = "Transparent" "RenderType" = "Transparent" }
		Cull Off ZWrite Off ZTest Always
		Blend SrcAlpha OneMinusSrcAlpha
		Pass
		{
			CGPROGRAM
			#pragma vertex vert
			#pragma fragment frag

			#include "UnityCG.cginc"

			struct appdata
			{
				float4 vertex : POSITION;
				float2 uv : TEXCOORD0;
			};

			struct v2f
			{
				float2 uv : TEXCOORD0;
				float4 vertex : SV_POSITION;
			};

			v2f vert (appdata v)
			{
				v2f o;
				o.vertex = UnityObjectToClipPos(v.vertex);
				o.uv = v.uv;
				return o;
			}

			sampler2D _MainTex;
			//RGB消融比例,数值在0~1之间,数值越大消失越慢,由于颜色混合会有很多种简单来说
			//(1,0.5,0.1) 在一个图片RGB的G、B值都差不多一样的情况下,图片像素点颜色R值大的消失最慢
			//因为计算出的点积值大,导致它需要的时间就越长,下面的if就是这个时间
			//下方是随意设置的,消失顺序是B值消失最快、其次R值消失、最后是G值消失,即蓝色消失最快,红色中间,绿色最后
		    static float3 rate = (0.3, 0.6, 0.1);

			fixed4 frag (v2f i) : SV_Target
			{
				fixed4 col = tex2D(_MainTex, i.uv);
				//像素点颜色RGB与指定RGB的点积结果是数值,数值若小于0则不显示像素点
				float gray = dot(rate, col.rgb);
				//_Time.x = 1/8s  y 1/4s z 1/2s w 1s  时间帧递增速度 即1/8s算一帧,3帧就是3/8s了
				if(gray - _Time.x * 9/5 < 0)
				{
					discard;//不显示像素
				}
				return col;
			}
			ENDCG
		}
	}
}
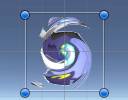
原理:在frag处将像素点颜色值与一个float3进行点积操作,决定消融RGB权重,越小越快消失,其中_Time.x是每帧自增1/8s的时间,discard是消除像素。
效果图:
 可见蓝色的,最快消失。
三、闪烁2D图片特效(本例所用的闪光贴图不是很好所以效果图不是很理想,要自己找一些闪光贴图)
Shader "Image/FlashShader"
{
	Properties
	{
		_MainTex ("Texture", 2D) = "white" {}
		_FlashTex ("FlashTex", 2D) = "black"{}
		_Offset ("Flash Offset", Range(0,1)) = 0.5
		_Brightness("Brightness", Range(0,1)) = 0.5
	}
	SubShader
	{
		Tags { "Queue" = "Transparent" "RenderType" = "Transparent" }
		// No culling or depth
		Cull Off ZWrite Off ZTest Always
		Blend SrcAlpha OneMinusSrcAlpha
		Pass
		{
			CGPROGRAM
			#pragma vertex vert
			#pragma fragment frag

			#include "UnityCG.cginc"

			struct appdata
			{
				float4 vertex : POSITION;
				float2 uv : TEXCOORD0;
			};

			struct v2f
			{
				float2 uv : TEXCOORD0;
				float4 vertex : SV_POSITION;
			};

			v2f vert (appdata v)
			{
				v2f o;
				o.vertex = UnityObjectToClipPos(v.vertex);
				o.uv = v.uv;
				return o;
			}

			sampler2D _MainTex;
			sampler2D _FlashTex;
			fixed _Offset;
			fixed _Brightness;

			fixed4 frag (v2f i) : SV_Target
			{
				fixed4 col = tex2D(_MainTex, i.uv);
				fixed4 flash_col = tex2D(_FlashTex, i.uv + fixed2(_Time.y, 0));
				//混合FLASH贴图颜色,注意要乘以原图a和Flash贴图的a,即原图和flash贴图的像素点只要有一方完全透明区域不会进行混合,最后乘以一个亮度
				fixed4 out_color = col + flash_col * col.a * flash_col.a * _Brightness;
				return out_color;
			}
			ENDCG
		}
	}
}
原理:在frag中将闪光贴图的uv位置根据_Time.y进行偏移x轴,然后将其颜色与原图颜色混合,注意必须混合时要乘以2个alpha值和一个亮度可自行调整。
效果图:
四、2D贴图阴影效果
Shader "Image/2DShadowShader"
{
	Properties
	{
		_MainTex ("Texture", 2D) = "white" {}
		_PlayerTex("Player Tex", 2D) = "black"{}
	}
	SubShader
	{
		Tags { "Queue" = "Transparent" "RenderType" = "Transparent"}
		// No culling or depth
		Cull Off ZWrite Off ZTest Always
		Blend SrcAlpha OneMinusSrcAlpha
		Pass
		{
			CGPROGRAM
			#pragma vertex vert
			#pragma fragment frag

			#include "UnityCG.cginc"

			struct appdata
			{
				float4 vertex : POSITION;
				float2 uv : TEXCOORD0;
			};

			struct v2f
			{
				float2 uv : TEXCOORD0;
				float4 vertex : SV_POSITION;
			};

			v2f vert (appdata v)
			{
				v2f o;
				o.vertex = UnityObjectToClipPos(v.vertex);
				o.uv = v.uv;
				return o;
			}

			sampler2D _MainTex;
			sampler2D _PlayerTex;

			fixed4 frag (v2f i) : SV_Target
			{
				fixed4 col = tex2D(_MainTex, i.uv);
				// just invert the colors
				fixed4 player_col = tex2D(_PlayerTex, 1 - i.uv);
				fixed4 out_col = col * player_col.a;
				out_col.a = out_col.a * max(0, sin(2 * _Time.y));
				return out_col;
			}
			ENDCG
		}
	}
}
using System.Collections;
using System.Collections.Generic;
using UnityEngine;

public class TDShadow : MonoBehaviour
{
    public GameObject playerGo;
    private void Start()
    {
        if (!playerGo) return;
        var playerTex = playerGo.GetComponent<SpriteRenderer>().sprite.texture;
        var shadowMat = this.GetComponent<SpriteRenderer>().material;
        shadowMat.SetTexture("_PlayerTex", playerTex);
    }
}
![]()


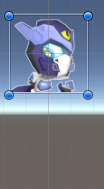
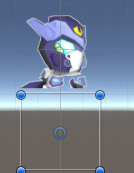
一个shader是给名为shadow的物体的,它是一个SpriteRenderer,而一个c#脚本是用于赋值其Shader的Player Tex贴图的,在shader里面叫_PlayerTex,所以SetTexture的第一个参数就是这个名称。
原理:将影子本体贴图(PlayerTex)的uv倒转过来,即1-uv,整个图片就旋转了180%,之后再用原图(黑色图)颜色值乘以倒转过来的本体贴图alpha值,那就得到了影子颜色值。
效果图:
五、扭曲2D图片效果
Shader "Image/DistortedShader"
{
	Properties
	{
		_MainTex ("Texture", 2D) = "white" {}
		_Weight ("Weight", Range(0,100)) = 20
	}
	SubShader
	{
		Tags { "Queue"="Transparent" "RenderType" = "Transparent" }
		// No culling or depth
		Cull Off ZWrite Off ZTest Always
		Blend SrcAlpha OneMinusSrcAlpha
		Pass
		{
			CGPROGRAM
			#pragma vertex vert
			#pragma fragment frag

			#include "UnityCG.cginc"

			struct appdata
			{
				float4 vertex : POSITION;
				float2 uv : TEXCOORD0;
			};

			struct v2f
			{
				float2 uv : TEXCOORD0;
				float4 vertex : SV_POSITION;
			};

			v2f vert (appdata v)
			{
				v2f o;
				o.vertex = UnityObjectToClipPos(v.vertex);
				o.uv = v.uv;
				return o;
			}

			sampler2D _MainTex;
			static float2 center = (0.5, 0.5);
			float _Weight;
			fixed4 frag (v2f i) : SV_Target
			{
				float2 uv = i.uv;
				float2 dt = uv - center;
				float len = sqrt(dot(dt,dt));
				//旋转弧度(距中心点越远的旋转弧度越大)
				float theta = len * _Weight;
				//2D旋转矩阵是写法是固定的
				float3x3 rot =
				{
					cos(theta), -sin(theta), 0,
					sin(theta), cos(theta), 0,
					0, 0, 1
				};
				//对dt向量进行旋转(与rot(2D旋转矩阵)相乘),然后加上中心点得到经旋转后的uv坐标
				uv = center + mul(rot,dt);
				fixed4 col = tex2D(_MainTex, uv);
				return col;
			}
			ENDCG
		}
	}
}
原理:像素点uv围绕某点进行旋转偏移,从而将图片扭曲,本例是中心点(0.5,0.5),通过点点相减得到像素点与中心点的向量,通过勾股定理得到向量长度,即A(x,y)向量的长度=sqrt(x^2+y^2) , 而dot是点积,点积学过高等数学应该知道两个向量的点积是一一对应相乘之和如:(x,y)*(x,y) = (x*x)+(y*y)也就是x^2+y^2(有点啰嗦了呵呵),这样就得到向量长度,通过向量长度和外部传递的权值决定旋转偏移值,而旋转像素点的方法和之前3D旋转有些许不同,本例用的是2D的旋转,乘以一个3*3矩阵,写法和3D的绕Z轴旋转矩阵有些许类似,最后将旋转后的向量与中心点相加即可得到进行了旋转偏移后的uv坐标点,再用它来取样像素点颜色值输出即可。
效果图: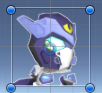
六、2D图片外边框效果
Shader "Image/TDOutLineShader"
{
	Properties
	{
		_MainTex ("Texture", 2D) = "white" {}
		_OutlineColor ("OutlineColor", Color) = (1,1,1,1)
		_OutlineScale ("OutlineScale", Range(0,2)) = 0.2
	}
	SubShader
	{
		Tags
		{
			"Queue" = "Transparent"
		}
		Cull Off ZWrite Off ZTest Always
		Blend SrcAlpha OneMinusSrcAlpha
		Pass
		{
			CGPROGRAM
			#pragma vertex vert
			#pragma fragment frag

			#include "UnityCG.cginc"

			struct appdata
			{
				float4 vertex : POSITION;
				float2 uv : TEXCOORD0;
			};

			struct v2f
			{
				float2 uv : TEXCOORD0;
				float4 vertex : SV_POSITION;
			};

			v2f vert (appdata v)
			{
				v2f o;
				o.vertex = UnityObjectToClipPos(v.vertex);
				o.uv = v.uv;
				return o;
			}

			sampler2D _MainTex;
			float2 _MainTex_TexelSize;//内置变量:_MainTex贴图的像素大小
			fixed3 _OutlineColor;
			fixed _OutlineScale;

			fixed4 frag (v2f i) : SV_Target
			{
				fixed4 col = tex2D(_MainTex, i.uv);
				fixed3 col_rgb = tex2D(_MainTex, i.uv).rgb;
				//获取当前像素带你上下左右像素点坐标,乘上边框Scale是为了偏移更大的距离,从而让认定为边缘的像素点变多而形成更厚的边框
				float2 uv_up = i.uv + _MainTex_TexelSize.xy * float2(0,1) * _OutlineScale;
				float2 uv_down = i.uv + _MainTex_TexelSize.xy * float2(0,-1) * _OutlineScale;
				float2 uv_left = i.uv + _MainTex_TexelSize.xy * float2(-1,0) * _OutlineScale;
				float2 uv_right = i.uv + _MainTex_TexelSize.xy * float2(1,0) * _OutlineScale;
				//上下左右像素点的alpha之积(越接近于0,代表是边缘附近的像素点)
				float w = tex2D(_MainTex, uv_up).a * tex2D(_MainTex, uv_down).a * tex2D(_MainTex, uv_left).a * tex2D(_MainTex, uv_right).a;
				//通过插值运算计算出其像素颜色值,当w越接近0,颜色值就越接近外边框颜色值,若为1则是原色
				fixed3 out_col = lerp(_OutlineColor, col_rgb, w);
				return fixed4(out_col, col.a);
			}
			ENDCG
		}
	}
}
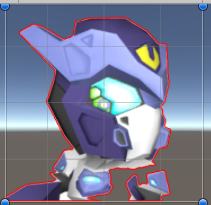
原理:在frag中分析当前渲染像素点的周围(上下左右)像素点的透明度,得到它们的乘积w 越接近0就其颜色值就越偏向外边框颜色,其中有个_MainTex_TexelSize是内置参数,贴图的像素点大小,_MainTex是你那个贴图的参数名,如果你贴图参数名不是这样的话要改对。
效果图:
七、漫反射
// Upgrade NOTE: replaced '_Object2World' with 'unity_ObjectToWorld'

Shader "My Shader/DiffuseReflectionShader"
{
	Properties
	{

	}
	SubShader
	{
		Tags
		{
			"LightMode" = "ForwardBase"
		}
		Pass
		{
			CGPROGRAM
			#pragma vertex vert
			#pragma fragment frag
			#include "Lighting.cginc"
			#include "UnityCG.cginc"

			struct v2f
			{
				float4 vertex : SV_POSITION;
				float4 world_vertex : TEXCOORD8;
				float3 world_normal : TEXCOORD9;
			};

			v2f vert (appdata_full v)
			{
				v2f o;
				o.vertex = UnityObjectToClipPos(v.vertex);
				//模型空间的顶点坐标转世界空间
				o.world_vertex = mul(unity_ObjectToWorld, v.vertex);
				//模型空间的法线转世界空间
				o.world_normal = UnityObjectToWorldNormal(v.normal);
				return o;
			}

			static float3 mat_col = {0.9, 0.9, 0.9};

			fixed4 frag (v2f i) : SV_Target
			{
				//归一化世界空间法线
				float3 N = normalize(i.world_normal);
				//获取世界空间照射顶点坐标的光照方向 再标准化
				float3 L = normalize(UnityWorldSpaceLightDir(i.world_vertex));
				//环境光颜色 混合 材质颜色  再乘以顶点法线与顶点所受光线的余弦值(即受到光线放的影响) 最终得到漫反射颜色
				// (N,L)点积 = |N||L|cos<N,L> 其中|N|和|L|都是1,因为归一化了,所以NL点积就是N,L余弦值,至于为什么要乘以这个余弦值是因为漫反射就是这样的
				float3 col = _LightColor0.rgb * mat_col * max(0, dot(N, L));
				return fixed4(col, 1);
			}
			ENDCG
		}
	}
}
原理:漫反射就一个算法:颜色值=环境光.rpg * 材质颜色 * 法线与光照向量的余弦值,其中有个很关键就是要归一化,然后2个向量的点积就是它们的余弦值,具体可看shader注释里面有说明。
效果图:
 (漫反射就是越朝向光照方向的点会越亮,反向光照的点会越暗,立体感会很足嘿嘿)
八、高光反射
// Upgrade NOTE: replaced '_Object2World' with 'unity_ObjectToWorld'

Shader "My Shader/HighLightReflectionShader"
{
	Properties
	{
		_MainTex ("Texture", 2D) = "white" {}
		_DiffuseColor ("DiffuseColor", Color) = (1,1,1,1)
		_Glass("Glass", Range(1,128)) = 1
	}
	SubShader
	{
		Pass
		{
			Tags
			{
				"LightMode" = "ForwardBase"
			}
			CGPROGRAM
			#pragma vertex vert
			#pragma fragment frag

			#include "UnityCG.cginc"
			#include "Lighting.cginc"

			struct v2f
			{
				float4 vertex : SV_POSITION;
				float4 world_pos : TEXCOORD8;
				float3 world_normal : TEXCOORD9;
			};

			sampler2D _MainTex;
			float4 _DiffuseColor;
			float _Glass;

			v2f vert (appdata_full v)
			{
				v2f o;
				o.vertex = UnityObjectToClipPos(v.vertex);
				o.world_pos = mul(unity_ObjectToWorld, v.vertex);
				o.world_normal = UnityObjectToWorldNormal(v.normal);
				return o;
			}

			fixed4 frag (v2f i) : SV_Target
			{
				//下面所有向量都要归一化的原因是需要求余弦值,用点积来求 a*b=|a||b|cos<a,b> 归一化后|a||b|都为1 那么点积值就是余弦值
				float3 N = normalize(i.world_normal);//法线向量
				float3 L = normalize(UnityWorldSpaceLightDir(i.world_pos));//光线向量
				float3 V = normalize(UnityWorldSpaceViewDir(i.world_pos));//视角向量
				float3 H = normalize(V + L);//半角向量 = 光线向量L + 视角向量V
				//漫反射颜色 = 环境光 * 漫反射材质颜色 * 法线向量与光线向量的余弦值 saturate是控制其值不小于0,最小值为0
				fixed3 diffuse_col = _LightColor0.rgb * _DiffuseColor * (saturate(dot(N, L)) * 0.5 + 0.5);//半兰伯高光反射,删去*0.5+0.5就是兰伯特高光反射(漫反射影响高光)
				//高光反射颜色 = 环境光 * 法线向量与半角向量余弦值的_Glass次方
				fixed3 hl_col = _LightColor0.rgb * pow(saturate(dot(N, H)), _Glass);
				fixed4 col = fixed4(diffuse_col + hl_col,1);
				return col;
			}
			ENDCG
		}
	}
}
原理:高光反射算法:环境光*法线向量与半角向量的余弦值的_Glass次方,最后再与漫反射颜色混合。算法都是固定好了的。
效果图:
 因为漫反射用的是半伯特漫反射,在计算漫反射颜色时删去*0.5+0.5就会变得更立体感点。
九、各向异性渲染(适用于头发、金属等渲染)
Shader "My Shader/AnisotropicRenderShader"
{
	Properties
	{
		_Gloss("Gloss", Range(8,128)) = 68
		_Kd("Kd", Range(0, 1)) = 0.8
		_Ks("Ks", Range(0, 1)) = 0.2
	}
	SubShader
	{
		Tags
		{
			"LightMode" = "ForwardBase"
			"Queue" = "Transparent"
		}
		Pass
		{
			CGPROGRAM
			#pragma vertex vert
			#pragma fragment frag

			#include "UnityCG.cginc"
			#include "Lighting.cginc"

			struct v2f
			{
				float4 vertex : SV_POSITION;
				float3 world_pos : TEXCOORD8;
				float3 world_normal : TEXCOORD9;
				float3 world_tangent : TEXCOORD10;
			};

			v2f vert (appdata_full v)
			{
				v2f o = (v2f)0;
				o.vertex = UnityObjectToClipPos(v.vertex);
				o.world_pos = mul(unity_ObjectToWorld, v.vertex);
				o.world_normal = UnityObjectToWorldNormal(v.vertex);
				o.world_tangent = UnityObjectToWorldDir(v.tangent);//切线向量
				return o;
			}

			float _Gloss;
			float _Kd;
			float _Ks;

			fixed4 frag (v2f i) : SV_Target
			{
				float3 N = normalize(i.world_normal);
				float3 L = normalize(UnityWorldSpaceLightDir(i.world_pos));
				float3 V = normalize(UnityWorldSpaceViewDir(i.world_pos));
				float3 T = normalize(i.world_tangent);
				float3 diffuse_col = _LightColor0.rgb * saturate(dot(N, L) * 0.5 + 0.5);
				float tl = dot(T, L);
				float tv = dot(T, V);
				//各向异性渲染
				float3 anisotropic_col = _LightColor0.rgb * pow((tl * tv + sqrt(1 - tl * tl) * sqrt(1 - tv * tv)), _Gloss);
				return fixed4(diffuse_col * _Kd + anisotropic_col * _Ks,1);
			}
			ENDCG
		}
	}
}
效果图:
 (算法貌似就是这样写的,具体原理,它就是个算法,实现就好了 不必深究)
十、水波纹效果(有些许难度,需要些数学知识。。)
Shader "Image/WaveShader"
{
	Properties
	{
		_MainTex ("Texture", 2D) = "white" {}
		_Amount ("Amount", Range(0,0.4)) = 0.2
		_W ("W", Range(0,100)) = 20
		_Speed("Speed", Range(0,500)) = 100
	}
	SubShader
	{
		Tags{ "Queue" = "Transparent" "RenderType" = "Transparent"}
		// No culling or depth
		Cull Off ZWrite Off ZTest Always

		Pass
		{
			CGPROGRAM
			#pragma vertex vert
			#pragma fragment frag

			#include "UnityCG.cginc"

			struct appdata
			{
				float4 vertex : POSITION;
				float2 uv : TEXCOORD0;
			};

			struct v2f
			{
				float2 uv : TEXCOORD0;
				float4 vertex : SV_POSITION;
			};

			v2f vert (appdata v)
			{
				v2f o;
				o.vertex = UnityObjectToClipPos(v.vertex);
				o.uv = v.uv;
				return o;
			}

			sampler2D _MainTex;
			//振幅波纹波动范围(-_Amount,_Amount)
			float _Amount;
			//周期(频率)波纹数量
			float _W;
			//衰弱速度(振幅削弱速度),越大越平滑
			float _Speed;

			fixed4 frag (v2f i) : SV_Target
			{
				// wave y = A * Sin(wt + b)
				float2 uv = i.uv;
				float2 center = {0.8, 0.1};
				float2 dt = center - uv;
				float len = sqrt(dot(dt, dt));
				//振幅会随着中心距增大而变小 _Speed控制变小速率的
				float amount = _Amount / (_Amount + len * _Speed);
				//振幅小于0 相当于波纹效果无 ,即uv的y值不会受到影响
				if(amount < 0)
				{
					amount = 0;
				}
				uv.y += amount * cos(_W * len * UNITY_PI);//余弦周期函数 A * cos(wt * π) 其中len充当t
				fixed4 col = tex2D(_MainTex, uv);
				return col;
			}
			ENDCG
		}
	}
}
原理:在frag中首先找一个水波纹中心点(0.8,0.1)即右下方的某个点,计算出其像素点与中心点的距离len,水波纹是从中心幅度最大逐渐变小的过程,学过高中数学的三角函数的周期函数如:余弦周期函数A*cos(wt*π)貌似是这样的,貌似有有个+b,太具体的忘记了可自行百度,其中w是波纹出现频率(在周期函数是周期的意思,值越大周期越短)。长度len用在了2个地方,确定振幅A和作为周期函数的t,这样就计算出uv的y值偏移值,这样就有了所谓的波纹效果。
效果图:
 红色圈住的部分就是波纹效果了!! 是不是觉得还OK。
十一、雾气效果
Shader "Image/FogShader"
{
	Properties
	{
		_MainTex ("Texture", 2D) = "white" {}
		_Color ("Fog Color", Color) = (1,1,1,1)
	}
	SubShader
	{
		Tags { "Queue"= "Transparent" "RenderType"="Transparent"}
		Cull Off ZWrite Off ZTest Always
		Blend SrcAlpha OneMinusSrcAlpha
		Pass
		{
			CGPROGRAM
			#pragma vertex vert
			#pragma fragment frag

			#include "UnityCG.cginc"

			struct appdata
			{
				float4 vertex : POSITION;
				float2 uv : TEXCOORD0;
			};

			struct v2f
			{
				float2 uv : TEXCOORD0;
				float4 vertex : SV_POSITION;
			};

			v2f vert (appdata v)
			{
				v2f o;
				o.vertex = UnityObjectToClipPos(v.vertex);
				o.uv = v.uv;
				return o;
			}

			sampler2D _MainTex;
			float3 _Color;
			//噪声函数算法 运算出一个噪声数值 具体是通过差值运算然后获取一个值的
			//对p(x,y)二维坐标进行点积运算后再取其正弦值乘以一个固定浮点数后获取其小数部分
			float rand(float2 p){
				return frac(sin(dot(p ,float2(12.9898,78.233))) * 43758.5453);
			}

			float noise(float2 x)
			{
				float2 i = floor(x);//取底数如(1,2,1.3) = (1,1)
				float2 f = frac(x);//取其小数如(1.2,1.3) = (0.2,0.3)

				float a = rand(i);
				float b = rand(i + float2(1.0, 0.0));
				float c = rand(i + float2(0.0, 1.0));
				float d = rand(i + float2(1.0, 1.0));
				float2 u = f * f * f * (f * (f * 6 - 15) + 10);

				float x1 = lerp(a,b,u.x);
				float x2 = lerp(c,d,u.x);
				return lerp(x1,x2,u.y);
			}
			//主要是它这个方法获取指定uv坐标的噪声数值
			float fbm(float2 x)
			{
				//噪声数值权重 越大,雾气越浓
				float scale = 1;
				float res = 0;
				float w = 4;
				//循环越多 雾气数量叠加越多
				for(int i=0;i<4;++i)
				{
					res += noise(x * w);
					w *= 1.5;
				}
				return res * scale;
			}

			fixed4 frag (v2f i) : SV_Target
			{
				float3 col = tex2D(_MainTex, i.uv).rgb;
				//噪声数值
				float rd = fbm(i.uv + _Time.x);
				//雾气颜色
				float3 fog_col = rd * _Color;
				//原图颜色到雾气颜色之间的差值运算得出最终的混合雾气的图片颜色rgb
				float3 out_col = lerp(col, fog_col, 0.1);
				return fixed4(out_col, 1);
			}
			ENDCG
		}
	}
}
原理:利用固定的噪声函数,根据uv坐标计算出噪声数值,然后用这个噪声数值乘以雾气颜色就得到了最终的雾气颜色值,最终用lerp插值运算方式将原图和雾气颜色值混合得到输出颜色值,进行输出就OK了。
效果图:

十二、高斯模糊效果
Shader "Image/GaussianBlurShader"//高斯模糊效果
{
	Properties
	{
		_MainTex ("Texture", 2D) = "white" {}
	}
	SubShader
	{

		Tags{"Queue"="Transparent"}
		//Cull Off ZWrite Off ZTest Always
		Blend SrcAlpha OneMinusSrcAlpha
		Pass
		{
			CGPROGRAM
			#pragma vertex vert
			#pragma fragment frag

			#include "UnityCG.cginc"

			struct appdata
			{
				float4 vertex : POSITION;
				float2 uv : TEXCOORD0;
			};

			struct v2f
			{
				float2 uv : TEXCOORD0;
				float4 vertex : SV_POSITION;
			};

			v2f vert (appdata v)
			{
				v2f o;
				o.vertex = UnityObjectToClipPos(v.vertex);
				o.uv = v.uv;
				return o;
			}

			sampler2D _MainTex;
			float4 _MainTex_TexelSize;//像素点大小
			/*
				高斯3*3矩阵
					 {1,2,1,
				1/16  2,4,2,
					  1,2,1}
				模糊原理:当前像素点的颜色值取其周围9个点包括自身的像素点颜色值的上述3*3矩阵比例之和
				如:左上角像素点比例是1/16 ,上方像素点比例是2/16
			*/
			//static float _Gaussian[9] =
			//{
			//	1.0, 2.0, 1.0,
			//	2.0, 4.0, 2.0,
			//	1.0, 2.0, 1.0
			//};
			uniform float _Gaussian[9];
			fixed4 frag (v2f i) : SV_Target
			{
				fixed r = 3;
				fixed3 col = tex2D(_MainTex, i.uv + _MainTex_TexelSize.xy * fixed2(-1, 1) * r).rgb * 1;
			    col += tex2D(_MainTex, i.uv + _MainTex_TexelSize.xy * fixed2(0, 1) * r).rgb * 2;
				col += tex2D(_MainTex, i.uv + _MainTex_TexelSize.xy * fixed2(1, 1) * r).rgb * 1;
				col += tex2D(_MainTex, i.uv + _MainTex_TexelSize.xy * fixed2(-1, 0) * r).rgb * 2;
				col += tex2D(_MainTex, i.uv + _MainTex_TexelSize.xy * fixed2(0, 0) * r).rgb * 4;
				col += tex2D(_MainTex, i.uv + _MainTex_TexelSize.xy * fixed2(1, 0) * r).rgb * 2;
				col += tex2D(_MainTex, i.uv + _MainTex_TexelSize.xy * fixed2(-1, -1) * r).rgb * 1;
				col += tex2D(_MainTex, i.uv + _MainTex_TexelSize.xy * fixed2(0, -1) * r).rgb * 2;
				col += tex2D(_MainTex, i.uv + _MainTex_TexelSize.xy * fixed2(1, -1) * r).rgb * 1;
				//fixed3 col = tex2D(_MainTex, i.uv + _MainTex_TexelSize.xy * fixed2(-1, 1) * r).rgb * _Gaussian[0];
			 //   col += tex2D(_MainTex, i.uv + _MainTex_TexelSize.xy * fixed2(0, 1) * r).rgb * _Gaussian[1];
				//col += tex2D(_MainTex, i.uv + _MainTex_TexelSize.xy * fixed2(1, 1) * r).rgb * _Gaussian[2];
				//col += tex2D(_MainTex, i.uv + _MainTex_TexelSize.xy * fixed2(-1, 0) * r).rgb * _Gaussian[3];
				//col += tex2D(_MainTex, i.uv + _MainTex_TexelSize.xy * fixed2(0, 0) * r).rgb * _Gaussian[4];
				//col += tex2D(_MainTex, i.uv + _MainTex_TexelSize.xy * fixed2(1, 0) * r).rgb * _Gaussian[5];
				//col += tex2D(_MainTex, i.uv + _MainTex_TexelSize.xy * fixed2(-1, -1) * r).rgb * _Gaussian[6];
				//col += tex2D(_MainTex, i.uv + _MainTex_TexelSize.xy * fixed2(0, -1) * r).rgb * _Gaussian[7];
				//col += tex2D(_MainTex, i.uv + _MainTex_TexelSize.xy * fixed2(1, -1) * r).rgb * _Gaussian[8];
				col = col / 16;
				return fixed4(col, 1);
			}
			ENDCG
		}
	}
}
原理:利用高斯模糊算法将像素点颜色值进行模糊运算,最后输出即可。高斯模糊算法其实就是将当前像素点周围的像素点根据设定好的权值与自己进行混合,注意本例只是用了3*3矩阵进行模糊,你可以使用更高阶的矩阵进行模糊,矩阵的参数如何设置其实是很随意的,不过最终混合起来的颜色值要除以它的总值,因为颜色值范围是0~1。其中有个r值越大就越模糊。
效果图:

十三、火焰效果
Shader "Image/TDFireShader"
{
	Properties
	{
		_MainTex ("Texture", 2D) = "white" {}
		_FireColor ("Fire Color", Color) = (1,1,1,1)
		_MaskTex ("MaskTex", 2D) = "black" {}
	}
	SubShader
	{
		Tags
		{
			"Queue" = "Transparent"
		}
		Cull Off ZWrite Off ZTest Always
		Blend SrcAlpha OneMinusSrcAlpha
		Pass
		{
			CGPROGRAM
			#pragma vertex vert
			#pragma fragment frag

			#include "UnityCG.cginc"

			struct appdata
			{
				float4 vertex : POSITION;
				float2 uv : TEXCOORD0;
			};

			struct v2f
			{
				float2 uv : TEXCOORD0;
				float4 vertex : SV_POSITION;
			};

			v2f vert (appdata v)
			{
				v2f o;
				o.vertex = UnityObjectToClipPos(v.vertex);
				o.uv = v.uv;
				return o;
			}

			float rand(float2 p){
				return frac(sin(dot(p ,float2(12.9898,78.233))) * 43758.5453);
			}

			float noise(float2 x)
			{
				float2 i = floor(x);//取底数如(1,2,1.3) = (1,1)
				float2 f = frac(x);//取其小数如(1.2,1.3) = (0.2,0.3)

				float a = rand(i);
				float b = rand(i + float2(1.0, 0.0));
				float c = rand(i + float2(0.0, 1.0));
				float d = rand(i + float2(1.0, 1.0));
				float2 u = f * f * f * (f * (f * 6 - 15) + 10);

				float x1 = lerp(a,b,u.x);
				float x2 = lerp(c,d,u.x);
				return lerp(x1,x2,u.y);
			}
			//主要是它这个方法获取指定uv坐标的噪声数值
			float fbm(float2 x)
			{
				//噪声数值权重 越大,雾气越浓
				float scale = 0.8;
				float res = 0;
				float w = 4;
				//循环越多 雾气数量叠加越多
				for(int i=0;i<4;++i)
				{
					res += noise(x * w);
					w *= 1.5;
				}
				return res * scale;
			}

			sampler2D _MainTex;
			sampler2D _MaskTex;
			float4 _FireColor;

			fixed4 frag (v2f i) : SV_Target
			{
				//fixed4 col = tex2D(_MainTex, i.uv);
				//i.uv * 数值a  数值a越大火焰团越小越多越密集,反之火焰图越大越少越散
				//数值a类似于 周期函数的w
				//自然界的火焰小火焰上升速度快,大火焰上升速度慢
				//fbm方法后面的fixed2(0, _Time.x * b) 是让火焰上升这么一个效果,-的话是上升,b可理解为速度
				float small_fire_fbm = fbm(i.uv * 2.8 + fixed2(0, _Time.x * 35));
				float big_fire_fbm = fbm(i.uv * 2.1 - fixed2(0, _Time.x * 22));
				fixed4 out_col = (small_fire_fbm + big_fire_fbm) / 2  * _FireColor;
				//out_col = lerp(out_col, fixed4(0,0,0,0), i.uv.y);//模拟火焰的从中心点向外亮度减小效果,这里是y值越大就越接近于黑色透明
				out_col = pow(out_col, 1.7); //pow 幂函数 因为out_col是(r,g,b,a) 都是小于1的数,对它们求幂是衰弱 爆炸式衰弱
				//clip(out_col.a - 0.8);//剔除alpha少于0.8的像素点即 最上方的那些黑色烟雾剔除
				//遮罩图,目前我用的是alpha遮罩,即相乘后由于有些像素点alpha为0, 那么那些像素就相当于被剔除
				fixed4 mask_col = tex2D(_MaskTex, i.uv);
				out_col = out_col * mask_col;
				return out_col;
			}
			ENDCG
		}
	}
}

十四、总结
十分感觉B站某大佬上传的视频下面是链接以上案例的视频出处,学习了比较多有趣的Shader案例,不过也都是些皮毛,数学知识还是要掌握一些的,很多地方写法几乎差不多就是很多巧妙的技巧实现了各种令人觉得很神奇的点,例如2D的外边框、火焰效果等,shader感觉真心不太需要很牛X的算法,因为算法基本都是已经别人为你写好的,只要这样做就能达到某种效果。