Spring IOC:
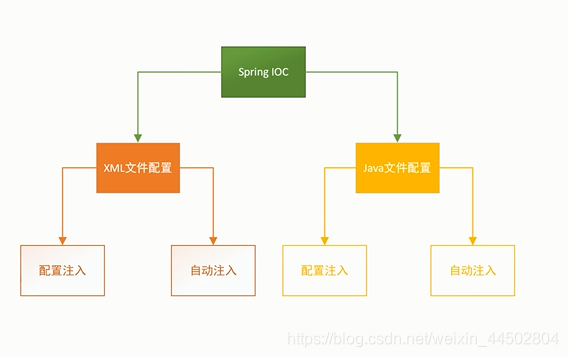
Java配置方式
SpringBoot流行之后,Java 配置开始被广泛使用。
Java配置本质上,就是使用一个Java类去代替xml配置,这种配置方式在SpringBoot中得到了广泛的使用。
实现步骤如下:
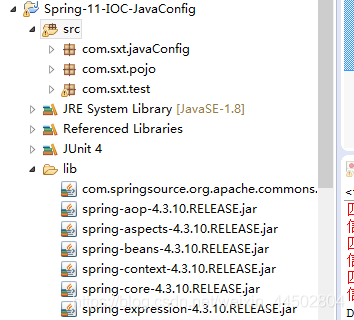
1、创建项目,导入需要使用的jar包
2、创建实体类
package com.sxt.pojo;

public class User {
	public void say(){
		System.out.println("hi!!!");
	}
}
3、创建配置文件类
package com.sxt.javaConfig;

import org.springframework.context.annotation.Bean;
import org.springframework.context.annotation.Configuration;

import com.sxt.pojo.User;

/**
 * Java配置文件
 * @Configuration 让当前类和applicationContext.xml作用等价
 * @author IF
 */
@Configuration
public class JavaConfig {

	/**
	 * @Bean 的作用和<bean>的作用是一样的
	 * id name 默认是和方法名相同的
	 * @return
	 */
	@Bean()
	public User getUser(){
		return new User();
	}
}
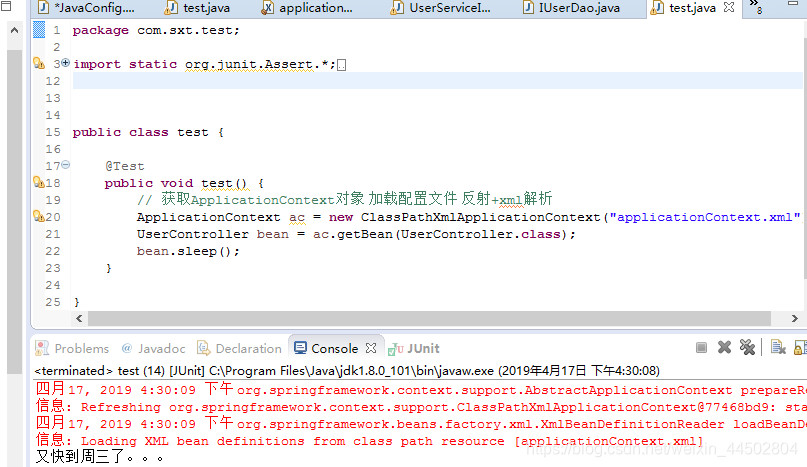
4、测试调用
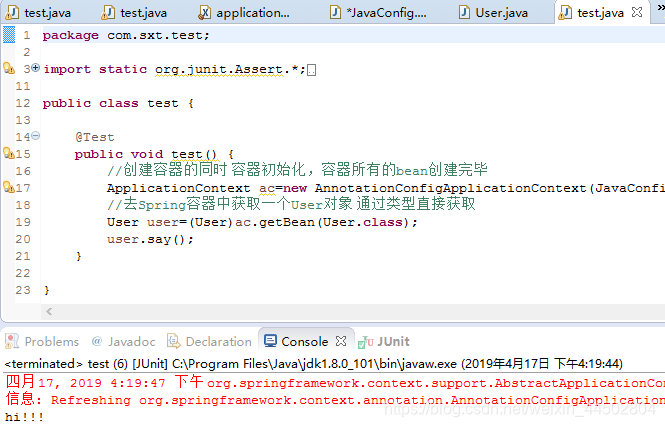
自动配置文件
前面这种配置方式,对于所有要使用的类都需要一个一个的配置。可以通过自动配置来简化Bean的配置。
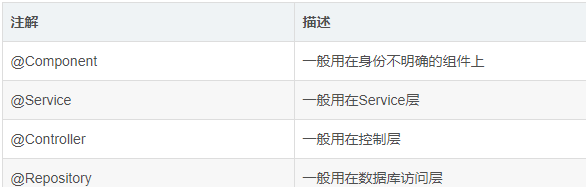
xml文件配置
xml配置通过四个注解来实现,目前来说功能是一样的
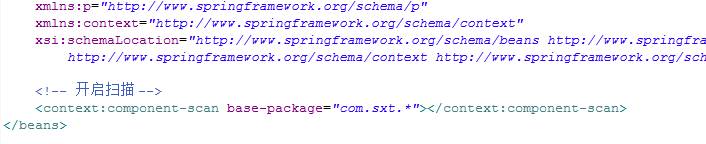
1.需要在application.xml文件中开启注解扫描
2.java对象中添加对应的注解
3.测试
案例:
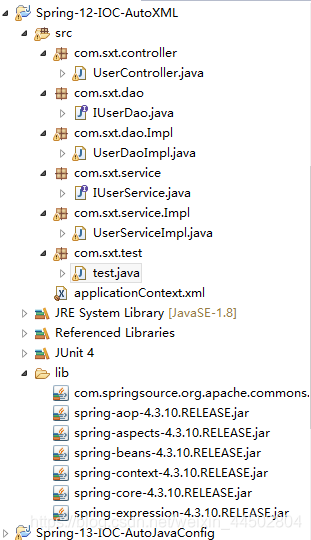
1.创建项目,导入jar包
2、dao层
package com.sxt.dao;

public interface IUserDao {
	public String add();
}
package com.sxt.dao.Impl;

import org.springframework.stereotype.Component;
import org.springframework.stereotype.Repository;

import com.sxt.dao.IUserDao;
//@Component //等价于<bean clas="com.sxt.service.Impl.UserDaoImpl" name="userDaoImpl"/>
@Repository
public class UserDaoImpl implements IUserDao {

	@Override
	public String add() {
		// TODO Auto-generated method stub
		return "hello ... ";
	}
}
3.service层
package com.sxt.service;

public interface IUserService {
	public String add();
}
package com.sxt.service.Impl;
import javax.annotation.Resource;
import org.springframework.beans.factory.annotation.Autowired;
import org.springframework.beans.factory.annotation.Qualifier;
import org.springframework.stereotype.Component;
import org.springframework.stereotype.Service;
import com.sxt.dao.IUserDao;
import com.sxt.service.IUserService;
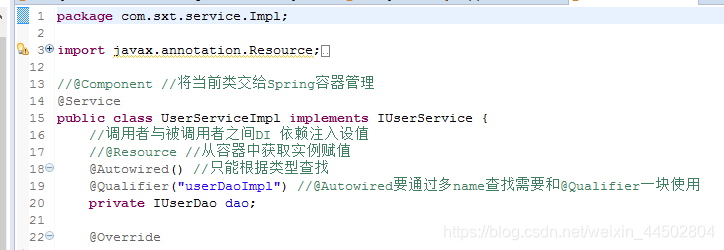
//@Component //将当前类交给Spring容器管理
@Service
public class UserServiceImpl implements IUserService {
//调用者与被调用者之间DI 依赖注入设值
//@Resource //从容器中获取实例赋值
@Autowired() //只能根据类型查找
@Qualifier("userDaoImpl") //@Autowired要通过多name查找需要和@Qualifier一块使用
private IUserDao dao;
@Override
public String add() {
return dao.add();
}
}
4.controller层
package com.sxt.service.Impl;

import javax.annotation.Resource;

import org.springframework.beans.factory.annotation.Autowired;
import org.springframework.beans.factory.annotation.Qualifier;
import org.springframework.stereotype.Component;
import org.springframework.stereotype.Service;

import com.sxt.dao.IUserDao;
import com.sxt.service.IUserService;

//@Component //将当前类交给Spring容器管理
@Service
public class UserServiceImpl implements IUserService {
	//调用者与被调用者之间DI 依赖注入设值
	//@Resource //从容器中获取实例赋值
	@Autowired() //只能根据类型查找
	@Qualifier("userDaoImpl") //@Autowired要通过多name查找需要和@Qualifier一块使用
	private IUserDao dao;

	@Override
	public String add() {
		return dao.add();
	}
}
5、配置文件中添加扫描
<!-- 开启扫描 -->
	<context:component-scan base-package="com.sxt.*"></context:component-scan>
6、测试
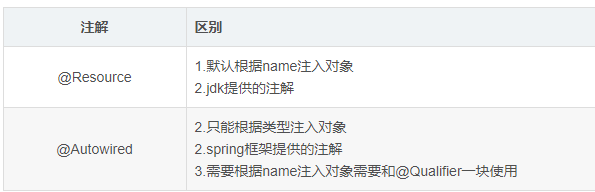
注解@Resource与@Autowired的区别:
扫描特殊配置
	<context:component-scan base-package="com.itbaizhan"
		use-default-filters="false">
		<context:include-filter type="annotation"
			expression="org.springframework.stereotype.Service" />
	</context:component-scan>
use-default-filters
表示使用使用spring默认提供的过滤器,
false表示不使用,true则表示使用。
一般来说,
true结合exclude-filter标签使用,表示除去某个注解
false结合include标签使用,表示包含某个注解
Java代码配置
Java配置和XML配置基本一致,唯一不同的地方就是包扫描的方式。
四个注解也是一样的。
包扫描通过@ComponentScan来实现。
java扫描
package com.sxt.config;
import org.springframework.context.annotation.ComponentScan;
import org.springframework.context.annotation.Configuration;
@Configuration
//添加扫描
@ComponentScan("com.sxt.*")//单个
//@ComponentScans(value={@ComponentScan(""),@ComponentScan("")})//多个
//@ComponentScan(value="com.sxt.*",useDefaultFilters=true,excludeFilters={@ComponentScan.Filter(type=FilterType.ANNOTATION,classes=Service.class)})
public class JavaConfig {

}
测试:

profile
在实际开发中,项目即将上线时,可能不需要不停的在开发环境、生产环境、测试环境…之间进行切换。
Java配置
1、创建实体类:
package com.sxt.pojo;

/**
 * 实体类
 * @author IF
 */
public class DataSources {
	private String url;
	private String userName;
	private String password;
	public String getUrl() {
		return url;
	}
	public void setUrl(String url) {
		this.url = url;
	}
	public String getUserName() {
		return userName;
	}
	public void setUserName(String userName) {
		this.userName = userName;
	}
	public String getPassword() {
		return password;
	}
	public void setPassword(String password) {
		this.password = password;
	}
	@Override
	public String toString() {
		return "DataSources [url=" + url + ", userName=" + userName + ", password=" + password + "]";
	}
}
2、java配置类
package com.sxt.config;

import java.security.Provider.Service;

import org.springframework.context.annotation.Bean;
import org.springframework.context.annotation.ComponentScan;
import org.springframework.context.annotation.ComponentScans;
import org.springframework.context.annotation.Configuration;
import org.springframework.context.annotation.FilterType;
import org.springframework.context.annotation.Profile;

import com.sxt.pojo.DataSources;

@Configuration
public class JavaConfig {
	@Bean
	@Profile("dev")
	public DataSources dataSourcesDev(){
		DataSources ds=new DataSources();
		ds.setUrl("http://devl:8080/");
		ds.setUserName("admin");
		ds.setPassword("123456");
		return ds;
	}
	@Bean
	@Profile("pro")
	public DataSources dataSourcesPro(){
		DataSources ds=new DataSources();
		ds.setUrl("http://pro:8083/");
		ds.setUserName("root");
		ds.setPassword("abcd");
		return ds;
	}
}
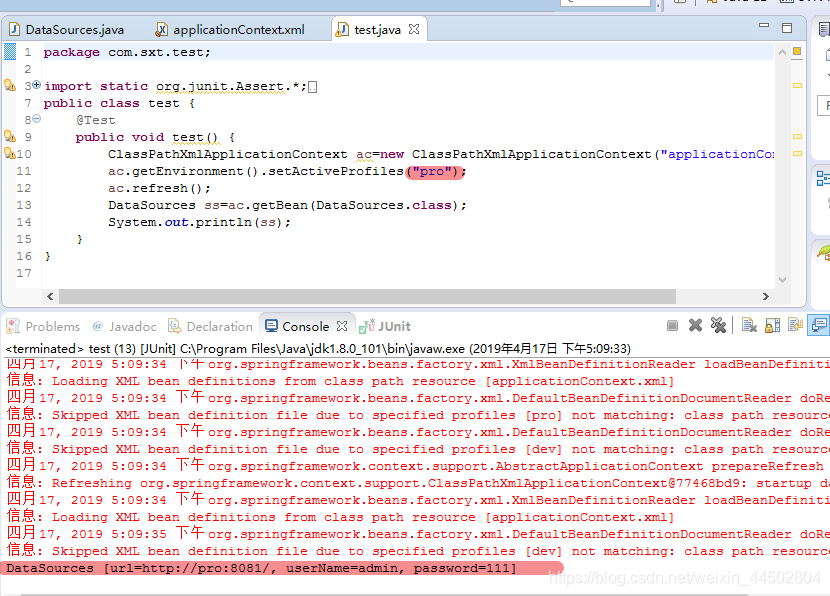
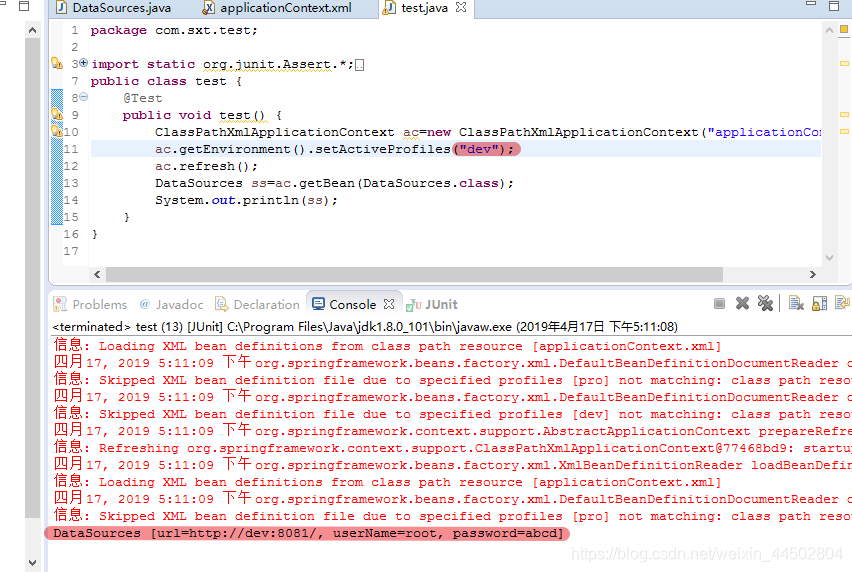
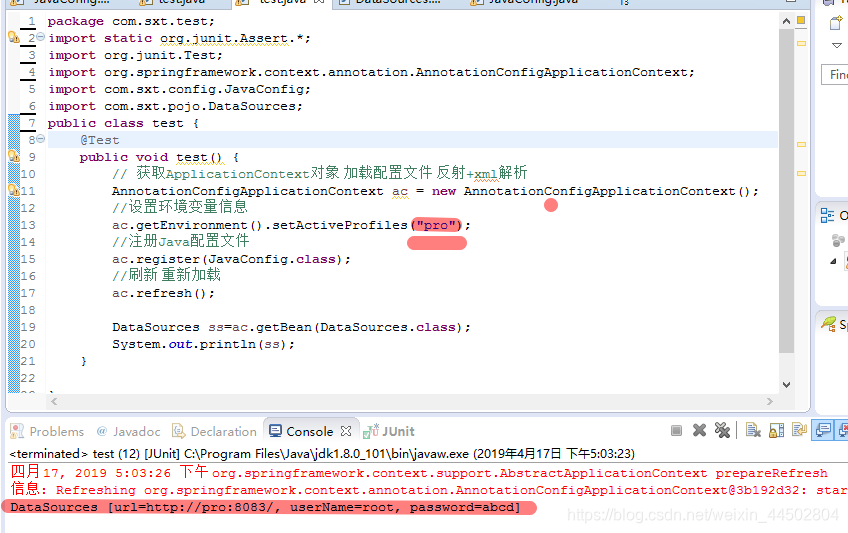
3、测试切换:

XML配置:
1、创建实体类
package com.sxt.pojo;
public class DataSources {
	private String url;
	private String userName;
	private String password;
	public String getUrl() {
		return url;
	}
	public void setUrl(String url) {
		this.url = url;
	}
	public String getUserName() {
		return userName;
	}
	public void setUserName(String userName) {
		this.userName = userName;
	}
	public String getPassword() {
		return password;
	}
	public void setPassword(String password) {
		this.password = password;
	}
	@Override
	public String toString() {
		return "DataSources [url=" + url + ", userName=" + userName + ", password=" + password + "]";
	}
}
2、xml文档中添加配置
<?xml version="1.0" encoding="UTF-8"?>
<beans xmlns="http://www.springframework.org/schema/beans"
	xmlns:xsi="http://www.w3.org/2001/XMLSchema-instance"
	xmlns:p="http://www.springframework.org/schema/p"
	xsi:schemaLocation="http://www.springframework.org/schema/beans http://www.springframework.org/schema/beans/spring-beans.xsd">
	<!-- Profile配置 -->
	<beans profile="pro">
		<bean class="com.sxt.pojo.DataSources">
			<property name="url" value="http://pro:8081/"/>
			<property name="userName" value="admin"/>
			<property name="password" value="111"/>
		</bean>
	</beans>
	<beans profile="dev">
		<bean class="com.sxt.pojo.DataSources">
			<property name="url" value="http://dev:8081/"/>
			<property name="userName" value="root"/>
			<property name="password" value="abcd"/>
		</bean>
	</beans>
</beans>
3、测试: