gem5的安装与使用
1. 安装各类库文件(ubuntu)
sudo apt-get install mercurial scons swig gcc m4 python python-dev
libgoogle-perftools-dev g++ libprotobuf-dev
由于ubuntu缺省情况下,并没有提供C/C++的编译环境,单独安装gcc以及g++比较麻烦,ubuntu提供一个build-essential软件包。安装这个软件包,编译C/C++需要的软件包都会被安装
sudo apt-get install build-essential
2.下载gem5源码
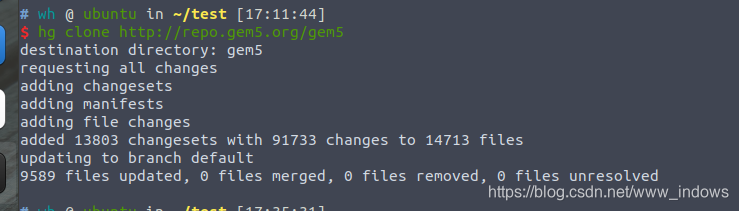
hg clone http://repo.gem5.org/gem5

- 配置hgrc
打开hgrc文件:vim gem5/.hg/hgrc,将以下文件内容拷贝到里面,修改username,style等信息,信息的修改只是一种标识,不影响编译和使用,最重要的是[extensions]扩充hg命令
[ui]
# Set the username you will commit code with
username=Your Name <[email protected]>
ssh = ssh -C
# Always use git diffs since they contain permission changes and rename info
[defaults]
qrefresh = --git
email = --git
diff = --git
[extensions]
# These are various extensions we find useful
# Mercurial Queues -- allows managing of changes as a series of patches
hgext.mq =
# PatchBomb -- send a series of changesets as e-mailed patches
hgext.patchbomb =
# External Diff tool (e.g. kdiff3, meld, vimdiff, etc)
hgext.extdiff =
# Fetch allows for a pull/update operation to be done with one command and automatically commits a merge changeset
hgext.fetch =
# Path to the style file for the M5 repository
# This file enforces our coding style requirements
style = /path/to/your/gem5/util/style.py
[email]
method = smtp
from = Your Name <[email protected]>
[smtp]
host = your.smtp.server.here
3.获取NVMain
- 注册bitbucket帐号
https://bitbucket.org/account/signup/ - 获取NVMain使用权
打开https://bitbucket.org/mrp5060/nvmain/并登陆bitbucket账号,登陆后重新打开前面这个网站获取下载命令
git clone https://your [email protected]/xxx
- 或者点击下载nvmain(无需注册)
- nvmain文件位置随意,我放在了gem5根目录下,如果放的位置不同,后面编译时注意相对位置
4.安装NVMain补丁
- 进入gem5根目录
- 初始化补丁目录
hg init
hg qinit
- 输入补丁 (注意nvmain文件位置,以及补丁的版本号)
hg qimport -f ./nvmain/patches/gem5/nvmain2-gem5-11688+
- 安装补丁
hg qpush
- 如果打补丁出错,检查gem5的版本,检查nvmain中补丁的版本
//版本不对,更新gem5
hg update 11688
//检查补丁是否打上
hg qapplied
5.联合编译gem5和nvmain
scons EXTRAS=nvmain ./build/X86/gem5.opt
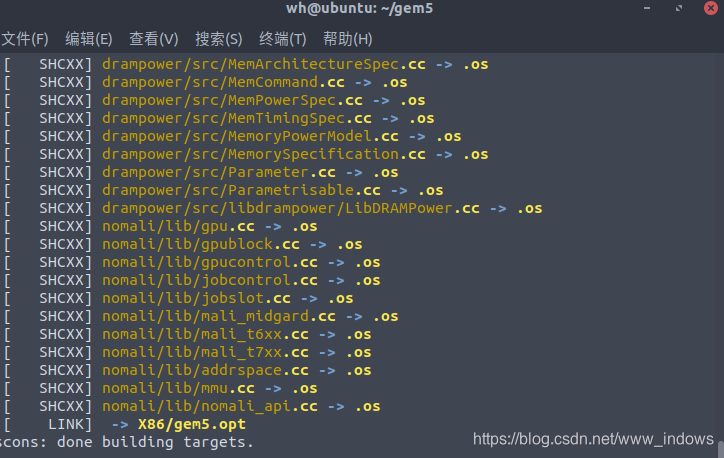
在这一步中容易出现各种错误
1. ImportError: No module named gem5_scons:
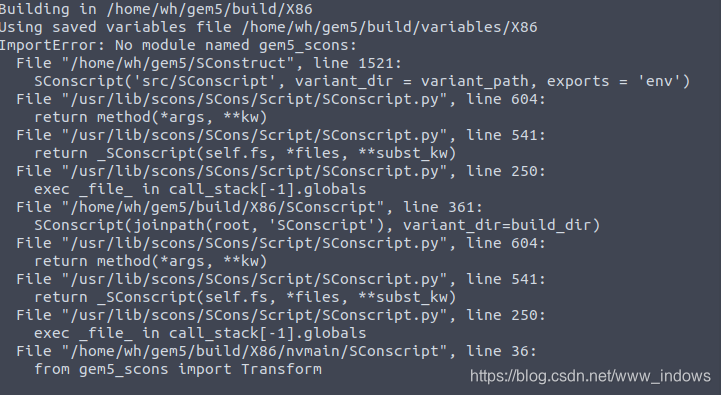
查看gem5目录中是否存在gem5_scons文件夹,如果没有则在site_scons中将gem5_scons移到gem5根目录下

2. [-Werror=implicit-fallthrough=]
这个问题困扰了我好久,百度了好久终于发现问题
如果gcc版本号为7,那么源代码的switch-case块中如果忘了加上break,有可能会报错Implicit fallthrough error。
解决办法:编译时忽略Implicit fallthrough error这个错误
修改 gem5中的SConstruct
在CCFLAGS中添加 -Wno-implicit-fallthrough 即可忽略该错误
  main.Append(CCFLAGS=['-Wall', '-Wundef', '-Wextra',
                         '-Wno-sign-compare', '-Wno-unused-parameter','-Wno-implicit-fallthrough'])
3. [-Werror]相关类似错误
均可按照上面的方法,忽略gcc-7版本的问题导致的错误
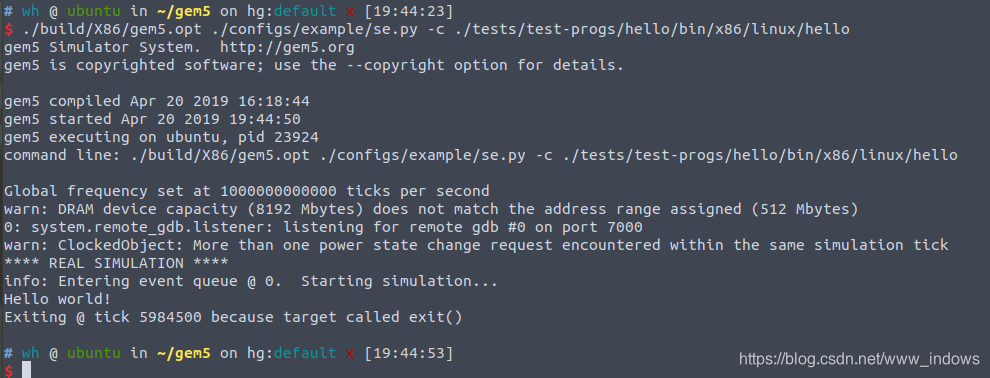
6.测试
./build/X86/gem5.opt ./configs/example/se.py -c ./tests/test-progs/hello/bin/x86/linux/hello