分享下自己的踩坑经验,希望能帮大家避免耗费太多配置环境的无效时间
专门针对dramsim而安装的gem5版本,如果针对其他版本,本文可能无法提供太多帮助
安装时需要注意的坑主要两个:1. GEM5版本 2. gcc和protobuf配置
只要这两个问题ok,安装会非常轻松顺利
以下所有资源在我网盘:
链接:https://pan.baidu.com/s/1CzZJk4rC065ueENMDnhAcA
提取码:u2cg
文章目录
0. 系统安装
!!强烈推荐使用自己的虚拟机,别用公共服务器!!
之前我尝试使用服务器配置gem5,但是普通用户没有sudo安装实在太艰难了,docker我又不会用且网差pull不下来gem5的镜像(因为他是在googlesource上的),为了保证身心健康,我决定还是在自己电脑上装个虚拟机来用
强烈推荐使用自己的虚拟机,别用公共服务器
所以第一步,建议装个虚拟机,我用的是ubuntu18.04,具体安装方法可以参考我的另一个博客
https://blog.csdn.net/Drinks_/article/details/117027679
注意安装的时候多分点硬盘空间,我就出现过low disk space警告,重新安装了系统
1. Gem5和dramsim2/3下载
github/gem5-dramsim3
上面是专门针对dramsim3的gem5版本
github/dramsim2
github/dramsim3
这个版本的官方说明比较老,可能需要开梯子old-gem5
2. gem5依赖配置
官网说明
To build gem5, you will need the following software:
- g++ version 4.8 or newer or clang version 3.1 or newer.
- Python, version 2.6 - 2.7. By July 2019 Python 3.X support was almost
complete. gem5 links in the Python interpreter, so you need the
Python header files and shared library (e.g.,
/usr/lib/libpython2.6.so) in addition to the interpreter
executable.These may or may not be installed by default. For example,
on Debian/Ubuntu, you need the “python-dev” package in addition to
the “python” package. If you need a newer or different Python
installation but can’t or don’t want to upgrade the default Python on
your system, see our page on using a non-default Python installation. - SCons, version 0.98.1 or newer. SCons is a powerful replacement for
make. See here to download SCons. If you don’t have administrator
privileges on your machine, you can use the “scons-local” package to
install scons in your m5 directory, or install SCons in your home
directory using the ‘–prefix=’ option. Some scripts require
argparse, which is available by default in Python 2.7 and can be
installed from PyPi for older versions. - zlib, any recent version. For Debian/Ubuntu, you will need the
“zlib-dev” or “zlib1g-dev” package to get the zlib.h header file as
well as the library itself. - m4, the macro processor.
The following is optional, but highly recommended:
- protobuf, version 2.1 or newer for trace capture and playback
support. - pydot, Pythons interface to graphviz, is needed for generation of
graphical representations of the simulated system topology.
There a few utility scripts written in Perl, but Perl is not necessary to build or run the simulator.
安装步骤
python2.7
sudo apt install python
直接安装2.7版本即可,这个版本的gem5不需要python3.6以上编译
gcc/g++
参考博客腾讯云-多版本gcc安装和切换和删除
因为我装了gcc4.8/gcc5/gcc7,没装过的话装4.8即可,同样是按照下面的步骤进行
可以通过如下命令查看当前安装的gcc版本:
ll /usr/bin/gcc*
安装gcc-4.8:
sudo apt install gcc-4.8 gcc-4.8-multilib g++-4.8 g++-4.8-multilib
附带:安装5和7
sudo apt install gcc-5 g++-5
sudo apt install gcc-7 g++-7
使用update-alternatives设置gcc和g++:
update-alternatives是ubuntu系统中专门维护系统命令链接符的工具,通过它可以很方便的设置系统默认使用哪个命令、哪个软件版本。
其中40 ,50 ,70是优先级数值可以自己设定,–slave能保证gcc和g++保持相同的版本。
(装了哪些版本就设置哪些)
sudo update-alternatives --install /usr/bin/gcc gcc /usr/bin/gcc-4.8 40 --slave /usr/bin/g++ g++ /usr/bin/g++-4.8
sudo update-alternatives --install /usr/bin/gcc gcc /usr/bin/gcc-5 50 --slave /usr/bin/g++ g++ /usr/bin/g++-5
sudo update-alternatives --install /usr/bin/gcc gcc /usr/bin/gcc-7 70 --slave /usr/bin/g++ g++ /usr/bin/g++-7
使用如下命令选择gcc的版本:
sudo update-alternatives --config gcc
选择4.8的版本

如果要修改,输入编号0/1/2/3即可
protobuf
dramsim2需要用到protobuf部分(这是可选的,单纯gem5是用不到的),一定要注意protobuf的版本问题!不然报错调试到怀疑人生
前提:电脑没安装过protobuf
如果你已经安装了,可以尝试卸载,也可以尝试是否能够不重装编译成功
如果报相关的错误,可以回来重新安装protobuf
卸载方式(如果安装过,这会把你所有的protobuf都删了,谨慎!其他的软件可能会无法使用):
sudo apt remove libprotobuf-dev protobuf-compiler
which protoc
得到对应的地址’which protoc’
rm 'dir in which protoc'
protoc --version
如果不显示版本号而是提示没有就卸载成功了
安装:
非常不推荐sudo apt install的方式安装protobuf,版本容易混乱
sudo apt install 不要像这样安装 libprotobuf-dev protobuf-compiler libgoogle-perftools-dev
如果你已经安装过了,我建议卸载重装,也可以先试试,不行再重装
建议使用源码编译的方式安装,我装的是v2.5.0
github/protobuf的tags
通过链接下载targz或者zip格式文件,解压
首先打开./autogen.sh
因为googlecode是被墙的,把
 curl http://googletest.googlecode.com/files/gtest-1.5.0.tar.bz2 | tar jx
 mv gtest-1.5.0 gtest
修改为
  wget https://github.com/google/googletest/archive/release-1.5.0.tar.gz
  tar xzvf release-1.5.0.tar.gz
  mv googletest-release-1.5.0 gtest
如果这样子都不行的话,就直接从github上下载googletestv1.5.0的文件
github/googletest
解压后将文件夹改名为gtest,放在protobuf的主目录下

安装protobuf的依赖
apt-get install autoconf automake libtool curl make g++ unzip libffi-dev -y
开始编译
./autogen.sh
./configure
make -j8
make check
sudo make install
sudo ldconfig
检查是否安装好
protoc --version
显示版本就是安装好了

还没结束,然后进行python版本的protobuf安装,在主目录下的python文件夹中进行
前提:有python2.7
cd python
python setup.py build
python setup.py test
python setup.py install
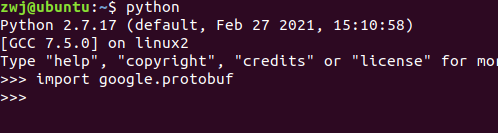
python执行import google.protobuf如果未报错,则说明安装成功了
最后装一下需要用到的库libgoogle-perftools-dev
这个可以直接装,不影响
sudo apt install libgoogle-perftools-dev
scons zlib m4
sudo apt install scons m4
sudo apt install zlib1g zlib1g-dev
pydot
pip install graphviz
pip install pydot
pkg-config 和 libpng
sudo apt install pkg-config
sudo apt-get install libpng-dev
3. gem5和dramsim2/3编译
解压刚才下载的gem5文件,进入主目录
scons -h
检查自己的依赖环境是否配置齐全,如果有warning(提示缺少东西什么的),就安装一下对应的库
不过如果按照2进行一步步安装的话,应该不会

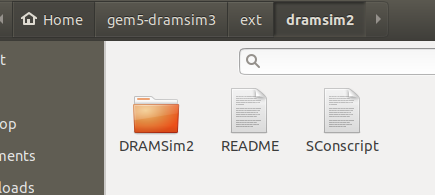
解压刚才下载的dramsim2文件夹,放在ext/dramsim2/目录下
注意,这里文件夹叫什么名字,后面调用就用什么名字,比如说我这里写的是DRAMSim2,之后调用就是用–mem-type=‘DRAMSim2’
编译dramsim2
cd DRAMSim2
make

cd traces
./traceParse.py k6_aoe_02_short.trc.gz

返回dramsim2的主目录,将system.ini.example文件拷贝一份,命名为system.ini

注意这里不要改掉原来的system.ini.example文件名,之后会用到
./DRAMSim -t traces/k6_aoe_02_short.trc -s system.ini -d ini/DDR3_micron_64M_8B_x4_sg15.ini -c 10000

DRAMSim2编译完成
编译GEM5
回到gem5的主目录
sudo scons build/X86/gem5.opt -j8
这里命令的意思scons build/<CONFIG>/<binary>是指:
使用scons编译,编译config是X86文件,生成文件保存为gem5.opt,-j8是加快速度的(根据自己的内核数量设置)
默认命令不带参数scons是直接生成ALPHA文件的gem5.debug,具体什么系统什么参数根据自己的需求设置
然后就开始漫长的编译过程

编译完成
编译dramsim3
将下载的dramsim3文件包解压至ext/dramsim3/目录下
和dramsim2同理,这个之后调用的方式就是DRAMsim3(根据自己需求定义,注意区分大小写)

    1.3 cd DRAMSim3 && mkdir build
    1.4 cd build
    1.5 cmake ..
    1.6 make

编译完成后,会在build文件夹下生成dramsim3main文件
./build/dramsim3main -h

再次编译gem5
回到gem5的主目录
sudo scons build/X86/gem5.opt -j8

4.测试gem5 dramsim2 dramsim3
DRAMSim2测试
sudo build/X86/gem5.opt configs/example/se.py -c tests/test-progs/hello/bin/x86/linux/hello --cpu-type='TimingSimpleCPU' --caches --l2cache --mem-type='DRAMSim2'
输出结果
gem5 Simulator System.  http://gem5.org
gem5 is copyrighted software; use the --copyright option for details.

gem5 compiled May 18 2021 21:53:40
gem5 started May 18 2021 21:55:26
gem5 executing on ubuntu, pid 77939
command line: build/X86/gem5.opt configs/example/se.py -c tests/test-progs/hello/bin/x86/linux/hello --cpu-type=TimingSimpleCPU --caches --l2cache --mem-type=DRAMSim2

/home/zwj/gem5-dramsim3/configs/common/CacheConfig.py:50: SyntaxWarning: import * only allowed at module level
  def config_cache(options, system):
Global frequency set at 1000000000000 ticks per second
0: system.remote_gdb: listening for remote gdb on port 7000
**** REAL SIMULATION ****
info: Entering event queue @ 0.  Starting simulation...
writing vis file to ext/dramsim2/DRAMSim2//results//DDR3_micron_32M_8B_x8_sg15/2GB.1Ch.1R.scheme2.open_page.32TQ.32CQ.RtB.pRank.vis
Hello world!
Exiting @ tick 33476500 because exiting with last active thread context
DRAMSim3测试
sudo build/X86/gem5.opt configs/example/se.py -c tests/test-progs/hello/bin/x86/linux/hello --cpu-type='TimingSimpleCPU' --caches --l2cache --mem-type='DRAMsim3'
测试结果
gem5 Simulator System.  http://gem5.org
gem5 is copyrighted software; use the --copyright option for details.

gem5 compiled May 18 2021 21:53:40
gem5 started May 18 2021 21:57:03
gem5 executing on ubuntu, pid 77997
command line: build/X86/gem5.opt configs/example/se.py -c tests/test-progs/hello/bin/x86/linux/hello --cpu-type=TimingSimpleCPU --caches --l2cache --mem-type=DRAMsim3

Global frequency set at 1000000000000 ticks per second
mmap: Cannot allocate memory
fatal: Could not mmap 17179869184 bytes for range [0 : 0x3ffffffff]!
Memory Usage: 127548 KBytes
运行正常的话 m5out文件夹里会有结果保存

5. End
以上Gem5 DRAMSim2 DRAMsim3就已经配置完成啦!
Enjoy~
附:常见错误
TypeError: init() takes exactly 1 argument (2 given)
这个错误的具体内容是这样的
Traceback (most recent call last):
  File "<string>", line 1, in <module>
  File "build/X86/python/m5/main.py", line 455, in main
    exec(filecode, scope)
  File "configs/example/se.py", line 266, in <module>
    MemConfig.config_mem(options, system)
  File "/home/zhangwenjun/gem5/gem5-refs_heads_stable/configs/common/MemConfig.py", line 238, in config_mem
    mem_ctrl.dram = dram_intf
  File "build/X86/python/m5/SimObject.py", line 1403, in __setattr__
    value = param.convert(value)
  File "build/X86/python/m5/params.py", line 209, in convert
    return self.ptype(value)
TypeError: __init__() takes 1 positional argument but 2 were given
Error setting param MemCtrl.dram to <orphan DRAMSim2>
这个问题我各种谷歌找到了一个答案
https://www.mail-archive.com/[email protected]/msg18511.html
DRAMSim isn’t a drop in replacement for the memory object anymore. Since
the change in the memory interface (http://www.gem5.org/project/2020/10/01/gem5-20-1.html#new-dram-interface-contributed-by-wendy-elsasser)
you can’t just drop in a different type of DRAM model.
You’ll probably have to modify fs.py, Options.py, or something like that to
be able to use DRAMSim3. There are already some special cases for
“SimpleMemory” and you should be able to copy that for DRAMSim3.
他是说DRAMSim不再是一个memory模块的替代,要修改fs.py Options.py或者其他的文件来适配DRAMsim3,而链接是在说
New features in 20.1
[PYTHON API CHANGE]: The DRAM models are now DRAM interfaces which is a child of the memory controller. Example change shown below.
The DRAM is split into a memory controller and a DRAM interface
所以这里我推测是gem5在20.1版本之后对dram模块做出了一些改动,不能再简单的按照之前cmake make的方法来配置,而是需要自己修改一些文件
解决方案:按照我给的那个gem5-dramsim3的版本进行编译
undefined reference to `google::protobuf::internal::empty_string_’
我在遇到这个问题的时候,error都指向google::protobuf,因此我推测是protobuf版本和gcc的问题,导致编译失败
因为如果我们在一开始按照learning gem5的官方教程编辑时,是按照这样的方式安装的
sudo apt install libprotobuf-dev protobuf-compiler libgoogle-perftools-dev
这样安装的话,我们的protobuf版本很容易出错
因此我们需要自己下载protobuf某个版本的源码去编译,并且安装相同python版本的protobuf,并且注意固定gcc的版本,不要随意改动
protobuf删除也比较麻烦的
解决方法:参考我在安装依赖里面的protobuf进行
其他版本的gem5(v2.1.0.0.0)-不配置dramsim
这里需要特别注意的是,新版本要求的gcc版本必须在5以上,python必须是3.6
而我们在上面进行操作的都是python2.7,我自己用的gcc是4.8
下面是我一开始不知道的时候装的,仅供参考,如果要配置dramsim,还是按照上面的来
gem5-dramsim3
官网给出的方式是这样子下载:
git clone https://gem5.googlesource.com/public/gem5
但是当我使用git下载,就会超时,目测是因为googlesource,所以需要翻墙自行下载

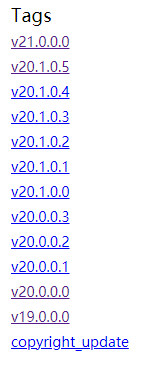
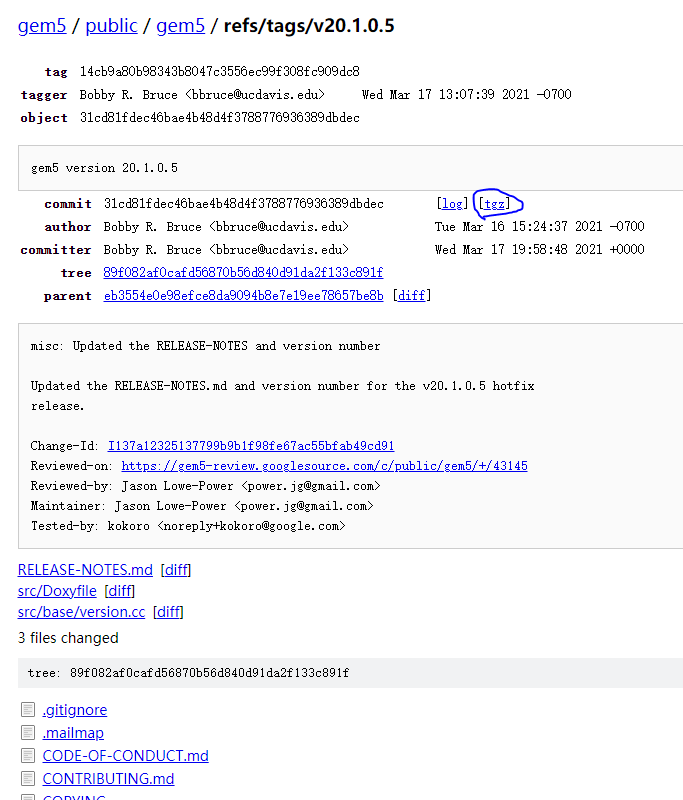
我下载的是21.0.0.0版本和20.0.0.3版本,大家自取,如果有需要其他版本又不知道怎么翻墙可以留言我,可以帮忙下载
(这里有个小坑,如果想配置dramsim,21.0.0.0版本配置需要自己进行一些修改)
链接:https://pan.baidu.com/s/1tYuHQACjnU8kHtLyH8_7Kg
提取码:zflu
当我想要按照官网步骤进行编译
python3 scons build/X86/gem5.opt -j8
的时候,提示:
python3: can't open file 'scons': [Errno 2] No such file or directory
step 1
之前从来没接触过Scons,他的python版本好像可以理解为python的cmake,sconsruct文件可以理解为makefile,所以我们使用scons的时候,可以先看看他的sconstruct
首先我是猜测是不是scons没装好,这里我们输入
scons -H
发现很正常
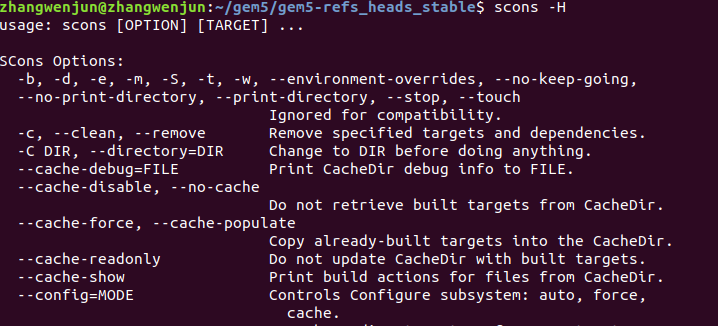
打开文件里的sconstruct看一下,给了详细的提示
You can use ‘scons -H’ to print scons options. If you’re in this ‘gem5’ directory (or use -u or -C to tell scons where to find this file), you can use ‘scons -h’ to print all the gem5-specific build options as well.
确认一下自己是否是在gem5目录,打印一下看看
scons -h

原来是python版本不对
提示1
第一条是提示我们确认装了python3
确认一下是否安装了
sudo apt-get install python3 python3-six python-is-python3 python3-pydot
提示2
然后是提示我们去确认是否在python3环境中
确保scons在Python 3环境中运行。 如果scons不能在Python 3中自动运行,则可以通过用以下短语替换scons来强制使用它:
/usr/bin/env python3 $(which scons)
例如,以下命令将使scons在Python 3环境中编译gem5 / X86,
/usr/bin/env python3 $(which scons) build/X86/gem5.opt
(可选)出于方便起见,您可以在环境中为Python3 scons短语设置别名。
这个应该就是跑不通的关键问题
按照他的要求,我们先看一下scons在哪
which scons
我的scons是在
/usr/bin/scons
那么按照他给的指令,运行
/usr/bin/env python3 /usr/bin/scons build/X86/gem5.opt -j9
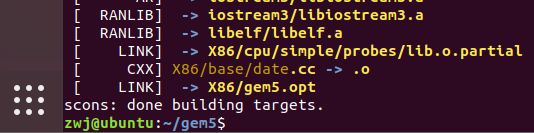
开始正常编译了,默默等待一下

编译完成,这里有两个warning
*** Summary of Warnings ***
Warning: Header file <png.h> not found.
This host has no libpng library.
Disabling support for PNG framebuffers.
Warning: Couldn’t find any HDF5 C++ libraries. Disabling HDF5 support.
谷歌了一下,发现stackoverflow有人遇到同样的问题问题链接
里面建议用如下命令解决
sudo apt-get install libhdf5-dev
sudo apt-get install libpng-dev
再重新编译一下
还是有warning,着实懒得管了,就这样吧,大家有解决方法的可以评论告诉我一声
gem5配置及简单使用
依旧是按照官网给的教程gem5配置
-
教程里提到,configs文件夹下有很多自带教程
./configs/learning_gem5 确实有 -
教程里解释了一下gem5和Simobject的关系。
gem5的模块化设计是围绕构建SimObject类型。模拟系统中的大多数组件都是SimObjects:CPU,缓存,内存控制器,总线等。gem5将所有这些对象从其C++实现导出到python。因此,从python配置脚本中,您可以创建任何SimObject,设置其参数并指定SimObject之间的交互。
教程给了一个simobject的说明,然而并不能打开,这里可以理解成对象(?)
之后gem5配置的教程就是对simple.py的代码做解释,然后跑一个最基本的helloworld(我敲了半天也没跑通
然后发现learning_gem5/part1/simple.py有这个完整版的文件,教程里面没写全所以跑不通
直接运行
build/X86/gem5.opt configs/learning_gem5/part1/simple.py
OK啦
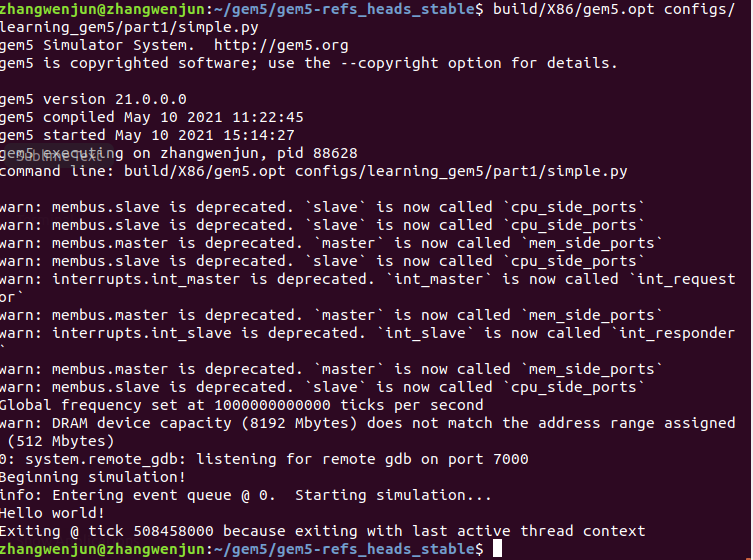
一堆warning但是还是跑通了
其他版本的gem5(v2.0.0.0.3)-不配置dramsim
20003版本和21000版本不一样,20003版本支持python2.7和python3.5,但是21000版本只支持3.5
同样是用scons -h查看一下目录
scons: Reading SConscript files ...
ImportError: No module named six:
  File "/home/zwj/gem5/SConstruct", line 100:
    from m5.util import compareVersions, readCommand, readCommandWithReturn
  File "/home/zwj/gem5/src/python/m5/util/__init__.py", line 46:
    from six import string_types
缺少six模块
sudo apt install python-six
安装后ok
scons -h给了两个warning
*** Summary of Warnings ***
Warning: Your compiler doesn't support incremental linking and lto at the same time, so lto is being
         disabled. To force lto on anyway, use the --force-lto option. That will disable partial
         linking.
Warning: Header file <png.h> not found.
         This host has no libpng library.
         Disabling support for PNG framebuffers.
先解决第二个
sudo apt install libpng-dev
第一个的话建议我们在编译的时候加上–force-lto的选项,那就加呗
编译
scons build/X86/gem5.opt --force-lto -j8
同样运行一下之前的测试代码
build/X86/gem5.opt configs/learning_gem5/part1/simple.py
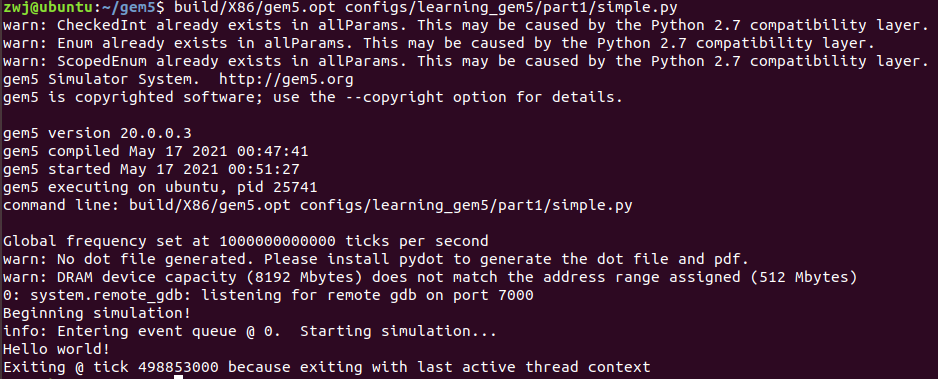
enjoy~
希望能够有所帮助
关注评论收藏 和小张一起学习吧