项目需要,用到Android作为客户端,电脑作为服务端,进行文件传输。记录一下自己第一次使用tcp建立通信的测试例子。
仅供第一次接触tcp/udp的初学者,参考,注意电脑和手机必须在同一个局域网下,才能建立通信。
1.网络调试工具:
我先启动一个tcpserver,记得注意自己的ip填写正常,端口不冲突,否则打开不了。

2.打开AS,建立一个新测试项目: 编写一个简单的页面 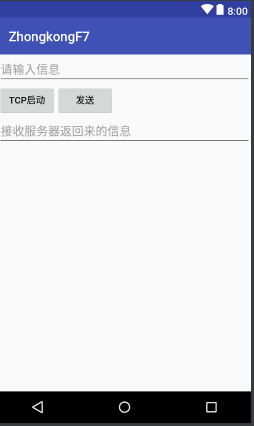
Main2Activity.xml 布局代码:<?xml version="1.0" encoding="utf-8"?>
<LinearLayout xmlns:android="http://schemas.android.com/apk/res/android"
xmlns:tools="http://schemas.android.com/tools"
android:layout_width="match_parent"
android:layout_height="match_parent"
android:orientation="vertical"
tools:context="com.example.thankpad.zhongkongf7.Main2Activity">
<EditText
android:id="@+id/et_text"
android:layout_width="match_parent"
android:layout_height="wrap_content"
android:hint="请输入信息" />
<LinearLayout
android:layout_width="match_parent"
android:layout_height="wrap_content"
android:orientation="horizontal">
<Button
android:id="@+id/bt_tcpsend"
android:layout_width="wrap_content"
android:layout_height="wrap_content"
android:text="TCP启动" />
<Button
android:id="@+id/bt_tcpsend1"
android:layout_width="wrap_content"
android:layout_height="wrap_content"
android:text="发送" />
</LinearLayout>
<EditText
android:id="@+id/et_text1"
android:layout_width="match_parent"
android:layout_height="wrap_content"
android:hint="接收服务器返回来的信息" />
</LinearLayout>
Main2Activity.java 代码;package com.example.thankpad.zhongkongf7;
import android.os.Handler;
import android.os.Looper;
import android.os.Message;
import android.support.v7.app.AppCompatActivity;
import android.os.Bundle;
import android.util.Log;
import android.view.View;
import android.widget.Button;
import android.widget.EditText;
import java.io.IOException;
import java.io.InputStream;
import java.io.OutputStream;
import java.net.Socket;
import java.nio.charset.Charset;
public class Main2Activity extends AppCompatActivity implements View.OnClickListener {
private Button bt_tcpstart, bt_tcpsend1;
private EditText et_text, et_text1;
private static final String TAG = "Main2Activity-------->";
private static final String addreeip = "192.168.1.15";
private static final int port = 8830;
private String app_text, receData;
private Socket socket;
// 获取输出流与输入流
private OutputStream outputStream = null;
private InputStream inputStream = null;
Handler handler = new Handler(Looper.myLooper()) {
@Override
public void handleMessage(Message msg) {
super.handleMessage(msg);
switch (msg.what) {
case 0:
et_text1.setText((CharSequence) msg.obj);
break;
}
}
};
@Override
protected void onCreate(Bundle savedInstanceState) {
super.onCreate(savedInstanceState);
setContentView(R.layout.activity_main2);
bt_tcpstart = findViewById(R.id.bt_tcpstart);
bt_tcpsend1 = findViewById(R.id.bt_tcpsend1);
et_text = findViewById(R.id.et_text);
et_text1 = findViewById(R.id.et_text1);
bt_tcpstart.setOnClickListener(this);
bt_tcpsend1.setOnClickListener(this);
}
@Override
public void onClick(View v) {
switch (v.getId()) {
case R.id.bt_tcpstart:
String btContent = bt_tcpstart.getText().toString();
if (btContent.equals("TCP启动")) {
bt_tcpstart.setText("TCP停止");
bt_tcpstart.setBackgroundColor(getResources().getColor(R.color.colorAccent1));
new Thread(new Runnable() {
@Override
public void run() {
try {
socket = new Socket(addreeip, port);
if (socket == null) {
socket.isConnected();
Log.i(TAG, "开始连接!!!");
}
Log.i(TAG, "连接成功!!!");
//连接超时
socket.setSoTimeout(8000);
// 获取输入流接收信息
while (socket.isConnected() == true) {
inputStream = socket.getInputStream();
byte[] buf = new byte[1024];
int len = inputStream.read(buf);
receData = new String(buf, 0, len, Charset.forName("ASCII"));
Log.i(TAG, receData);
Message message = Message.obtain();
message.obj = receData;
message.what = 0;
handler.sendMessage(message);
handler.sendEmptyMessage(1);
}
} catch (IOException e) {
e.printStackTrace();
Log.i(TAG, "连接失败!!!" + e.toString());
}
}
}).start();
} else {
bt_tcpstart.setText("TCP启动");
bt_tcpstart.setBackgroundColor(getResources().getColor(R.color.colorAccent2));
try {
socket.close();
} catch (IOException e) {
e.printStackTrace();
}
}
break;
case R.id.bt_tcpsend1:
app_text = et_text.getText().toString().trim();
tcp_start();
break;
}
}
private void tcp_start() {
new Thread(new Runnable() {
@Override
public void run() {
try {
if (app_text.equals("")) {
Log.i(TAG, "输入不能为空");
} else {
// 获取输出流发送信息
outputStream = socket.getOutputStream();
byte[] sendData = app_text.getBytes(Charset.forName("ASCII"));
outputStream.write(sendData, 0, sendData.length);
outputStream.flush();
// socket.shutdownOutput();
// socket.close();
}
} catch (IOException e) {
e.printStackTrace();
}
}
}).start();
}
@Override
protected void onDestroy() {
super.onDestroy();
try {
socket.close();
handler.removeCallbacksAndMessages(null);
} catch (IOException e) {
e.printStackTrace();
}
}
}
但我们点击app启动,按钮,app这边会与电脑的server建立连接,会显示一台设备连接状态。
确定连接后,server发送一条消息过去

app收到回复;

我们再从app发送一条消息到server。

tcp server接收

以上代码可以直接粘贴,测试,至于我们在线程里面是不可Toast提示的,我们可以建立个子线程,通过线程发送特定的消息,Hander,handleMessage去显示,还有这里只是展示简单的字符串信息发送,如果是想传输文件,也可以的,上面的tcp建立socke建立连接,以及文件输出输入流还要结合自己需求添加。tcp的通信建立连接,大概的流程是这样,如果想查找适合自己的项目要求,可以直接网上百度,整理一下来完善自己的项目。由于个人技术能力有限,有不足的,请大神指点迷津,谢谢。
想要简单的源码可以到我的github上面去下载————>https://github.com/yezi10086/ZhongkongF7.git